Search Results: Whitney Garcia-Devers

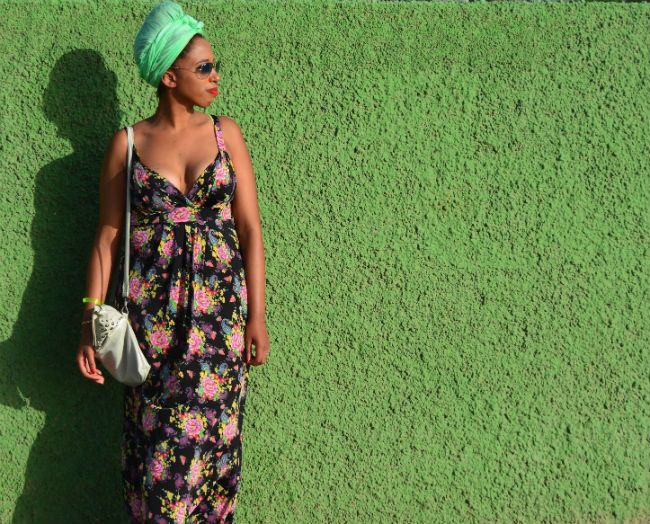
Last summer I realized the joy of wearing headwraps. The African beauties here in Holland inspired me.
A headwrap is not only a fashion statement; it also helps you protect your hair against weather circumstances. Another advantage of a head wrap is that you can upgrade your hairdo when you want to skip washday.
In the Netherlands, there are many women who sell gorgeous African-inspired headwraps. But there are also small businesses that offer these accessories (such as Phunky Roots“>. I use regular fashion scarves, which I mostly buy from H&M, Zara and Bershka. Sometimes I wear a satin wrap underneath regular shawl in order to prevent my hair from drying.
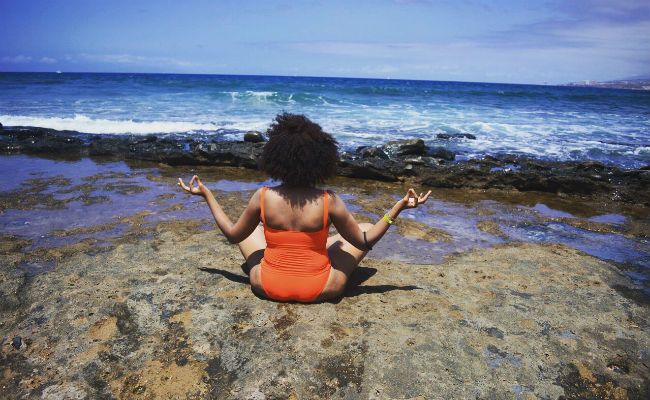
Last year, I went to Tenerife, which is a hot volcano island belonging to Spain. I realized that my hair would endure severe sun damage if I would not cover it. So, I decided to do this fashionably. The island Islanders and fellow tourists loved it.
The two following techniques differ slightly depending on the thickness of the scarf. Below I will explain the main steps in my headwrap tying routine.
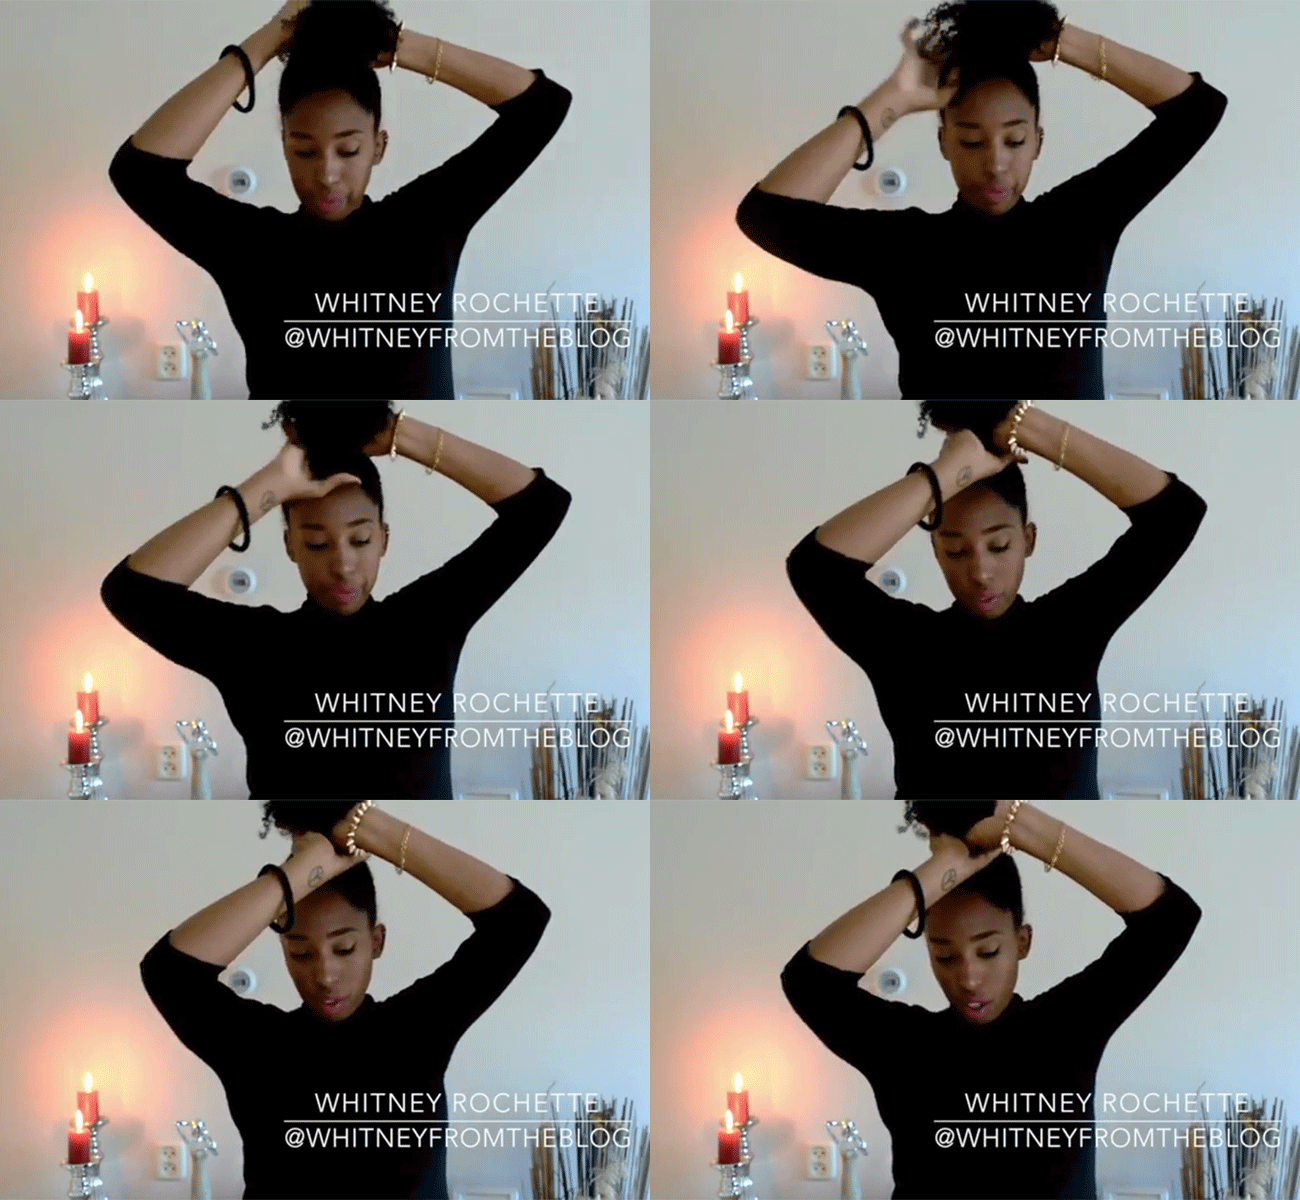
1. Pull your hair in a bun. The bigger the bun, the nicer the outcome will be.
2. Grab a scarf that will match your outfit! Bend your head and wrap the scarf around your head.
Twist the two ends of the scarf approximately four times.
3. Pull the twist back tightly. This will result in a nice shape on the top of your head.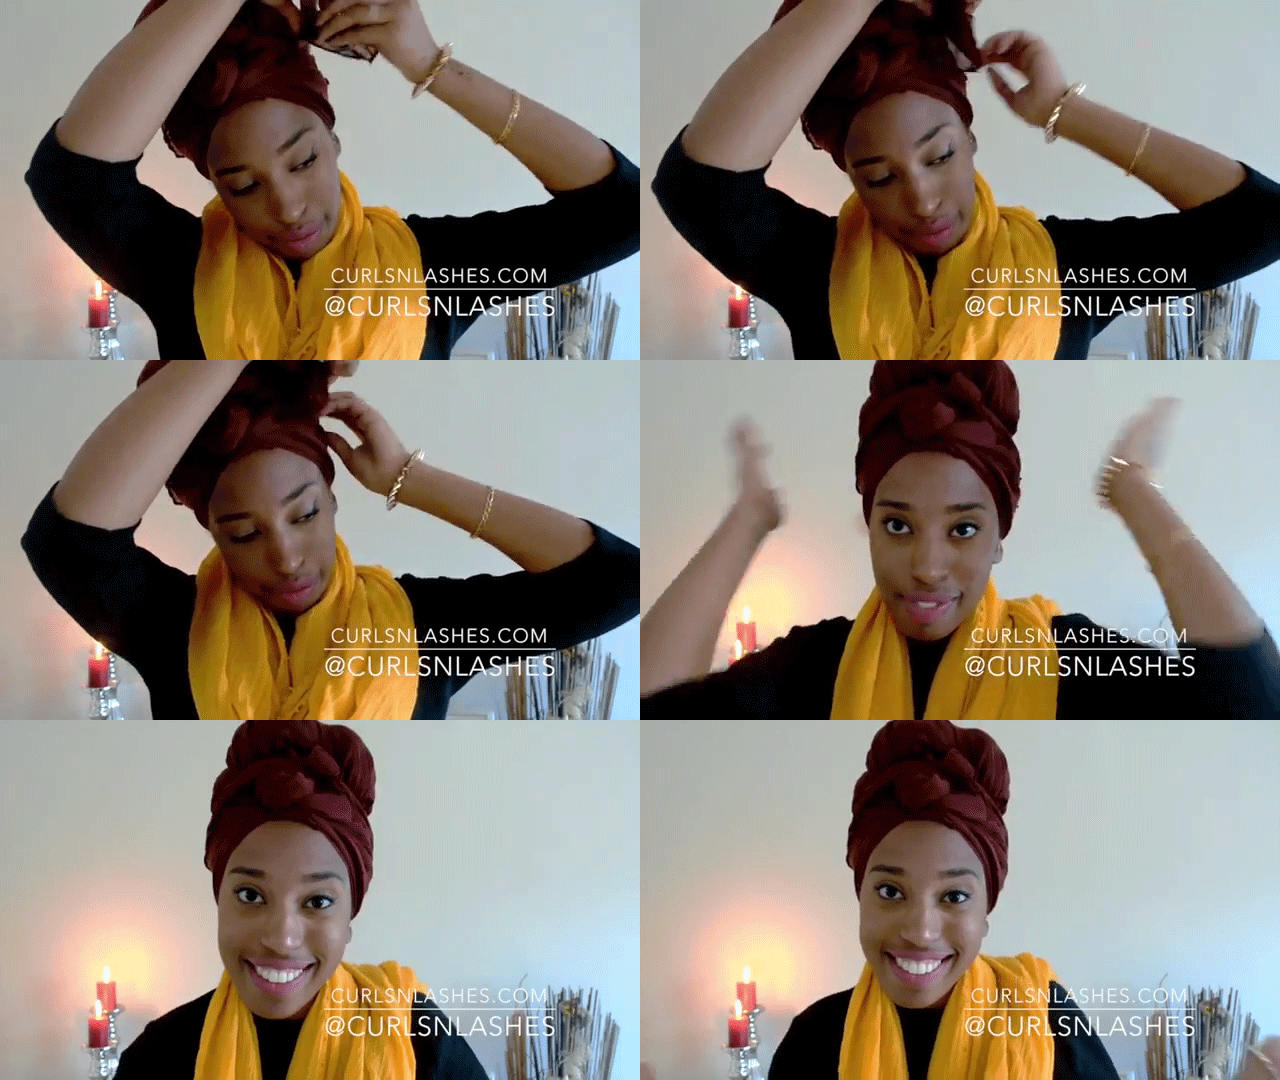
4. Pull the remaining ends to the back of your head, creating a knot.
Stick the ends away below the parts wrapped around your head.
In the video, I added a layer by wrapping an additional scarf. Consequently, I achieved a more dramatic effect. However, the thickness of the second scarf required me to change the technique slightly:
1. Bend your head and wrap the additional scarf around your head.
2. Twist the two ends of the scarf, only once. Pull the remaining ends to the back of your head.
3. Stick the ends away below the parts wrapped around your head.
Watch my video tutorial of both techniques:
What tutorial would you like to see from me next?
Don’t forget to subscribe to my channel (just click the YouTube box above”>.
During 2014 and 2015 I travelled many times to different climates. It was a journey it itself finding out how to protect my low porosity curls, but I want to share with you what I learned along the way.
1. Bring your own product!
Before going to your destination you might want to check whether that area sells curly hair products. Last year I went to Tenerife and the retailers on the island only sold products for type 2 or 3a hair. Luckily, I brought my own.
2. Use sun protection
The consequence of continuously exposing your hair to the sun is sun damage. Not only can the sun have damaging effects on your skin, it has the same effect on your hair, too. The UV rays penetrate into your hair scalp and scatter melanin; as a consequence the color of your hair might change. Lastly, the sun makes your hair dry which might increase how porous your hair becomes. Cover up with a hat, scarf, or use a hair product with UV protection. You can also use natural UV protectants like avocado oil or almond oil.
3. Ward off humidity
When traveling to a humid and hot country or island, it is worthwhile to invest in leave-in conditioners and moisturizing creams. Don’t forget to also bring a deep conditioner in order to nourish your hair after swimming or wandering outside for a long time.
4. Bring the moisture
Buy or bring products that consist of moisturizing ingredients, such as coconut oil, aloe vera, jojoba oil etcetera. Click here to learn more about moisturizing ingredients. I have written an article about my favorite curly hair care products, these products will also moisturize your hair during your stay at a hot country. Here are my current faves.
5. Protect yourself from cold
The cold temperature causes the outer layer of your cuticle to lift. As soon as you enter a warm building or room, the product that is penetrated into your strands melts and the moisture leaves your hair. Consequently, your hair often looks dry and frizzy during the winter. Thus, it is essential to bring a leave-in conditioner, cream and a jelly (or oil”> to your destination. After applying a leave-in and cream, seal your hair with a jelly or oil in order to prevent the moisture to leave your hair.
6. Avoid tangles from the wind
Wind can also be damaging to the hair because it creates tangles and dirtiness. Prevent this from happening by pulling your hair in a bun when you are walking outside or wearing a hat lined with satin inside. When I went to Tenerife, I loved covering my hair with fancy scarves. When I returned home, I noticed that I did not have any wind or sun damage.
7. Try a protective style
In order to make your holidays even more relaxing you can install a protective style beforehand (box braids, Marley twists, or loc extensions”>. Your hair will be protected against the weather circumstances and you can invest your time in something else other than styling everyday!
[prodmod]Do you have travel tips that work for curly hair? Share them with us!
Do not forget to follow @NaturallyCurly on Instagram! And visit my personal blog, Curls N Lashes.
During the transitioning process, different parts of your strands have different needs, making it increasingly difficult to find the right hair care products that will serve both sections. The parts close to your roots demand curly hair care products in contrast to your ends. This is one of the reasons why people prefer doing a big chop or a semi chop in order to facilitate the process of finding the right hair care product. If you have chosen to transition rather than to big chop, you will need products that can do the following 3 things for you.
1. An effective leave-in conditioner
A leave-in conditioner is key to maintaining moisturized locks during the transitioning process. How do you find one that works for you without wasting money on products that do not work out? The first step is to determine your hair’s porosity, which will have a major impact on what does and does not work for you. If you are unfamiliar with this term, we define porosity in our Glossary as “how easily your hair is able to absorb and hold moisture and chemicals. There are varying degrees of porosity that we commonly use: high porosity, medium porosity, and low porosity.” If you do not know your porosity, you can take our quiz here.
I personally have low porosity hair, so a few of my favorite leave-ins are the Eden BodyWorks Coconut & Shea Leave-in, SheaMoisture Jamaican Black Castor Oil Strengthen Grow & Restore Leave-in Conditioner and Moisturize Me Curl & Style Milk by Lotta Body.
Relaxed or chemically processed hair is high porosity, and NaturallyCurly contributor Sabrina Perkins recommends SheaMoisture Coconut & Hibiscus Curl Enhancing Smoothie, Kinky-Curly Knot Today, Oyin Handmade Hair Dew and Eden BodyWorks Jojoba All Natural Hair Milk for high porosity hair.
2. A Holy Grail protein treatment
Purchase products that strengthen your hair. Due to the high porosity of relaxed hair, your ends may appear dry and unhealthy. High porosity hair is unable to retain moisture, because the outer layers of the strands has gaps and holes. A hydrolyzed wheat protein treatment increases the ability of your hair to retain moisture and makes your hair more manageable. It can also reduce your hair porosity over time.
If a protein treatment is new to your regimen, check out ApHogee Intensive Two Minute Keratin Reconstructor, Aubrey Organics GPB Balancing Protein Conditioner and Briogeo Don’t Despair, Repair! Deep Conditioning Mask. Find a full list of our top protein treatments here.
3. A creative cocktail
You can create amazing products yourself, which is in the long run cheaper and more effective. During my transitioning process, I cocktailed deep conditioners, leave-in conditioners, and a jelly all together. My Dominican family gave me amazing homemade recipes for deep conditioners. The advantage of creating your own cocktails is that it will match the needs of the different sections of hair. Need more moisture? Just add some coconut oil! Moreover, if the cocktails do not work you can use the remaining ingredients for the creation of a new product altogether. Need a starting point? Here are 3 easy cocktails you can try today.
For most curlies, a leave-in conditioner is one of the most important products in our regimen because it is applied it onto the hair after washing to seal in the moisture from a rinse-out conditioner and water.
In order for my curls to be highly defined and less frizzy, I need to apply a leave-in conditioner and a moisturizing cream to my hair. One of the most important steps is to find out what type of leave-in conditioners will work for you. Before diving into my favourite leave-in conditioners, I would like to highlight some important things about my hair type.
- I have a 3c curl pattern
- I have low porosity
1. Moisturize Me Curl & Style Milk by Lotta Body
This prevents my curls from tangling looking dry. This leave-in conditioner is great for low and medium porosity hair, since it’s not likely to stick on your cuticles. Besides, the product will penetrate easily through the layers of my hair.
2. Eden BodyWorks Coconut & Shea Leave-in
I love this leave-in conditioner–not only because of its fragrance, but also its moisturizing and fatty acid rich ingredient, coconut oil. My curls remain moisturized for approximately three days; in order to increase this duration, I also apply a moisturizing cream afterward.
3. SheaMoisture Coconut & Hibiscus Curl & Style Milk
To me, this brand has successfully created product lines for different hair porosity. This product is perfect for my low porosity curls. My hair gets easily moisturized and remains moisturized. The fragrance is strong, which results in people complimenting my hair and loving the scent that is always lingering.
4. SheaMoisture Jamaican Black Castor Oil Strengthen Grow & Restore Leave-in Conditioner
At first I did not really believe that this product would actually meet its marketing claims. After three weeks however, I noticed how strong and long my nails became (since my nails are always in contact with the product while applying it”>. My hair grew longer, too.
[prodmod]Do you prefer a leave-in conditioner or a moisturizer or both? Let us know on our @NaturallyCurly Instagram!
During my entire childhood, I braved the relaxers because I didn’t to people labeling my hair with their hurtful words. In our Dominican culture, curls and coils are often labeled as ‘bad’ or ‘harsh hair’.
I remember telling my mother that I wanted to stop relaxing my hair like it was yesterday.
She was not really thrilled with this decision and asked me to reconsider my choice. During her teenage years, she started relaxing her mother, sisters and her own hair. As soon as she reached mid-thirties she decided to transition because her hair was losing density. This made it more difficult for me to understand why she did not accept my decision. The rest of my family agreed with her. In our Dominican culture, curly and coiled hair is often labeled as ‘bad’ or ‘harsh hair’.
Throughout my entire childhood, I braved the white burning “creamy crack” because I didn’t to people labeling my hair with their hurtful words. However, during my teenage years, I started to develop my own opinion and perspective on social matters. Not to forget, I developed values, which encouraged me to accept the naturally me. I knew that changing the perspective of my family would require much effort, but I did not expect it to be this tough and painful.
My family pushed me to return to relaxing.
During family gatherings I often heard “You probably should relax your hair, it does not look pretty!”, “you really should fix your hair!”, “your hair looks really bad” and “your hair is not healthy, it is extremely dry and the breakage is clearly visible”. At some point, my mother bought a relaxer, which I refused to apply on my hair. Each time I received the suggestion to relax my hair or the comment that my natural hair will not be pretty I felt strongly demotivated.
I decided to teach myself to process opinions of others. Thus, I stopped sticking my hair in a bun and wore my curls down, whatever the circumstances.
Consequently, I felt going through a downward spiral. I decided to teach myself to process opinions of others. This would contribute to my inner peace and self-confidence. I learned that, in order to change someone’s mind, I had to show them while standing my ground. Thus, I stopped sticking my hair in a bun and wore my curls down, whatever the circumstances. At some point I dared to say: “I do not care about your opinion, I care about my happiness”.
In 2014, my mother started purchasing curly hair care products for me!
Around summer 2015 I joked that I would apply a texturizer on my hair and she answered that she would not recommend me doing so. “Your hair is pretty,” she said. My grandparents started admiring the curls and during gatherings often share their positive thoughts about my hair. I do not hear the words ‘bad hair’ anymore.
What was your transitioning journey back to natural like?
Follow my personal blog, Whitney From The Blog!
I, like many girls, want to rock big hair these days.
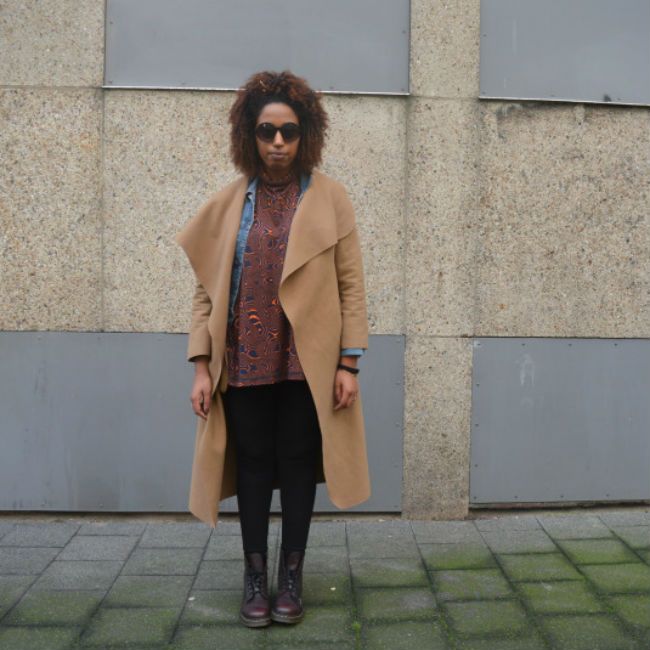
But depending on your hair type, some circumstances make it nearly impossible to have big volume. Your curls could be weighed down with product, or it can be your first day hair. Sometimes your hair’s density and porosity make for a stubborn situation, too. Here, I describe some methods that have worked for me in creating more volume in my curly hair.
1. An afro pick
This is one of the most common ways to create volume in textured hair. Some women avoid this method because they associate a comb with resulting losing definition and creating frizz. I always have a pick in my makeup bag, as this allows me to lift my roots lightly during the day. The more volume, the merrier!
2. A twist-out
Doing a twist-out on wet hair might you an experience of less volume than on dry hair. If you feel that the weather is making it impossible for you to rock your second day curls, I suggest doing a twist-out on dry hair during the night. Yes, I am often taking the weather into consideration, because here in the Netherlands it is pouring rain most of the time.
For this method, you need a Denman brush and a styling gel–I like the green Eco Styler. Divide your hair in sections and start twisting into either two or three-strands. The three-strand results in more defined curls, in my opinion. When searching for a twist-out tutorial on YouTube, try to find with a similar hair type as yours–this way, you will have better guidance.
3. A braid-out on a blowout
Oftentimes when I am rocking a blowout, I start missing my curls after a few days. I just love having different hairstyles during the week, so I usually do a braid-out on my blown out hair. I was satisfied with the results and used my Afro comb to make it bigger (and bigger”>. Remember, always apply a heat protector to your hair to avoid heat damage when using any heat styling tool.
4. A light styling product application on a wash-and-go
If I want to enjoy my volume, I’ll apply a lightweight product after a wash-and-go. The more hair care product I apply, the more my hair will weigh down, consequently making me lose volume.
This does come with a trade off, the fewer products I apply (just a leave-in”>, the more frizz I might have throughout the day. On the other hand, the more products will leave me with more definition but less volume (leave-in, cream, jelly”>.
How do you achieve more volume? Share with me!
Follow my Instagram @WhitneyFromTheBlog | Visit my blog whitneyfromtheblog.com
We all want our curls and coils to look healthy. However, the criterion of healthy hair is often subjective or biased. It is often assumed that shiny hair is healthy hair. But does this apply to all hair porosity? Let’s dig a bit deeper.
Curly hair often looks dry” depending on its hair porosity. NaturallyCurly has an amazing hair typing chart that consists of clear information about porosity. To summarize, hair porosity is the ability of your hair to absorb and retain moisture. The porosity of your hair is dependent on the cuticle, the outer layer of your hair. When the cuticle lies flat, this means you have low porosity. When light shines on low porosity hair, it will be easily reflected. Consequently, you hair looks “shiny”. Low porosity hair has a great ability to retain moisture; thus, your shine will last for days after cleansing or co-washing and moisturizing.
On the other hand, hair that has high porosity may look dry because of its open cuticles.
The open hair cuticles will not be a flat surface, therefore the hair will be less successful in reflecting light. Consequently, the hair looks dull. Not to forget, medium and high porosity natural hair has more difficulty retaining moisture. Those with these types of hair porosity will often experience their wash and go’s being able to last a few days without looking dry, frizzy, and dull.
Indeed, high porosity might be the result of damage. However, this porosity is also heritable.
In order to emphasize these claims, watch this video recently posted by one of our editors, Nikki. She and Devri have the same hair type (3c”>. However, Nikki’s curls are shinier than Devri’s, even though they both have the same curl pattern. They both have different type of porosity, which is due to a number of reasons–Devri has color treated her hair for years, for example. The determining factors don’t always depend on chemical or color damage, though. It can also be due to the environment and genetics. Still, both girls are rocking completely healthy curls.
If you want to measure the health of your hair, you can test the porosity quarterly. For instance, you can do a porosity test at the end of every season. In 2014 my hair porosity was high, but I knew that I had bad habits (Continuously dying my hair and skipping deep conditioning treatments”>. So it was not likely that I inherited this porosity. Two years and a one visit at the hairdresser later the porosity of my hair changed to low porosity.
To conclude, shine is not a direct result of having healthy naturally curly hair.
Curly hair has different hair porosities of which some simply do not have the ability to reflect light and retain moisture. The health of hair can best be accessed by critically reviewing your hair care habits and define whether some of those habits changed the porosity and appearance of your hair over time.
Confession: the transitioning process has been a struggle. A beautiful struggle, nonetheless.
I’ve gotten to know my curls through developing certain techniques to enhance the beauty of my natural hair. While curly hair “rules” are the base of my curly hair routine, I don’t always follow them, due to a busy lifestyle (and laziness”>.
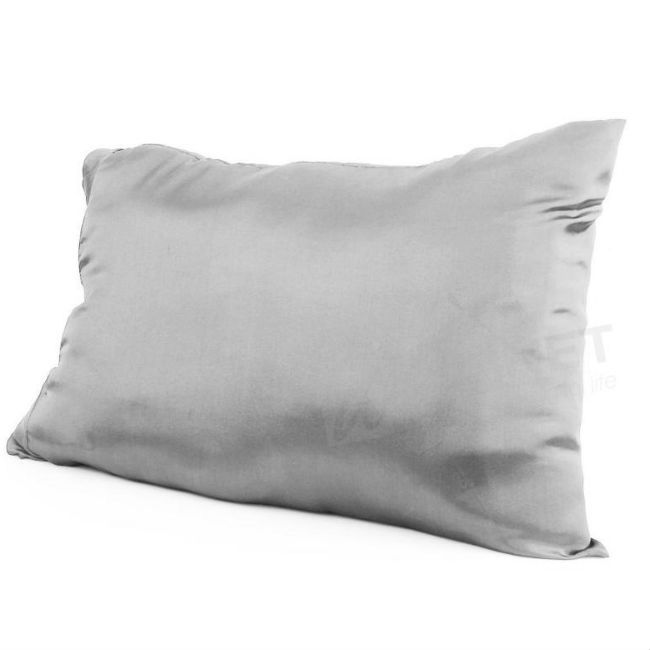
I don’t always sleep on a satin pillowcase.
For some reason I do not really like sleeping on a satin pillowcase. Honestly, the material feels a bit odd. Thus, I wrap a satin scarf around my hair as an alternative.
I don’t always use shampoo.
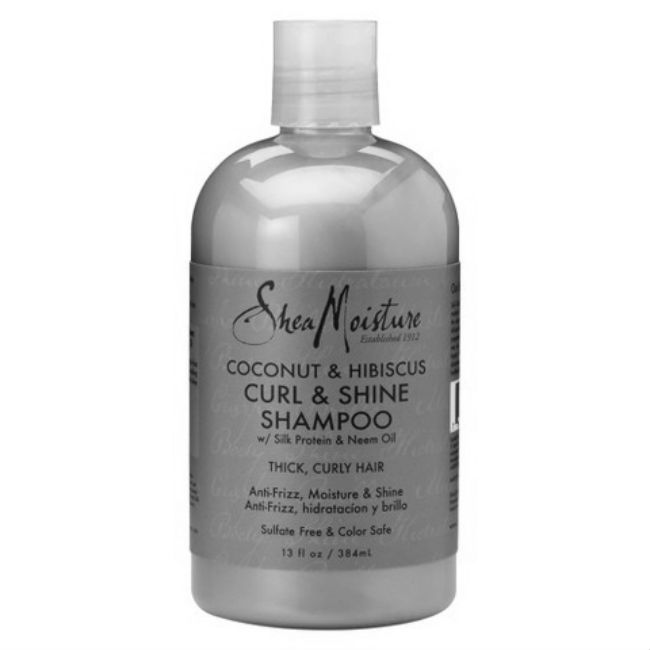
Sometimes I forget to bring the necessary hair products in the shower with me, especially my shampoo. When my favourite–SheaMoisture Coconut & Hibiscus Shampoo–is missing, I don’t think twice to just grab a random one. It’s too cold to get out of the bathroom sometimes!
I don’t always condition, either.
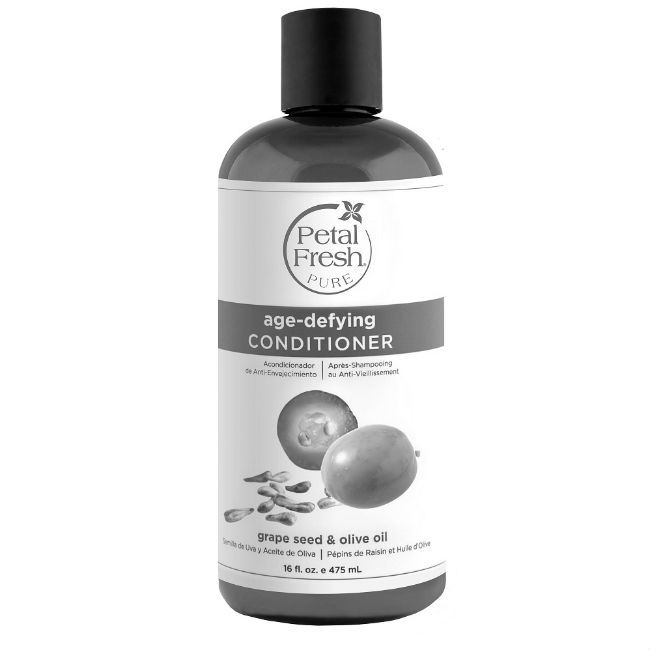
Instead of conditioning my hair I deep condition my hair. Nevertheless, when my hair starts getting very tangled, I grab the Rosemary & Mint conditioner by Petal Fresh in order to facilitate the detangling process.
I never wear protective styles.
I never do protective styling, because my scalp is very sensitive. Besides, I do not have the proficiency to do amazing hairstyles such as box braids and marley braids. Yes, I can go to a hairdresser. However, I often notice that many hairdressers put to much tension on the scalp and I prefer to prevent this. I do “low manipulation styling” instead.
I don’t always refrain from touching my hair.
Hey, I just can’t help it sometimes–especially after I have followed a different routine. I get the strong urge to touch my hair and see if it achieved the expectations I had.
I don’t always finger detangle.
In my opinion, this process gets pretty time consuming. Especially, when I have many things to do during the course of a day. Luckily, the Denman brush offers me a great solution as long as I detangle my hair from the ends up to the roots.
Do I notice damage for not following the rules above?
I do not ignore these rules frequently. Thus, I do not notice any damage at all. Remember: when ignoring one of these rules you should pamper your hair during the next wash-and-go. Are there any rules that you ignore? Share them with us and many other readers!
The day before my washing routine I prepare my hair for washing. Sometimes I skip this step process because of my busy lifestyle. However, I have faced the consequence of not following this process, unmanageability of my curls.
What I Use
-
My fingers or Denman Brush
-
Four hair clips or hair ties
-
Olive oil
-
Black castor oil
-
Rosemary oil
-
Mint oil
Step 1. Prepare the oil mix
It’s always tricky to estimate how much oil someone will need. In my case, I prepare a mixture which lasts roughly for a month. I use a 10ml bottle to store this mixture. Here are the proportions:
- 2.5 ml black castor oil
- 3 ml olive oil
- 2.5 ml rosemary oil
- 2 ml mint oil
This mixture promotes my hair growth while making my hair feel thicker. Side note: in March 2015, the hairdresser thinned my hair out. Because of this, I regained the thickness (Thank God”>. Besides, your hair will become shiny and strong.
Step 2. Prepare hair for washing
I start the process of preparing your curls for the washing process the night before. First, I section my hair in four sections. Remember to keep the sections separated by tying them up with hair clips/ties, as shown in my picture.
Step 3. Finger detangle my hair
Apply the oil mixture to the hair and finger detangle the hair, starting from the ends all the way up to the roots. If you have many knots in your hair, I suggest using a Denman brush in order to facilitate this process.
After detangling all sections, I pull my hair up in four buns. Now my hair is completely detangled and ready for the washing process.
The Advantages
-
Less breakage
-
Oil mixture nourishes the hair
-
Increased manageability
The Disadvantages
-
Time investment required
-
Oils might be expensive depending on home country
How do you prepare your curly hair for washing?
Before starting this popular hairstyle, remember that the best results would be achieved on hair that is healthy. No hairstyle tutorial will be successful if you neglect your hair health!
I highly recommend eating enough vegetables and two fruits a day. Not to forget, it is essential to drink enough water. A healthy lifestyle is not the only contributing factor to healthy hair. The right hair care products will enable your hairstyle to last forever, while keeping your hair moisturized. A porosity test and this awesome chart will give you some guidance.
For the my Type 3c twist-out routine you will need the following tools and products.
Is your hair Type 3c?
Type 3c curls typically have the circumference of a pencil or a straw. If you don’t know your curl pattern yet, this quick guide can help. And if you have 3c hair that looks different to mine, don’t worry, this might be why.
Tools & Products
-
Spray bottle filled with solely water
-
4 hair clips
-
Leave-in conditioner – I like Natural Almond & Avocado Detangling Leave-in conditioner by Design Essentials
-
Curl defining product – I use CurlForming Custard by Design Essentials
My technique
1. I divide my hair into four sections.
I do not moisturize my hair, because I feel that wetting the hair results in less volume. One section will be divided in a smaller section. Smaller sections result in defined curls, whereas the effect of larger sections is looser curls. I really enjoy having defined curls, so I divide my hair in small to medium sections that you can see in the photos.
2. Grab your spray bottle and dampen the hair section.
3. Apply your preferred leave-in conditioner and brush the section with a Denman Brush.
Remember to start at the ends and carefully brush towards the roots. This will prevent breakage.
4. Apply your favorite curl defining product and brush the section with the Denman Brush.
You will notice that your curls are highly defined when wet, the key will be to keep this definition as it dries.
5. Divide the section in two smaller sections and create two finger coils. Twist the coils and seal the ends with a bit of curl definer.
6. Once the hair is completely dry, separate the twists.
When separating the twist, I carefully pull the twist down until I see two ‘curls’ appearing. I carefully separate these. For more volume, I continue separating the twists until you achieve your desired volume.
Making the style last
Maintaining the hairstyle is easy; in the evening I’ll pull my hair up in a pineapple bun. Sleeping on a satin pillowcase helps prevent frizzy hair. If you do not owe a satin pillowcase, wrap a satin scarf around the area around the pineapple tail. The next morning, I’ll take the hair tie out of the bun and shake my hair and go!
I recently used this twist-out technique on 7th day hair and the results astonished me. The outcome of the twist-out resembled a fresh wash-and-go!
What does your flawless twist-out look like?
Follow me @WhitneyFromTheBlog for more curly hair advice!
When I tell my fellow curlies that my wash and go last for approximately seven days, I immediately notice the disbelief on their faces.
To be honest, I do not do much with my hair and I believe that this is one of the main causes of endless good hair days. In my view, the main asset contributing to elasticity of my curls during the week is my hair care routine.
The day before
I pre-poo, mixing the following oils together:
- Jamaican Black Castor oil
- Rosemary oil
- Mint oil
While pre-pooing my hair, I massage my scalp and finger detangle my hair from the ends all the way to the roots.
After this, I pull my hair up into a lose pineapple bun and cover my hair with a scarf (as shown below”>.
That morning: Cleanse, Detangle & Deep Condition, Protein Treatment
I gently wash my scalp with a sulphate-free shampoo; TRESemmé Naturals Shampoo is my favourite. I prefer washing my hair with these types of shampoos, because it does not strip my hair and I preserve my natural oils. I strongly recommend to not apply the shampoo all over your hair, since the ends might weaken.
I rarely use conditioners–I actually skip this phase and start the deep-conditioning process. At this point, I’ll use the following:
- My detangling process is actually the deep-conditioning phase. In order to prevent breakage I divide my hair into four sections. These sections will be divided into smaller sections, which will be detangled with my fingers first.
- Thereafter, I comb my hair with the Denman brush. This results in soft, detangled hair.
- Lastly, I pull my hair up into a pineapple bun and cover it with a plastic bag or cap for roughly one hour. My favourite deep conditioners are: ORS Shealicious Moisture Lock, Dabur Vatika Black Seed Hair Mask and ApHogee Two-Step Protein Treatment.
- I rinse the deep conditioner thoroughly with cold water. This makes my hair shiny. Hot water makes my hair dry; therefore, hot water should be avoided during the washing process. In the last phase of my wash and go routine, this is the crucial part of the process. Products can either have a positive or negative effect on the elasticity of your hair during the week.
The Styling Routine
1. Leave-in- Lottabody Leave-in conditioner
2. Cream- Eden Bodyworks Curl Defining Cream
3. Jelly- Camille Rose Naturals Curl Maker
Divide the hair into sections and finger-detangle the hair while applying the products. After applying the jelly, the praying hands method should be executed. This method entails placing the hair between your hands and stroking your hands down.
Hi Whitney, please introduce yourself!
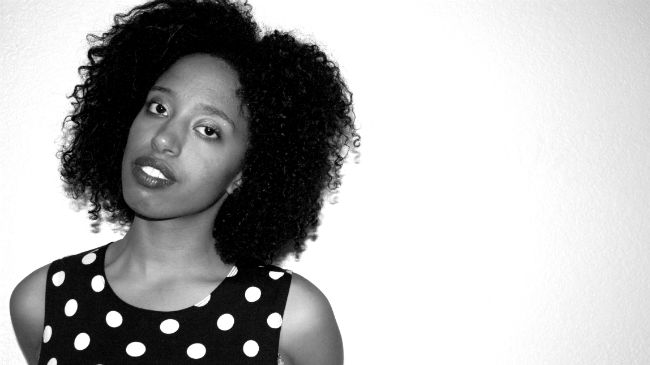
My name is Whitney Rochette García Devers. I was born in Curaçao and raised in a Dominican family. At the age of six I moved with my family to Holland and we immediately settled in Rotterdam. Currently, I am a project manager at Unilever which is actually an internship. I work in the category Oral care. I study International Business and Languages at the University of Applied Sciences in Amsterdam. From January this year until May this year I lived in Chico, California as part of a mandatory exchange program.
How long have you been writing?
Honestly, writing is my life. Since I was twelve I have been writing stories which I of course never shared with someone, because I was very shy back then. However, last year I really felt the urge to communicate with a group of readers. Thus, I started writing beauty and lifestyle articles for Vrouwen.nl which is a Dutch website focusing on women. Since I was writing monthly I decided to chase another dream: starting a fashion blog. In December 2013 I started Whitneyfromtheblogue and a couple of months ago I started a beauty and health blog, Curlsnlashes.
Texture does not define the beauty of your hair, but its health does.
 How long have you worn your hair in its natural state?
In 2011 I stopped relaxing my hair. Nevertheless, I was not used to the texture of my roots. Hence, my mother recommended me to use a texturizer. Unaware of the consequences I used it multiple times…until 2013. My hairdresser did not understand why the relaxer was not going out of my hair, until I told her that I have been using a texturizer. She immediately informed me that a texturizer is the same as a relaxer. So actually I am a year natural now.
What is the naturally curly hair community like where you live?
Year after year, there are more naturals in the Netherlands. A few years ago the supply of curly hair products was very low, until the natural hair movement started. I think that this motivated more girls to stop relaxing their hair and to take profit of the great hair products which are now available in the Dutch market. Lots of people like the beauty of our curls and ask continuously questions related to hair care and products.
 What are some of the biggest lessons you have learned when it comes to your hair?
Texture does not define the beauty of your hair, but its health does. At the beginning of my natural hair journey I was getting more and more disappointed when I noticed that my curls became smaller. It was so difficult to let my hair shine, but as time went on I realized that I was not taking care of my hair as I was supposed to. So I started embracing my hair type more, I started doing some research and at the end I started to get to know my hair. So please know, that the transitioning process is not easy you have to invest time as well as money.
 Describe your everyday style.
I like both bohemian and edgy style of clothing. Sometimes I have a very colorful outfit and sometimes my clothes are pretty dark and mysterious. My make up style is natural, mainly because I have a nose ring. The piercing already grabs attention. Hence, I only apply some mascara, eyeliner and lip gloss. In the winter I wear somewhat more makeup, but overall I try to keep it calm and dreamy.
My favorite hairstyle is the curly afro or a high bun. The curly afro is the easiest for me to create, since it is the most natural state of my hair.
What are your favorite hair products right now?
At the moment I use the leave-in conditioner of Sheamoisture regularly. I love, love, love the co-wash of Sheamoisture as well, because it does not strip my hair and in cleanses it thoroughly. I love castor oil in order to seal my hair, it makes my hair real soft and shiny.
[prodmod] Where can we find you online?
If you are interested in fashion, you can follow my fashion blog- Whitney from the blogue. For beauty and health, follow me and my friend at- Curlsnlashes
Blog- WhitneyFromTheBlog


