Search Results: Tabitha Tongoi

Detangling is a tried and tested method for avoiding knots and matting. For the past three or so years, I’ve detangled my hair when it is dry rather than dripping wet. I felt that when I detangled my dry hair, it was easier to manipulate. It felt gummy and could easily bend out of shape when wet. However, now that my hair is approaching 20 inches, I’ve found it much easier to detangle when it is about 70% dry. Here’s what has worked for me:
Start with stretched hair
I would not encourage you to try and detangle a shrunken ‘fro. You might end up in tears or maybe even with a pair of scissors in your hands. A dry shrunken ‘fro is often really tangled and therefore, bound to leave you frustrated. Trust me, I’ve been there, done that, and I’m now writing an article so that you don’t have to suffer the frustration that I did.
After wash day, keep your hair in a stretched style – two-strand twists or three-strand braids are best. You might even try the banding method or African threading. Stretched hair is less prone to breakage and single strand knots, also known as fairy knots.
Always detangle your hair in sections
Detangling your hair in sections will prevent you from going insane. Unless your hair is under 5 in. long, I’d suggest tackling your mane bit by bit. Part your hair into six or so sections and tie it in bands. When detangling, address each section at a time from start to finish. Using sections not only means you give each part the attention it needs, it’s also easier. Sections keep your hair away from your face and allow you to systematically work through your hair from nape to crown and from tip to root.
Use an emollient-based product for added slip
An emollient-based product is one that has a high percentage of oils. Type 4 hair, especially kinky hair, tends to have a lot of friction between the strands. Adding an oil or conditioner will give you slip and reduce matting for less breakage. I always reach for olive oil, because it is a lightweight oil that is easily accessible.
Use your fingers
The array of brushes available for detangling is mind-boggling. Every entrepreneur worth their dime has patented the latest brushing technology that promises to make your knots melt away like butter. However, when it comes to my haircare, I’ve found that brushes cause way too much tension and friction. They have also caused me excessive and unnecessary breakage. That’s why I simply use my fingers for regular detangling. Doing so may be more time-consuming, but in the long-run, I’ve found that I’ve retained a lot more length.
Be Patient
Detangling is a time-consuming process. Make sure you allocate enough time. It takes me five hours to fully detangle my hair from tip to root, and I do this about once a month. On detangling days, I make sure I have my Netflix on to make an otherwise exhausting process more enjoyable.
Do you have 4C hair? How do you detangle it and how has your routine changed as it grew longer?
Long hair requires more product
I know this may seem obvious at first, but trust me, hair length has some unforeseen repercussions for your wallet. As my hair has grown longer, I have to use far more product than I did when I first went natural. With 20 in. of natural hair, I go through a 450 ml jar of deep conditioner in only five wash days. That’s an entire jar every month! Now that I have longer hair, I’ve found that I fork over a little more cash for my hair’s needs in order to keep all twenty inches cleansed, moisturized, and sealed.
Long hair takes up more time
When I first went natural, my entire wash day took me 1-2 hr. from start to finish. Twisting my hair was a breeze. I’d twist my hair as I watched a show on Netflix. It was a easy and I’d be done before a single episode was over. However, with about 20 in. of hair on my head, I’m finding that twisting my hair can take up to five hours. This means, I have to carve out an entire Saturday morning every so often to nurture my strands. Retaining length is a commitment that requires time.Shorter hair was more versatile
Quite frankly, I have to admit this: I do get kind of jealous when I see curlfriends with cute, spunky tapered cuts. Teeny weeny afros can be chic, defiant, and edgy all at once. One can change up their hair color easily, chop off their colored ends, and then shave the hair on one side of their head all in a matter of a few months. And Pinterest boards make for endless options.Long hair requires low manipulation
Those of us who crave length have to keep our hair in low manipulation styles to reduce breakage. Oftentimes, this means we are limited to a range of two to three protective styles that work well for us. If the same routine doesn’t bother you, then long hair may work well, but if you’re artsy and enjoy versatility, a shorter ‘fro may do the trick.Which do you prefer? Long hair or short hair?
Fast forward to two years later. My hair care routine became a lot more stressful than it used to be. If this experience sounds all too familiar to you, don’t worry, I’ve been in your shoes.
Here are three major reasons your hair journey has become tedious:
Your hair is longer
I have about 20 inches of coily, type 4 hair. Long gone are the days when my wash day routine would take two to three hours from start to finish. With longer hair, I’m finding that every step of my regimen takes longer. Now I need to carve out at least four hours to fully tend to my hair. I’ve made accommodations for the fact that my hair, at its length, needs more time and care.
As your hair grows longer, you’ll need to adjust your time expectations.
You’re no longer inspired
When I first went natural, I followed dozens of bloggers and vloggers. I literally drooled over fat, juicy fros and twists all day long. Natural hair was life. However, as I got more accustomed to my coils and kinks, I stopped seeking out curlfriends with whom to share tips and tricks. The more I isolated myself from the natural hair community, the less I cared for my hair.
Over the years, I’ve found that engaging with other naturals not only allows me to keep abreast with the latest techniques in hair care, it also inspires me to nurture my mane.
Life has changed
Maybe you’re a new mum or like me, you’ve just started a new career. Needless to emphasize, life has become a lot busier. You’re caught between running errands, catching up with friends and family, and adjusting to your new role and responsibilities.
Trust me, I understand how drastic life changes can leave one with little time to care for their hair. Here’s what I’d suggest: simplify your hair care regimen. Rather than a 24-step process with thirty different products, keep it basic. Cleanse, deep condition, rinse, seal, and protective style. Do what you can to keep your hair healthy without going crazy.
Is your natural hair journey stressful? If so, in what way? How are you adjusting your hair care practices?
Use chemical-free products
As consumers become more health conscious, more hair care brands are starting to offer natural, chemical-free product formulations. Brands are eliminating harsh chemicals and preservatives and opting for conditioning oils such as castor oil, olive oil, and coconut oil as well as herbs like lemongrass, chamomile, rosemary, and mint. Rather than opting for synthetic detergents that are drying to your hair and scalp, find brands that adhere to testing and production practices that are sustainable and eco-friendly.Repurpose kitchen products for your hair
If you’ve been part of the natural hair community for a while, you may know about the wonders of olive oil, aloe vera juice, and apple cider vinegar to name a few! Olive oil, which is used in many recipes, can also be used as a sealant to lock moisture in your hair. Aloe vera juice, which is often mixed into smoothies for an added dose of antioxidants, can also be sprayed onto our hair as a moisturizer. Rather than going out to buy more hair products, duck into your pantry and feed your hair with some of nature’s best delicacies.
Think about the packaging
This part of a hair care regimen is often overlooked. After all, when we run out of product, most of us simply opt to chuck the packaging in the bin. To reduce waste, you could buy smart. By this I mean buy products that are wrapped or packaged in recycled material. You could also opt to bulk buy products you know you’ll use for months to come. For example, rather than buy 100 small containers of shea butter, buy one large bulk container. This may not only help you cut down on the amount of plastic you’re buying, but may also guarantee you a sturdy hard plastic container that you can downcycle for composting later down the line.
These hair care product alternatives may not only be better for the environment, they could be great for your overall health too.How do you reduce waste in your own regimen? Leave us a note down below.
In the natural hair community, various styling techniques have been used to avoid tangles. Some naturals are adamant about pre-pooing while some religiously use detangling brushes to keep their strands from matting. I’ve used both methods in my hair regimen, but section washing is what works the best for me.
What is section washing?
Simply put, section washing involves dividing your hair prior to washing it and only handling each part and section at a time. Simple.
Why is this beneficial?
Curly hair, when shrunken, tends to be very voluminous – at least mine is. It takes the strength of a bodybuilder to lather shampoo through my mane, let alone access and completely cleanse my scalp. Section washing allows me to divide and conquer.
How do I section wash my hair?
Prior to applying any product on my hair for wash day, I part my hair into six sections. First, I part my hair down the middle and then I split each section into three. I install loose two-strand twists and then proceed to apply product on my hair. For example, if I’m shampooing my hair, I apply the product to each section, give it a thorough cleanse, wash the product off, and then move on to the next.
Some curlistas simply section off their hair using hair clips rather than installing two-strand twists or braids. Some even prefer not to unravel each section as they go, but rather smooth products on and off their strands. As each head of hair is different, it’s best to try different section washing techniques and then settle on what works for you. Either way, you’ll find that as you keep your hair stretched and sectioned when washing, it will tangle and knot less.
Leave us a note down below and let us know if you’ve used section washing to keep your hair tangle-free!
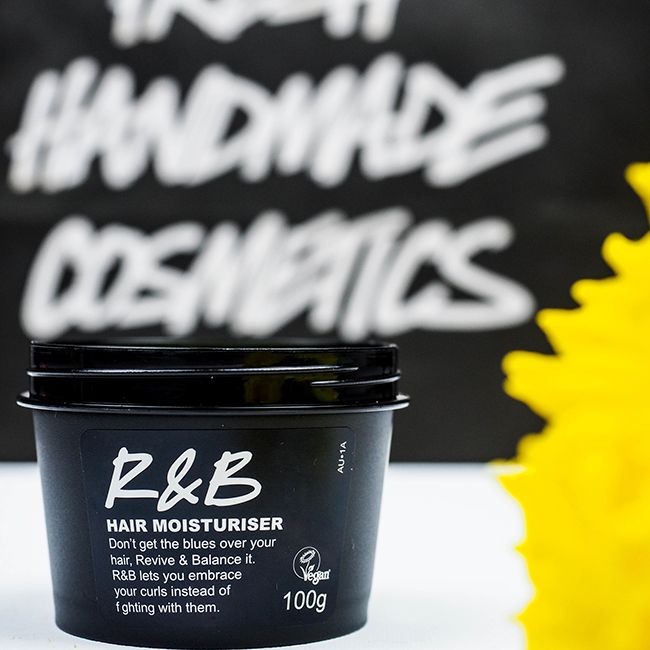
Luckily, after a few catastrophic misses, I think I’ve found a product worth keeping: Lush Cosmetics R&B Hair Moisturizer. This product is the bomb dot com. Can we just have a moment of silence for this product? My hair gulped it down like it was in a Coca-Cola ad. It made my hair feel very soft and pliable.
Ingredients in Lush R&B Moisturizer
Lush R&B Hair Moisturizer has 14 ingredients, all of which are natural ingredients or safe synthetics. The ones listed first are oat milk, glycerin, organic avocado butter, olive oil and jojoba oil. This blend of oils and butters conditions the hair shaft and gives hair added slip. I found that my hair felt supple after several uses and my detangling sessions have been a lot easier.
How I use the Lush R & B Hair Moisturizer
As I already have a pretty basic and consistent hair regimen, I use Lush Cosmetics R&B Moisturizer to seal my hair at the end of the day. After I spritz some water on my hair, I apply a dime-size to the length of my strands, focusing on my ends. I use it sparingly, so that it doesn’t all absorb into my pillow when I sleep. I mostly reach for this moisturizer when my strands are feeling crunchy and dry.
One thing I really like about the R&B moisturizer is that it’s pretty affordable and easily available in Lush Cosmetics stores across the country.
Are you a curl-sista living in Australia? What are your favorite hair products and where do you buy them?
What after all is shiny hair and why is there an obsession with ensuring our hair matches this standard? Is sheen-free hair necessarily dry hair and on the other hand is shine indicative of healthy and moisturized hair?
Well, let’s begin with a few talking points:
The practice of greasing hair is deeply entrenched within the Black community
Prior to going natural, I solemnly believed that applying heavy pomades to my scalp would stimulate growth. You better believe that every Sunday, without fail, I’d douse my scalp in oils that made my hair glisten and shine. Nonetheless, my hair was prone to breakage and I didn’t see much health and length retention. I’m pretty sure I’m not alone. In Hair Story: Untangling the Roots of Black Hair in America, Ayana Byrd explores the roots of pervasive inter-racial prejudices while contextualizing how fads, such as the much-maligned Jheri Curl, become pervasive. Needless to say, this subject alone could make up an entire article, but what I mean to point out is the idea that curly hair should shine is one deeply rooted in our black culture.
Media has gone a long way in psychologically convincing us that healthy hair is shiny hair
A walk through beauty aisles will reveal how often shine is used to capture a shopper’s attention. Subliminal messaging employed over and over again may begin to sound like the truth and influence our perceptions of what is and isn’t considered healthy hair.Now that we’ve considered a few poignant, societal factors that may influence our understanding of healthy and unhealthy hair, as far as shine is involved, I’d like to explore what physical factors influence the level of sheen on our hair.
The structure of hair
The shingle-like, outermost layer of the hair strand is called the cuticle. Depending on your hair’s natural porosity, you may find your cuticle is raised, tightly bound, or in between. If your hair is highly porous, it loses moisture easily and is likely to have less sheen, as uneven surfaces refract rather than reflect line. In addition, if your hair is curly, you may find that it naturally feels drier, because your scalp’s sebum encounters more friction as it travels down the hair shaft of coily hair.
Styling practices
Heat styling, permanent hair color, and poor styling practices compromise the health of one’s hair, leading to dryness.
As each head of hair is different, I’d encourage you to look into all the aforementioned factors when assessing whether or not your hair is dry or simply sheen-less. In addition, you may be able to look at the manageability and elasticity of your hair in order to understand whether or not it is healthy and moisturized. In other words, does your hair have a healthy protein-moisture balance? Does it snap or hyperextend when combed? Are you able to detangle it easily or does it feel dry and crunchy?
While this article may not have resolved the debate as to whether sheen-less hair is dry hair and shiny hair is healthy hair, I hope that it has at least given you some factors to consider when assessing your approach to this topic and more essentially to the health of your hair.
Feel free to leave us a comment down below with your thoughts!
Clip-ins are becoming my go-to protective style.
Why use clip-pins?
While I’ve only used clip-in extensions as a protective style for the past few months, I vouch for them for three main reasons.
1. They are easy to install.
If you’re a little too familiar with long waits at the hair salon to install weaves or braids, using clip-in extensions might be a quicker protective style option for you. They can be installed in just a few minutes–with minimal hassle, no less–and still give you salon-fresh hair.2. They are durable.
I have found that as I only wear clip-in extensions for my day-to-day errands and activities, I am able to extend their shelf-life a little longer. Before bed, I take out my clip-ins before to avoid matting and knotting.3. They are easily accessible.
Over the past year alone, I have come across five accessible companies specialising in clip-in extensions to match curly, coily and kinky hair. Aside from wigs and weaves, the natural hair community can now consider clip-in extensions as a an affordable protective style option.Make the most of your clip-ins
Just like any other protective style, clip-ins should be properly installed and worn in order to maintain the health of our real, natural hair. These four easy techniques help me make the most of my clip-ins:-
Use a simple protective style as a base.
While some naturalistas like to install clip-in extensions to their picked out natural hair in order to add volume, I prefer to keep my natural hair as tucked away as possible. A true protective style should call for as little manipulation as possible.
I may opt to braid down my twists or if I’m up for it, install thick cornrows. In addition to making it easier to clip the extensions into my real hair, my type 4 coils are able to get a much needed break from overstyling.
-
Maintain your hair regimen.
As I keep my hair underneath the clip-ins in a low manipulation protective style, I’m able to maintain my hair regimen as normal. When wash day comes around, I simply take out my clip-in extensions and proceed as I would with my haircare routine. Doing so allows me to keep my strands moisturised and sealed over the duration of my protective style.
-
Use lightweight styling product.
My biggest tweak suggestion to your haircare regimen is to use lighter products. Rather than the castor oil or shea butter, use hair products that are less likely to cause build-up. Instead, use a diluted aloe vera mist and a dab of olive oil as a daily moisturiser.
-
Take extra special care of your clip-in extensions.
As with any other type of extensions, clip-ins need care. Prior to installing your clip-ins, be sure to give them a good wash. Lightly deep condition them to prevent dryness. Every so often, set time aside to detangle them and as always, after a few weeks of use, put them aside and opt for another short term protective style. These simple steps should give your clip-in extensions longevity of use.
What has your clip-in extensions experience been like?
Here are 10 clip-in extension brands every naturalista loves!
Follow my long, natural hair journey on my personal blog, Craving Yellow.
[prodmod]
Inconsistency
In order to grow healthy hair, you have to consistently stick to your regimen. This means scheduling times in your day or week to carefully nurture your strands. Oftentimes, many naturalistas tend to underestimate the time and effort needed to nurture their kinks and coils when making the switch from relaxed hair. It’s easy to see photographs of other curlsistas and think healthy hair will come instantly.
This is not the case. To grow healthy, natural hair you need to stick to your regimen for several months or even years. Don’t be discouraged by this time frame – instead make your hair regimen a part of your self-care routine and before you know it, you’ll reap the fruits of your labor!
Too many steps
I have to admit I was guilty of this when I first went natural. I literally had a 22-step process that rotated every four weeks and that took up almost 8 hours of my weekend. I was simply doing the most. I had resorted to including every possible remedy I had seen on YouTube and read on blogs. I would rinse my hair with all sorts of teas and then finish off with some apple cider vinegar before running ice cold water through my strands (and that was only the tail end of my regimen!”> Needless to say, I soon learned my regimen was too complicated and time-consuming. Five and half years later, I can assure you the simpler your regimen is, the more likely you are to stick to it.
Too many products
This point goes hand in hand with the one above. If your regimen demands that you have to use three deep conditioners, four leave-in conditioners, and six types of oils on your hair, you’re probably overdoing it. Using too many products is not only expensive, it can be detrimental to the health of our hair in the long run. Applying too much product to our strands can lead to product buildup, which weighs down your hair and can leave it looking lifeless. Remember, when it comes to products, find a few good ones that work for you and stick to them for a while. Doing this will not only make it easier for you, but your kinks and coils are more likely to thrive.
The wrong products
When you go natural, it’s essential that you take some time to carefully examine the products you’re using. Oftentimes, many naturalistas simply apply the same old products they used when they had relaxed hair. This may be detrimental to your natural hair’s health as some products are formulated specifically for relaxed or chemically-straightened hair. For example, protein deep conditioners for relaxed hair may contain a high amount of protein as the cuticle of relaxed hair is more prone to damage. Healthy, natural hair is less likely to experience protein loss, so it will most likely require a less potent product formulation.
General styling habits
When referencing the term, “regimen” many naturalistas may assume this simply refers to a wash-day routine. However, styling is a critical part of one’s hair regimen. Moisturizing and deep conditioning your hair once a week adds elasticity and shine to hair and may prevent breakage. But what could impact your hair even more is how you handle it between wash days. If you over-manipulate your hair in styles that tug at your strands, you may find your hair breaks easily. In between wash days, wear protective styles such as buns, flat twists, or cornrows to help you retain the health and length of your hair.
Have you found that your regimen is no longer working for you? What have you done to adjust it so as to ensure the health of your hair? Leave us a note down below, we’d love to know!
1. Thoroughly detangle your hair
I don’t know about you, but I’ll tell you this: my hair loves to grow in tufts. Whenever I undo my two-strand twists, my hair will happily remain coiled up in a tendril. I love the fact that my hair is versatile and can hold a curl without the need for any added product, but at the same time if I leave my hair in tendrils, it can give the appearance of thin hair. To restore my hair to a more voluminous state, I always take time to separate the tendrils into smaller sections. This process of detangling my hair gives it more body and bounce.
2. Fluff out your roots
To avoid a scalpy look that can give the appearance of thin hair, fluff out your roots. This can be by using an afro pick comb and gently lifting the roots up without combing through to the tip of your hair. If you don’t want to use a comb you can gently massage your roots while tugging upwards. As a naturalista with tight curls, my hair tends to become matted at the roots, so I simply use the tips of my fingers to massage them and then lift the hair. This method is bound to effortlessly make your hair look fuller and longer.
3. Get a tapered cut
If you’re not scissor shy, you may want to consider a tapered or layered cut. Layers give the illusion of volume by adding shape and dimension to your hair. Some naturalistas like to have the front and crown of their hair a little longer than the nape area. This style of cutting hair is particularly transformational for naturals who like the appearance of fuller hair.
4. Avoid heavy butters and creams
This goes without saying for seasoned naturalistas, but if you’re a newbie, I’ll let you in on this hair trick: heavy butters and creams can weigh your strands down. Heavy butters such as cocoa butter and Shea butter are great sealants, particularly in extreme weather, as they lock in our hair’s moisture. However, a little goes a long way when it comes to these heavy-duty emollients, so if you want to have the appearance of fuller hair, use them sparingly. Apply them to your ends and use a lighter oil, such as Argan oil, along the length of your hair shaft.
5. Curl it up
A fluffed out, almost blown-by-the-wind-fabulous style creates a voluminous look. Lucky for us curly girls, nature’s given us some bounce already. If you still want more volume, use styles like twist-outs or braid-outs. You may even use Curlformers for a few twirls. Whichever your style of choice, once you’ve fluffed out your curls, bend over and shake your head from side to side. When you stand back up, let your curls lay as they are. You’re nearly guaranteed to turn a few heads with your effortlessly edgy, carefree curls!
Do you have tricks up your sleeve on how to make hair appear fuller? If so, feel free to leave a comment down below!
Excessive dryness
If your hair is crackly, (yes crackly like a winter fire”>, then it’s dry! Plain and simple. Our curls and kinks should be supple rather than crunchy. If you’ve done all you think you can possibly do to curb dryness to no avail, you may need to take a step back to see if your hair is over manipulated. If you switch between hairstyles frequently, leave the ends of your hair exposed, or maybe even use direct heat from time to time, your hair may just be buckling under the pressure. You may need to use more low-manipulation protective styles as well as reduce heat use in order to preserve the moisture in your strands.
Buildup
At one point in my regimen, I had a 10-step daily, moisturizing routine. I was using 2-3 products as moisturizing agents and then sealing with a variety of oils and butters. Needless to say, after a while my hair was limp, weighed down, and lifeless. In fact, the excessive buildup of oils caused a gray tint on my hair. Not cute at all! I’ve come learn my natural hair thrives best when I apply fewer products. Everyone’s head of hair is different, but as a general rule of thumb, if your hair is deteriorating in sheen and bounce, it may be time to cut back on excessive use of hair products.
Flaky scalp
If you have small, white flakes on your scalp, this could be a sign of dandruff. Remember, skin sheds naturally from time to time, but if your scalp is flaky over an extended period of time, this is a sign that you need to closely monitor the health of your hair. A flaky scalp could be caused by many factors, including over applying products with chemicals that are astringent or drying. Oftentimes, popular black hair practices, such as greasing the scalp, do more harm than good. Rather than lather excessive amounts of petrolatum on your scalp, dab a light oil, such as olive oil onto your scalp and massage it in. If you have an itchy and flaky scalp, feel free to visit a dermatologist or trichologist, as they are best placed to offer medical and treatment advice.Breakage
Styling your hair in heavy braids or intricate weaves can cause breakage due to tension on the strand. When installing extensions, our hair is pulled and tagged in order to conceal it. If your hair is not properly prepared to withstand the manipulation of being sewn or glued, you may find that your strands snap under the pressure. In addition, when extensions are being removed, hair is more prone to breakage and splitting if handled brashly and improperly maintained underneath the extensions. If the ends of your hair are uneven or if some patches of your hair tend to be longer or shorter than others, this may be a sign that you need a good trim as well as a break from wearing extensions.
Remember our hair is very fragile, so we need to be extra careful not to over manipulate it.
What signs do you look for when assessing your hair’s health?
Tell me in the comments below!
For updates on our latest articles, follow NaturallyCurly on Facebook.
Subscribe to my YouTube channel, Craving Yellow for more curly girl advice.
Like what you see? For more articles like this, sign up for the NaturallyCurly newsletter!
Wigs are a fantastic way to maintain the health and length of your hair. Long, healthy hair is not simply a matter of throwing on a wig and walking out the door. Oftentimes we do need to prepare and maintain our hair over the course of our protective style. Here is what I recommend:
Ensure your natural hair is clean
Prior to wearing your wig, take a moment to ensure your natural hair is clean. If you have not washed your hair in a couple of days and you have sweaty scalp or product buildup, wearing a wig may be detrimental to the overall health of your scalp in the long run. Depending on their breathability and cap construction, wigs can harbor bacteria and grime that can upset the natural pH levels of your scalp, leading to dryness and flakiness. To ensure your scalp is at its best, cleanse your hair regularly, but most importantly, prior to beginning a wig regimen.
Braid your hair to prevent matting
Braiding your hair underneath a wig is not only meant to ensure your wig looks natural, it also has the benefit of preventing your hair from matting. Our curly hair loves to grow in tufts, so we can’t simply pat down our fros and then don our wigs. We’re better off braiding our hair in cornrows or even in small twists prior to wearing our wigs. This will ensure we keep our hair as stretched as possible for the duration of the protective style. Additionally, once it is time to take a break from wigs, we will be better able to detangle our pre-sectioned hair.
Wearing a wig is not a ticket out of caring for your hair.
Care for your hair underneath
Wearing a wig is not a ticket out of caring for your hair. If we’re keen on maintaining the health and length of our hair, we’re better off nurturing our hair underneath. Now you may not be able to complete your usual hair regimen in full, but at the very least, ensure you cleanse your hair weekly. Also, rather than apply heavy oils or pomades to your scalp, use a light oil like argan oil to seal in your hair’s moisture. You may also want to give your scalp a massage at least once a week to aid in circulation. Be sure to closely monitor the health of your hair over the course of your protective style.
How do you prep your hair for wigs? Leave us a note down below, we’d love to know!
It is best to build your hair regimen around your hair’s unique needs. If your hair is exceptionally dry, you may need to focus on adding moisture, while if you’re an athlete and sweat heavily every day, you may want to emphasize the cleansing aspects of your hair regimen. Remember, a hair regimen is built in response to your hair’s needs, so it may not always remain the same. Nonetheless these four anchor points should ground your hair regimen over time.
1. Pre-poo
You may choose to apply an oil along the length of your hair to prevent excessive cleansing during the washing process. This step is often referred to as pre-shampooing. Shampoos, particularly those with sulfates, can often strip our hair of natural oils, so pre-pooing adds an extra layer of protection against loss. To pre-poo your hair, apply a light oil such as jojoba oil to the length of your dry hair. Leave the oil on for at least 30 minutes and then proceed to cleanse your hair.
2. Cleanse
There are different levels to which hair can be cleansed. Clarifying products are the most astringent while bentonite clay and oat water may be gentler. Either way, over the course of your wash day regimen, feel free to use some type of cleanser to rid your hair of weekly buildup. Our community’s favorite cleansers are SheaMoisture Jamaican Black Castor Oil Strengthen, Grow & Restore Shampoo, Obia Naturals Coconut Shea Shampoo Bar. Some of our Editors’ favorites are Elucence Volume Clarifying Shampoo and Alikay Naturals Moisturizing Black Soap Shampoo, and Briogeo Rosarco Reparative Shampoo.
3. ConditionConditioning your hair is one of the most important steps you can take to ensure the health of your hair. Conditioning your hair using a moisturizing deep conditioner adds extra moisture and slip to your strands and prevents breakage in the long run. In addition, protein deep conditioners work to strengthen our strands say after coloring or applying heat to our hair. Again, feel free to switch between the two depending on your hair’s unique needs. A couple of our favorite deep conditioners are SheaMoisture Jamaican Black Castor Oil Strengthen, Grow & Restore Treatment Masque and the Alikay Naturals Honey and Sage Deep Conditioner.
4. Seal
In order to prevent moisture loss, apply sealants. You may use a light oil, heavy oil, or even a whipped butter. You want to use a product that is able to coat your strands with emollients in order to slow down moisture loss. After all, the purpose of a regimen is to keep our hair moisturised. Steps 1, 2, & 3 above would be pointless if our hair dry.
Lastly, a regimen is a personally tailored process that may take several months to get it right, so keep trying. Keep doing your research and learning from the wider community of curl sistas. You can always come back to this list to make sure you have your foundational pointers in place.
[prodmod]Dry vs. wet detangling
Just to be clear, dry detangling and wet detangling aren’t all that different. In the former you detangle your hair when it’s nearly dry and in the latter you detangle your hair when it is dripping wet, maybe even as you wash it. This particular aspect of natural hair care can be contentious. Naturalistas who detangle dry hair claim that their hair is better able to handle the manipulation and less likely to break. Naturalistas who detangle wet hair claim the opposite. They say that their hair is better able to handle manipulation when it is wet, as it is softer and more pliable.
I’ve used both methods with success over the past five years of my natural hair journey. When my hair was shorter, I enjoyed both dry and wet detangling. However, when my hair was about 10-13 inches, I found that dry detangling was an efficient way of getting rid of knots. However, now that my hair is approaching 20 inches, it seems to do better with wet detangling. The key, I guess, is to learn to be responsive to your hair’s needs as they change over time.
4 things you need to detangle
Now that we have an idea of what I mean by “wet detangling”, here are four things that will make your wet detangling sessions a lot easier.
Deep conditioner
Prior to detangling, deep condition your hair with a moisturizing treatment. Feel free to add ingredients such as butters, honey, and oils to add more slip. I’ve found that my strands are easier to manipulate when I infuse my hair with moisture prior to thoroughly deep conditioning. My hair feels like my knots have melted away.A thorough monthly session
Set aside two or so hours each month to thoroughly work your way through your strands one at a time. I know this might sound like much but it makes every other detangling session in between easier for the rest of the month!Sections
If you attempt to detangle your entire mane all at once, you’ll get frustrated. Trust me, I’ve been there! Instead, section your hair and work on each section at a time. As you work your way through each section of hair, be sure to braid it up loosely and pin it out of the way, which leads me to my fourth and final point.A stretched style
As best as you can, try to keep your hair stretched after detangling. There’s no point whatsoever in spending your precious time picking out knots and tangles only to have your hair shrink and matt again. As Type 4 naturals, stretched styles keep our hair from coiling back up onto itself. Let your hair dry out in a stretched style to avoid tangles.Do you detangle your hair when it’s wet or when it’s dry? What methods and techniques have you found effective? Leave us a note down below, we’d love to know!
Watch: 5 Signs You Are a Product Junkie
Ignore marketing fluff
Before you purchase a product, get past the marketing fluff. By this, I mean don’t believe every catchy word on the jar. Companies make a lot of promises that their product will add shine, stop breakage, or even relieve dryness, but without the right ingredients, all these claims are just fluff. To see if a product does what it actually says it does, read its ingredients list. You may want to look for water/aqua as well as emollients and oils. You may also want to look out for labels such as sulfate-free and paraben-free, as these indicate the product’s formulation doesn’t strip our hair of its natural oils and also doesn’t have dangerous parabens that may be linked to cancer. There may be ingredients listed in scientific terms that you may not be familiar with, but as a rule of thumb, I always use Google to do a little research on the ingredient. If a product contains too many preservatives and artificial chemicals, I’ll leave it right on the shelf.
Try sample sizes
Many hair companies are now offering their products in sample sizes. Every chance I get I grab a couple and test them at home. I take time to assess the product’s performance. If it does a good job of removing my weekly buildup and relieving a dry and itchy scalp, I’m more likely to commit to a full-size product. Rather than believe that a product automatically does what it claims to do, I test it and mark it according to my own standards.
Pay attention to packaging
Now this is not too important. At the end of the day, it’s what’s on the inside that counts rather than fancy claims on the packaging. That said, I’ve got to admit I’m always drawn to products that are well packaged and branded. I think companies that take time to make their product stand out on the shelf, may also have a few other essentials, such as the product formulation, already figured out. For me, pretty packaging communicates that the hair company has thought long and hard about their ideal customer and is doing their best to appeal to them.
Sniff test
I’m quite sensitive to strong smells, and while I like a shampoo that leaves my hair feeling daisy fresh, I don’t want to feel like a walking bottle of perfume for the rest of my day. For me, if a product has overbearing accents, I’m least likely to purchase it. This to me may be a sign the product is not well formulated or balanced. Checking that a product passes the sniff test before I purchase rules me out from making purchases that will go to waste.
Compare prices
I don’t want to close my eyes in anguish as I swipe my card for a product. Unless this product is made from the rarest oils from the depths of the Amazon, I’m not willing to pay above market price. Some hair product lines are exclusive, professional, or even designer and so may warrant a higher price, but most products that are in the mainstream market should be priced within reason. Before you splurge, find out the price range of similar products in the market and then make an informed decision.
Buy multi-purpose products
I like a product that fulfills multiple hair needs at once. I have never been a fan of 2-in-1 shampoos and conditioners, but I sure do love conditioners that do well as both deep conditioners and even leave-in conditioners depending on how much I apply on my strands and for how long. I have often found that products with a more natural or organic base are more versatile. For example, apple cider vinegar can serve as a cleanser and when diluted and infused with a few other treats like aloe vera juice, it can serve as a leave-in mist. Some deep conditioners also straddle the divide between protein and moisture intense categories. Once in a while, I don’t mind a product that is highly moisturising but also restores my hair and leaves my strands feeling sturdy.
What factors do you consider when selecting your hair products? Leave us a note down below, we’d love to know!
What is the kakadu plum?
The kakadu plum is an Australian native plant found in the northwestern regions of the continent. Its scientific name is Terminalia ferdinandiana and it is locally known as gubinge, murunga, or Billygoat plum. It has been used by indigenous Australian communities for centuries as an antiseptic, food, and a healing remedy.
The kakadu plum is a nutrient-rich, botanical powerhouse and one of Australia’s superfoods. Scientists believe it developed an efficient system to protect itself from the oxidative stress caused by constant exposure to harmful rays of the sun.
The kakadu plum contains the world’s highest concentration of nutrient-available vitamin C with up to 3000mg of vitamin C per 100g of fruit. This is 50 times the amount found in an orange. It’s full of antioxidants, anti-fungal, antiviral, and anti-inflammatory properties.
What are the benefits of the kakadu plum for hair?
Kakadu plum-infused hair products supports moisturization and hydration in curly hair. By maintaining the level of collagen and elastin, kakadu plum can boost moisture and gloss in particularly dry or lusterless hair.
These five hair products have kakadu plum extracts:
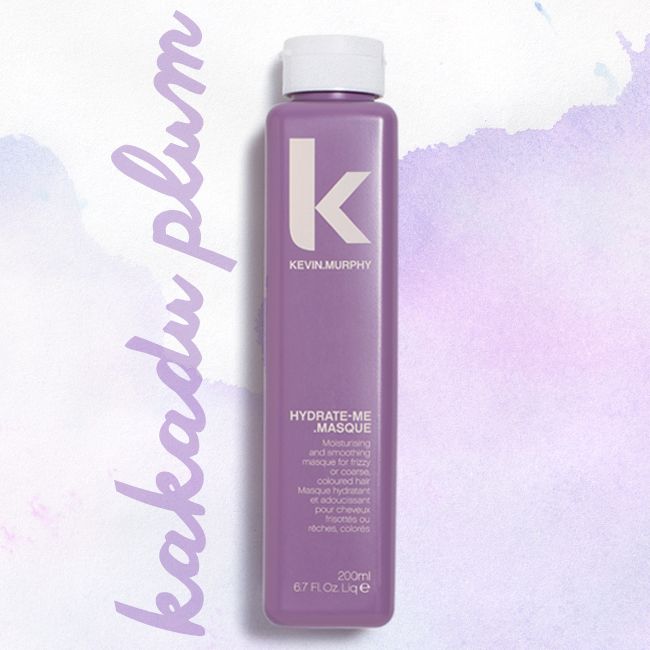
- Kevin Murphy Hydrate-Me Masque– Infused with kakadu plum, rosehip, and evening primrose oil, this conditioning mask draws from its rich vitamin base to infuse strands with hydration.
- Australian Native Botanicals Conditioner For Coloured Hair– With no sulphates, silicones, or synthetic fragrances, this conditioner offers restoration for colour-damaged hair from its rich kakadu plum antioxidants.
- Salon Only Repairing Shampoo– Rich in desert lime, kakadu plum, and native quandong extracts, this shampoo’s protein rich formulation fortifies the hair context to promote elasticity and shine.
- Organic Selections Rosemary & Kakadu Plum Conditioner– As a scalp tonic, this vegan-friendly, sulphate-free, and vegetarian conditioner draws from a wide base of nature’s best powerhouses to restore moisture balance to curls and kinks.
- De Lorenzo Insant Allevi8– Formulated from baobab protein, kakadu plum and cactus flower, this desert-inspired range promises to restore moisture and shine to your curls.
Research sources
My hair grows in tufts
One of the most enlightening aspects of going natural has been learning how my hair grows. I’ve observed that if left untouched for a few weeks, my hair sprout out in tufts. Individual strands of hair coil around each other and grow out together almost like locks. Two-strand twists allow me to keep my hair growing in this same pattern – by keeping my strands twisted, I imitate my hair’s natural inclination to grow in tufts.
Easy to install
The only tools I need to install my –strand twists are my fingers. I simply section off my hair, gently detangle it and proceed to wrap one section of hair around another. I honestly cannot imagine an easier style to install! Some naturalistas like to add holding creams and butters to the length of their hair as they twist it up, but that’s as complicated as it gets.
Great for all lengths of hair
I’ve worn strand twists from when I had 4 inches of hair to this very moment when my hair is about 20 inches long. I’ve found them equally effective at all lengths. When my hair was shorter, I’d wear micro-twists and as my hair has grown longer I’ve made my twists slightly thicker. The great thing about twists is that you can install them as you please regardless of the length of your hair.
Easily styled and accessorized
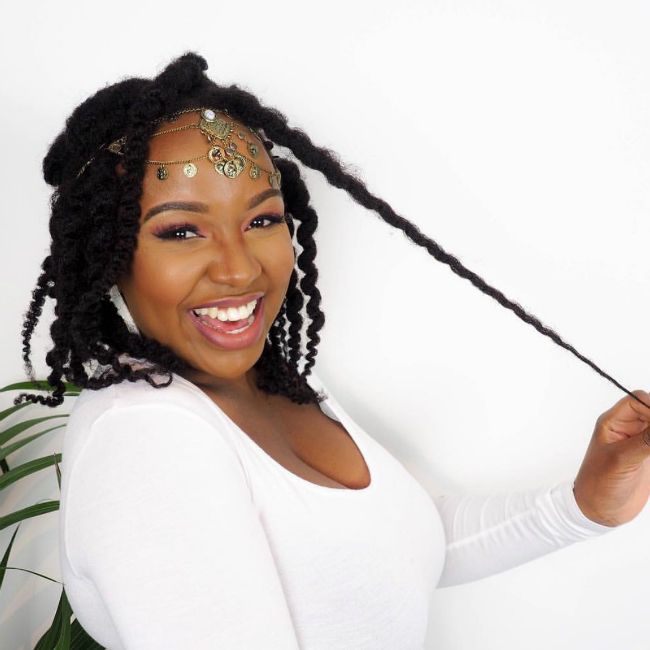
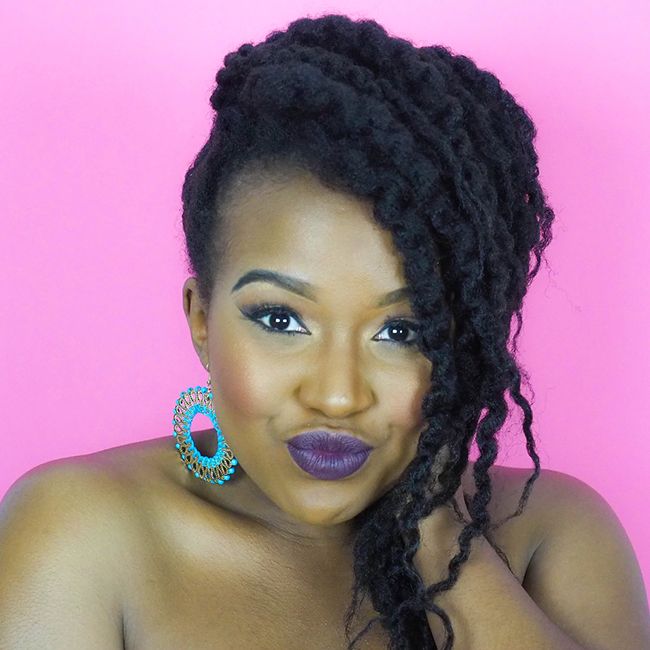
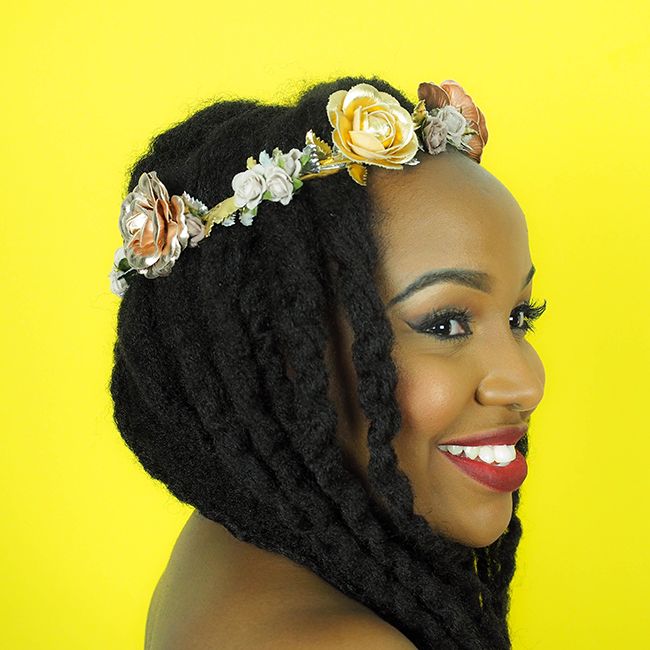
I like to consider my twists as a variation of locks. In other words, I draw inspiration from my naturalistas with dreadlocks when it comes to styling. Sometimes I pin my strands up and away in a bun and other times I’ll interweave them to don a more chic and sophisticated style. Heck I might wear a flower crown and let my strands grace my face or add a little bow for some sunshine on a rainy day. It’s all about what works for you really. The bottom line is two-strand twists are versatile and can be styled just as easily as one would locks.
They allow me to nurture the health of my hair while keeping it protected. This is one of the aspects I love the most about my two-strand twists. When I first went natural, I was keen to keep my strands protected but also moisturised. I found that with styles like braids or even weaves, I was able to do the former but hardly the latter. However with two-strand twists, I’ve found I can keep my hair protected and in a low manipulation style while still deep conditioning and moisturising as usual. I complete my entire regimen in my two-strand twists and only retwist my hair as necessary.
Have you worn two-strand twists as a protective style? What’s been your experience? Leave us a note down below, we’d love to know!
Question
My hair always appears to be dry, even though it isn’t…or is it? I’m not sure, but I know that isn’t the way my hair naturally should be. I shaved my head multiple times to try and start over and reset the hydration. Every product I use seems to either be too heavy and thick and sits on my hair, or it just doesn’t do enough.
PLS HELP ME! I want juicy waves not dry and crunchy!
Answer
It is worth acknowledging that the beauty industry promotes glossy shiny hair. Advertisements for sheens and elixirs have somehow made shiny hair translate to healthy hair. However, as is the case with 4C hair, this isn’t always true. Type 4 hair cuticles tend to be raised meaning our hair refracts rather than reflects light. This in turn may give the appearance of “dull” hair. That said, there are several ways to abate dryness and in turn add a shine to our hair.
Read more: You are Feeling Texture, Not Texture
Ensure that your moisturizing game is top notch
Be sure to keep up with my weekly deep conditioning treatments. Moisture is essential for the health of our hair as it adds elasticity and prevents breakage. Now your hair doesn’t have to be soaking wet all day every day, but make sure to have it drenched in water at least once a week.
Always deep condition after you cleanse
Always deep condition or use a daily conditioner after cleansing your hair, especially with a shampoo. Daily conditioners and deep conditioners close the cuticle after it has been lifted by cleansers. Remember that a closed cuticle increases the potential of shine.
Seal your strands with natural oils
I prefer natural oils like olive oil, avocado oil, or coconut oil, as they’ve proven to be effective sealants over the course of my five year natural hair journey. When my hair is slightly damp after a wash, I apply a tablespoon of olive oil and a tablespoon of coconut oil along the length of my hair and then follow through and braid or twist my hair. When I take my twists or braids out, my hair is shiny.
What are your favourite ways to add hydration and sheen to your hair?


