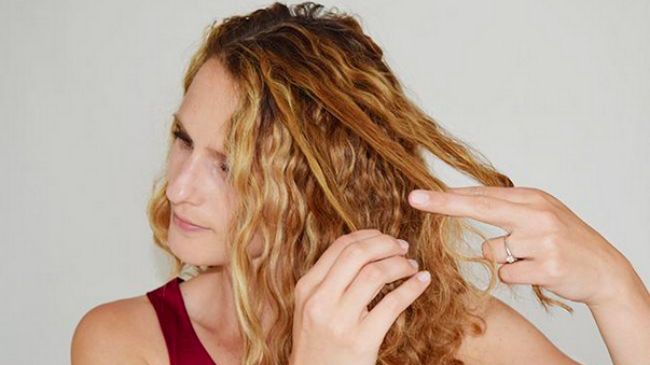
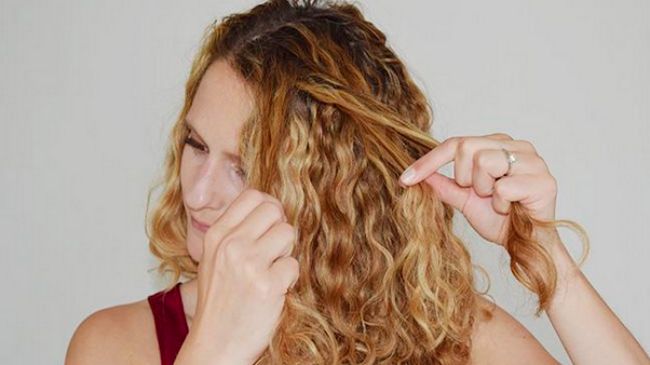
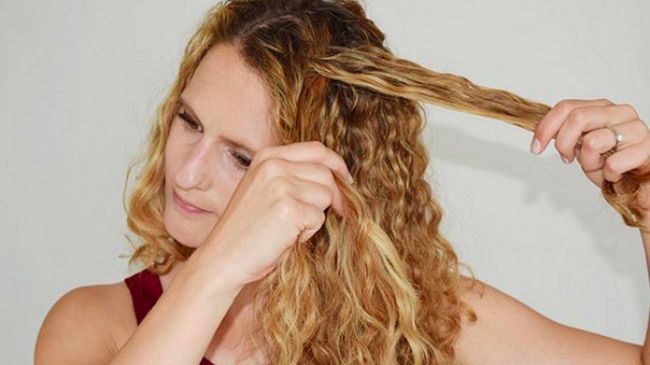
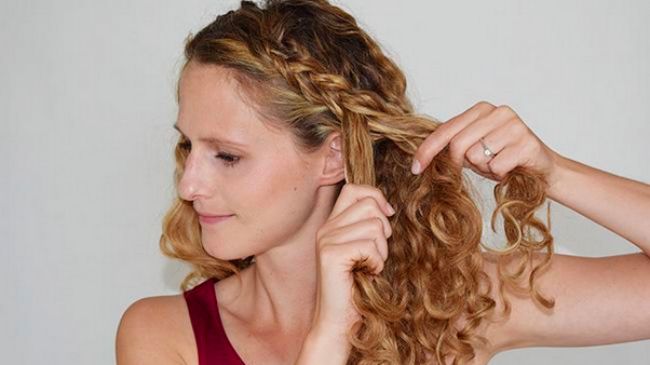
Search Results: Sandra

Your curls don’t want to clump properly, but love being in a lot of small strands? If so, this article is a must read for you! After years of trying to get my curls to clump, the following routine finally helped me with clumping.

1. Comb your curls thoroughly to remove all knots
First of all, start off as usual when washing your hair, then continue by combing your curls when they’re soaking wet and covered with conditioner. Make sure to thoroughly comb them with either your fingers or a comb to get rid of all the knots. This is important, as knots prevent your curls from clumping properly.
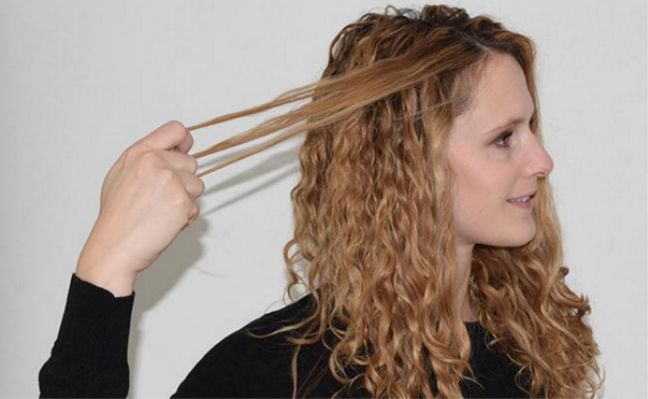
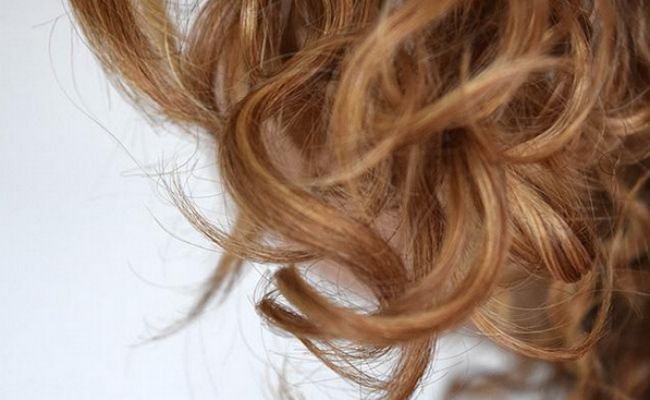
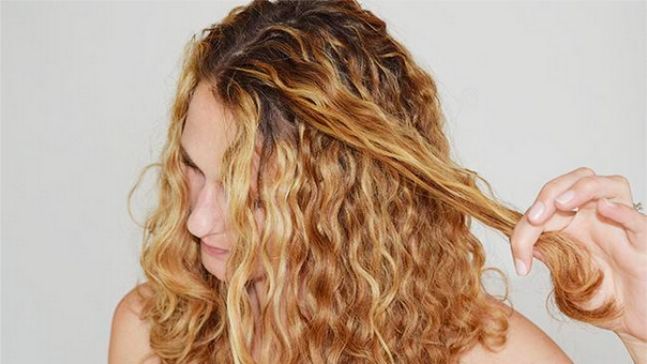
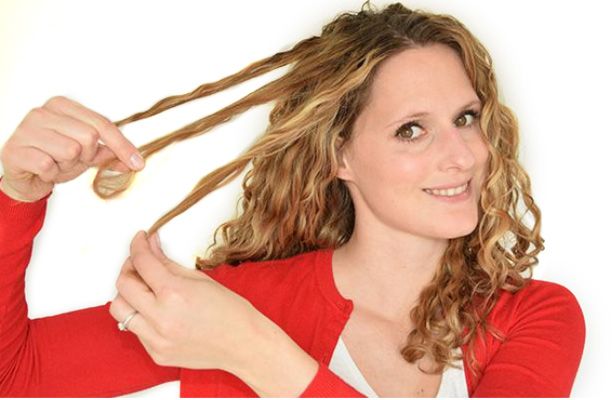
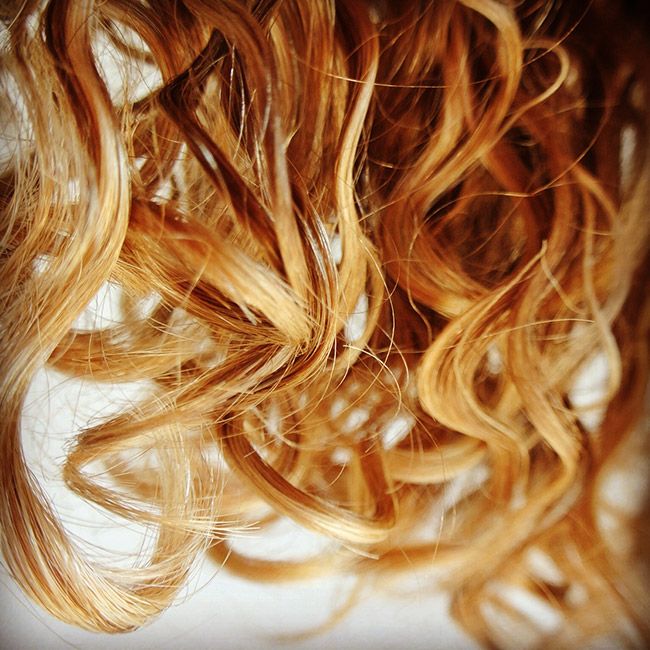
Don’t worry if you are breaking up all the clumps at this point – it’s natural to break them up while combing your curls. The following picture shows how my curls look at this point during my routine: obviously, there are a lot of small hair strands.
2. Stop raking after you have combed your curls
The next step is crucial to get my curls to clump: rinse out the conditioner you have added to comb your curls and do not rake through your curls anymore — not even to rinse the conditioner.
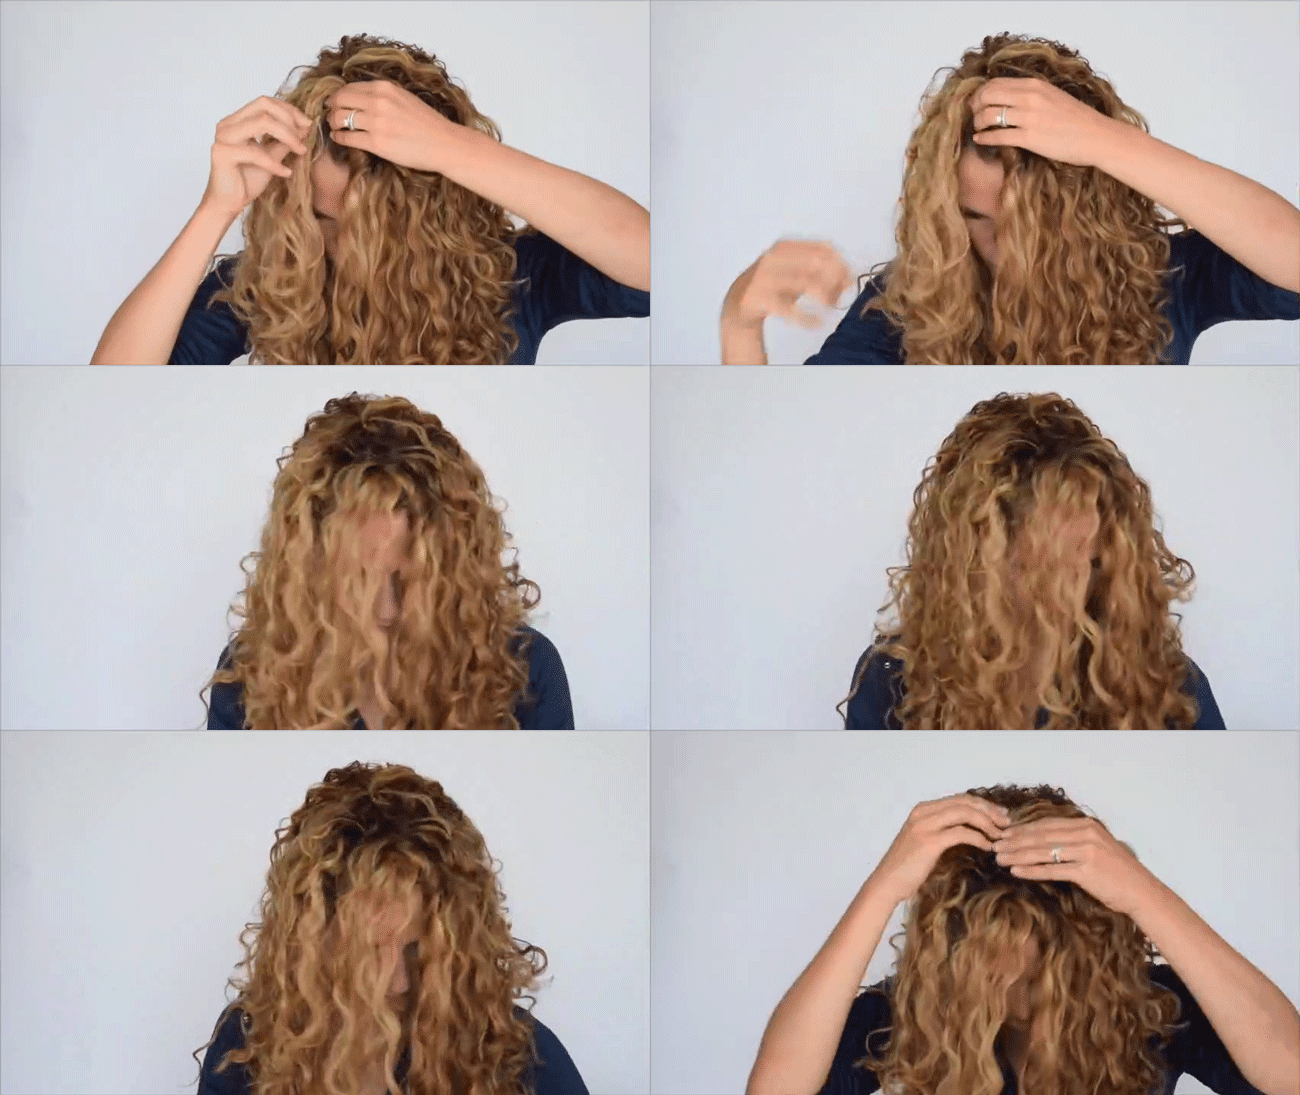
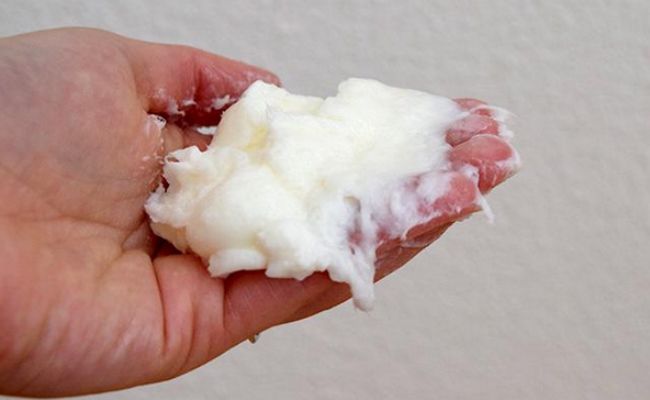
As far a clumping goes, combing your curls to evenly spread your styler is a no-go. Of course you still have to be able to add styler to all of your curls. My favorite way to make sure all of my curls get covered with styler, is to take some styler into my hands, rub them to spread the styler in both my hands, then put my head upside-down and glide along the “outside” (no raking!”>–from the nape to the ends.
Now repeat the gliding along on the “inside” of your curls, meaning from your face to your curls’ ends. Usually the ends don’t get enough styler and easily get frizzy. To prevent this kind of frizz, I grab all of my hair like I’d put it into a ponytail to provide them with enough styler.
3. Get rid of excess moisture
To get your curls to clump they’re supposed to be as dry as possible when you start blow-drying. I also recommend the following procedure if you prefer letting your curls air-dry, because it will make your curls springier.
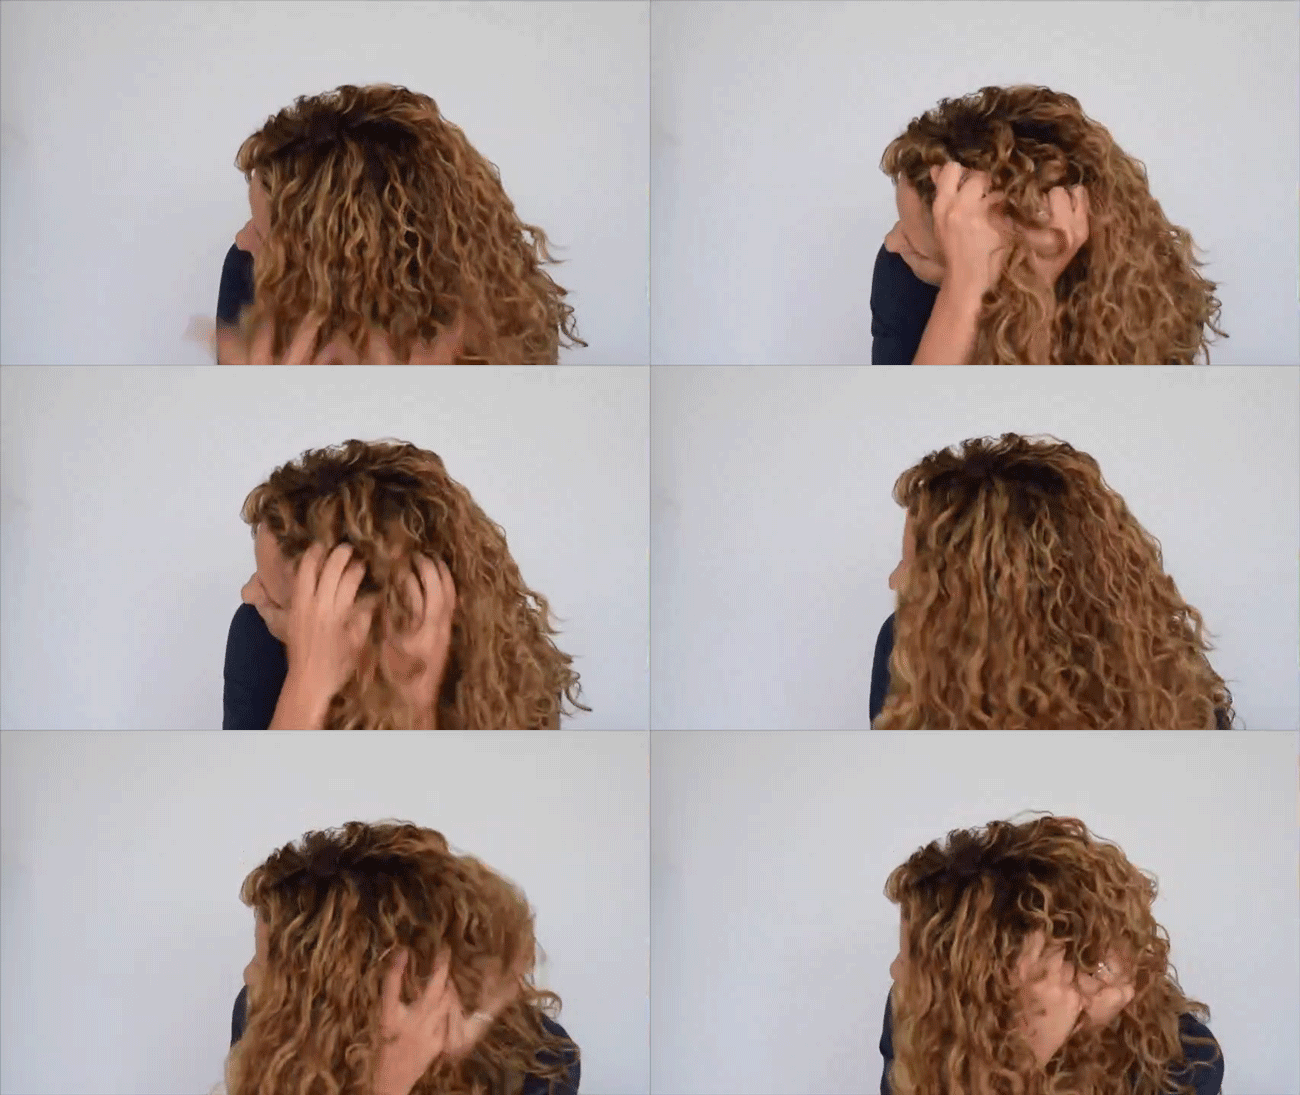
Start scrunching with your bare hands, but try not to touch your curls too much in order to keep them from getting frizzy. The easiest way to do this is by cupping about ¼ of your hair, bringing your curls close to your scalp and then squeezing your hands 5-6 times while staying at the same spot – like you were squeezing a lemon. Yes, literally! The more pressure you use when squeezing, the more moisture you’ll get out of your curls, leading to better clumping and less frizz. Repeat this for all of your curls.
After scrunching your curls with solely your hands, I recommend plopping for a few minutes to get rid of some additional moisture. If plopping isn’t for you, just skip it!
4. Keep on scrunching…
I usually plop for about 10 minutes and then scrunch again with the old t-shirt I’ve used for plopping. Again, squeeze with a lot of pressure to get rid of as much moisture as possible. I either stop scrunching when my t-shirt is totally wet (it already was a bit wet from plopping”> or when my curls don’t release any more moisture. This is exactly the condition you want them to be in before diffusing your curls – already as dry as possible!
5. Minimize frizz with the right blow-drying technique
If you choose to blow-dry your curls there’s one thing to bear in mind while diffusing: Don’t move your drier whenever it’s turned on. Always turn it off before you move to diffuse another section of your curls. This is the last step to get nice clumps, because turning off your diffuser to move it will prevent your curls from getting frizzy. You’re thinking this doesn’t have anything to do with clumping – you’re right it doesn’t directly, but it certainly has in indirect impact on your clumps: The less frizz you’ve got, the more hair strands stay within one clump thus getting your curls to form bigger clumps!
These already are my 5 steps to get curly hair to clump nicely. They won’t take up a lot of time, because they are only slight adaptations to your usual routine.
Did my tip for nice clumps work for you? I’d love to hear from you – please leave a comment!
If you’d like to learn more about my curly hair regimen, you can find my full routine here, and you can learn what happened when I tried the Curly Girl Method here.

First off, let me tell you I’m trying to wash my hair only about every 2-3 days. On non-washing days I love wearing my curls in any kind of (half”> updo.
Cleansing: To Poo or Not to Poo
When I was new to the Curly Girl method I though I needed to stop using any kind of shampoo and only co-wash my hair. Very soon I noticed my curls starting to hang down, losing their volume and looking kind of limp – a result of being over-conditioned. That’s when I decided I still needed a shampoo – the sulfate free Curl Junkie Gentle Cleansing Shampoo. It has ever since been my all-time favorite shampoo. I only use it on my hair close to the scalp and massage it in without bringing it to the ends as they usually lack more moisture than my roots.

My Favorite Moisturizers
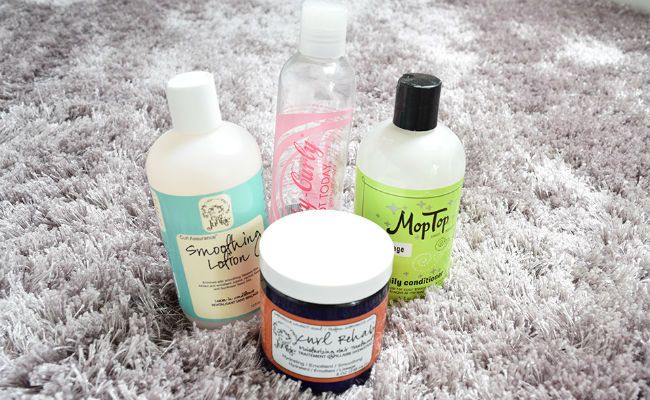
After rinsing out the shampoo I use different kinds of conditioners to spoil my hair with enough moisture. Whenever my hair feels dry (I notice it being dry when it has gotten frizzy after my last hair wash”> I use a richer conditioner like the Mop Top Daily Conditioner or the EDEN Bodyworks JojOba Monoi Deep Conditioner. I know you’re supposed to apply a deep conditioner for about 30 minutes, but as my hair usually isn’t lacking a lot of moisture I just leave it in my curls for about 5 minutes. The days on which my hair feels quite moisturized I’m only using the Curl Junkie Curl Assurance Smoothing Lotion and even wash it out. Yes – I rinse out the leave-in conditioner, because I really can’t deal with leaving in any conditioner causing my curls to stay wet super-long.
By raking in whichever conditioner I choose is the right one, I detangle my curls – starting at the ends moving up to the roots until I can’t feel any more knots. I try not to pull my curls too much, but separate the single hair strands involved in one knot with my fingers. This does take up some time, but it definitely helps prevent hair breakage. If my hair is tangled badly I use the Kinky Curly Knot Today to detangle it (the best product to detangle your curls gently!”>.
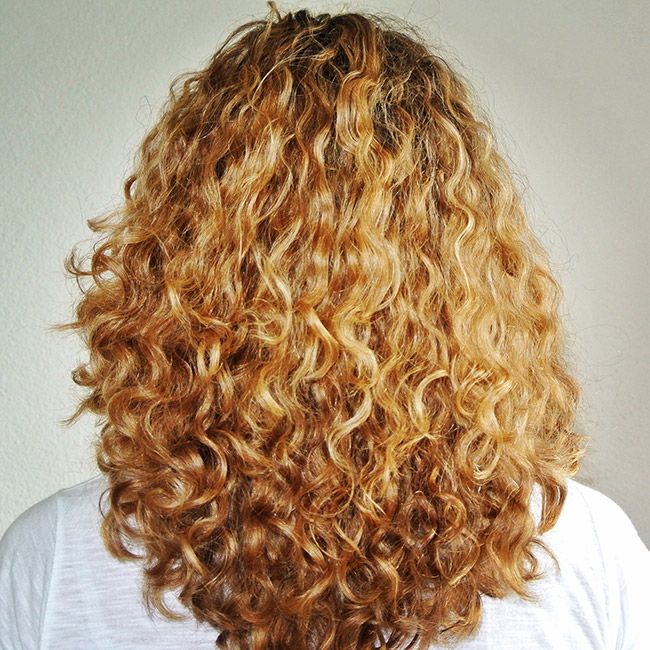
How I Get My Curls to “Clump”
As I have some troubles getting nice clumps I completely rinse out the applied conditioner and from then on I don’t ever rake through my curls anymore and I only touch them with my bare hands when I’m applying a product or when they’re completely dry. But getting them to be completely dry takes some more steps along the routine.
At the moment the Mop Top Anti-frizz Gel in medium hold is my favorite styler, because it doesn’t weigh my curls down and still gets them to build nice, non-frizzy clumps. As I need to be careful not to break up any clumps I apply the gel by gliding along the outside of my hair. To make sure all of my curls are covered with the styler I turn my head upside-down and add some more gel by scrunching it in. I try to scrunch only about 5 times as scrunching too often destroys all the hard work on achieving nice clumps – it breaks them up! The purpose of scrunching in the styler is not only to get all curls covered, but also to get excess water out of my curls making it easier to blow-dry them.
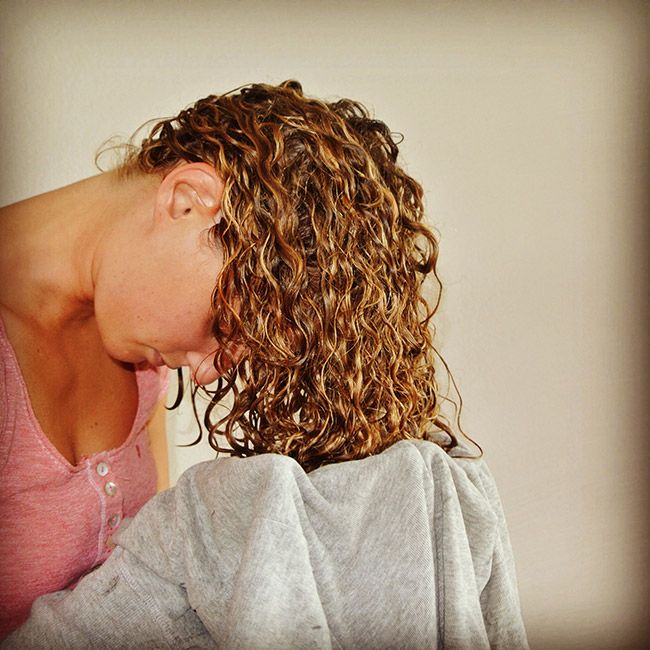
The Best Way to Dry
I’ve noticed that starting to blow-dry my curls when they’re still quite wet leads to more frizz as diffusing takes longer. Which is why my next step is also aimed at getting my curls drier before diffusing: I wrap an old t-shirt around my head (plopping”> and leave it this way for about 10 minutes. When I take the t-shirt off my head I still use it to scrunch my curls again (now with the t-shirt, not with my hands”> getting them even drier.
Then I finally start diffusing my curls upside-down until they’re about 80-90% dry. I prefer blow-drying my hair upright for the last 5 minutes as to see what my curls will look like when they’re dry. I always use medium heat and low air to blow-dry my curls with a diffusor to prevent them from getting frizzy.
Extra Volume
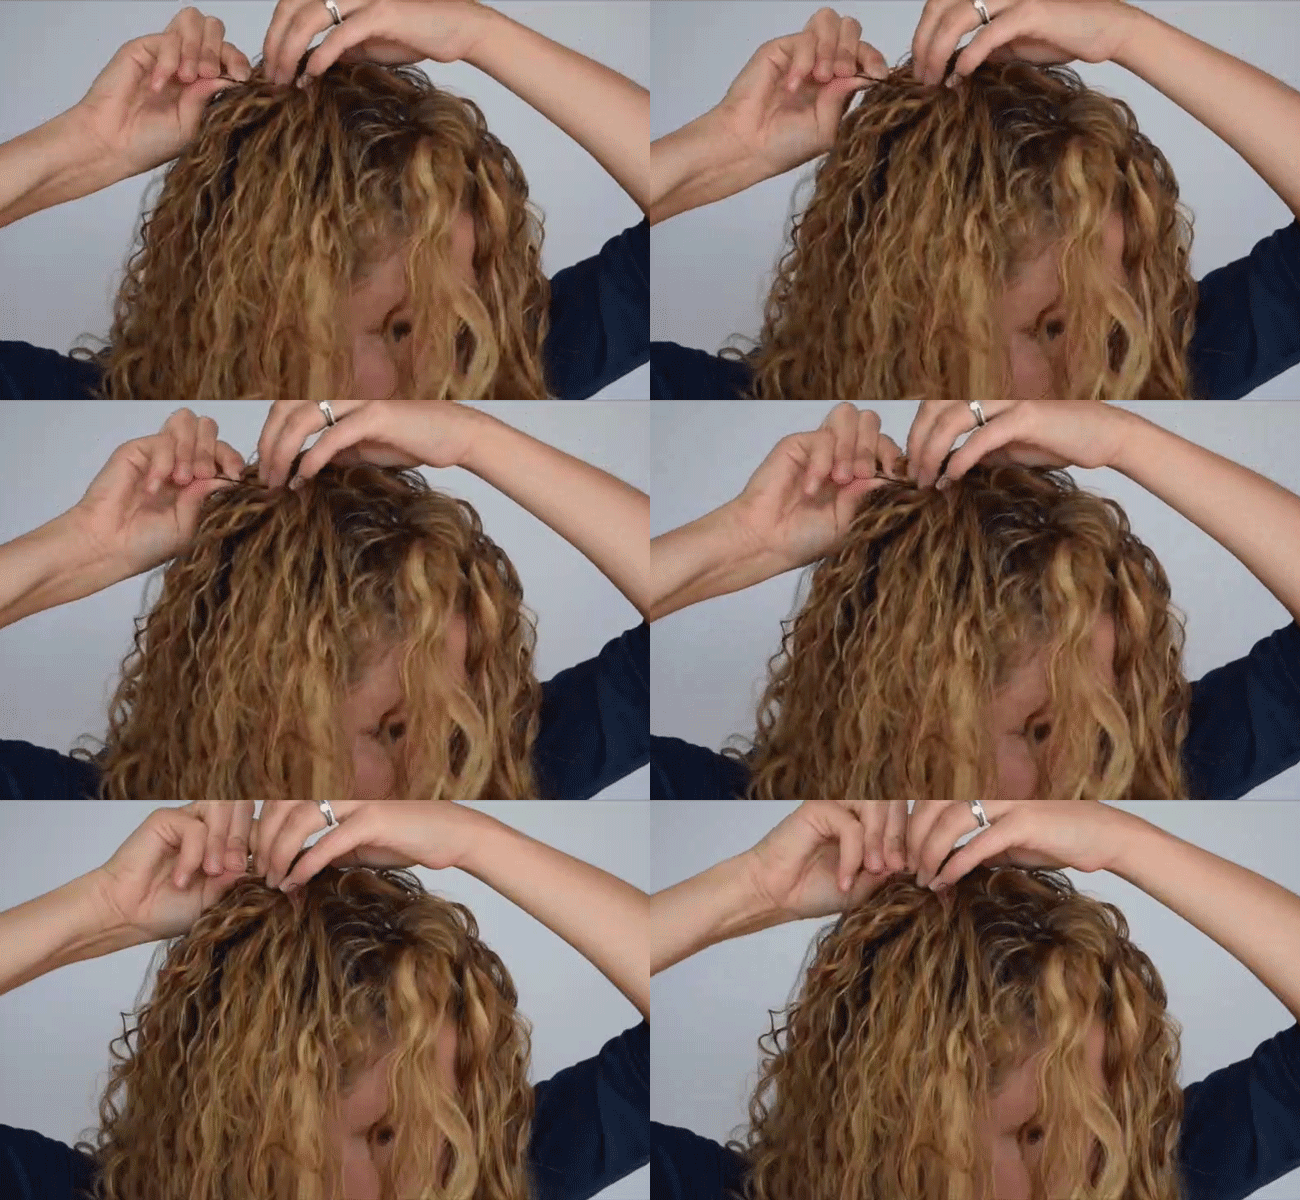
If I feel like I need to get more root volume I take about 4 normal bobby pins and put them in my hair right along the parting line. For every bobby pin I take some hair strands from each side of the parting line and put them into the bobby pin. I then wait for my hair to get totally dry, take out the bobby pins and scrunch out the crunch if I’ve used a styler leaving me with a gel cast. Finally I shake up my curls to get some more volume and that’s it.
Read next
5 Must-Know Steps for Making 3A Curls Clump
How to Sleep & Refresh 2nd Day Curly Hair
The Drying Technique That Gives My Curls More Volume
You can follow Sandra’s curly hair love story on her blog, JustCurly.
This article has been updated due to discontinued products.
Having curly hair is a gift. We do not always feel that way–just ask a curly on wash day–but no matter where you are on your own curly hair journey, try to view your curls as a gift and I am sure you won’t regret it.
Embracing my curls has helped me to be at ease with myself. However, I’ll admit that that took quite a while.
For the greater part of my life, I didn’t like my curls. I would have traded them for straight hair–and also less hair–without thinking about it twice. I did not know how to care for my curls, nor did I like their volume.
Growing up, I just wanted to be like everybody else.
Weren’t we all trying to fit in and at the age of 16? I just stayed away from anything that made me feel different, including my hair. I started straightening my curls and although the straightening process itself was quite annoying, I didn’t mind putting my curls through it. That is, until I noticed my hair looking straw-like and then I knew I had to change my way of thinking about my curly hair. Looking back now, I think it’s funny how I feared even that smallest drop of rain…
Actually learning how to wash and style my curls really changed the way I think about them. I realized that my curls are a part of me that I need to accept. I needed to like them. It took a long time to appreciate my curls–the process didn’t happen overnight. It only started once I found the right products and techniques that worked for them.
Having positive thoughts about my curls was a real game changer.
Instead of obsessing over a strand of hair that would not curl properly, I chose to see my curls as something that made me unique and different from everybody else. I like being called The Curly One–there aren’t that many curlies in Switzerland.
We tend to be too hard on ourselves. Think about it–you wouldn’t stare at another curlies’ hair in judgement, would you? You shouldn’t be doing that when it comes to your curls. Instead, stay positive!
What do you like about your curls?
What better question to ask than what you like about your curls? So, think of at least three things you love about your curls and share them in a comment below!
I’ll go first: I really like that my hair is voluminous, I like being referred to as the curly one in a group, and I love how hairstyles stay in place better with curly hair.
There are so many articles explaining how the Curly Girl Method works and why it’s the best way to take care of curly hair. I want this article to focus on something different: my curly hair journey and its struggles–which includes the CG method”>. Then, I want to show you why the CG Method turned out to be perfect for my curls.
I used to believe that I would never like my natural curls.
When I first began embracing my hair, I grew frustrated of them looking great on one day but then look like a huge mess on another day. I had no clue whatsoever as to how they managed to become beautiful one minute and frizzy the other. I felt like I could literally watch my curls turn frizzy.
This is how my curls looked on a bad day:
On a good day, however, they already were quite frizz-free:
So, to GC or not to CG?
After having spent a fortune on different products designed for curly hair, I was about to give up on embracing my curls when a friend told me excitedly about DevaCurl. I had figured that I could give my curls one last chance and ordered the entire product line.
At the same time, I started searching the internet for more information about DevaCurl and came across the term Curly Girl Method. When I first read about it, I couldn’t imagine that discontinuing products with silicones and sulfates in them could really change the appearance of curls that much. I started looking for other curlies who were open to sharing their experience with this regimen–this is also how I discovered NaturallyCurly. I read the threads of users and their pre-CG photos and I was truly impressed. Motivated by some serious curl envy, I started going the Curly Girl Method route in hopes of eliminating my own frizz problems.
After having used the new sulfate and silicone-free products, I was disappointed.
I thought that my curls would look awesome right away but they didn’t! Determined not to give up, and because the online forums said that it could take a few weeks until the results get better, I kept trying. Sure enough, I started noticing some changes after 2 to 3 weeks. My curls were less frizzy and also a bit curlier. Pleased with the small progress, I decided to keep on going and to really quit straightening my curls. In the end, it took my curls a few years to fully overcome the damages of the straightening. Now, my curls are no longer highly porous.
What is your experience with the Curly Girl Method?
Let us know, and follow my blog JustCurly.com.
Are you tired of always pulling back your curls into a ponytail or a bun? If so, it is time to add some French braids as your go-to hairstyle!
To create this hairstyle, you will need:
-
3 hair ties
-
1 hair donut
-
bobby pins
Directions
Start by separating your hair into three sections.
The left and right ones will become French braids; the middle section is created to cover up the middle parting line that would be created if you were to French braid all of your curls.
The left and right section can reach further back the closer they are to your neck, creating a V-shaped section in the center.
Tie together all of the curls from the center section– so they don’t unintentionally become part of the two French braids. It doesn’t need to look neat, you’ll redo this middle section later on.
Start braiding on one side by separating three small, equal sections right next to your parting line. Start braiding by crossing the lower section across the middle one and then crossing the upper section across the middle one (just like you would when you are normally braiding your hair”>.
Add some curls to the braid the next time you cross the lower section across the middle one. Do so until you have added all of the curls in this section to the braid, then finish braiding without adding any more hair to it.
Secure the braid with a small hair tie and repeat the same on the other side of your parting line. When both braids are complete, bring down the curls from the middle section.
Grab all of your curls (including the two braids”> and create a low ponytail. Then remove the hair ties from the braids that are now in the ponytail (so that the ponytail looks like a “normal” one”>.
Grab the donut and create a bun with it. If you’re struggling doing so, watch my YouTube video on creating the perfect bun:
Follow my blog, JustCurly for more type 3 curly tutorials and tips.
I like to create this 3rd day hairstyle whenever my curls are feeling a bit flat but aren’t too frizzy.
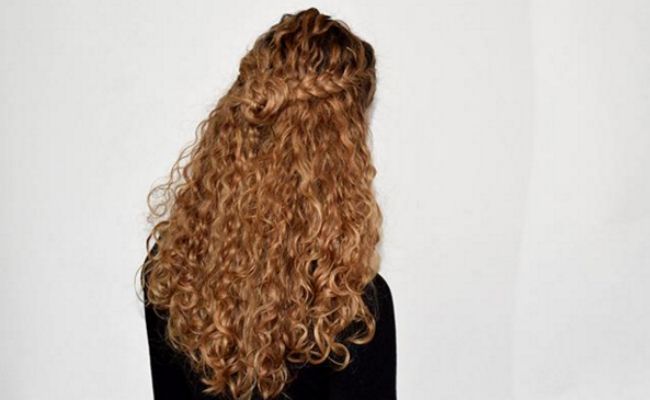
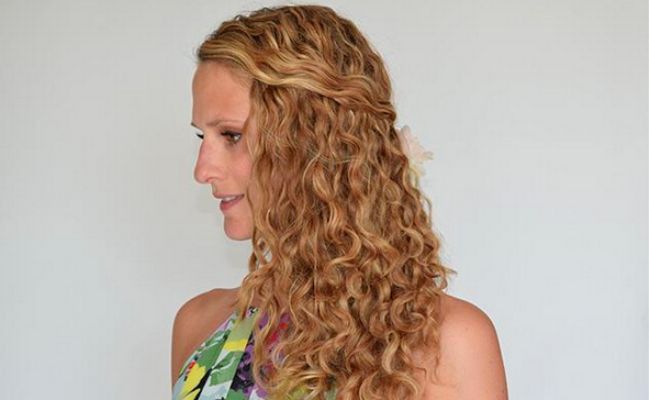
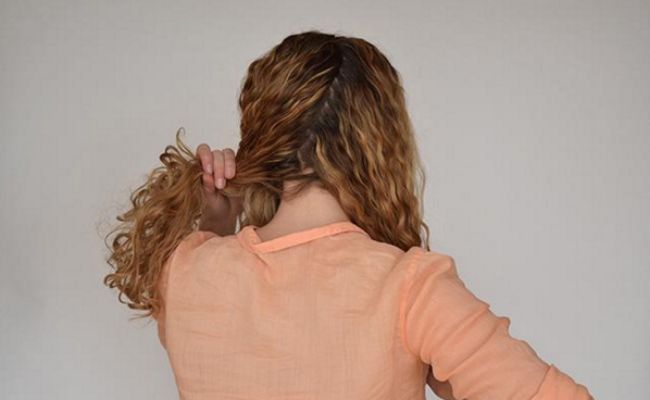
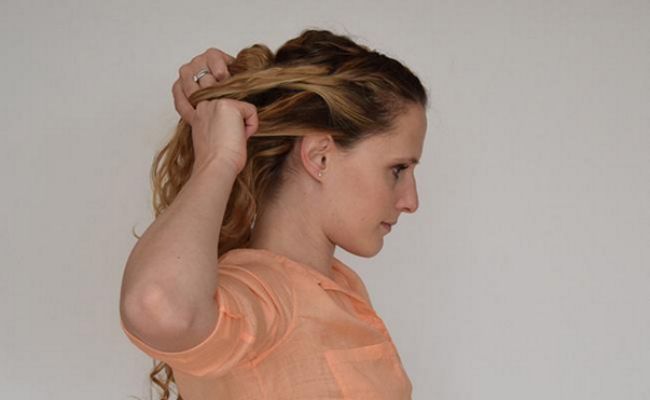
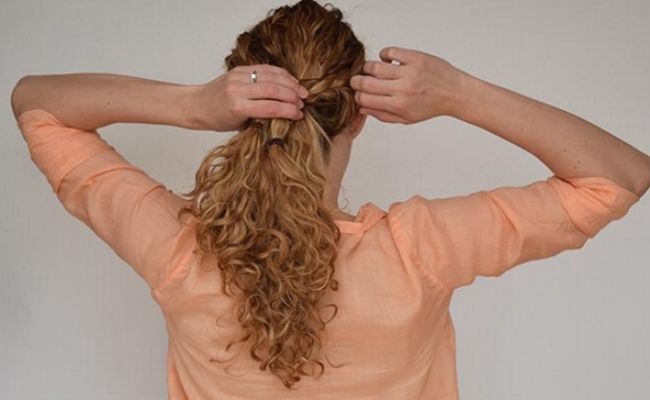
Pulling your curls back into a ponytail on second or third day curls might be the easiest (and most obvious”> choice of hairstyle. However, it certainly isn’t the only option–why not try a half updo? I’ll show you how (the pictures show my actual third day curls”>:
You will need
-
3 small hair ties
-
5-7 bobby pins
Take a section of the curls that frame your face until your reach your ear and separate it from the rest of your curls.
You will do this on both sides of your parting line. Start with either side. Choose a bigger section if you want to create bigger braids to have more curls in the updo.Start braiding by crossing the top section across the middle one without adding any additional curls to the braid.
Be sure to hold the braid back while braiding–this way, the braid will later on lay nicely on your curls.Continue by crossing the lower section across the middle one–again, without adding any curls to the braid.
Add a little bit or hair the next time you cross the top section across the middle one.
Do the same each time you cross the lower section across the middle one.Continue french braiding until all of the hair you have previously separated from the rest is within the braid.
When there are no more curls to add to the braid, finish without adding any additional curls to it. Always make sure to hold the braid into the direction it will later be in.
If you want your braid to look bigger, pull on it before securing with a small hair tie.
Be careful when pulling on it as not to cause too many short hair strands to stick out.
Fix it with a small hair tie.
Repeat steps 1 through 8 on the other side of the parting line.
Try to create two equally big braids. Then, tie them together at the back of your head with a small hair tie.Pick up both braids and start twisting them around until both braids are interlocked.
Then hide the ends–with the hair ties–underneath the rest of the braids.
Secure the braids with some bobby pins.
I used about 7 bobby pins to make sure they don’t fall out of my updo.You’re all done!
Visit my blog Just Curly for more curly hair tips and tutorials.
Take it from my experience:
Brushing your curls when they are dry will leave you with big, poofy, frizzy hair that most likely doesn’t look curl like it’s supposed to anymore. This is exactly what I have been doing for most of my life. Being the only curly in my family, I didn’t even know I had curly hair–I always figured I just had big waves. That is, until the day I found out that I am not supposed to brush my hair when it’s dry.
Like many curlies, I don’t have the best memories of people brushing my curls.
I remember all too well the countless times I desperately tried not to break out in tears while all kinds of hairdressers brushed my curls–I would have rather gone to the dentist than to the hairdresser!
Of course, we also need to comb our hair. However, most of us only do so when our curls are soaking wet and covered with conditioner. And even then, I recommend not using a brush. Let me explain why.
Your fingers are more precise
When you comb your curls using your bare fingers, they will be stopped by the knots in your curls. This way, you notice the knots being there and you will thus be able to more gently untie any knots (see how I do it in the video below”>.
A brush hurts more (and snags on knots”>
When you are using a comb, you will feel a pain caused by every single knot on your scalp. The comb pulls on your curls until the knot is resolved, with the pulling causing your scalp to hurt. Every time your scalp hurts during brushing/combing you have pulled on your hair too much. Pulling on your curls can cause quite some damage.
Wondering why you have so many short hair strands?
This could not only be caused by an imbalance in moisture and protein, but it might also be an effect of pulling on your curls too much. So if you are prone to breakage, try to always comb your curls as gently as possible by only using your bare fingers.
Don’t buy into the industry claims
Of course, the beauty industry does not usually agree with me on this. It will instead tell you to buy that brush “specifically designed for curly hair”. However, in my opinion you definitely don’t have to buy an overpriced brush. Save your money and use your fingers instead.
All the above described reasons are logical, but let me finish this article with an emotional reason as to why you should ditch your brush: Back in the days when I was still brushing my hair on a daily basis, I managed to break at least 5 brushes; I’m guessing that could be a sign that curlies are not supposed to use brushes.I’m interested in hearing your own experiences!
What memories do you have of people brushing your curls? Or maybe you have also managed to break a brush before? Please leave a comment below!
Plopping my curls is a step of my routine that I wouldn’t want to miss, as it really helps me to achieve nicely curled and frizz-free hair. Recently, I have discovered that plopping my curls with the right kind of towel leaves me with even better results than when I used my old t-shirt to plop.
Rather than wrapping the towel around your hair like a turban, I recommend plopping your curls instead. This will enhance your definition, as opposed to the turban-technique, which elongates your curls.
Remember: Absolutely keep your curls away from terry cloth towels!
Terry cloth leaves you with frizzy, undefined curls. You can either use a microfiber towel or a cotton one. My favorite towel right now is the cotton Frizz Eliminating Towel by Hair Remedie. Not only is it big enough to completely wrap around all of my curls, but it absorbs moisture quickly.
Basically, it can be used just like you would use any other towel to plop your curls. The tricky part is to make sure the towel stays in place during the whole time of plopping. I use a big hair tie to fix it in the back of my head.
Watch the video to see how I plopped my curls with the Hair Remedie Frizz Eliminating Towel:
I would love to hear from you! Do you have any questions on plopping curly hair? Have you figured out an easier way to get rid of excess moisture before drying your curls?
I have been struggling with clipping my roots for several years. I have bought different clips that were specifically designed for clipping, but they still did not increase my root volume–most of then just lay flat. But I finally found a trick that worked for me! I am going to show you my simple step-by-step routine that is quick, easy, and will help you increase your curly hair’s volume from the roots out.
- What I use: bobby pins
Style Prep
Before you start clipping your roots, blow dry your curls until they are about 80-90% dry. If you prefer to air dry, clip your roots while your curls are still wet and leave them in during your entire drying time.
To clip your roots, you need about 5 normal bobby pins: Start putting one of them in your curls at the front of your parting line: make sure you take hair from both sides of the parting line and then add the first bobby pin.
Repeat with one more bobby pin further back your parting line (grab hair from both sides of your parting line”>.
Continue adding more bobby pins to each side of your parting line to increase the volume right around your face. Don’t worry about it looking too voluminous at this point, as the top will flatten down after you take them out.
Finish clipping by adding one last bobby pin right where your parting line ends.
I like to add this last bobby pin to my curls the other way round, with the opening to the front.
To achieve your best possible result, leave the bobby pins in for about 5 to 10 minutes.
I use this waiting time to finish blow-drying my curls, as I like to blow-dry them until they are 100% dry to support my curls’ overall volume.Finish clipping by carefully removing the bobby pins from your curls.
This is crucial to protect your curls from turning too frizzy. I usually do this by pulling the bobby pins out between two fingers that are holding back my curls.
Scrunch a bit for even definition. Shake your curls and go!
Watch the video
Taking care of your curls and following the Curly Girl Method at the same time isn’t as hard as it might seem at first. There is a variety of great products on the market available to follow the CG Method without breaking the budget or going out of your way to find them. You can train your hair by gradually switching to the Curly Girl Method. Is your routine still missing a silicone and sulfate-free product? These are my current Holy Grails:
” src=”https://diana-cdn.naturallycurly.com/Articles/Ml_darshana-1.jpg”>
Pre-poo: Darshana Natural Hair Oil
Add a little bit of the Darshana Natural Hair Oil to your curls at least 30 minutes before you wash your curls. I love the additional shine this great GC-friendly hair oil gives me!
Shampoo: Curl Junkie Curl Assurance Gentle Cleansing Shampoo
When following the CG-method you have to use a non-lathering shampoo, like the Curl Junkie Curl Assurance Gentle Cleansing Shampoo. This shampoo will get rid of any residue I might still have in my curls without damaging it, so there is no need to use any silicones afterwards.
Conditioner: Mop Top Daily Conditioner
I love how the Mop Top conditioner gives my curls just the right amount of moisture without over-conditioning them. Like the name says, I use it daily–or at least every time I wash my curls.
Detangler: Kinky Curly Knot Today
Are you struggling with detangling your curls? If so, you definitely have to give the Kinky Curly Knot Today a chance. Not only does it reduce my detangling time, but it also makes it less painful and much easier to get knots out.
Leave-in: Curl Junkie Curl Assurance Smoothing Lotion
If you are looking for a great conditioner to revive your second day curls, this is it. I usually mix my Smoothing Lotion with some water and scrunch a bit into my hair before heading out. This works great on on second (or sometimes even third”> days. It is also a great refresher, as it does not weigh my curls down.
Styler: Kinky Curly Curling Custard
Although this styling custard can be somewhat difficult to apply, because if you are using too much of it, your curls will take forever to dry (seriously!”>. However, it is one of my favorite CG-friendly styling products as it clumps my curls while reducing frizz at the same time. Give this product a try, once you have figured out the right amount for your hair, it’s a real lifesaver.
Gel: Mop Top Anti-Frizz Gel (medium hold”>
If you are looking for an easier GC-friendly styling product, I can strongly recommend you the Mop Top anti-frizz gel, which is super easy to apply. Just make sure to scrunch out the crunch as soon as your curls are completely dry.
Did I miss any of your favorite CG-friendly products?
If so, leave a comment, I am always looking for great new products to try. Follow me online @JustCurlies and visit my blog, Just Curly.
[prodmod]
Being asked to participate in your friend’s wedding as a bridesmaid is a wonderful honor. But oftentimes, this also means wearing the same dress and a similar hairstyle to the other bridesmaids. While it is fun playing dress up for your friend’s big day, this may also get to be challenging if you find yourself to be the only curly haired bridesmaid and you have a dress code to still adhere to.
To help answer this question, I put together three different hairstyles (each comes with a tutorial”> that allow you to wear your hair in its natural state while looking elegant at the same time. Each of those three hairstyles is quite simple and you’ll be able to style your curls this way yourself – there’s no need to see a hairstylist and spending money on getting an appropriate bridesmaid hairstyle!
1. The elegant half-updo
Wearing your curls in a half-updo is the simplest form of a hairstyle. If you’re going for a half-updo, I recommend using a crystal hair clip to make this hairstyle look even more elegant.
You’ll need:
- 1 crystal hair clip
1. Twist a little section of curls from the front, right next to your parting line. To prevent frizz, only grab whole clumps of curls. Repeat this on the other side of your parting line.
2. Bring both twisted sections to your back.
3. Finally, secure them with your crystal hair clip.
2. The one-sided floral hairstyle
Doing a half-updo on a hot summer day might not be a very appealing idea. To still be able to wear most of your curls down, I suggest you to do a one-sided hairstyle (this way you won’t have any curls lying on your neck causing you additional heat”>.
You’ll need:
-
5-6 bobby pins
- 1 floral or crystal hair clip
Again, depending on the wedding style, wear a crystal hair clip to make it look more appropriate for the occasion.
1. Bring all of your curls to one side.
2. To make sure your curls stay to one side, twist your curls like shown in the above picture and fix it with some bobby pins.
3. To fix your curls to one side, I recommend using several bobby pins. Put them in from the top to the bottom, this way they will best stay in your hairstyle.
4. Once you’ve fixed your curls to one side, grab a small section from right next to your parting line. To prevent frizz, make sure you only take whole clumps of curls.
5. Bring this section back to where you’ve fixed the twisted section and also secure it with some bobby pins.
6. Add a floral or a crystal clip to turn it into a perfect bridesmaid hairstyle!
3. The styled-up ponytail
Do you love wearing your curls in a ponytail? If so, this hairstyle is an easy way to style up your usual ponytail and make it wedding-ready by adding a cute head band and by covering your hair tie.
You’ll need:
-
1 head band
-
1 hair tie
- 1 bobby pin
1. Take an elegant headband and place it in your curls like an Alice band with your parting line still being visible.
2. To hide the sides of the head band, take out some curls from both sides of your parting line, but be careful not to pull out too many curls as this could cause your headband to move backwards.
3. Pull your curls back and put them into a ponytail.
4. To hide the hair tie, use a small hair tie for the ponytail. Then take a small section of curls from the lower part of your ponytail.
5. Twist it around your hair tie and then fix the end with a bobby pin. If you’re having troubles fixing it, read this great tutorial on it.
How did you wear your curly hair to your friend’s wedding?
Regular deep conditioning is a crucial part of having healthy, frizz-free, shiny curls.
How often you should deep condition your own hair greatly depends on your curls’ texture and porosity. I have found that my naturally curly hair needs more deep conditioning. Here are my tips on deep conditioning 3a curls with medium porosity. I deep condition my curls about every other week, especially during the warmer summer months, as I want to be careful not to over-condition them.
I deep condition my curls about every other weekIf your curls already are pretty healthy (e.g. usually well-moisturized with only a little frizz”>, be careful not to over-condition your curls, either. You will notice your curls being super-soft but just hanging down with no elasticity. If you notice this, get your protein and moisture balance right with a treatment.
While I don’t mark the day down on a calendar that I have deep conditioned on, I can feel when my curls need some extra moisture. Especially if you notice your curls feeling drier than usual, it’s time to deep condition.
Signs it’s time to deep condition
-
My curls are less shiny than they usually are.
-
The ends of my hair do not properly clump and even look a little frizzy.
-
My curls are more tangled than usual and I cannot explain why. Not just because I have not washed them for several days, or even because I was at the beach.
This is what my curls look like after adding a good deep conditioning treatment:
My deep conditioning routine
My deep conditioning routine starts the same as my regular conditioning: I wash my hair with shampoo and then detangle my curls with Kinky Curly Knot Today. As soon as I have combed through my curls and washed out my detangler, I apply a generous amount of deep conditioner. When I deep condition, I just replace my usual conditioner.
I apply the deep conditioner to my fine curls by combing it in. I use quite a lot (see the photo below”> to make sure all of my curls are fully saturated from root to tip. Then, I leave the product in my curls for about 10 to 15 minutes before I thoroughly rinse it out.
I make sure I rinse all of the deep conditioner thoroughly so my curls are not limp and weighed down, then I style my curls as usual.
If regular deep conditioning does nothing for your 3a curls, should consider adding some heat and also adding some oil to seal in the moisture. This is especially important if your waves or curls are highly porous.
[prodmod]
My favorite deep conditioners
I have tried a few different deep conditioners, but the following four seem to work best for my curls.
Which deep conditioner do you like most? Follow me on my blog JustCurly.com for more curly tips, hairstyle tutorials and product reviews.
I’ve been wanting to try incorporating a hair oil into my regimen for a long time.
A few years ago, Moroccanoil was very popular where I live in Switzerland, but when I checked the ingredients list I noticed there were silicones in it. I follow the Curly Girl method in my hair routine so this ruled out Moroccanoil for me, and at that point I mistakenly assumed that all oils contained silicones and I ruled out all hair oils from my product search. Obviously I was wrong about hair oils and silicones – the two do not always go hand in hand.
When I heard about a new natural hair oil called Darshana Natural Indian Hair Oil — a hair oil that does not contain any silicones or sulfates — I was excited to try it. I still can’t believe how much shinier my curls were after only using a few drops of it. Oils are more expensive than other hair products, but in my opinion this is absolutely worth the initial investment. See for yourselves, try it and let me know what you think.
When trying a new product, I always worry about frizz.
I worry about the product creating more frizz, or whether it will break up my clumps and leave my curls hanging down with no volume. As it turned out, this oil had no negative impact on my curls whatsoever. I think it is important to address the cost of this product, at $18 for two ounces the price is considerably higher than what you spend on other hair products. However, do keep in mind that you really only need a small amount of it, just a few drops every time you wash your curls. Unlike conditioner, this oil will last for a very long time! If the price tag scares you, I am giving away 4 bottles on my blog. So you have a chance of winning one and trying before you buy!
How I used it
I used the oil at least 30 minutes before washing my hair by applying it on my dry curls as a pre-poo. To get even better results, I recommend leaving it in overnight.
1. I took a small amount of the oil and used my fingers to massage it onto my scalp.
2. I also applied it to my curls from the roots all the way to the ends. A little goes a long way, so I only lightly coated my hair with it.
3. I pulled back my curls for the time being. If you’re planning on leaving the oil in overnight, you can also do a pineapple and cover your pillow with a satin pillowcase.
To see how this product worked for other curlies with different curl patterns, you can read more reviews of Darshana Hair Oil in NaturallyCurly’s product review section. Have fun trying it and let me know what you think about it by commenting below. I am looking forward to hearing from you all!
[prodmod]
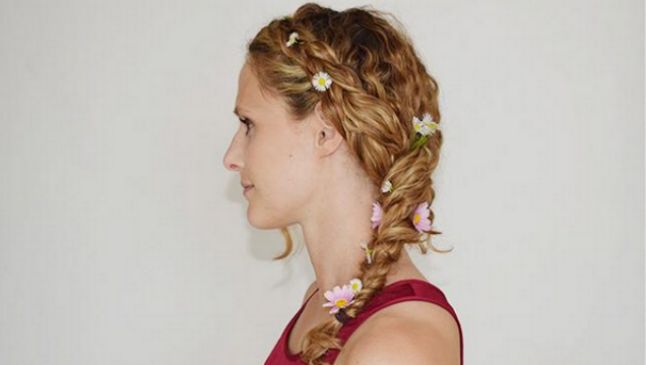
This year’s festival season has already started. Are you still looking for a cute festival hairstyle that works with your curls? In this article I will show you a hairstyle that not only looks good but also is perfect for withstanding warm weather and a lot of dancing. Side note: I promise, this hairstyle looks harder than it actually is! If you can’t Dutch braid that’s not at all a problem, you can also go for a French braid, which will create a similar look.
To make braiding easier, I strongly recommend that you first wash your curls, but not add any styling products to it. This way your curls are going to stay in the braids a lot better thus enabling this hairstyle to last longer! I’ve never thought it really made a difference until I tried it and I noticed a huge improvement in the way my curls behaved.
You will need
-
2 small hair ties
-
some bobby pins
-
(real”> flowers
Step-by-step tutorial
1. Take a small section of curls from the side of your parting line with more hair leaving out a small section at the front.
2. Split the chosen section into three smaller sections.
3. Start Dutch braiding by crossing the front section underneath the middle one.
4. Continue braiding by crossing the back section underneath the middle one.
5. Now, start adding more curls to your braid by first adding the section you’ve left out in Step 1 (the one right at the front”> to the front section. Then cross the front section (now including the previously left out one”> underneath the middle section.
6. Continue to always add a little bit of hair when crossing a section underneath until your braid reaches your ear.
7. Then fix your Dutch braid with a small hair tie (I used a rubber one, which I later cut apart”>.
8. Now, part all of your curls into three section: To better know where each section ends, I like to put one to the right side of my face, the other one to the left side, and the third section consists of all the curls in the back.
9. Now start braiding the three sections by crossing the section opposite your Dutch braid underneath the middle section.
10. Then, cross the section with your Dutch braid in it underneath the middle one. Make sure your braid is quite tight (especially if you would like to add some flowers to the braid later on”>.
11. Continue braiding this way. As soon as you feel like it’s easier to braid with the braid in front, move it to the front and finish braiding it. Be careful: if you bring it to your front you’ll need to cross the sections across each other!
12. Secure the end of your braid with a hair tie.
13. Cut the hair tie you tied the Dutch braid with. Make sure all of your curls are secure in either one of the braids. If you feel like some of them are a bit loose, secure them with bobby pins to make sure your hairstyle holds up.
14. You could stop here, but since it’s a hairstyle for a festival, I suggest you add some flowers to it. Just cut a few nice flowers from your garden or a park, wildflowers work perfectly for this. Cut their stems short (about 1 inch”> and stick them into your braid. It’s easiest to place them in the braid where you crossed two sections.
Follow me on blog JustCurly.com for more curly hair tutorials.
You’d like your curls to be more voluminous? Slightly adapting your drying routine might do the trick! Since I absolutely love voluminous curls, many steps of my usual washing routine aim at getting well defined but still voluminous curls. This is why I do all the following: getting them cut in lots of layers, plopping, getting rid of excess moisture or clipping my roots. If you think achieving voluminous frizz-free curls is impossible I’ve got good news heading your way: it is possible! This is how I get my curls to be this voluminous but still frizz-free:
Blow-dry your curls!
In order to get more voluminous curls I recommend you to blow-dry your curls instead of letting them air dry. Changing your drying routine from air- to blow-drying can already get you a lot more volume! The following two pictures show the difference in volume when my curls still were a bit longer.
My curls after blow-drying them:
My curls after letting them air-dry:
I was quite surprised to see how big of a difference it is as I usually never let my curls air-dry (read the whole article I did on this on my blog“>.
Blow-dry your curls until they’re 100% dry:
Many curlies will never ever blow-dry their curls until they’re 100% dry, because we’re afraid of them getting dried out and thus frizzy. I didn’t dare to do this until very recently and I’m so happy I’ve tried it! This way I get my curls to be even more voluminous than when I just blow-dried them until they were 80-90% dry. I am well aware that some of you might completely disagree with me on that, but my experience has taught me it’s actually a good thing to completely blow-dry my curls, but see for yourselves–can you guess which picture I took after blow-drying my curls until they were 100% dry?
Did you see the difference? I took the first picture after only blow-drying until 80-90% dry and the second picture was taken another time after blow-drying my curls until 100% dry. I took both pictures within the same week, but it’s funny how my curls look shorter in the second picture… They’re not at all frizzier than when I blow-dried them until they were only about 80-90% dry. After completely blow-drying them they are not only curlier, but also more voluminous.
Keep your curls moisturized
If you’re now thinking about trying to blow-dry your curls until they’re 100% dry, please keep in mind to make sure your curls are well moisturized. This way they’ll stay well defined and frizz-free. I suggest you to use a slightly heavier conditioner than usual. In case this weights your curls down too much, try to just leave in a bit more than usual (especially the ends’ need enough moisture”>.
If using more conditioner isn’t working for you or if your curls are still being too frizzy after blow-drying, I recommend you to use a gel leaving you with a gel cast. The gel cast helps preserving your clumps and prevents your curls from getting too frizzy. But don’t forget to scrunch out the crunch after blow-drying.
You can still clip your roots
Clipping your roots while your curls are still at least a bit damp has the best effect on your root volume. So when you are blow-drying your curls until they’re 100% dry it’s best to take a short break from blow-drying to clip your roots when you curls are about 80-90% dry. Continue blow-drying right after you’ve put the clips into your curls and then finish blow-drying your curls with the clips in them. Don’t use any metal clips if you’re leaving them in while blow-drying as they might burn your scalp when heating up. That’s why I always use normal bobby pins to clip my roots!
So why not blow-dry your curls a little longer the next time? I would love to hear if blow-drying your curls until they are completely dry worked for you– please leave a comment! To read more of my curly hair journey, visit my blog or follow me on Instagram.
Waterfall braids can be seen everywhere and seem to be a big trend lately, but unfortunately most of the examples on Pinterest and YouTube appear to be completed on straight or wavy hair. Which is too bad, because for me braids and curls are a perfect match. Moreover, braiding curly hair is a lot easier than braiding straight hair because it tends to hold a braid more easily. The only thing you need to pay attention to is not to pull on your curls too much while braiding.
Keep in mind that braids in naturally curly hair don’t need to be perfectly neat and can be a bit messy. It’s more important to try not to separate your clumps as separating them will cause some frizz. So when you’re adding more curls to your braid, add whole clumps whenever possible.
What you’ll need:
-
2 bobby pins
That’s it! Have you ever seen a tutorial with so few supplies?
How to waterfall braid:
1. Take a small section from your preferred side of the part line (most people with a side-part like to take the section from the side with more hair”>. Neither your part line, nor the section you take need to be in a perfectly straight line (a privilege of having curly hair!”>.
2. Split the section into three equally smaller sections.
3. The beginning of a waterfall braid is just like the one of a normal braid: start braiding by crossing the back section across the middle one.
4. Continue by crossing the front section across the middle one.
5. Add a little bit of hair to the back section before you put it across the middle section. Grab the additional hair from right next to your part line.
6. Instead of crossing the front section across the middle one, let go of the front section. This is how the “waterfall-effect” is created.
7. As you still need three strands to braid, grab new hair from right below the front section you’ve just let go of. Make sure to take about the same amount of hair that was previously in the front section and then cross the new front section across the middle one.
8. Repeat steps 5. -7. as often as you like to. I usually stop when the braid reaches the back of my head (at this point it’s also getting difficult to braid, because you have to rearrange your hands while braiding”>. My last step before finishing the braid is step 7.: letting go of the front braid.
9. Hold on to the other two sections and fix them with two bobby pins. Depending on how thick your waterfall braid is, you might need more bobby pins. To later hide the bobby pins in your curls, pull all of your curls apart right where you need to fix the braid’s end.
10. To hide the bobby pins, put your curls back to where they naturally fall and you are done!
I usually braid only one side, but of course you can also do a second waterfall braid on the other side of your part line, which is what I did in my YouTube video.
Watch the video
To read more of my curly hair journey, visit my blog or follow me on Instagram.


