Search Results: Sabrina Perkins

These clays are born of the earth, and as we love using what the earth has to offer, clays never disappoint. In recent years they are becoming popular but many cultures throughout our history have been using clays to heal and rid their bodies of toxins. According to Wellness Mama, there are animals that will even eat dirt and clay to remove poisons from their systems during illness and distress. They are natural, potent, and mineral-rich to clean, detoxify, and condition our hair and skin. If you are new to them do not worry, as I am about to share some of the plentiful benefits for your hair, body, and even wallet!
[prodmod]Affordable
Most clays are inexpensive and the pricey clays tend to be harder to access. Once such clay would be the Dead Sea clay aka black mud. Harvested from the banks of the Dead Sea, it is hard to find any that is 100% Dead Sea mud so you pay more in comparison to other clays. Clays like rhassoul and bentonite can run you around $6 to $15 for a 1lb jar. A little goes a long way, as it has great shelf life and is usually mixed with water and aloe vera juice for application.
Availability
Now, nearly all products are accessible because of the internet! You can find just about anything anywhere with a Google search. Amazon.com, Etsy, and sites are making even the most remote product available to every consumer, but if online shopping is not your preference, then just going to your local Whole Foods or Sprouts will garner a wealth of products formulated with clays.
Detoxifying
Clays rid the body of toxins. Bentonite clay has the ability to produce an electric charge when hydrated and that charge gives it the ability to absorb toxins, heavy metals, impurities, and even chemicals. Bentonite clay is amazing at pulling heavy metals and toxins from the body with the montmorillonite that come in two forms: sodium and calcium. Both use the negative charge in attract and attach to the toxins and heavy metals. This clay is almost like a magnet to toxins.
Natural
If you oppose to using non-natural cleaning methods, then clay or mud are an excellent way to steer clear of them. Wikipedia says that clays have been used for thousands of years and the first recorded use of a medicinal clay was in 200 B. C in Mesopotamia. They are from this earth, natural, potent, mineral-rich and made with ingredients most can pronounce.
Prevent hair loss
Dead Sea clay, among others can be extremely beneficial for preventing hair loss. Heredity, stress, and even scalp conditions can be attributed to hair loss by the blood vessels in the hair follicles that shrink and cut off food and oxygen. According to Livestrong, Dead Sea mud contains manganese, which is a mineral that increases blood flow, so merely massaging Dead Sea clay or mud into your scalp and let sit for ten minutes will improve the health of your scalp.
Most healing clays and mud have amazing benefits for your skin and hair. Clay washing is affordable, natural, and easily accessible. Whether you DIY or buy pre-made bars with clay in them you will walk away feeling like you stumbled across something great.
How do you incorporate clays in your hair care regimen?
“Rinse-Only” hair washing
One unorthodox method of hair care that is growing in popularity is the water-only hair washing. It is also called rinse-only, as you wash solely with water. Despite the simplicity of the act there are some slight variations. Some simply use the water and their fingertips while others add a boar brush, but the premise is the same with cleansing with water and working with your sebum instead of working against it.
Why just water?
Many shampoos strip the very essence of our hair’s natural oils and our scalp tries to correct this by overproducing sebum. According to the Science of Acne, sebum is a naturally occurring substance produced by the sebaceous glands, which moisturize, lubricate, and protect our skin and hair. The method of water only washing is eliminating cleansers so that your hair will stop overproducing sebum and your scalp’s natural pH will rebalance.
For centuries, women in China, Japan, and Southeast Asia have used rice water to wash and rinse their hair.
Despite the recent surge in attention from naturals, curlies, coilies, and minimalists, this form of washing dates back hundreds of years. Dr. Margaret Trey says that “For centuries, women in China, Japan, and Southeast Asia have used rice water to wash and rinse their hair.” Rice water has amazing benefits for hair like decreasing friction and improving hair’s elasticity. It can also protect against and repair hair damage. Hair Buddha says, “Our ancestors used brushes and hot water to cleanse their bodies and hair, as they did not have all the advanced products we now use and take for granted.”
True water only washing means no use of any product. The hair is washed with fingertips vigorously under warm or lukewarm water to break up and remove all the dirt from your hair and scalp. The boar bristle brush is used to spread the sebum from the roots to the ends to help facilitate moisturizing, protect the hair, and remove dust and dirt from the scalp and hair.
What about grease?
There is a greasy period where the scalp is learning to produce less sebum and your hair may not look the best but if you are co-washing regularly, then you know there was a period of getting used to that as well. Many women cover their head with scarves, bandanas, hats, or keep hair braided while weaning their hair off shampoo. This period can last anywhere from two to six weeks before the scalp balances itself out.
American Board Certified Hair Colorist and licensed cosmetologist Monae Everett has a different view of water washing. First off, she calls it water rinsing and not washing, as the technique breaks up the dirt and oil but does not actually remove it. As a professional in the field of hair care and beauty, Ms. Everett believes in more traditional methods on cleansing with the use of shampoos but can understand not everyone may subscribe to that means.
Ms. Everett does see how this technique can be attractive to some and even beneficial when trying to discover your natural curl pattern. Oftentimes products we use can mask our true pattern, but rinsing with only water can give a clearer reading on your own hair. Water rinsing allows an individual to find out your personal hair needs like how your hair responds to external elements and pollutants and how often to cleanse and condition. If you try this method for a few weeks to better understand your hair’s needs, then this may be beneficial in the long run for learning what your hair needs to retain moisture and combat breakage.
The perfect cleansing routine for you
Ms. Everett discusses a way someone may try this method on a trial basis:
A smart way to incorporate this in your cleansing routine would be to water rinse (wash”> for a few weeks. This is the time for you to see your natural curl pattern and discover what your tresses feel and look like. Then, go onto trying an apple cider vinegar rinse to remove any excessive buildup and balance the pH of your hair. They could also instead try shampooing once a month and slowly increase to find the perfect cleansing routine that gives you healthy, moisturized hair.
Is water washing something you may want to try? Are you already addicted?
For most of human history, men have had beards since forever. As tools were refined, the development of the razor came into existence and birthed shaving. Fast forward to today and men shave for various reasons: fashion, cleanliness, religion, employer or career demands, or to attract a mate. The rudimentary razor has given way to many brands, styles, techniques, and purposes but for some men choosing which would better suit them is a limited affair.
Men with curly hair are usually subject to basic shaving utensils, as most are engineered for the straight-haired man. If you think that is not an issue, then you would be sadly surprised. Curly or coily-haired men find shaving to be a battle and chore, because shaved hair follicles tend to curve back, re-enter the skin, and cause irritation and razor bumps when you are not using the right products or technique.
My Brotha says that 50 to 80% of black men live with the problem of ingrown hair, whiteheads, and razor bumps daily. This is more than an inconvenience because razor bumps can itch, burn, create scarring, and make the entire experience dreadful. This has caused some men to tweeze their ingrown hairs (which can be painful”> or rely on depilatory creams, which tend to work better than razors but if used incorrectly they can irritate the skin and become absorbed into the blood stream.
I was shocked when I found this information, but when I began to reflect on my father’s and husband’s shaving problems, it dawned on me that these problems needed a solution. Many men suffer in silence but there is no need to any longer. We have the top three shaving kits that cater to men with coarse, curly and coily hair. This is the perfect time, as the holidays are upon us and any one of these would be the perfect gift under the tree!
Bevel Shaving System
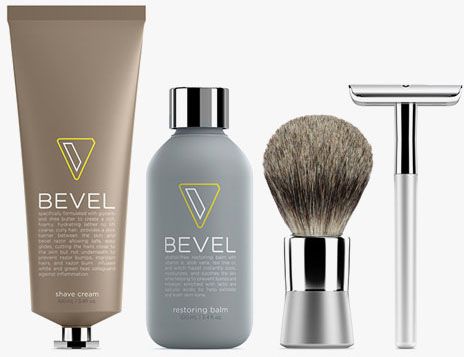
The Bevel shaving system is a 5-part system to reduce razor bumps and give a less painful shave. The Bevel razor is unique, as it was engineered for coarse and curly hair and made with safety razors that cut only at the hairs’ level for a more comfortable and closer shave without the tugging, pulling, or irritation. This razor will not clog, and will put an end to discoloration and scarring that so many men have become accustomed to. It comes with a priming oil to protect, a badger brush to lift the hairs, specifically formulated shave cream, double-edge safety razor, and a restoring balm.
SheaMoisture African Black Soap Shaving Kit
This system has a focus to cure and correct. Their collection has blends of certified organic shea butter and African black soap with the anti-inflammatory and antiseptic properties of tea tree oil. This helps to heal and rejuvenate the skin with each and every shave. This system has moisturizing butters that will soothe ingrown hairs and prevent razors bumps and burns. This collection includes the following shaving products: soap, shave brush, anti-aging moisturizer and bump preventer, shave creme, after shave, skin protector, and lotion.
Black Opal Anti-bump Shave System
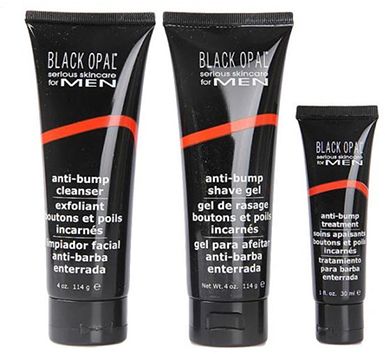
This shaving system promises to banish razor bumps and give the shaver a renewed confidence in his skin and looks. It is a 3-part system with the Anti-Bump Cleanser, Anti-Bump Shave Gel, and Anti-Bump Treatment. The system was created to clear up razor bumps and prevent ingrown hairs from forming with the effective exfoliating micro-beads that remove dead skin cells to prevent ingrown hairs. It claims to soften the beard hair for a more painless shave and the fast acting formula fights bacteria and reduces inflammation.
Does your father, brother, or significant other struggle with razor bumps, ingrown hair, and irritation?
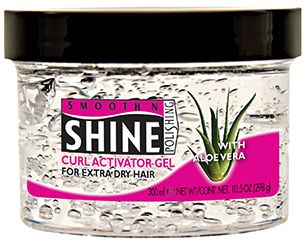
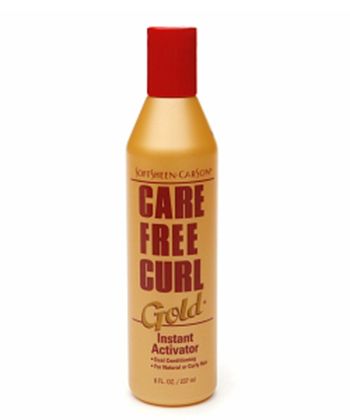
Remember the infamous Jheri Curl? (Of course you do”>. Well Jheri Curl could not have been the sensation that it became without one necessary component: curl activators. Jheri curls are a chemical relaxing system that was created by Jheri Redding who was a hairdresser, chemist, and hair care product entrepreneur. It became hugely popular when Comer Cottrell made it available to the masses in the early 70’s. The Jheri Curl could not be what it was without the curl activator that was necessary to keep the hair moist. Curl activator died down around the 90’s but there seems to be a resurgence of it and some naturals are loving it. The reason being is the main ingredients in curl activators are humectants, which is often glycerin. We love glycerin! Some activators are also formulated with another one of our favorites, aloe vera.
Curl activators are great at retaining moisture so they can be used as a moisturizer, detangler, and curl enhancer. Just like anything in the hair care aisles, we have to be cautious of which ones to buy. Some have the drying alcohols that can dry out your tresses. This is why I created a list of ten amazing curl activators that will moisturize, provide slip, and enhance your curls!Top 10 Co-Washes and Cleansing Conditioners
Wash Day
Products and Tools
- Cleanser – As I Am Coconut CoWash Cleansing Conditioner
- Tea rinse – Natural Hair Community Growth Stimulating Hair Tea
- Deep conditioner – SheaMoisture Manuka Honey & Mafura Oil Intensive Hydration Hair Masque
- Sealer – SheaMoisture Raw Shea Butter Reconstructive Finishing Elixir
- Clip – Goody Ouchless Barrette
- Leave-in conditioner – SheaMoisture Manuka Honey & Mafura Oil Intensive Hydration Conditioner
- Styling gel – Kinky Curly Curling Custard
- Steamer – Q-Redew
Quick Points
- I cleanse weekly to maintain a simple routine and reduce tangles.
- I cleanse in the shower and style at the sink.
- I do not pre-poo.
Regimen
- Run the shower stream over your hair and gently run your fingers through your hair to help guide the tangles and tangles. I do this until my hair is completely elongated as an indication that the hair is fully saturated.
- Part your hair in four sections and twist them into Bantu knots.
- Scoop out a generous amount of As I Am Coconut CoWash Cleansing Conditioner and apply it to one section at a time in a downward motion. Remember, the focus is smoothing the hair shaft and reduce tangling. Use your fingertips (not your nails”> to loosen buildup from the scalp.
- Cleanse the rest of your body and allow the cleansing conditioner to just sit you are done.
- Remove one section at a time and lean under the shower stream as to gently and thoroughly remove the cleanser with my fingers.
- Pour the tea rinse over your entire head. Gently massage the tea into your scalp and hair. Do not rinse.
- Spraya few pumps of the SheaMoisture Raw Shea Butter Reconstructive Finishing Elixir into your palm with the SheaMoisture Manuka Honey & Mafura Oil Intensive Hydration Hair Masque and paint the mixture into your hair, making sure every single solitary strand is properly coated. Continue until all sections and strands are covered.
- Place hair into a low ponytail, secure ends with a Goody ouchless barrette, and cover with a plastic cap for at least 15 min or overnight. For an overnight treatment, secure your hair with two scarves or t-shirts to catch any leakage.
- Rinse the deep conditioner out thoroughly and then put hair into four sections with Bantu knots.
- Take each section add a few pumps of SheaMoisture Manuka Honey & Mafura Oil Intensive Hydration Conditioner along with a few pumps of the elixir to shingle through each section with your fingers, Bantu knot, and exit the shower.
- Use a t-shirt to blot excess water and product and apply Kinky Curly Curling Custard to each section, raking through to ensure gel is distributed evenly.
- Secure your hair in a low ponytail and place a goody barrette at the ends for elongation.
- Place a satin scarf over the top until you are ready to leave the house.
- Remove the barrette, shake, and take my fingers into the roots and lift to bring it to life.
This is a year-round regimen that I rarely change. I do replace the deep conditioning with a protein conditioner about once a month, but I only allow the protein treatment to sit while I am in the shower (never overnight”>.
Refreshing
Everyday I wet my hair in the shower until it reaches its full length, add a few pumps of my leave-in and the elixir, and rake through each section before putting them into Bantu knots. I use the same routine with the gel and barrette as well. Lately I have been having success with achieving second and third day hair with the Q-Redew. The only difference to my wng during the winter is what is in my spray bottle. I normally just have distilled water and lavender oil and I add a few drops of glycerin during winter. I use my spray bottle according to my needs.
How do you achieve your wash and go?
As we crank up the heat the air becomes dryer and can rapidly rob our skin and hair of its moisture.
Hair Butters
Hair butters are natural vegetable butters that are extracted from plants, roots, seeds, and trees. They remain solid at room temperatures and consist of solid or semi-solid fat oils. They are superior emollients and softeners for your hair and skin and every butter has unique properties that make it vastly beneficial to the user. Many have anti-inflammatory, soothing, or moisturizing properties that give more than just shine and softness to your tresses.
Some butters are heavier than others and can negatively affect your hair. Knowing your hair’s porosity will help you determine which butter is best for your strands this winter. Low porosity or even fine-haired coilies, wavies, and curlies need to steer clear of the heavier butters because the butter will just create weighty buildup and prevent moisture from penetrating the tight hair cuticle. High porosity hair needs the extra oomph to keep that moisture from escaping once it enters the hair shaft. A lighter butter may be too light to take on that task during winter.
Best Butters for Winter
Shea butter
A favorite among curlies and coilies this heavy butter comes from the fat of the nuts of the African Karite Tree. A rich source of moisture, vitamins, and fat, this butter is thick and perfect for high porosity or thick hair. It can be used on the hair and scalp, is a potent emollient and does provide some skin and hair sun protection.
Shea butter is firm much easier to use if mixed with a carrier oil (e.g. coconut oil”> that will keep it from hardening. Once whipped with a carrier oil, Shea butter becomes a fluffy, ultra-moisturizing natural asset.
This is probably too thick for fine haired or low porosity curlies or coilies.
Cupuacu butter
A much lighter butter than shea butter, this butter is similar to cocoa butter, but has a softer and creamier consistency. Cupuacu butter is from the rain forest and rich in phytosterols that benefit dry, damaged skin and hair. Fatty acids help to moisturize with its power to attract moisture making it a superior hydrator and it can protect skin and hair from UV-rays. Ingredients to Die For says that cupuacu butter is a great butter to try this winter especially if you have low porosity hair.
Hemp Seed Butter
This is a great butter for all hair types and is heavier than cupuacu butter but lighter than shea butter. This non-greasy butter comes from the cannabis plant and is drug-free and non-hallucinogenic in its industrial state. Livestrong says hemp seed butter is a natural sunblock and high in protein, which will improve the feel and appearance of your hair.
There are loads of butters that will give your hair what it needs in the colder months. Finding the right one may take time and research, but as the wind gets chillier and the nights longer, remember that your tresses need to be protected as much as your skin.
Do you have a favorite natural butter you use during winter?
All curly girls love to shine. We are used to being the center of attention from our hair. When you think glam you think shine, but often our hair is not as shiny as we would like. Straight hair reflects light so you see the shine, whereas the bends of curly, coily, and wavy hair only refract light. This can give our tresses a more dull appearance. Is it fair? No ma’am but you can still get your shine on but in other ways.
Cold water rinsing
Rinsing with cold water after washing helps to close your hair’s cuticle, seal it, and give a natural sheen or slight shine.
Apple cider vinegar (ACV”>
Many naturals already know the wonders of ACV on their strands for several benefits. The most popular reason is that it removes product buildup, but how many are aware that it also leaves the hair cuticle soft and smooth? With that smoothness comes a natural shine from the closed cuticle that allows the hair to reflect some light.
Air-drying
Air-drying your hair instead of using a hooded dryer or diffuser allows the hair to dry naturally. If none of those sounds like the route you feel like taking to add some much needed shine and glam, then take a look at another way to get it without too much work on your part.
Hair serums
Hair serums are often silicone-based products that coat the surface of the hair without penetrating the hair’s cuticle like some natural oils. They add shine and softness to the hair. Many protect the hair from the sun and they remain on the hair until you wash them out. It is best to add them on clean hair to keep them from creating buildup. The serum even reflects light and makes your tresses look shinier and healthier while protecting them from dust and even humidity.
Style Craze says that hair serums are not just for shine as many curly girls (and even straight haired ones too”> use them to stave off dry and damaged strands. They can also help against heat applications and even chemical reactions that can occur with some styling products and gadgets. Here are some tips to remember when using hair serums:
- Buy a brand that works, not just the one that is the cheapest. You truly get what you pay for.
- Apply to your strands (not your scalp”> and work through with your fingers or a wide tooth comb.
- Using too much can create buildup or weigh your curls, waves, or coils down. Use sparingly and add more only if you see you need it.
Not all hair serums have silicone and not all curly girls are happy to use them, regardless of the silky benefits they bring. Here are a few brands that most curly girls find are the best and get the job done all without the burden of silicones.
[do action=”gallery” title=”10 Silicone-Free Serums/][do action=”gallery-slide”]
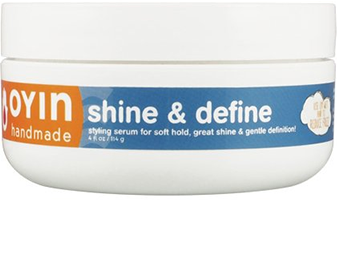
Oyin Handmade Shine and Define Styling Serum
You will not lose moisture with this serum that has water, flax seeds, aloe barbadensis leaf juice, sea vegetable complex, coconut oil and castor seed oil that delivers shine and softness. This serum is designed to nourish, add shine, and define all with a light and non-greasy feel. Smooth out your edges and reduce your frizz with a light fruit scent.
[/do] [do action=”gallery-slide”]
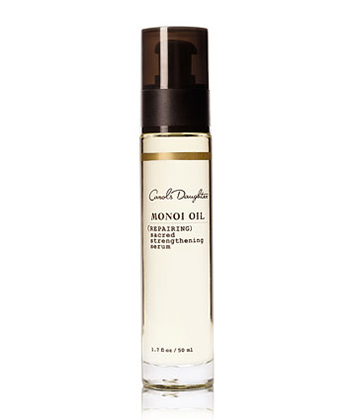
Carol’s Daughter Monoi Oil Sacred Strengthening Serum
Olive fruit oil and grape seed oil make up the first five ingredients in a serum that boasts of reversing and preventing damage to even the most distressed tresses. Heat styling, color treating, and chemical straightening take a damaging toll on your strands, so this serum rebuilds that damaged hair from the inside out.
[/do] [do action=”gallery-slide”]
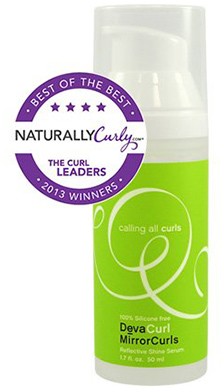
DevaCurl MirrorCurls
PEG-10 sunflower glycerides, water, silica, sunflower seed extract, balm mint extract, and hops extract help to deliver shine and softness to a serum that made the Best of the Best in 2013. All textures will benefit from this 99% botanically infused, silicone-free moisture adding serum.
[/do] [do action=”gallery-slide”]
Living Proof Style | lab satin hair serum
Get superior shine with this satin smooth serum. Cut your styling time with this alcohol-free and silicone-free styler that will add shine, movement, and softness to your tresses.
[/do] [do action=”gallery-slide”]
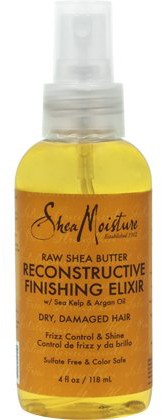
SheaMoisture Raw Shea Butter Reconstructive Finishing Elixir
A penetrating blend of shea butter, argan oil, carrot oil, and macadamia nut oil that fights frizz and adds shine to dry, damaged tresses. Lightweight and not greasy, this elixir uses mineral-rich sea kelp to nourish and smooth your hair’s cuticle all without the help of silicones.
[/do] [do action=”gallery-slide”]
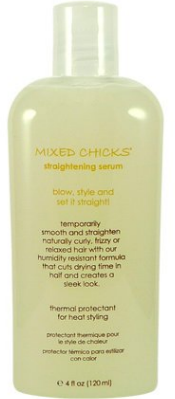
Mixed Chicks Straightening Serum
Water, glycerin, propylene glycol (humectant”>, and guar hydroxypropyltrimonium chloride (adds conditioning properties”> create this superior thermal protectant for heat styling. The humidity resistant formula cuts your drying time in half and you finish with gain a sleeker, straighter look longer.
[/do] [do action=”gallery-slide”]
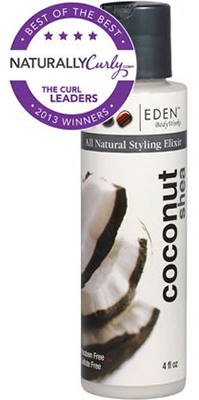
EDEN BodyWorks Coconut Shea All Natural Styling Elixir
A moisturizing conditioning serum that prevents frizz with the water, coconut oil, aloe vera leaf juice, sorbitol, and PEG-50 shea butter. Leave frizz behind while you gain softer, sleeker, and shinier tresses.
[/do] [do action=”gallery-slide”]
Bee Mine Hair Growth Serum Strawberry Kiwi
This hair growth serum is potent due to its ingredients. This all-natural powerhouse with 100% organic coconut oil, sweet almond oil, grape seed oil, select Ayurvedic herbs, and sulfur powder helps to grow hair and moisturizes your tired tresses.
[/do] [do action=”gallery-slide”]
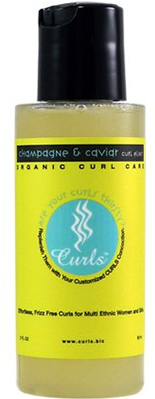
CURLS Champagne & Caviar Curl Elixir
Soybean oil, virgin coconut oil, champagne extract, and caviar extract make up a luxury-enriched elixir that boasts of enhancing hair growth and hair strengthening. Bring dull, dry hair back to life with the power and richness of caviar and champagne.
[/do] [do action=”gallery-slide”]
L’Oreal EverSleek Super Sleek Intense Serum
Water, glycerin, and PEG-40 hydrogenated castor oil will make your strands say goodbye to frizz. A smoothing serum without the weight of silicones, this intense product helps control even the most rebellious and unruly hair.
[/do][do action=”gallery-end”/]
It was not fun so the thought of wearing intricate or tension-filled hairstyles is met with a resounding no. The problem is what if you want a low manipulated style that lasts for more than one day and does not require extensions? Being tender headed is not particularly associated with any specific hair type, so anyone can try these styles.
Puff
The puff can be perfect style for tender-headed women. For one, this is one of the easiest styles, and if done correctly on washday it can last all week. The key to this becoming a low manipulated style is your ability to not do touch-ups daily. Most buns need a ponytail holder and there is much to say about the popularity of the messy bun. There is no need for your bun to be tight because proper nighttime routines will ensure it lasts.
Buns are sweet, sassy, and sexy, so most of the work needed would be slicking down edges (if you feel the need”> or putting hair into the ponytail and then the bun.
NaturallyGG shares three high and gorgeous buns that can last all week if properly maintained at night. Remember that any sized bun can be glam. The first one may be too much for my tender-headed lovelies, as she wraps her ponytail holder on her ponytail twice, but the second and third looks are probably gentler.
Roller Sets
Roller sets and women go hand in hand. This is one style that crosses over from relaxed to natural with ease because the style looks amazing on both! Roller sets last longer than many other styles and do not require heat, so do not sleep on this time-honored treasure that most tender-headed women have no problems with. Roller sets are so versatile, as you can use perm rods, magnetic rollers, Curlformers of any size or type of roller to achieve a great roller set with longevity. The setting lotion and how well you place them on the rollers seem to be the most important factors in a successful roller set.
Toni from My Natural Sistas shows her superb roller set on perm rods. Her look is flawless it can last a week with the proper nighttime routine.
Wash & Go
If you have not mastered the wash and go, then I suggest you give it a try. If you can achieve second, third, or even longer days on your wash and go, then this is a great low manipulated style for the tender-headed lovelies. There is no twisting, braiding, or fuss with this style that allows you to rock your unique coils, curls, or waves with ease.
Christine Amor shows us how she creates her wash and go, and we see that most of the work is done on washday. She shares a few different ways to work your wash and go with elongation or a ninja bun! No twisting, braiding, or added tension to your poor tresses or scalp.
So, what are your favorite low manipulated styles for my tender-headed lovelies?
What is keratin?
Keratin is an essential component to hair, as 90% of your hair is made up of keratin protein. It is a protein formed by the combination of 18 amino acids. Although hair also contains water, lipids, traces of mineral elements, and melanin, Hair-Science says keratin is its main component. Keratin is the key structural building block of hair, skin, and nails, so it can be strong, delicate, and vulnerable to damage. This explains why many protein hair care products have hydrolyzed keratin protein in them.
Products use the keratin protein to fill the gaps in the hair shaft to give your hair a strengthening boost.
As discussed in our Why Eggs and Mayonnaise Don’t Work article, “proteins must be hydrolyzed or broken down so that the amino acids will be small enough to fit and bond to the hair shaft in order to provide the hair with strength as a temporary repair.” Hydrolysis is necessary to break the proteins down and make them small enough to fill the cracks in your hair shaft from all the damage our hair incurs as a result of sun exposure, styling, chemical treatments, and heat styling. The broken down keratin in hair products will temporarily replace the chipped away keratin in our hair’s cortex. This is only a temporary fix, but it is still a necessary component in keeping our hair healthy. There are products and services that use keratin and not all of them are bad. I am here to show the various ways keratin is being supplied to the public so you can make an informed decision on using it yourself.
Keratin in protein treatments
Keratin protein is the strongest protein found in hair care products, so it makes sense to use these proteins to strengthen your hair. Not only can your hair grow stronger, but hydrolyzed keratin protein is moisture binding so you can increase your moisture retention to reduce breakage and bring luster to your curls, coils, and waves. Many of the popular products that naturals know and love contain this amazing protein, such as ApHogee Intensive Two Minute Keratin Reconstructor, Briogeo Don’t Despair, Repair! Deep Conditioning Mask, and AG Hair Cosmetics Re:coil. These products use the keratin protein to fill the gaps in the hair shaft to give your hair a strengthening boost. Everyone can benefit from a protein treatment, but people with color-treated hair and high porosity hair can benefit the most.
[prodmod]Keratin in smoothing treatments
Keratin has been getting the majority of its bad press from its usage in straightening systems that make curly, coily, and wavy hair super sleek and straight or eliminate frizz. The major concern lies in the use of formaldehyde in some of these straightening systems. One such treatment that has been under fire from the Food and Drug Administration and Occupational Safety & Health Administration (OSHA”> is the Brazilian Blowout. OSHA discovered that “some hair smoothing products may contain formaldehyde, may release formaldehyde at levels above OSHA’s permissible limits during use, and may be mislabeled, all of which can pose health risks to salon workers.” For many, the use of formaldehyde in these systems has overridden many of the benefits the procedure.
With all of the negative press surrounding keratin treatments, many companies have since responded by altering their formulas or creating entirely new treatments to exclude the use of formaldehyde. It is important to note that not every keratin system or straightening system contains formaldehyde or an ingredient akin to it or a derivative of it. If you are considering a keratin treatment, be sure to research the specific treatment before going to the salon.
How keratin straightening treatments work
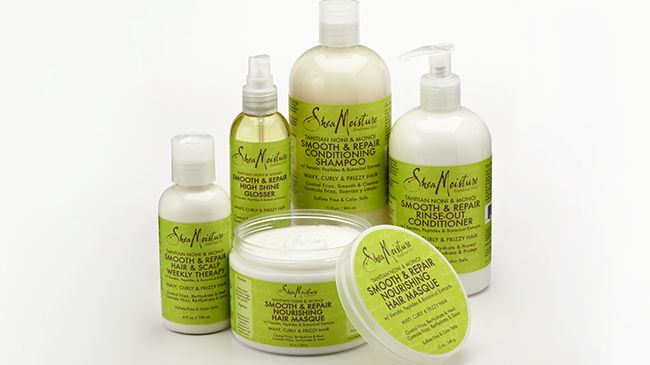
The stylist applies a keratin hair-straightening product to your hair and uses heat from the flat iron to seal it in. The entire process takes about 90 min or more, depending on your hair’s length and density. Popular treatments include Keratin Complex Smoothing Therapy by Coppola and Global Keratin Complex, and there are at-home kits on the market as well. One popular at-home treatment is the SheaMoisture Tahitian Noni & Monoi Smooth & Repair Hair Straightening System. Every product in the Tahitian Noni & Monoi Smooth & Repair Hair Straightening System has hydrolyzed keratin protein to add strength before you apply direct heat to your hair. This allows your curls, coils, and waves to return undamaged, vibrant, and bouncy, within reason. Remember, heat damage can still occur with temperatures at high heats. The keratin does not straighten the hair, it is meant to strengthen and seal the hair after heat from a blow-dryer or flat iron is applied.
Not every keratin system or straightening system contains formaldehyde or an ingredient akin to it or a derivative of it.
Beyond formaldehyde
Formaldehyde is not the only reason keratin treatments have developed a negative connotation. An overuse of chemicals can create problems if not used sparingly, especially in conjunction with high temperatures of hot tools. “The other negative aspect to these treatments is the temperature at which you must heat the hair to accomplish the goal,” explains celebrity hairstylist David Babaii. Harper’s Bazaar says that “subjecting a fine or heavily highlighted head of hair to a 450 degree flat iron, too, may not leave your hair feeling as wonderful as these treatments tend to claim.”
The application of chemicals, length of time left on the hair, and temperature used will vary depending on your goals (are you straightening, or just eliminating frizz?”> and of course your stylist. Be sure to go to a trained professional you can trust, either through reading salon reviews or from personal recommendations. It is possible to have a very positive experience with keratin if you know what to look out for. Many women in the curly community swear by their keratin treatments to prevent frizz, while maintaining their natural curl pattern.
The bottom line
The smoothing treatment has made some enemies but there are now many alternatives to the dangerous ingredients of the past. The bottom line is that you need to research products and treatments before you commit your hair and your money to them. I would suggest asking your salon specifically which brand of keratin treatment they perform, and then researching that treatment beforehand. Similarly, if you are doing an at-home keratin treatment, read the label first. This is your hair, your health, and your responsibility to make an informed decision.Have you tried a keratin treatment? What were the results?
Curl pattern gets all the attention and glory but it should not overshadow the importance of hair porosity
You may be wondering what products or ingredients are better for your strands once you find out. No worries, because we are here to suggest hair butters for each hair porosity so that your tresses get exactly what it will need for the colder weather. I have to admit that do not use butters as much as other products, so as I searched for more information I began to wonder why I had not given them a real try. I love natural oils so much that it just makes sense to give them a try.
According got Making Cosmetics, natural (vegetable”> butters are extracted from numerous plants, roots, seeds, and trees and they contain solid or semi-solid fat oils. This makes them outstanding emollients, softeners, and protecting agents for your body and hair. They are made up of fatty acids, oils, and active ingredients with each one having specialized properties like anti-inflammatory, soothing, antioxidants and even moisturizing.
Low porosity
Low porosity hair needs the moisture-rich natural butters that will hold onto the moisture it gets. Because it has a more closed cuticle than the other two porosity types, it is more prone to build up and products often weigh the hair down.
Avocado Butter
Avocado butter is a high-quality emollient and moisturizer with natural sunscreen and antioxidant properties.Pistachio Butter
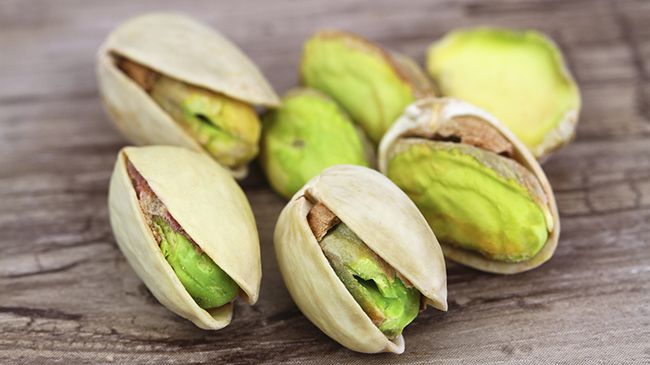
Pistachio butter is not as popular as the other two, but it is rich in fatty acids that moisturize and has great penetrating qualities that will be an asset to hair with low porosity. It is great for your skin too and will not clog your pores.Cupuacu Butter
Cupuacu butter is very similar to cocoa butter, but cupuacu has a softer and creamier consistency. It contains fatty acids and phytosterols and is very moisturizing to your skin and hair. It is also great for its UV-A and UV-B protection.
Medium Porosity
The middle of the road porosity hair type is the easiest to manage since it retains just the right amount of moisture and can hold onto it. That does not mean it cannot benefit from natural butters and it does need to be taken care of.
Cocoa Butter
Cocoa butter is a high quality emollient and conditioner that adds nourishment and shine to your tresses without weighing it down.
Shea Butter
Shea butter is a potent moisturizer and emollient with its unsaponifiable lipids that will be great for adding moisture to your strands.High Porosity
This hair type has either been damaged mechanically, chemically, by weather elements, or can even be genetic. Too much moisture is absorbed and released quickly, so a natural butter used on this type needs to do double duty by attracting and sustaining moisture.
Palm Butter
Palm butter has antioxidant properties but what is even better is it has nourishing and cell regenerating properties while gently moisturizing. Livestrong says it has a refattening agent that helps restore hair’s natural oils that may be stripped during shampooing.Coffee Bean Butter
Coffee bean butter helps to promote moisture retention and has antioxidants and anti-inflammatory properties. It is great for conditioning your skin and hair.Hemp Seed Butter
Hemp seed butter is a powerhouse. It is rich in fatty acids, a natural sunblock, and helps reduce the moisture loss that this hair porosity type suffers from. It has an excellent source of amino fatty acids, and if your hair is lacking Omega-3 fatty acid then hemp seed butter will help to replenish it and make your hair stronger and healthier.What’s your porosity, and which butters work best for you?
There is more than one way to care for your hair but there is also more than one way to harm it. Actually, every aspect of your routine can be harmful to your tresses, and if using all of them then you are doing your hair a grave disservice. No need to worry as we are going to show you just how you can stop causing breakage in all areas of hair care maintenance.
Cleansing Too Often
Cleansing your tresses is a big component of healthy hair care. First off, it is good hygiene to cleanse your tresses and scalp regularly. The frequency depends on the individual’s schedule, hair needs, products, and particular climate, but the vast majority of curly girls cleanse at least once a week more or less. This essential component of healthy hair does not come without a price to be paid. You can create damage to your tresses by doing the very thing you need to keep your hair clean!
There is such a thing as cleansing too often. Curly and coily hair does not require as much cleansing as straight hair, as sebum does not travel down the hair shaft as fast as it does for straight textures. Gentle cleansers are suggested since several shampoos contain harsh surfactants (e.g. sodium lauryl sulfate“> that strip the hair of its natural oils, which is the direct opposite of what your tresses need to prevent breakage. Co-washing or using sulfate-free shampoos is a better choice to combat tangles and breakage. Pre-pooing with a penetrating oil is another way to combat the negative effects of shampoo and detangling.
Rough Detangling
Detangling is more than just a crucial component of healthy natural hair. It is the art of removing tangles and shed hairs with your fingers, wide tooth combs, tangle teasers, or brushes. It is necessary to prevent and release the hair from mats and knots. However, detangling can cause just as much damage if done improperly.
You must be smart with detangling by using the proper tools and products. Pre-pooing is a great way to expedite detangling. Dampening the hair with water, adding conditioner, and detangling in sections are more ways to make detangling more efficient. Improper detangling will cause breakage. Hair is more vulnerable to breakage when soaking wet and dry hair is fragile, so softening the hair with water and adding lubrication with conditioner are perfect.
Excessive Conditioning
Now, you are probably wondering how is it possible to damage your hair while conditioning? Well, there is such thing as too much of a good thing. Protein treatments and deep conditioners are necessary in your healthy hair routine, but there needs to be a balance. Using protein in your hair too often will cause your hair to become brittle. Once a month is good but more than that is too much and all the strength you are trying to give your strands will only make them dry, brittle, and damaged. Not deep conditioning regularly is just as bad. Excessive deep conditioning can create compromise the elasticity of your hair. You should be deep conditioning after cleansing to help fight hair damage and temporarily strengthen your hair after the trauma of the washday. It is a treat to your tresses so do not skimp on it, especially as we are embarking on colder weather.
High Manipulation Styling
Hair styling is another necessary portion of natural hair, but the more manipulation your hair endures creates more opportunities for breakage. This is why many naturals choose protective styling to lessen manipulation on their strands. Less manipulation leads to less damage. Our hair is more fragile than naturally straight hair and therefore retains more length and moisture with less styling.
Sleeping On Cotton
Having a nighttime routine is the best way to stave off breakage. Just recklessly flopping on your pillow is not in the best interest for any curly. Cotton pillowcases and sheets are not nice to our tresses, as they can either whisk away the natural oils or cause friction, thus creating split ends. Sleep with either a satin scarf or a satin bonnet. You can also sleep on a satin pillowcase with your pineapple like I do!
How do you prevent breakage throughout your regimen?
The holidays are upon us and many are worried about the cold, dry weather affecting their tresses, especially when we travel. Yes, travel is a bummer on our hair sometimes. Traveling with hair products can be an annoyance at best and a disaster at worst if there are damaged bottles and leaking product getting all over everything in your travel bag. You check to ensure the bottles are closed tightly or if you are like me, you buy new ones that are sealed so they do not spill, but the trip back is just as harrowing as you either have to toss it or hope they do not spill over everything. If I sound like an exaggerated infomercial then I am sorry but I have ruined a suitcase full of clothes with hair products so please empathize with me.
With the holidays approaching many wavies, curlies, and coilies will be traveling near and far in cars, trains, and airplanes. Traveling requires packing, and packing requires finding better ways to transport our toiletries including hair care products. It is a necessary hassle that can make or break your family gathering and photos, so why not de-stress by trying something new?
Shampoo, conditioner, moisturizer, and lotion bars are making it big around the DIY circuit and for good reason. All natural shampoo bars are all the rage in the beauty markets. Curl Chemist says, “The polar head group of the molecule is a carboxylate, rather than a sulfate (R-COO-Na+ vs. R-OSO3-Na+”>, which results in a milder surfactant. They are formed by reacting a fat (triglyceride”> with a strong base, either sodium hydroxide (lye”> or potassium hydroxide (potash”>, in a process called saponification.”
Here are great perks to using these bars over their liquid cousins:
- Less wasteful
- Less expensive
- No leak, no mess
- Smaller
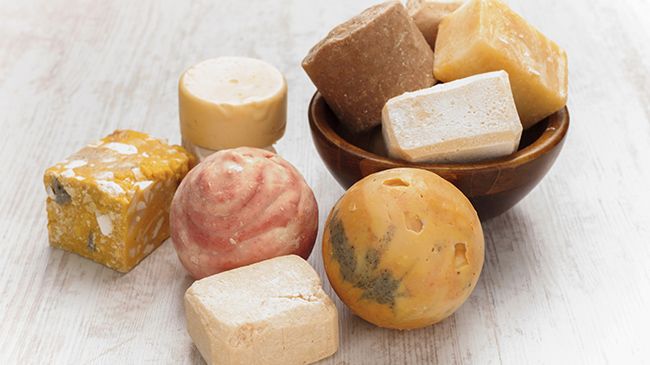
Ginger and Lime Shampoo Bar
Ingredients and Tools
- 7.2 oz. apricot kernel oil
- 7.2 oz. argan oil
- 10.8 oz. babassu oil
- 7.2 oz. refined & deodorized cocoa butter
- 11.52 oz. refined 76°F melt point coconut oil
- 3.6 oz. sweet almond oil
- 7.2 oz. clear/refined jojoba oil
- 10.8 oz. olive pomace oil
- 3.6 oz. refined & deodorized shea butter
- 2.88 oz. rosehip (seed”> oil
- 24.8 oz. distilled water
- 9.5 oz. lye/sodium hydroxide
- 2 oz. silk amino acids powder
- 3 Tbsp French green clay
- 4.5 oz. fresh ginger lime fragrance oil, or scent of choice
- double boiler pot
- spoon
- silicone soap molds
Instructions
- Pour the lye into the distilled water, mixing until dissolved and then set aside to cool.
- Combine the oils and butter in a large stainless steel pot.
- Heat over medium heat on the stove until all of the ingredients have melted and then remove from heat and set aside to cool.
- Pour the lye and water mixture into the oils and mix with a spoon until you reach a light trace.
- Add the fragrance oil along with the silk amino acids powder and French green clay and mix.
- Pour into soap molds and cover.
- Allow the bars to set for 24 hrs and then remove.
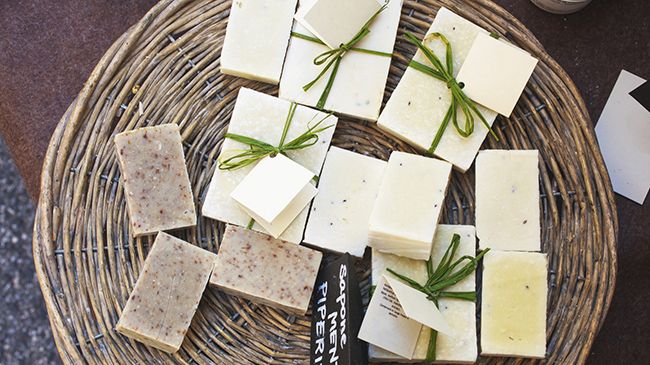
Homemade Moisturizer Bars
Ingredients and Tools
- 1oz beeswax
- 1oz hard butter
- 1oz liquid oil
- 1/4 tsp fragrance or essential oil
- 1/4 tsp vitamin E
- spoon
- double boiler pot
- silicone soap molds
Directions
- Place the beeswax, butter, and oil into a double boiler until melted.
- Remove the bowl from the heat and cool slightly. You do not want it to completely solidify yet.
- Mix in the vitamin E or fragrance and pour into molds and allow it to set.
- Transfer to the refrigerator or freezer until solid.
Where is the conditioner bar recipe? Do not worry. We have you covered on How to Make Your Own Conditioner Bar.
Homemade moisturizer bars are almost impossible to get wrong. If for some reason you do not like the way they look, feel, or smell, you can melt them down again. Are the bars to hard? Add more oil or butter. Too soft? Add more beeswax. Not fragrant enough? Melt it down and add a little more fragrance. Do be cautious with the temperature essential oils can be heat sensitive, so melt them lightly. Now that you see the benefits of carrying these amazing bars in your suitcases, it is now time to share how to create them!
Do you use solid products when you travel?
…so when you see it failing you wonder, “Why is my natural hair failing me?” Well, your hair never fails you. It’s probably your routine.
As my hair thrived, so did my tangles. My washdays grew longer and my frustrations began to mount. Common sense is not as common as one would think, so it was much too long before I made the connection that longer hair meant more tangles. It was even longer before I came to the realization that I needed to change my routine. I lost too many hairs to an insane struggle that was more internal (in my mind”> than in my hair. My hair was not the problem, I was the problem.
Oftentimes new naturals and even frustrated veterans give up the natural hair journey before giving it a full and fair chance. My issue was simple. I had to change my routine. I needed to wash my hair in sections and be strategic in my wash routine. We all become comfortable with a hairstyle, a wash routine, and a particular product, so when you see it failing you wonder, “Why is my natural hair failing me?” Well, your hair never fails you. It’s probably your routine.
Is your hairstyle damaging your hair?
Just like overuse of protein or wearing braids too tight too often, too much of a bad hair practice can be detrimental to healthy hair. Oftentimes a practice or style in and of itself is not bad, but overuse can cause damage. If you part your hair in the same place too often and you begin to see breakage, it may be time for a different part. If you notice edges are thinning and you wear tight ponytails, then you may need to try different styles. You may be comfortable with a hairstyle but your hair may need a break.
If you part your hair in the same place too often and you begin to see breakage, it may be time for a different part. If you notice edges are thinning and you wear tight ponytails, then you may need to try different styles.
Thinning hair or bald spots should always be a warning that something is wrong. It does not always occur right after you wore a style that added too much tension or too high heat was applied during a flat ironing. Sometimes it takes time for the damage to occur so it may be harder to identify what caused it. Keep in mind that the average person will lose anywhere from 50 to 100 hairs a day and thinning hair is quite common in women.
Thinning hair or bald spots should always be a warning that something is wrong.
Have your styling habits caused damage?
According to Health.com, hair thinning or loss can be from physical stress, pregnancy, too much vitamin A, and heredity like female-pattern hair loss (androgenic alopecia”>. Another big problem is poor hair care, which can ultimately create dry, brittle hair or hair thinning. Livestrong notes harsh products, excessing heat styling, and even tight ponytails can all be culprits for hair thinning.
Your hair is growing and changing along with you, and as we find comfort with styles, products, and routines, they can be stuck in time when everything else has moved on. Listen to your hair and watch the signs of excessive shedding, dryness, breakage, or thinning hair. Sometimes a protein treatment is not the only solution. Sometimes it is time for a new hairstyle.
Benefits of Conditioner Bars
- Conditioner bars are less wasteful. Unlike most liquid conditioners that are made with around 60 to 80% water, these do not contain water and are full of the ingredients you want. Concerned about distribution? The water from your shower will help to spread the product.
- They are easy to use. They just glide on your wet hair and you can use either your fingers or a wide tooth comb to distribute.
- The packaging is limited. Waste not, want not. Being green is always a plus!
- There is less mess. No leaking bottle or spillage while in the shower. We all know that is the worst!
- It is lost lasting/cost-effective. This little bar will last a very long time, if you let it properly dry after each use it will last a very long time. Cutting your bars into smaller portions and using a little at a time will help you preserve it.
- Create easy traveling. Great for travel because they pack without the worry of leakage.
Now that you see just how beneficial they are it is time to give some a try. I have two recipes for you to try and get your DIY urges met!
DIY Solid Conditioner: Spill-Proof for Your Travels
Have you ever been forced to part with a beloved beauty product in airport security? Or found yourself hurriedly pouring your cocktails into travel-size containers the night before a trip? What about the fateful mishap of opening your suitcase to find your shampoo has spilled all over your clothes. This spill-proof conditioner bar is perfect for your travels. It will give you fifty grams of product that are easy to travel with no matter what.
Tools and Ingredients
- Kitchen scale
- Spoon
- Double boiler pot
- Silicone cupcake molds
- 30% (15g”> cocoa butter
- 30% (15g”> incroquat* (behentrimonium chloride”>
- 20% (10g”> cetyl alcohol
- 20% (10g”> nourishing oil of choice
- Optional: essential oil(s”>
- Optional: hydrolyzed keratin, panthenol, or silk amino acids (proteins”>.
Directions
- Mix everything together and pour into a double boiler pot on low-medium heat.
- Stir occasionally until completely melted.
- Pour the mixture into the silicone molds.
- Let it cool down, preferably in the fridge or freezer for an hour.
- Peel or cut the conditioner bars out of the mold.
Recipe from Her Packing List
Argan Oil Conditioner Bars
Argan oil is ideal for low porosity, very curly hair, but you can substitute for the hair oil of your choice.
Tools and Ingredients
- Saucepan with 2 in of water
- Craft stick
- Pint sized mason jar
- Quarter cup of BTMS 50
- 1 Tbsp shea butter
- 1 Tbsp cetyl alcohol
- 1 Tsp argan oil
- 1 Tsp apricot oil
- .5 Tsp DL panthenol
- 1.25 ml phenonip
- Essential oil(s”>
Directions
- Mix the BTMS, shea butter, cetyl alcohol, argan oil, and apricot oil in the mason jar.
- Place the mason jar in a saucepan and heat mixture on a low-medium setting.
- Make sure all of the ingredients are melted before turning off the burner.
- Quickly add DL panthenol and phenonip and essential oils.
- Pour conditioner into the silicone molds.
- Allow the conditioner bars to become completely solid and then remove them from the mold.
- Place it in a cool and dry place for around 24 hrs.
Recipe from Hair Treatments Talk
Not into DIY? Try the LUSH Jungle Conditioner Bars or the Nature Skin Shop Hair Keratin Treatment, which comes in a ready made bar form without any of the kitchen time.
Have you tried a conditioner bar?
Regular cleansing and conditioning is a must
If you normally wash your own hair every week or every other week, wearing a wig or weave will not or should not change that. If you are wearing a wig then take it off and wash hair as usual. If you are wearing a weave you still need to cleanse your hair regularly. Using an applicator bottle with a pointed tip to apply the shampoo directly to your scalp. Diluting the shampoo in the applicator bottle will allow you to remove it easier. Gently massage with fingertips to effectively cleanse your scalp and hair and smooth the shampoo down the extensions. In order to prevent matting and tangling, do not rub the hair in a circular motion.
Conditioning is just as important as cleansing, so do not skip this step! If getting to your hair is difficult then you can add conditioner to another pointed tip applicator bottle to ensure all of your hair receives the conditioner. To avoid tangles wash in the shower or sitting straight up in the tub. Being bent over the kitchen sink and having the hair over your head can allow tangles to occur in the weave hair. I use this method for washing my own hair to keep tangles at bay.
Natural oils are still necessary
After the cleansing and conditioning you need to seal in the moisture with an oil. Some naturals like to oil their scalp, so if you prescribe to that then place a few drops of your favorite natural oil on your fingertips and run them along your scalp in between the weave tracks. Massage the oil into your scalp, hair, and even the wig or weave if it is human hair. If you are wearing synthetic hair you may need to be more careful as it will not need it.
Allow your hair to properly dry prior to wearing the wig after cleansing your own tresses. You do not want to harbor a breeding ground for mold by keeping your hair damp under that wig. Allow your hair to properly dry after cleansing your hair or weave before adding hair accessories like headbands, hats, or scarves.
Do not neglect the wig or weave
They need to be cleansed and conditioned as well. Human hair can and should be treated just like your own hair so it needs to be cleansed and conditioned. For synthetic wigs or weave hair you should consult the manufactures instructions on cleansing to keep it clean and looking good for the duration of the style.
Avoid having hair bunched up under a wig
Bunched hair tangles and causes breakage. Keep hair braided or wrapped neatly and worry more about being gentle to your hair than how flat the twist are under the wig.
Choose a wig that allows your hair to breath
A wig with netting allows your hair to receive some air without the pollutants so you get the best of both worlds. Make sure to use a silk wig cap in order to knot dry your hair out.
Remove weave after 6-8 weeks
Keeping it in longer can lead to locking of your hair, the weave, or both.
Give hair a break in between applications of added hair
Your hair needs a break from the wigs and weaves, so removing your sew-in, washing your hair, and immediately installing another sew-in is not giving your hair enough time to breathe and enjoy the lack of tension. Tasha Swearingen says, “The time you’ll need to do without a sew-in really just depends on how your hair reacts, which you won’t know until you take it out. If you have a lot of breakage after you’ve taken out the sew-in, you might consider leaving it out for a few weeks while you work to replenish the moisture your hair needs.”
Benefits for Hair
This oil has been used for many ailments including baldness and hair loss. This amazing oil has high amounts of oleic acid, so it is light and has the ability to penetrate the skin easily. Buzzle says, “When applied to the scalp, it acts as a vasodilator, which can dilate the blood vessels, resulting in more nutrients supply to the hair follicles through blood circulation, and a healthy environment for hair regrowth.” Not only will you see hair growth, but the hair will also be protected, nourished, hydrated, and stronger. The other type that is rich in linoleic acid is a great source of polyunsaturated fatty acids, and as it prevents essential fatty acids deficient in our bodies it also gives additional nutrition to our hair, according to Oilypedia.
This oil has been used for many ailments including baldness and hair loss.
The richness of polyunsaturated fatty acids makes it perfect for dry, relaxed, or color-treated tresses. As we embark on colder weather many of us worry about drier hair, so hair moisturizers rich in essential fatty acids (EFA”> are necessary and welcomed. Safflower oil can be applied topically or taken orally to benefit your tresses so you have a few ways to administer the oil in upcoming months.
Who is into teas? If that is your prime way to relax or get your nutritional intake then using plentiful richness of safflower in a tea may be for you! The petals from the safflower plant can be steeped in boiling water for around five minutes, remove petals before straining, and enjoy! Live and feel claims that the tea is soothing and will treat coughs.
How to Use It
Do you prefer to use pure oils? Here is a way to restore the moisture back into your hair and scalp by using it topically.
- Add a few drops of safflower oil into the palm of your hands and rub them together.
- Apply it to your ends and the move towards the scalp.
- Leave it in for an hour.
- Rinse thoroughly.
- Repeat procedure every week to retain moisture.
Products to Try
If teas or pure oils are not your preference, then give these products a try:
- Organic Root Stimulator Curls Unleashed Take Command Curl Defining Crème
- Miss Jessie’s Multi Cultural Curls
- Jane Carter Solution Scalp Nourishing Serum
- Bumble and Bumble Grooming Cream
- Deeply Restorative Smoothing Hair Oil Concentrate
Have you tried this miracle oil? How did you apply it?
We see boys and girls running around with curls, coils, and locs, so the grooming lessons are needed for anyone with more than an inch of hair. Basic hair care needs will one day become their own responsibility, so unless you want them blindly thrashing, you have to teach them routines, techniques, and basic hair hygiene.
Washing hair routines
Washday is the longest day for most naturals. There is pre-pooing, detangling, cleansing, deep conditioning, and styling. Depending on your schedule, goals, and your hair’s needs, the day can be a chore. As you drag your child through this ritual are they paying attention to what you are doing? No, they are not. There needs to be conversation and even participation (when they are old enough”> so they first understand why we do what we do and then learn how to do it.
Start young and stay consistent with cleansing routines. If you want them to have a good understanding of the importance of clean hair, then they need to see it occurring. There are product lines for children that are great for their beautiful hair. Try them out and see if you like them and if they like them. Get them involved in the process as soon as they show an interest. And when they are old enough, teach them how to read labels and which ingredients to look for.
The wonders and dangers of heat
You may already be applying heat to their hair, whether it is a flat iron or blow-dryer. No matter what you are using, make sure you teach them about the benefits and drawbacks of heat styling. When you educate your child about the proper tools, techniques, products (e.g. heat protectants“>, and temperatures then heat styling can be used effectively to lessen the potential of heat damage.
Teaching your child about using heat means educating them on the effect of too much heat, too high heat, and not using correct tools to ensure heat damage does not occur. Do not wait until they leave the nest. Make sure they understand how to properly care for their tresses when using heat and if you do not feel comfortable using heat then consult a professional. It is better to allow someone else to do it than to possibly damage your child’s tresses.
Color, chemicals, and care
Most of us hope chemicals are not introduced too early in our child’s life, despite the fact that many naturals had relaxed hair as children. This norm of the past is giving way to embracing natural hair and that comes with the acceptance of coily, curly, and wavy tresses that were once considered bad. All hair is good, and as we nurture our children’s hair we must educate them on some chemicals that are more popular and appropriate for adults. Adding color to your child’s hair can be done with hair chalk or even cream eye shadows, so using chemicals are not necessary. It is fun, inexpensive, and much safer than using chemicals.
There may be a time when your teenager may want to experiment with permanent color and texture altering products, so make sure they are aware of the dangers of not using them properly and overall risks. There is no guaranteed way to prevent damage. Chemistry expert Anne Marie Helmenstine says that using bleach will lighten the hair by reacting to the melanin in the hair and removing the color through an irreversible chemical reaction. Teaching your child everything about hair bleaching is not necessary, especially when small, but they do need to know how this process will change the hair, as the need for protein treatments and deep conditioning may have to be incorporated in his or her regimen more frequently. Deep conditioning and retaining moisture will always be necessary when working with chemicals of any kind.
Salons
Are they necessary? To some yes, but not so much for others, as many naturals have embarked on the DIY hair care trek with huge success. From trims and hair color, there are more naturals taking the plunge and allowing bloggers, vloggers, and hair sites to guide them on at-home hair care. Introducing your child to a salon is a great way for them to know there are resources for them. No one says you have to do everything for their hair, so if you feel more comfortable seeking out a professional for certain styles or treatments just take out the time to find them. Check out our salons around the country that cater to curls, waves, and coils so you know they will be able to care for your child’s tresses.
When will you start teaching your child to self groom?
Many of us only wish we could put together a room, office, or an entire room with mind-blowing flair. It is more than just adding a few decorative plants or an area rug. Interior decorating is more than just the generic definition: the art or process of designing the interior decoration of a room or building. According to Merriam-Webster, the designer’s goal is to produce a coordinated and harmonious whole in which the architecture, site, function, and visual aspects of the interior are unified, pleasing to mind and body, and appropriate to the activities to be pursued there. These designers are often found working in other industries like architecture and engineering. Yes, there is much more involved than finding some cute throw pillows.
As a profession filled with women, it may seem hard to stand out or be seen but the enchanting and artistic Niki McNeill shatters that notion with her creativity and depth. Ms. McNeil brings beauty and functionality to any space that needs inspiration and magnetism. Despite her hectic schedule, Ms. McNeil spared a few minutes to allow us to delve into her passion.


