Search Results: Sabrina Perkins


Naturally curly, coily, and wavy hair is like a delicate flower that is both beautiful and needs loving attention. As the weather has become cooler, many realize the importance of moisture retention by combatting the dry heat from indoors and the arctic blasts from outdoors. It is a challenge when you add wearing cotton and wool that whisk away the moisture in your hair on contact.
During this time of the year, many use cleansing conditioners to stave off the harsh results of some shampoos. Co-washing or conditioner washing cleans the hair with a botanical conditioner that tends to be gentler on textured hair. Many curlies following the Curly Girl Method (CG method) by Lorraine Massey use this method and have found it quite effective at reducing frizz and retaining moisture.
Image Source: @kaynaturelle
I am not here to give shampoos a bad name, as cleansing is necessary for a healthy hair regimen. Shampoos are used for cleansing our hair, but many have harsh surfactants like sodium laurel sulfate or a blend of several surfactants, and they tend to rob the moisture from our tresses. I personally only use cleansing conditioners year-round, with a couple of exceptions for coloring my hair and a clarifying shampoo whenever necessary. Many others do the same, but this is a great time to see how your hair responds to them, even if you do not.
Now that the weather is required, we take extra care to keep our moisture intact. If you are considering it, we have a list of the top ten that are sure to please.
1. As I Am Coconut CoWash Cleansing Conditioner

One of the 2013 Best of the Best 2013 and my personal favorite, this cleansing conditioner is made with water, coconut, tangerine, fatty alcohol, cetrimonium chloride (emulsifier), and castor oil. This cleansing conditioner spreads easily, gently removes product buildup, and makes detangling a breeze. Great for color-treated hair and will retain your hair’s precious moisture.
2. tph Hustle & Co

Taraji P. Henson is bringing a conditioning wash that can be used for curly and coily textures. It’s infused with olive oil, sage extract, and shea butter for a refreshing cleanse that can soften and boost hair’s manageability. Whether you want to extend your wash day and use this after shampooing or by itself for additional hydration, you’ll love the moisture in this product.
3. SheaMoisture Coconut & Hibiscus Co-Wash Conditioning Cleanser

A highly favored hair care line came out with its sulfate-free conditioning cleanser with water, coconut oil, shea butter, mango seed butter, olive fruit oil, and wheat germ oil. You can remove all the impurities without stripping the hair of its necessary natural oils, reduce frizz, and leave your hair bouncy and light.
4. Aunt Jackie’s Coconut Creme Recipes Coco Wash Coconut Milk Conditioning Cleanser

Aunt Jackie’s conditioning cleanser will leave your hair clean and free of impurities, while feeling touchably softer. Blended with other essential ingredients including Avocado and Shea Butter, Aunt Jackie’s Coco Wash is excellent therapy for all hair types and textures, Gentle enough to use daily.
5. OUIDAD Coil Infusion™ Drink Up Cleansing Conditioner

Ouidad created a formula specially designed for coils needing moisture, slipping, and looking to reduce breakage. This multitasking formula can be used as a conditioner or a co-wash and can help strengthen hair and reduce breakage.
6. Eden BodyWorks Coconut Shea Cleansing CoWash

Water, aloe vera leaf juice, fatty alcohol, shea butter, and coconut oil create this sulfate-free, no suds gentle cleanser. Remove residue and buildup for a healthier hair environment. Here is a conditioner that penetrates the hair shaft to improve hair’s strength, flexibility, and hydration.
7. Flawless by Gabrielle Union – Hydrating Co-Wash Cleansing Hair Conditioner

Gabrielle Union released a co-wash cleansing conditioner that can help remove dirt and product build-up with Coconut, Castor Seed, Passionfruit seed, and Rice Oils. Ingredients like coconut oil, castor seed oil, passionfruit seed oil, rice oil complex, shea butter, and marshmallow extract blend to detangle, hydrate, and condition hair.
8. Herbal Essences Naked Cleansing Conditioner

Water, fatty alcohols, stearamidopropyl dimethylamine (replacement for silicones and adds slip), rosemary leaf extract, and peppermint oil make up this cleanser that will renew your senses with an herbal mint fusion. It is a low-lathering conditioner that brings nourishment and smoothness while gently cleaning and giving you touchable soft hair.
9. Carol’s Daughter Hair Milk Co-Wash Cleansing Conditioner

Water, fatty alcohol, glycerin, and agave tequilana stem extract combine to make a sulfate-free gentle cleanser to wash away the impurities without giving you a tangled mess of curls and coils. Fight frizz and tangles with this incredible moisturizing cleansing conditioner.
10. The Doux One Love CoWash

Your curls, coils, and waves will thank you for this co-wash that can help detangle, cleanse, and condition hair in one wash. The Doux brings us a scalp cleanser and deep conditioning treatment that uses hydrating ingredients like jojoba and grapeseed oil to reduce friction and provide heat protection.
Which cleansing conditioner or co-wash do you plan to use this season? Let us know in the comments.
Cleansing our hair and scalp is crucial to keeping healthy hair. No matter how well you think you care for your hair, if you are not properly removing dirt, pollutants, product buildup, and sweat, you are doing a huge disservice to your hair. Many curly girls do not care for shampoo (me included), but I know the importance of cleansing and the vast array of product options. Clays, shampoo bars, cleansing conditioners, and more are available to cleanse the hair and scalp properly, and while we need those precious oils to stave off dryness, surfactants are still necessary for cleansing.
What is a Surfactant?
Surfactants are one of many different compounds that make up a detergent that removes dirt, product buildup, and pollutants. Their job is to break down the interface between water and oils and/or dirt. They hold the buildup or dirt in suspension to allow for removal through rinsing. As we learn more about the formulas in our favorite products, it only makes sense to discuss some of the more common ones, and we are starting with sodium C14-16 olefin sulfonate.
Image Source: @aprilbasi
What is Sodium C14-16 Olefin Sulfonate?
Sodium C14-16 olefin sulfonate is an anionic surfactant often found in bath, shower, and hair care cleansers. It is a mixture of long chain sulfonate salts prepared by sulfonation of C14-16 alpha olefins. It can be derived from coconut and produces a copious foam.
Read more: Top 30 Sulfate-Free Shampoos
Is Sodium C14-16 Olefin Sulfonate a Sulfate?
The name may be misleading, but sodium C14-16 olefin sulfonate is not a sulfate. Sulfonate is related to but not the same as sulfates. In a sulfonate the sulfur is linked direct to a carbon atom where as a sulfate is linked directly to the carbon chain via an oxygen atom. They have similar qualities when it comes to the propensity of irritating skin, but sodium C14-16 olefin sulfonate is not a sulfate.
Image Source: @mattloveshair
Pros
It works tremendously well. A rather strong cleansing agent with the ability for high foaming and a well-emulsifying surfactant. It is safe for personal care products that mix well with water to remove dirt, oils, and pollutants so they can be rinsed away. This is an excellent addition to clarifying shampoos.
Read more: 20 Clarifying Shampoos Gentle Enough for Damaged Hair
Cons
It can be drying and irritating for the skin and scalp, which may pose a problem for persons with sensitive skin or dry scalp and/or hair. Some curly girls find it too strong and too drying but to offset the potential for dryness or sensitivity issues, secondary surfactants are sometimes used with this agent to minimize the negative impacts on the scalp and hair. As for the consumer, a pre-poo may also combat the drying effects of this cleansing agent. Also, remember to always condition or deep condition after using a shampoo, especially a clarifying shampoo, to ensure the cuticle gets closed. An open cuticle leads to dryness, which could then lead to frizz and breakage.
The Takeaway
Sodium C14-16 olefin sulfonate may have a drying effect on one’s scalp and hair, but if you need a strong cleanser to remove buildup or dirt, then this agent may be the one for you. It is a safe and excellent surfactant to use, and here are some products that have sodium C14-16 olefin sulfonate formulated in it.
- Cake, the Posh Wash, Sulfate Free Swirl Shampoo
- Neutrogena T/Sal Therapeutic Shampoo, Scalp Build-Up Control
- Frederick Benjamin Shampoo
- OGX Weightless Hydration Coconut Water Shampoo
- GIRL+HAIR Cleanse+ Moisturizing Shampoo
Our editors independently select all products featured on NaturallyCurly. However, we may earn an affiliate commission when you buy something through our retail links.”
No matter your hair type, all hair needs protein and moisture balance. The protein is called keratin, and we tend to see breakage whenever that delicate balance is off-kilter. Like anything in life, you can’t have too much of one without affecting the other, and our hair needs protein, moisture, and nutrients to stay healthy and look great.
So many obstacles are in the way of healthy hair, like pollutants, dirt, harsh chemicals, and even hard water. Keeping that balance in check needs assistance, and many naturals are quick to add moisture but rather hesitant to add protein. Protein is necessary for a healthy hair regimen to undo the damaging routines and products we’ve inflicted on our tresses. Finding the proper protein treatment depends on your hair’s needs and maintenance, so we’ve brought 20 great protein-enriched products to help your strands stay strong and damage-free.
Top 20 Protein-Rich Products

AG Hair Recoil Activator
This is a rich curl cream with herbal extracts and natural corn starch as well as magnesium sulfate, silk and keratin protein, and panthenol. It’s earned the coveted 5-curl rating from NaturallyCurly’s team of experts and is guaranteed to bring your curls to life in a way you haven’t experienced before with fantastic definition.
Aunt Jackie’s Curls & Coils Softening Conditioner
Tame, nourish, and deep condition frizzy, hard-to-manage, dehydrated, brittle natural curls, coils, and waves with natural extracts and proteins. Gentle humectants moisturize and hydrate. It’s an excellent restorative treatment for any type or texture, including natural, colored, relaxed, and texturized hair.
Aphogee Curlific! Texture Treatment
Wavy, Curly, or Coily hair types are more susceptible to damage than straight hair due to structure and styling resistance. This treatment restores elasticity and life to damaged, textured hair and helps eliminate hair loss due to breaks and splits.
Aphogee Hair Strengthening Kit
This kit is a convenient way to help stop hair breakage for weeks and to prepare hair for any chemical service. This two-part system strengthens with protein and then softens with moisturizers and emollients. It’s effective on even the most damaged hair, works in minutes, and lasts through multiple shampoos. Depending on hair type and care regimen benefits last 2-3 weeks per application.
Briogeo Don’t Despair Deep Conditioning Mask
Fortified with ultra-hydrating avocado, sweet almond & argan oils, strengthening keratin protein, power-conditioning rosehip oil, soothing aloe, and super hair-essential vitamins B5, D, A, E, and biotin. This unique targeted ingredient complex helps increase hair elasticity and moisture to prevent breakage, promotes healthy shine and luster, and replenishes strength.
Curlisto Stuctura Lotion
This hair lotion promotes manageability and body without stiffness and contains proteins to improve strength and pliability. It is recommended as a styling aid for hair that needs extra body, definition, and texture.
Curl Keeper Silk Conditioner (Formerly Curly Hair Solutions Silk Protein Deep Moisturizing Treatment)
Curl Keeper Silk Conditioner is a moisturizing daily conditioner with Silk Amino Acids to strengthen hair. Use daily to help your color last longer and keep your hair moisturized.
Curl Junkie Curl Rehab Treatment
Give your hair the moisture it deserves with this moisturizing deep treatment conditioner. Let your hair drink in a wonderfully rich cocktail of aloe, herbs, healing butter, and oils to rejuvenate and restore your precious curls!
DevaCurl Intense Moisture Treatment
DevaCurl Heaven In Hair is an intense moisture treatment for all curl types. Try this one out if you hair seems really dry and needs a little extra TLC. Hands down, one of my faves for my long wash days when I need to deep condition.
DevaCurl One Condition Delight
This do it all product gives the perfect amount of hydration, while also touting a super light and moisturizing formula. Made with rice proteins, lotus flower and a chia-flaxseed blend, it fights frizz, detangles, and sets you up for a defined, wavy look that lasts.
Elucence Extended Moisture Treatment
Elucence Extended Moisture Repair Treatment infuses a surge of moisture to the inner structure of the hair, fortifying weak, damaged follicles and improving elasticity and strength, leaving hair full of body and shine and helping to repair damaged ends with wheat proteins and plant polysaccharides.
Especially Hair Deep Treatment
Looking for a more straightforward solution for conditioning your hair? Try this multi-purpose deep treatment that may be a leave-in conditioner or rinse-out masque. It is ideal for all curl types, especially Types 3 and 4; it has a light citrusy scent and a honey yogurt-like consistency.
Flawless by Gabrielle Union Restoring Oil Treatment
Deeply hydrate, nourish, enhance shine, and smooth split ends with our silicone-free 5-oil blend. It absorbs quickly and smoothes rough cuticles for shinier, frizz-free hair, all thanks to its infusion of Argan, Marula, Avocado, Coconut, and Macadamia oils for strengthening, hair repair, and increased elasticity.
Genedor Beauty Superfruit Antioxidant Shampoo
Cleanse hair gently and effectively using this sulfate-free shampoo, featuring a nourishing blend of honey, proteins, goji, acai, mulberry, pomegranate, tea flower, and coffee seed extracts that penetrate the strands resulting in hair that is anti-aged, moisturized, strong, and shiny.
Honey Baby Naturals Sweet Softening Conditioner
This hair-softening conditioner utilizes a unique blend of milk Protein and honey to leave hair ultra-soft, strong, and manageable. Milk protein works to strengthen hair and help prevent breakage during combing, while the gentle formula hydrates each hair strand & binds in moisture to help maintain healthy soft hair.
Jamaican Mango & Lime Conditioner
If you have locs, this one is for you. This formula provides a firm hold and soft finish for re-twisting locs without flaking and causing build-up of traditional gels.
Coconut Restore Keratin Intensive Masque
This Repair Masque is enriched with extra virgin coconut oil and keratin to renew, rebuild & protect your hair from root to tip. The formula restores hair’s natural elasticity, helping to repair hair damage and helping seal cuticles and split ends.
OGX Anti-Breakage Weightless Healing Oil
The best defense against harsh elements and daily styling is inner strength. Rich, fortifying oil infused with keratin proteins and argan oil helps hair resist breakage while conditioning your strands and adding that extra shine.
Tropic Isle Protein Hair Conditioner
Jamaican Black Castor Oil is a great oil that will penetrate beneath the scalp to produce healthy hair follicles and increase hair growth and thickness. Try out all of the different scents they have, including Eucalyptus and lavender!
It seems simple, right? Take a shower and wash your hair daily. Wrong! Washing your hair may seem simple, but you would be surprised how many people do it incorrectly.
Washing your hair incorrectly can lead to scalp irritation, dandruff, and other scalp issues. How often someone decides to wash their hair is a personal choice, although a standard can be set according to lifestyle and hair type. I wash my hair with shampoo once every two weeks and co-wash it weekly to refresh my strands. I can do that because of the products I use and my lifestyle, but that can change with changes in my habits, too. Certain hair types and textures only require washing once a week, while others feel best when washed 2-3 times a week.
Thick, Coarse Hair or Tight Curls and Coils

Image Source: @nadiyaassia
With this hair type, shampooing can be the last thing on your mind since you need to wash your hair no more than once a week or once every 2-3 weeks if your hair does not feel dirty. Daily washing is a bad idea as this would be too drying for your hair.
Image Source: @naturallynoreen
Try co-washing your hair with water and conditioner or water wash to refresh between washes. Water washing means you massage your scalp using water, not shampoo, cleanser, or conditioner. Some people do this in between their co-washes and shampoos.
Medium Curls and Waves

Image Source: @carla_rautenbach_
You can afford to shampoo once a week. If you skip a day or two, no need to worry because your curls will look great with a little refreshing. Curls can work well when they have a small amount of oil. You may need to co-wash in between shampoos if you work out frequently. You can also water wash between co-washes.
Image Source: @nanipagex
Fine Curls and Waves

Image Source: @sallieoleta
With a fine texture, your hair may seem oily by the evening, mainly when you use styling products daily. Depending on your scalp, you may find that co-washing makes your hair appear oily the first few times you do it. Experiment with co-washing over time, and you may find that the oiliness subsides. If it’s not for you, try to prolong the time between shampoos using dry shampoos or sticking to light stylers and refreshing with water rather than a product. At the very least, reduce daily shampoos and minimize your wash days to once every 2-3 days.
Of course, your hair type is not the only contributing factor to how often you should wash your hair. For example, your porosity and your city’s water quality will also affect what might be best.
Image Source: @deliagorenco_
There is never one correct answer regarding hair care – which can lead to confusion. We constantly get questions on this topic, like this one from our reader posted this question in Curly Q&A:
“How often should I wash my hair? I usually wash my hair once a week, my hair doesn’t stink, it doesn’t feel dirty, it doesn’t look dirty…..I don’t really like it. Also, I wouldn’t say I like to do anything like twisting or just anything new until the day before I wash my hair or the day I wash my hair (Saturday). So is washing it once a week necessary?” –NaturalDude
When Should You Wash?
No, washing weekly is not necessary for everyone. That weekly standard is for people who find it fits into their lifestyle. Here are three easy rules to guide you towards a wash day decision.
1. Wash when hair is dirty
There is no need for a wash day schedule just because we are used to one. Wash your hair when it is dirty, and that can be anywhere from 1-3 weeks for some, although for many, two weeks are just fine when you have oily hair. “Washing” means cleansing with a shampoo or cleansing conditioner, not just re-wetting hair and running conditioner through it. Many run conditioner through their hair to refresh it and to keep it going until cleansing is necessary. Some months may require more washing (when you are working out more, swimming, etc.), so do not need to stick to a wash schedule if it does not work for you.
2. Wash when you have buildup
The buildup is not always dirt. Oftentimes it is product buildup. Like putting hair in twists the day before wash day, I do something similar when using silicones. I know it will cause buildup by day two, so I do not use it until I wash my hair. I don’t want to walk around with buildup for a week, so I schedule certain hairstyles according to my wash schedule.
3. Experiment with washday schedules
The best way to determine if two weeks would be a better fit for you is to try it. If washing weekly is too much, stop and go longer, like a week and a half or two weeks. Going longer than that may be such a great idea, but knowing that just because you are not washing so often does not mean you cannot wet your hair and moisturize it. Do not lock yourself into a regimen out of habit but more out of a fit into your life. If your hair is not dirty, go an extra week and see how it fares.
This article was originally published in 2011 and has been updated for grammar and clarity.
Moisture is our curls’ life force. Our hair thrives off the proper balance of moisture and proteins, and despite knowing that we have to keep this delicate balance, it is hard to maintain. Nature’s source of moisture is water, but many are still unaware of the importance of water in a curly girl’s regimen. Some are under the impression that oils moisturize hair, but they do not; they seal moisture in. Hair moisturizers are big business — however, many on the market have tons of emollients and oils but lack the water. The best moisturizers are water-based, so if you are suffering from dry hair, ensure water is a main component of your moisturizing regimen.
Some are under the impression that oils moisturize hair but they do not; they seal moisture in.
I love water and use it as my main moisturizer with only a hint of lavender oil, but many curly girls prefer those moisturizers with a little more oomph to bring their hair back to life. Moisturizers are excellent for revitalizing second, third, and even fourth-day hair, so jumping back into the shower is not the only way to revive those strands, and not everyone chooses to go the DIY route for a moisturizer. Spray leave-in conditioners are great for looser textures and fine strands that become easily weighed down. Lucky for us, the hair care market has flooded us with options for already-made moisturizers, though it can be challenging to find the right ones, so we are sharing some of the best liquid moisturizers (water-based) that curly women love.
1. Mielle Organics White Peony Leave-in Conditioner

A holy grail amongst many curlies, it’s known to seal in moisture, smooth the cuticle, and tame frizzies and flyaways. It’s great for natural and transitioning hair and protects from heat damage. It won a NaturallyCurly Best of the Best Award for Best Leave-In Conditioner as voted by thousands of NC community members.
2. RENPURE Coconut Whipped Creme Leave-In Conditioner
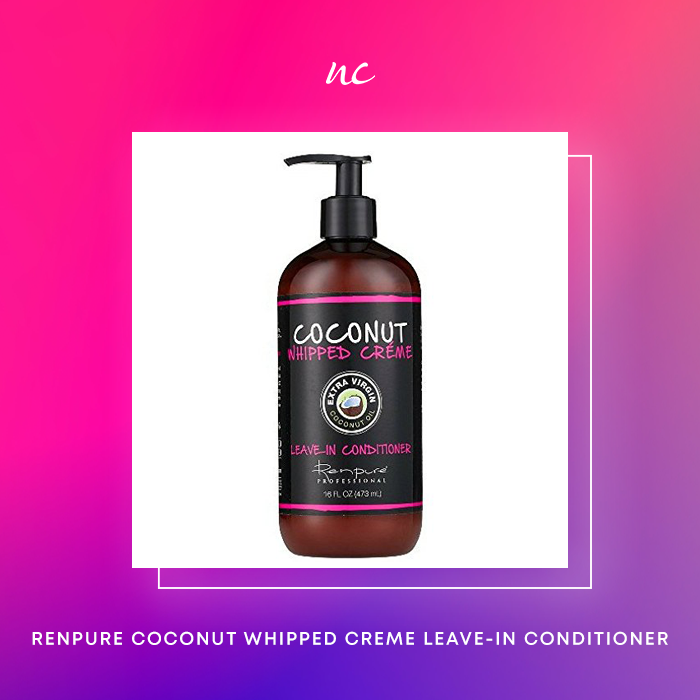
With over 17,000 reviews on Amazon and a 4.5-star rating, curlies have used this product for years as a lightweight solution for dryness and frizz. The number one ingredient is water, but this is not a cone-free product, so Curly Girl Method followers should opt for a different leave-in.
3. SheaMoisture 100% Virgin Coconut Oil Daily Hydration Leave-in Conditioner

This lightweight, milky leave-in refreshes with a sweet coconut scent that softens hair and improves styling manageability without leaving behind product buildup. 100% extra-virgin coconut and shea oils, coconut milk, and acacia senegal combine in this restorative formula that rehydrates hair, detangles, and acts as a barrier against heat while reducing frizz.
4. Aunt Jackie’s Curls & Coils Quench! Moisture Intensive Leave-In Conditioner

This is not a spray formula, but has a light, watery consistency that leaves hair slippery for easy detangling thanks to ingredients like aloe and marshmallow root. Type 2 Wavies, Type 3 Curlies, and Type 4 Coilies alike love the moisture they get from this leave-in. Just know that this has a thin, watery consistency, so if you love a thicker moisturizer, this will not be it.
5. As I Am CocoShea Moisturizer Hair Spray

This unique moisturizing hair spray will delight your curls and coils while protecting them from UV rays. Water, coconut oil, and shea butter will protect, soften, and seal in moisture with this well-loved leave-in treatment.
6. Curls Lavish Curls Moisturizer

Water, glycerin, emulsifiers, silk amino acids, and emollients make up this excellent second-day curl refreshing moisturizer. Get frizz-free curls without sulfates, silicones, parabens, or mineral oils.
7. Soultanicals Hair Sorrell Knappylicious Kink Drink

Looking for the perfect curl refresher to perfect your twist out? This moisturizing blend of hibiscus leaves, sweet ginger, agave nectar, and ‘superfruit’ sea buckthorn gives you a fruity, nourishing tropical hair treat! Perfect for warm summer days, this hydrating blend will transport you to exotic locations with every spritz.
8. OBIA Naturals Curl Hydration Spray

A pH-balanced hydrating spray to detangle and impart shine on thirsty curls. It has water, vegetable glycerin, argan oil, rose, and coconut oil, aiding in a powerhouse moisturizer that will not leave buildup or residue.
9. Oyin Handmade Juices & Berries

Water infused with shavegrass leaves, lavender buds, nettle leaves, and chamomile flowers, this oil-free moisturizer by Oyin is wildly popular. Your thirsty curls, coils, and waves feel therapeutic effects with the perfect blend for a daily pick-me-up without the weight.
10. adwoa beauty Baomint Leave In Conditioning Styler

Water is the number one ingredient of this minty moisturizer, yet it has a creamy consistency for those of you who prefer a thicker formula. This recently launched product has quickly become a Holy Grail for being exceptionally moisturizing. And if it’s new to you, you can buy it in a mini-size to try it out! We love a mini-size.
What’s your favorite water-based leave-in conditioner? Let us know in the comments below.
This article has been updated with new links and products.
It was not long ago when people were unfamiliar with good alcohols. The perception was that all alcohols are drying to one’s tresses. When the natural hair revolution exploded, we became educated on what our hair actually needed. It is no secret that our hair needs different care than our straight-haired sisters. Becoming educated on the ingredients in hair products is essential in keeping them moisturized, healthy, and strong. You save time and money when product trial and error consistently fail. Now, before we assume, I will explain the difference between good and bad alcohol.
Are All Alcohols Bad For Hair?
No, they are not, and it is good that people are beginning to learn the differences. Doing a little layman’s research is all it takes, but we know you want the 411 on them, so we decided to become super sleuths and do the work for you. For curlies, most short-chained alcohols are considered bad, as they have very few carbon atoms in their backbones, meaning they are liquids that can act as solvents and dissolve the natural protective oils in your skin and hair.
So-called “Bad” Alcohols
I call them so-called bad because they can have limited benefits for curlies. Short-chain alcohols are often used in some hair products for their drying effect. They evaporate quickly, which may be helpful in some regard, but that drying can whisk away the moisture that your hair needs. It appears they are ideal for looser textures like wavy hair and may be used sparingly for tighter textures. They are also used in styling products to ensure proper spreading of the products onto the hair.
- Ethanol alcohol
- Ethyl alcohol
- Propanol alcohol
- Alcohol denat.
- Isopropyl alcohol
- Isopropanol alcohol
- Benzyl alcohol
All of these alcohols have similar functions. In shampoos and conditioners, these alcohols primarily help to mix oil and water and are sometimes antiseptic. These small-chain alcohols are small enough to penetrate the hair shaft and are often the culprit for frizz. Isopropyl alcohol is used to absorb other substances into the hair follicles and is a common ingredient in hair color rinses and the absorption of dyes. Believe it or not, this is a home remedy for removing head lice; some loc wearers use it for that, too.
Good Alcohols
Have you heard of fatty alcohol? Sure you have if you have visited a curly hair care site within the past two years! Fatty alcohols or long-chain alcohols are derived from fat (usually from coconut or palm oil), and they do not act like ethanol or isopropanol.
They have 12 more carbons per molecule, and this higher carbon count tends to make them oilier, which is why they are called fatty.
Read more: All About Alcohols
- Cetyl alcohol
- Cetearyl alcohol
- Stearyl alcohol
- Lauryl alcohol
Image Source: @rizoscurls
These are definitely beneficial to curly hair as they do the following:
- Add moisture by drawing water into the hair
- Add slip for detangling
- Add thickness to a product
They are emulsifiers that aid in mixing water and oil in conditioners and help spread conditioner more easily over the hair.
Alcohols can be used to penetrate the hair shaft, and although they are surfactants, they do not properly cleanse the hair. They tend to be found more in the top five ingredients of daily conditioners and deep conditioners and act as an oily moisturizer that will give your hair a smoother, softer feel by helping the hair cuticle lie flat.
Conclusion
Short-chain alcohols are small enough to penetrate the hair shaft but tend to be drying for textured hair. They are used in some shampoos and conditioners for the product’s spreadability. Because they can allow other substances to be absorbed into the hair follicles, they are common ingredients in color rinses and hair dyes. Fatty alcohols or long-chain alcohols are derived from natural resources like coconut oil and are too big to penetrate the hair shaft.
Their larger carbon makeup causes them to be oily, so they are mostly used for emollients in hair conditioners and deep conditioners. They aid in detangling by giving a product more slip and helping the water and oil mix and not separate in some products. They both serve a purpose, and even the bad ones need not be used sparingly for specific styles. Seeing the full picture should allow you to make better hair ingredient choices and keep your tresses moisturized and healthy.
If you’re still looking to skip using alcohol in your products, check out our list of alcohol-free mousses you can use on your curls, coils, and waves.
Hair porosity does not receive the same attention as other hair characteristics like length or curl pattern, but it is essential to truly understand your texture.
Porosity is your hair’s ability to absorb and retain moisture, oils, or chemicals like color. Low, medium, and high are different degrees of porosity. Due to damaging habits such as mechanical manipulation and color treatment, many naturals deal with high porosity hair.
Why porosity matters
Low Porosity – the hair cuticles are tight and resistant to opening for water and other forms of moisture. Women with low porosity often complain of products merely “sitting on their hair.”
If your hair has low porosity, check out the Maximum Hydration Method for moisturizing your hair.
Medium (Normal) Porosity – the hair cuticles are raised enough to readily absorb moisture, oils, and chemicals. Normal porosity hair tends to hold moisture, shine, and absorb color and chemicals better than low or high-porosity strands.
High Porosity – the hair cuticle that is highly raised or even chipped and, therefore, quickly absorbs moisture. The downside is that because it’s raised and remains raised, you can lose the moisture just as quickly as it was absorbed. This hair type is often damaged by harsh chemicals, dyes or bleach, high heat, or harsh shampoos that strip the hair. Because the cuticles are aggressively raised, the strands catch onto each other and become easily tangled.
5 Ways to Treat High Porosity Hair
1. Protein treatments
Incorporating protein treatments in your regimen is important for high-porosity hair to gain strength and not break as frequently. Often, highly porous hair results from damage, so if you haven’t incorporated protein, it’s time to start. Highly porous hair has holes in the hair shaft; protein temporarily fills those holes and strengthens the hair. It’s like patching a tire. Protein treatments are usually advised to be used monthly. For an extra boost, you can also use light protein treatments every few weeks in between the monthly heavy protein treatment. Remember that protein is not a moisturizer and should not be treated as such.
2. Deep conditioning

This should be done following every wash. Remember to slather on generous amounts and heat it! If you do not have a hooded dryer, do not fret. Covering your hair with a plastic cap or a warm towel for 15 minutes will suffice. I often leave my deep conditioner on overnight and rinse in the morning. Find a thick, deep conditioner like SheaMoisture Raw Shea Butter Deep Treatment Masque. I love this because it really brings my hair back to life.
3. Sealing with butters or oils

Butters and oils can help seal in the moisture that your hair soaks up without releasing it back to the air. Shea butter and olive oil are both heavy and great for sealing. Since olive oil is one of the few oils that penetrate the hair shaft, this would be a great option to use as a sealant.
4. Using heavier products with natural oils
Heavy products will reinforce your sealing from the butter or oil and help compensate for the missing protective layer. Check the ingredients label of your products to see if heavy oils like olive, castor, or avocado oil are listed in the top five ingredients.
5. Apple cider vinegar and aloe vera
If your hair is too fine or doesn’t respond well to heavy oils and butters, try apple cider vinegar (ACV) and aloe vera. Both ACV and aloe vera will work to adjust the pH balance of your hair. Rinsing with the slightly acidic ACV will help flatten the cuticle and seal in the moisture. Some naturals add aloe vera gel or aloe vera juice to their leave-in conditioners or spray bottle solutions.
This article was originally published March 2014 and has been updated for grammar and clarity.
Most curlies, wavies, and naturals are terrified of getting their hair cut because there are so many horror stories. Even if you don’t have one, you have heard tear-filled testimonies describing the disastrous cuts they have received under the care of some stylist who is not-so-qualified or inexperienced with curly hair. Curly hair is not like straight hair, so when stylists try to use the same techniques, the result is uneven, chopped up, unnatural cuts that look like your 4-year-old niece took matters into her own hands. Cutting wet curly hair does not allow the stylist to see where your curls will naturally fall, so having your curls cut in this state will not allow you or the stylist to see the true desired shape.
The Relationship Between Curlies + Haircuts
An alternative to stylists who prefer to or primarily style straight hair is the curly salons that chop into your hair using carving and slicing techniques that are supposed to debulk or thin out your hair. These high-priced techniques deform the curl structure and make your ends frizzy and ripped. You end up with fishhook strands, and it grows out horrible! This is the main reason many natural, curlies, and wavies have begun doing their trims and cuts, and although we do a great job, it’s nothing like going to a professional and getting the royal treatment and the perfect cut. If you are dying for a new style and have no clue what to do, you may want to try the DevaCut.
Image Source: @kait_touch_this
What is a Devacut?
The DevaCut was created by the Devachan Salon and is a special technique for cutting curly, wavy or coily hair. The cut is more about making each curl look its best and not just a way to “tame” the curls. The cut is created on dry hair so the stylist sees how each curl will fall and how each curl is shaped. You determined your style after you consulted with your stylist before the cutting process. Don’t fret if you aren’t in NYC, where the Devachan Salon is, because you can find salons and the DevaCut throughout the US through My Deva Curl. You can use our Salon Finder if you want to read reviews of certain stylists and salons from other curlies.
The cut is primarily for women who have a some sort of curl definition and wear wash and go’s

Image Source: @wandamulzac
Women seeking a DevaCut are strongly advised to consider that the cut is primarily for women with some curl definition and wear wash-and-gos. Because the average curly has more than one texture, cutting the hair in a dry, wash-and-go state allows the stylist to see how the various textures naturally fall and mold the desired shape. If you frequently wear your hair in stretched styles (e.g., twist outs, braid out, flat iron), then this method may not be the best option because there is a likelihood that your shape will be uneven in a stretched state. If you are a wash and go curly or coily, straightening before cutting may not be the best option because when the hair shrinks, the integrity of the shape may be compromised.
If you feel that a DevaCut is not for Type 4 hair, this is not true for all Type 4 textures. Erica showcases a transformation for a client at CrosscoSalon in Plano, Texas, where she defined her Type 4 or Z-pattern texture.
Image Source: @crosscosalon
If you are newly natural or new to being a wash and go curly or natural, I highly suggest mastering your technique before receiving a DevaCut. For some people, wash and go’s do not wash and go, so mastering the technique where you are satisfied with the results is a great base before receiving a cut.
Are you considering a DevaCut? Have you received a DevaCut? What was your experience?
All protein treatments are not created equal, despite whatever the packaging may tell you. Curly, coily, and wavy hair relies on a perfect balance of oils, nutrients, moisture, and proteins. Proteins are large molecules consisting of amino acids that our bodies and cells need to function properly, according to the Owner of Medical News Today, Christian Nordqvist. Proteins play a role in virtually every biological process, including hair. Keratin, which hair is made of, is a strong protein that can break down with sun exposure, wind, pollutants, daily maintenance, manipulation, heat tools, and chemical treatments like permanent color. This is where protein treatments help temporarily repair the hair strands rather than just using a standard repairing treatment.
Image Source: @hairbytashi
Protein treatments add strength and resiliency to damaged hair by attaching hydrolyzed proteins directly to the hair follicle and hardening the cuticle layer. If there are holes in the hair cuticle, it will fill those holes or gaps while also placing a barrier around the hair shaft to lessen further damage. Most protein treatments are conditioning treatments. They can come to be a deep conditioner, light, or reconstructor (heavy). Several types cater to your specific needs, but we came up with the top eight that will give you the best treatment for even the worst type of damage.
Read more: 20 Protein Free Hair Products for Protein-Sensitive Hair
1. ApHogee Intensive Two Minute Keratin Reconstructor

You almost cannot discuss protein treatments without mentioning ApHogee. Water, emulsifiers, fatty alcohols, and hydrolyzed proteins make up this hugely popular protein treatment to prevent breakage and lessen split ends while protecting the hair and the body. It is a concentrated blend of keratin amino acids, oils, and vitamins for bleached, tinted, or chemically straightened strands.
2. Aphogee Two-step Treatment Protein for Damaged Hair
Another favorite of curly girls, this two-step treatment will rebuild the hair structure with its unique formula of magnesium and modified proteins. A powerful protein treatment will restore your hair’s elasticity while softening those brittle and dry strands damaged by chemical services and heat. It even helps to remove mineral deposits from swimming pools and hard water.
3. Tropic Isle Living Jamaican Black Castor Oil Protein Conditioner
Another favorite, and for good reason, this Black Castor Oil Protein Conditioner will feed your hair with a nutrient-rich formula that will rehydrate and strengthen your damaged strands. This quality treatment restores your hair’s softness, manageability, and shine.
4. Briogeo Don’t Despair, Repair! Deep Conditioning Mask

A deep conditioning protein treatment, Briogeo Don’t Despair gets much love from curly girls. This intensive deep conditioning treatment delivers an optimal blend of nutrients, vitamins, and natural oils that restore and replenish damaged strands with 95% naturally derived ingredients. This mask does not contain parabens, phthalates, sulfates, artificial fragrances, dyes, or gluten.
5. Creme of Nature Argan Oil Intensive Conditioning Treatment
This reconstructor by Crème of Nature is an intensive moisture infuser that strengthens and prevents further hair breakage. Hair is left softer, silkier, and full of body. Perfect for color-treated or chemically-straightened hair.
6. SheaMoisture Jamaican Black Castor Oil Strengthen, Grow & Restore Treatment Masque
Utilizing ingredients like Jamaican Black Castor Oil, Shea Butter, Peppermint, and Keratin this mask can help restore and grow deeply damaged hair in less than an hour. This mask should be a go-to if you have experienced the backlash of over-straightening and chemical treatment to provide your hair with what it needs to bounce back.
7. tgin Miracle RepaiRx Curl Protein Reconstructor
If you’re looking for a restorative protein treatment to strengthen hair from the inside out, look no further than the Miracle RepaiRx CPR protein treatment. This miracle formula promotes hair growth and a healthy scalp by helping reduce breakage, shedding, and preventing split ends. This can be used over 4 to 6 weeks and can be used on wigs, weaves, and extensions.
8. Ouidad Deep Treatment Curl Restoration Therapy
The Ouidad Deep Treatment Curl Restoration Therapy is an intensive conditioner that restores curl hydration, shine, and health to your strands. Added heat from wearing a processing plastic cap, mixed with the proteins and amino acids drive this formula deep into the hair’s cuticle for serious rejuvenation. Gain bounce, luster, and highly conditioned curls.
Before using a protein treatment, ensure you understand how they can work in your hair.
Read more: How to Fix Protein Build-Up
Locs are beautiful. They are chic, hot, and regal, and no matter how you wear them, they draw attention to you. Many are noticing how versatile they are as people get creative with color and accessories to jazz them up. Locs have continued to gain mainstream appeal with celebrities like Chloe and Halle Bailey, and Megan Good sporting them in an array of styles. They have versatile styling options just like loose natural hair whether you want to create space buns, ponytails, or cornrows. As we’re inching into the holiday season, the updo is going to take center stage which means it’s time to get creative with your locs.
Take a look at these 10 stunning and easy-loc updos that we find perfect for casual wear and special occasions.
1. Braided Loc Bun
2. Elegant Fall Hairstyle Updo
3. CrissCross Bun Updo
4. 1940’s Loc Updo
5. High Top Layered Bun Ponytail
6. Simple Goddess Loc Updo
7. Loc Updo With Flexi Rods
8. High Ponytail With Side Swoop
9. Sleek Bun
10. Braided Updo
Interested in finding the best way to style your locs? Check out our article “Best Products for Locs” to help you out.

Pictured: SimplyCyn
While many curly, coily, and wavy girls still look to hair texture or curl pattern as a guide on hair products, knowing your hair’s porosity is a far more important indicator on how to care for your hair. Hair porosity is your hair’s ability to absorb and hold onto moisture. There are three types: low, medium and high, and each have its challenges. While it seems rather simple to understand, there is confusion on how to figure out your hair’s porosity and what products and techniques may be ideal for your hair. Today we are going to delve into mishaps to avoid when caring for low porosity hair. Not sure what your hair type is? Take our quiz to learn your porosity.What is low porosity hair?
Low porosity means your hair strands have a tightly bound cuticle layer that lays flat and tends to repel water. Depending on your texture, low porosity hair can be shiny and tends to be stubborn with chemical processes. If your hair is low porosity it can become high porosity over time with more mechanical, thermal, and chemical damage, so moderation and trims are important. Here are a few things to remember on what not to do if you have low porosity hair.1. Do not forgo shampoo
Low porosity hair is more prone to product buildup. Solely using cleansing conditioners or co-washing more than shampoo may not be the best regimen for low porosity hair. If you figure you have low porosity hair and suffer from buildup, try a clarifying shampoo and incorporate shampoos over co-washing to see if that makes a difference. Also, shampoo slightly opens the cuticle for optimal deep conditioning after so do not rely on co-washing. Read more: Top 30 Sulfate-Free Shampoos2. Don’t skip the heat with your conditioners
Holding onto moisture is not the issue but getting it in is. Try using heat caps and hooded dryers for deep conditioner. They are great tools to help certain ingredients adsorb onto the hair shaft and makes your curls, coils, and waves feel softer.3. Don’t use leave-in conditioners too often
Traditional leave-in conditioners are usually formulated with proteins to help strengthen the hair cuticle, so your hair might become stiff from protein overload. Consider using or alternating your leave-in conditioner with a lightweight moisturizer or hair milk with humectants for soft curls, coils, and waves between wash days. Read more: Avoid Protein Overdose with These Protein-free Moisturizers4. Don’t use heavy butters and oils
Thick butters and oils are too heavy for low porosity hair, especially for those with fine strands. Thick products accumulate quickly, causing product buildup up that leads to dryness, especially with multiple applications between wash days. If you like sealing your hair at the end of your regimen and refreshing your hair through the week, then consider light oils and light refreshers to rejuvenate your curls. Read more Top 15 Products for Low Porosity Hair How to Moisturize Your Stubborn, Low Porosity Hair This article has been updated for grammar and clarity.
Curly, coily, and wavy girls always have to be on the hunt for the hacks that help maintain their natural texture. A nighttime routine is vital to ensuring you maintain frizz-free and tangle-free tresses while preventing the moisture from whisking away while you sleep. I have been keeping satin or silk scarves in my hair arsenal all my life. It is a well-known fact black women tie up their hair at night whether relaxed or natural. Scarves keep hairstyles intact, smooth, and ready for morning styling.
Satin and silk scarves, bonnets, and pillowcases help keep your curls frizz free and full of volume while you sleep. The bottom line is satin or silk is the only way to go for nighttime care but which of the two is actually better? Satin or silk?

Image: @daynabolden
What is silk?
Silk is an animal protein fiber produced by certain types of insects for building cocoons and webs. Creepy right? Who would imagine something so refined and beautiful would come from bugs, but it is true and fascinating. According to Today I Found Out, larvae produce silk and although many insects produce silk, the mulberry silk moth is the main insect used for the commercial silk industry. Silk is breathable, comfortable, one of the softest fabrics, and highly prized material.
What is satin?
Satin is actually a weave and not a natural fiber like silk. Fiber is the actual thread from which the material is made and weave is how you make it. Traditionally, satin will have both a glossy side and a dull side. It is made using combinations of other fabrics like nylon, rayon, polyester, and even silk. A popular stain is charmeuse, which is a man-made luxury fabric (polyester) from finely woven material.
The differences between silk and satin
The biggest difference between the two is that silk is a natural fiber and satin is a weave. Satin can be created by used silk or other materials. Silk comes with more strength and will have a more shimmery appearance compared to satin’s glossy surface with a dull back. Both have their backings from China but silk is harder to produce, as a single thread requires silk from thousands of silk worms. This makes silk much more expensive than satin which comes from synthetic fibers.
Which is better for pillowcases, bonnets or scarves?
Satin will be much cheaper than silk but if you want to use only a natural fiber, then silk may be the better of the two. Although satin will provide the same benefits as silk when made with the better woven technique like charmeuse satin, check to see the ratio of fillers or fabrics in comparison to the silk in the satin weave to determine just how well it will measure up to silk. For the most affordable yet great quality scarf, bonnet, or pillowcase, using charmeuse satin may be the best choice overall where you will have the best of both worlds while keeping your tresses moisturized, frizz-free, and beautiful.
According to Ebonicurls, the maker of the popular Ebonnet™, charmeuse satin provides the same benefits as silk with a satin weave finish and is more durable with its floating appearance that drapes well. The satin pillowcase, bonnet, and scarf will maintain the natural oils in your hair and allow for less friction between your hair and other surfaces such as a cotton sheet or pillowcase.
Read next: 10 Satin And Silk Pillowcases For Curly Hair
Have you tried both silk and satin? Which worked better for you?
This article has been updated for grammar and clarity.

Image:@alittlealeja
Curlies in hot, dry climates may find themselves fighting with dry, brittle strands this season. Heat may be a contributing factor to the dryness of your hair, but finding the true culprit can take some digging. Blckduck needed some help on summer dryness and inquired in our Curly Q&A for assistance.Question
How can I keep my hair moist in the summer heat? I have tried coconut oil to no avail. I have tried the avocado mask as well as the banana/honey/olive oil mixture, but my hair still gets dry after being outside. I do try to wear a hat, but I don’t want to do that too often for fear of damaging my hairline. Also, I work out 5 to 6 days a week.Answer
First, you may want to incorporate a moisturizer. Oils seal in moisture, but they do not provide moisture. Most oils will help to retain the moisture that is already in your skin and hair, but it cannot moisturize on its own. Summer can be drying with the intense heat, so here are a few tips for keeping your hair moisturized all summer long. Hair masks are a great start, but these additional tricks will help you hydrate your hair.Water is the best moisturizer
Nature provides the #1 source of moisture for our bodies and our strands. Nothing is better than water, and while many mistakenly assume that oils are moisturizers, that simply is not true. Humectant ingredients such as aloe vera, honey, and glycerin are great for attracting moisture and staving off dryness, so check your ingredient lists. You also need to use water-based moisturizers (water will be at the top of their ingredient list”> or simply apply water directly to your hair before adding an oil or serum to seal in the moisture.Use a travel size bottle
Carry around a small spritz bottle of moisturizer to keep hair pliable throughout the day, as sometimes we need that refresher to keep curls hydrated and soft. I always carry one, especially in the summertime. Fill it up with:- water
- leave-in conditioner (use more or less leave-in depending on what your hair needs”>
- a few drops of your favorite oil
Spritz & seal at night
Whenever I notice my strands are getting thirsty, I make sure to spritz my hair with a mix of distilled water and lavender and massage it in before heading to bed.Seal hair before adding styler
Some of us follow the LOC method (liquid+oil+cream”> while others love the LCO (liquid+cream+oil”> method. Try adding a sealant (oil”> before you add your styler to help seal in your moisture to increase your hydration levels.The summer elements can be very drying
Sun, wind, chlorine, and salt water can all wreak havoc on your strands. We tend to be outside more and engage in water-play in the hotter months, so take precautions by protecting your hair when you can. Wear sun hats, apply conditioner to your hair before swimming, and use hair products with UV protection. All of those tips will help keep your hair more moisturized.Switch to a summer regimen
Many of us switch from our heavier products to lighter ones in the summer months. Quite a few curlies switch from gels to styling creams, which tend to be a more moisturizing formula for stylers. The lighter stylers may not give you hold that will last for a week, but their water-based formulas will be more moisturizing.Refresh hair during the week
Since you work out frequently, you may need to refresh your hair once or twice a week to remove any products that were sweated out and to remove scalp buildup. Rather than using shampoo, wash with a gentle co-wash if you are going to cleanse several times a week. Never be afraid of water for your hair and scalp, and know that water will be your very best friend this summer to keep hair moisturized.
Our scalp is skin, but it is some of the thickest skin on our bodies, and it carries more blood than the rest of our body does. It also contains sebaceous glands that produce sebum, and that sebum protects the hair. Now, we worry about keeping our hair clean, but we also have to keep our scalp clean, and according to the Mayo Clinic, there are even forms of hair loss attributed to scalp health or lack thereof. A problem some curly, coily, locked, and wavy girls may face is mildew or fungus.
Have you ever experienced mildew in your hair before? Read more to learn how to avoid and remove mildew in your hair.
What does mildew look like in hair?
Mildew is a surface fungus, often gray or white in color, and often found in damp or moist areas. It gives off a musty smell, and it can be found in your house, on fabrics, and, yes, even your hair and scalp.
Why does mildew occur in hair?
Mildew often occurs in the hair and scalp when wet hair is left unable to dry for extended periods of time. The moisture that gets trapped in the hair can breed mildew, and hairstyles more prone to this would be buns, ponytails, updos, or even locs, although people who sweat heavily in their hair may also suffer from this. The air needed to dry the hair properly is not able to get through to the wet hair, and often they notice something is wrong with the musty smell.
How to prevent mildew in hair
Since this is an issue for a professional, I tapped on the shoulder of American Board Certified Haircolorist and hairstylist Monaé Everett, who advises that the key to avoiding scalp mildew is to allow your hair to dry completely after shampooing, wetting the hair, or sweating.
How to prevent mildew if your hair is really thick
“People who have very thick hair or sweat excessively on the scalp have to take special precautions to fully cleanse and dry their hair” says Everett. “It is more reliable to apply heat to dry very thick hair than to allow hair to dry overnight.”
How to prevent mildew if you sweat a lot
“If you sweat excessively on your scalp, consider cleansing your scalp with an astringent such as Sea Breeze.” Everett shares. “Sea Breeze removes dirt, certain types of dandruff, and oil from the scalp and skin, without the worry of over-drying the scalp. Simply spray it on the scalp, and rinse.”
How to prevent mildew in braids or extensions
“Sea Breeze spray is also a great way to cleanse the scalp if you have braids, locs, or sewn-in hair extensions. This method helps those who have a difficult time getting all the way to the scalp during shampoo or those who don’t fully rinse the product from their hair.” Everett also shared other natural scalp cleansers including apple cider vinegar and lemon juice.
How to remove mildew from hair
Clarifying shampoos or medicated shampoos may need to be used to ensure all the mildew is gone, but proper drying of the hair and scalp is essential to fixing it. Here is a common DIY remedy for this problem.
DIY Mildew Hair Removal Spray
- 2 Tbsp. Tea tree oil or 20 drops of grapefruit oil
- 2 cups of water
Mix in a spray bottle, and spray the solution throughout your hair and scalp, especially where the mildew is concentrated. Leave it on for twenty to thirty minutes, and then shampoo your hair.
Adding a few drops of tea tree oil to your shampoo may also help, and I used this myself when I was suffering from dandruff; it worked like a charm. Yes, this is an ugly topic, but it’s a very real one, and if you find yourself suffering from mildewed hair and scalp, then fix the problem by allowing your hair to dry properly. Knowledge is power!
Have you suffered from mildew hair or scalp? What did you do to get rid of it? Let us know in the comments below!
This article was originally published in 2017 and has been updated.
With a medicinal value dating back thousands of years, ginger has been well-researched, with many of its traditional uses confirmed and still used today. Ginger, also known as Zingiber officinale, is from the Zingiberaceae family, which is closely related to turmeric and cardamom. Ginger originated in the tropical jungles of Southern Asia, dating back to over 5000 years ago, and is mentioned in ancient Chinese, Indian, and Middle Eastern writings and prized for its culinary and medicinal properties. The commonly known spice ginger is the rhizome (the underground portion of the individual spears of the ginger plant).
What are the benefits of ginger?
Ginger is loaded with anti-inflammatory and antioxidant properties like beta-carotene, capsaicin, caffeic acid, and gingerols. It is full of vitamins, minerals, anti-viral, circulation-stimulating, detoxifying, digestive, and antiseptic compounds. This explains why it is so widely used for ailments like the common cold, vomiting, motion sickness, nausea, mild stomach upset, pregnancy, and even cancer chemotherapy.
Why is ginger so great for your hair?
In Ayurveda, ginger is highly regarded as a hair growth treatment. There are several components in ginger that aid in hair growth, like magnesium, phosphorous, and potassium. These minerals help stimulate blood flow to the scalp, which encourages restored hair growth. Ginger has an abundance of fatty acids that help with thinning hair, so while it is encouraging blood flow to the scalp it is also preventing thinning hair from turning into hair loss.
Ginger has natural antiseptic properties that provide alleviation for dandruff. Just mix two tablespoons of grated ginger with three tablespoons of olive or sesame oil and a dash of lemon juice. Massage into your scalp and leave in for 30 minutes or overnight before rinsing. This mix should be used at least three times a week until dandruff has been remedied. Besides helping with hair growth, ginger is also known to help with eliminating dandruff and adding sheen.
Ginger for thinning edges
Thinning edges are a common problem and can occur from genetics, hormones, certain medications, or excessive styling. Overuse of ponytails that are pulling too tightly, and slicking down edges with gels that contain drying alcohols, wig caps, and glues can also damage your delicate edges. With the blood-circulating properties in ginger, you can turn a nightly massage into something more than just a relaxing way of drifting off to sleep. You can simply squeeze the juice from the ginger and massage it into your edges with jojoba oil or avocado oil. This should turn into a nightly routine to encourage the hairs to stop breaking and to regrow those edges. Keep in mind that ginger does two things for thinning edges: stop the hair from falling off even more and stimulate the hair follicles to grow at their own optimal speed. It does not make it grow faster, but it increases blood flow to the scalp to stimulate the hair follicles and encourage growth.
DIY Massage Oil for Thinning Edges
- Ginger oil
- Jojoba, olive, or avocado oil
1. Mix equal parts of ginger root oil with another oil like jojoba, avocado, or olive oil.
2. Massage the oil mixture onto the scalp around the edges gently and in a circular motion.
This can be used on your entire scalp as well. Do nightly until you feel they have grown back fully. There is no need for a lot of the mixture to be used during each application, or you will end up with an oily mess, so use enough to gently massage and not leave a significant residue.
Read next: How to Give Yourself a Scalp Massage
Understand that this will not work if you are still using those techniques that may have caused the thinning edges in the first place, so do not cause tension to your edges while you work on growing them back. If the scalp is thinning due to hormonal problems or medicine then seek the advice of a medical professional on what you can do to revive the problem without interfering with your health. If you are more interested in just using ginger as a hair growth remedy, then I have a great and popular mix below!
DIY Hair Growth Mix
- 1 tbsp. grated ginger
- 1 tbsp. of jojoba oil (or favorite carrier or base oil)
1. Mix ginger and jojoba oil together before applying directly to your scalp and massage in circular motions gently.
2. Allow to sit for 30 min.
You may notice a warming sensation, but nothing to worry about. That means it’s working! Proceed to shampoo and condition.
Are you ready to switch up your hair routine by using ginger for thinning edges? Let us know in the comments below.

1. Argan oil
Argan oil is a light plant-based oil produced by cold pressing from an argan nut from the argan tree, which grows in Southwestern Morocco. It is high in vitamin E, palmitic, stearic, oleic, and linoleic fatty acids and can protect the hair and scalp from UV rays. Argan oil will not only fight frizz but is great for adding shine to dull curls without weighing down your hair.
Why do we love it?
It is super lightweight, so it won’t weigh down your hair. It can be used with a deep conditioner or by itself because it penetrates the hair shaft to help keep hair moisturized. This is why it is ideal for frizz that many face during the warmer months. Argan oil is great for keeping the scalp moisturized and protected from the sun, as we tend to be outside more in the warmer months.
2. Grapeseed oil
This non-greasy, lightweight, and odorless gem comes from the seeds of a grape and while different from grapeseed extract, it has a powerful composition backing it up. Grapeseed oil has vitamin E, linoleic, oleic, palmitic, and stearic fatty acids and excellent at being absorbed into the skin.
Why do we love it?
It is lighter oil than olive oil and coconut oil and will not leave you a greasy mess. Much less expensive than other oils, it has natural conditioning agents that will help soften hair, fight frizz, and add sheen without weighing down your strands or making them oily and will fight free radicals that can be damaging to your scalp and hair.
3. Jojoba oil
Jojoba oil is a wax ester that comes from seeds of the jojoba plant found in southern U.S. and northern Mexico. This oil is unique because it is structurally and chemically similar to human sebum and extremely safe to use. It also has vitamin E, erucic, gadoleic, and oleic fatty acids and has antibacterial and antioxidant properties.
Why do we love it?
It is lightweight, so it will neither weigh down your strands nor clog your pores. It will protect hair from chlorine and saltwater for all the swimming you will be doing this summer.
4. Rosehip seed oil
Rosehip oil is a dry oil that soaks into skin easily and harvested from the seeds of Chilean grown rose bushes. It is chocked full of vitamins, antioxidants and oleic, palmitic, linoleic and linolenic fatty acids. Rosehip oil is a wonderful emollient for dry or mature skin and excellent at aiding in repair and renewal of damaged hair follicles and scalp tissues. Great for restoring hair and skin’s elasticity and protects them both from the sun.
Why do we love it?
This oil is lightweight with a non-greasy feel and absorbs well into the skin, scalp, and hair. It is great for sensitive skin (I use it as a moisturizer”> and will not leave your face or hair feeling greasy during the warmer months. This oil is great for protecting your strands and skin from the blistering sun during the hotter months.
5. Sweet almond oil
One of the lightest drupe oils, sweet almond oil is extracted from edible almonds and is mild and hypoallergenic. A light oil, it fully absorbs in to the skin and gentle enough to be used on babies. It has vitamin E, potassium, zinc and linoleic, linolenic, oleic, palmitic, and stearic fatty acids. It is an ideal sealant, promoter of healthy hair follicles and will add shine to your strands.
Why is sweet almond oil great for spring and summer?
Sweet almond oil is excellent for spring and summer, because it penetrates easily into the skin, scalp, and hair while sealing in moisture and smoothing the hair shaft when applied modestly. It is lightweight and nourishes dry skin and hair well.
Do you have a favorite oil for spring and summer? The Righteous Roots Rx Oil was voted NaturallyCurly’s Best of the Best 2019 best scalp treatment and hair oil, grab yours here.

Question
What type of braids should I get for my natural hair? I’ve never had braids and want to explore. I am going on three months natural (and”> I’ve heard putting braids in will maximize the growth. Which kind of braids should I get?
Answer
First, congrats for going natural. No matter how many have gone before you, this is a personal and rewarding journey that is more than a hairstyle change, depending on what it means to you. A popular way to go natural is wearing braids for maximum length retention. Maximum growth comes from not braids but proper diet, exercise, moisture-protein balance, low stress levels, genetics, and low manipulation. This does not mean you cannot achieve maximum growth by wearing braids while you transition; this is just a reminder that added hair is a style and not a solution for optimal hair growth.
Placing braids in your hair is a great way to transition, but there are rules to follow so that your transitioned hair (that may be fragile and weak from chemical relaxers”> does not become weaker or neglected. Hair that is in braids, under a wig, or in a sew-in still needs moisturizing and cleansing, and when transitioning you must be hyper vigilant about taking care of your curls when it is braided or hidden away. Protective styles only work if you are protecting the hair that is hidden.
Crochet braids, Senegalese twists or braids, or box braids are great styles for transitioning
There are several types of styles to choose from but like the next tip states, you need to be aware of which size will be best.
Steer clear from small braids or tight braids
These can be detrimental to your edges especially, but styles like micro braids are notorious for pulling hair out from the root. They are really not great for anyone, but for a transitioner it can be grave mistake that may cause breakage. The larger the braids the better, as that allows you to reach your scalp and hairs to properly moisturize, cleanse, and allow air to get to your scalp.
Give your hair a break in-between braid installations
Do not take your braids down on a Tuesday and have more installed on a Friday. You need to give your hair a week or longer to breath and rest. It may be a great time for a trim during one of those breaks too, so check your ends and edges to making sure there is no thinning. Never allow a braider to install your braids so tight that you find bumps or have headaches. That means the braid is too tight and you are at risk of thinning or even breakage when you take it down.
Give your hair (during breaks”> some extra TLC
Protein treatments are great for strengthening your hair after a long braid installation. Make sure to deep condition during and after your braid installation. Remember that your hair needs to be cleansed, conditioning, and moisturized whether braided or loose. Never leave your braids in longer than recommended and give your hair enough time to rest between applications.
Read more: Ask Dr. Kari: Effective Protective Styling

Question
Help! I’ve tried close to everything! Hair is still frizzy! Hi! So I’m a 16-year-old Caucasian female! This past year I’ve learned that my hair was super curly! It never used to be that way, but once I hit puberty I noticed it changed and became frizzy and wavy and partly straight still, well now, it’s curly! I want to wear my hair down because I hate having to wear buns and braids all of the time, but the thing is my hair is so frizzy. It is embarrassing if I try to wear it down, and I’ve tried close to everything! Serums, oils, leave in frizz conditioners, gels, mousses, etc. and nothing seems to work! I need help! Is this fixable? I just want to be able to wear my hair down natural!
Answer
Trying to reduce frizz takes new techniques paired with trial and error. First off, knowing why this is happening can be of some comfort so let’s explain why you are going through a hair texture change.
As our body ages we may see some changes in our hair texture. “Hair changes every five to seven years,” said Christo of the Christo Fifth Avenue Salon and creator of the Curlisto line of hair products. Science has not totally figured out why someone with stick straight hair and a rounder follicle can end up with curly hair and a flatter follicle or vice versa from aging, but this is a fairly common phenomenon.

Now here are some tips for reducing your frizz and helping you create beautiful curl definition so that you can grow to love your curls!
How to fix it
- Incorporate co-washing between your shampoos. The whole purpose of co-washing is to keep from stripping the hair of their natural oils, which in turn creates excess frizz. Here are our community’s favorites!
- Apply a leave-in conditioner to your hair before applying a styler, as it will keep the moisture in your hair and also fight off frizz.
- Explore different stylers with various holds. There are cream stylers, cream gels, mousses, and gels. I know you have had some problems with stylers before, but here is where the trial and error comes into play. We all have to find what we like, but if you need some direction here are our Editors’ Choice picks.
- Apply product to soaking wet hair.
- Do not dry your hair with a conventional towel. Use an old t-shirt or a microfiber towel that will not disrupt the curl or the curl pattern.
- Try braiding your damp hair in 4-6 braids at night, this will prevent frizz from forming (from rubbing on your pillow”> while you sleep. Make sure your hair is completely dry before you take down the braids, otherwise your hair may frizz once you leave the house (you can use a diffuser to speed up the process if necessary”>. When you take down your dry braids they will give you a uniform wave.
- Do not touch your hair while it is drying and setting. The more manipulation, the more frizz that will be induced.
What about humidity?
On ultra-humid days, add additional leave-in conditioner or an oil to help weigh down the hair and keep the strands from expanding. Also, those may be the days you choose to rock the traditional bun, messy bun, or even the ninja bun as these three looks look even better with more volume as frizz often gives us.
Frizz isn’t that bad
Another important aspect to keep in mind is that your unique texture may be prone to frizz and there is nothing wrong with that; it is equally beautiful. No matter how much you deep condition, moisturize, and seal, frizz may be a part of your natural texture. It is frizzy when wet and frizzy when dry. Another thing to consider is whether you have heat damage. Heat damaged hair has a chipped and raised cuticle, which expands as an attempt to absorb moisture, so if you straighten regularly, then you may want to stop and be patient for your virgin hair to grow in.
Working with your curls instead of against them is the best way to have frizz-free hair. Co-washing, using a lot of conditioner, sealing your hair’s cuticle and leaving it be when styled will all help in your quest for frizz-free curls when first coming aboard the curly, coily girl ride. It is a fun ride so enjoy!
Has your hair changed over time? Either grown curlier or less curly?
This article has been updated.