Search Results: Rocio Mora

Whether from heat or over manipulation, there are a few ways to find out if your curly hair is truly damaged.
Sometime the hair doesn’t always look damaged, but there are a few things you can look out for that will help distinguish the difference between healthy and unhealthy hair. Here are 7 ways to tell if your naturally curly hair is damaged.
SPLIT ENDS
- Do your curl crushes brag about going a year between trims or a proper hair cut?
They maintain healthy hair all year around. If you notice that your ends begin to split almost immediately after a trim, your hair could be fragile and break off easily. The minimum amount of time before an average person will notice their hair splitting is one to two months after a trim.
TEXTURE
- Have you ever run your finger over a strand of hair? Does it feel a bit bumpy or smooth?
If there is an obvious difference in smoothness on a single strand of hair from root to ends, chances are you have gaps in your hair strand which is a significant sign of breakage. While protein treatments help to temporarily fill in the gaps, sometimes the problem can be fixed internally with proper nutrition and effective hair vitamins.
POROSITY
- While I have mentioned before the importance of knowing your hair’s porosity levels, it is more important to identify whether your hair is damaged or not.
Hair that is highly porous means the cuticle layer is damaged, so your curls aren’t able to properly absorb and maintain moisture. The end result is hair that is dry and brittle. There are a few things you can try to actually tighten the cuticle, along with using products formulated to give you the effect of closing it.
MATTING HAIR
- If you find yourself taking much longer than normal to detangle even when your hair is soaking wet with a slippery conditioner, this could be a sign that your curls are damaged.
This is because the cuticle is lifted in damaged hair, making it harder for each individual strand to slide past each other when combing or detangling.
LOSS & BREAKAGE
- If you notice a lot of hair falling out when detangling, while combing or brushing, there is a high chance your curls are damaged.
Next time you brush your hair, take a look at the strands that your tool has collected. If you notice a root bulb, it could be improper nutrition and an unhealthy scalp. If there is no bulb, chances are your hair has been broken off which signifies weak or damaged hair.
POPPING & SNAPPING
- Healthy hair, when wet, actually stretches if it is gently pulled. Elasticity in each hair strand is normal.
However, if it stretches a bit too much and then snaps or pops, your curls lack protein. On the other hand, if your hair pops right away when you attempt to stretch it, your curls could be too dry and lacking moisture. These are two minor yet important elements in unhealthy or damaged hair.
DULLNESS
- A lack of shine could be a direct cause of improper styling techniques or excessive heat styling.
Another reason why your hair might be looking a little dull could be because of chemical damage like using relaxers or boxed hair dyes that are too strong for your curls.
These are just a few ways to tell if your curls are damaged. Have any other tips to contribute so the rest of us can tell if our own curls are damaged? Let us know in a comment below!
In the naturally curly community, there are several DIY hair masks you’ve heard of floating around the internet–from deep conditioners to protein treatments to moisture masks. Do you know the proper way to apply these at home treatments to get the best results on your curls? Follow along!
1. Ensure that your hair is clean!
Most DIY treatments work best when applied on clean hair. Why? You won’t have to deal with any product build-up–your strands will be free of any previous products applied, therefore allowing your curls to absorb the nutrients as much as possible. You can choose to either co-wash or clarify as long as your hair is clean.
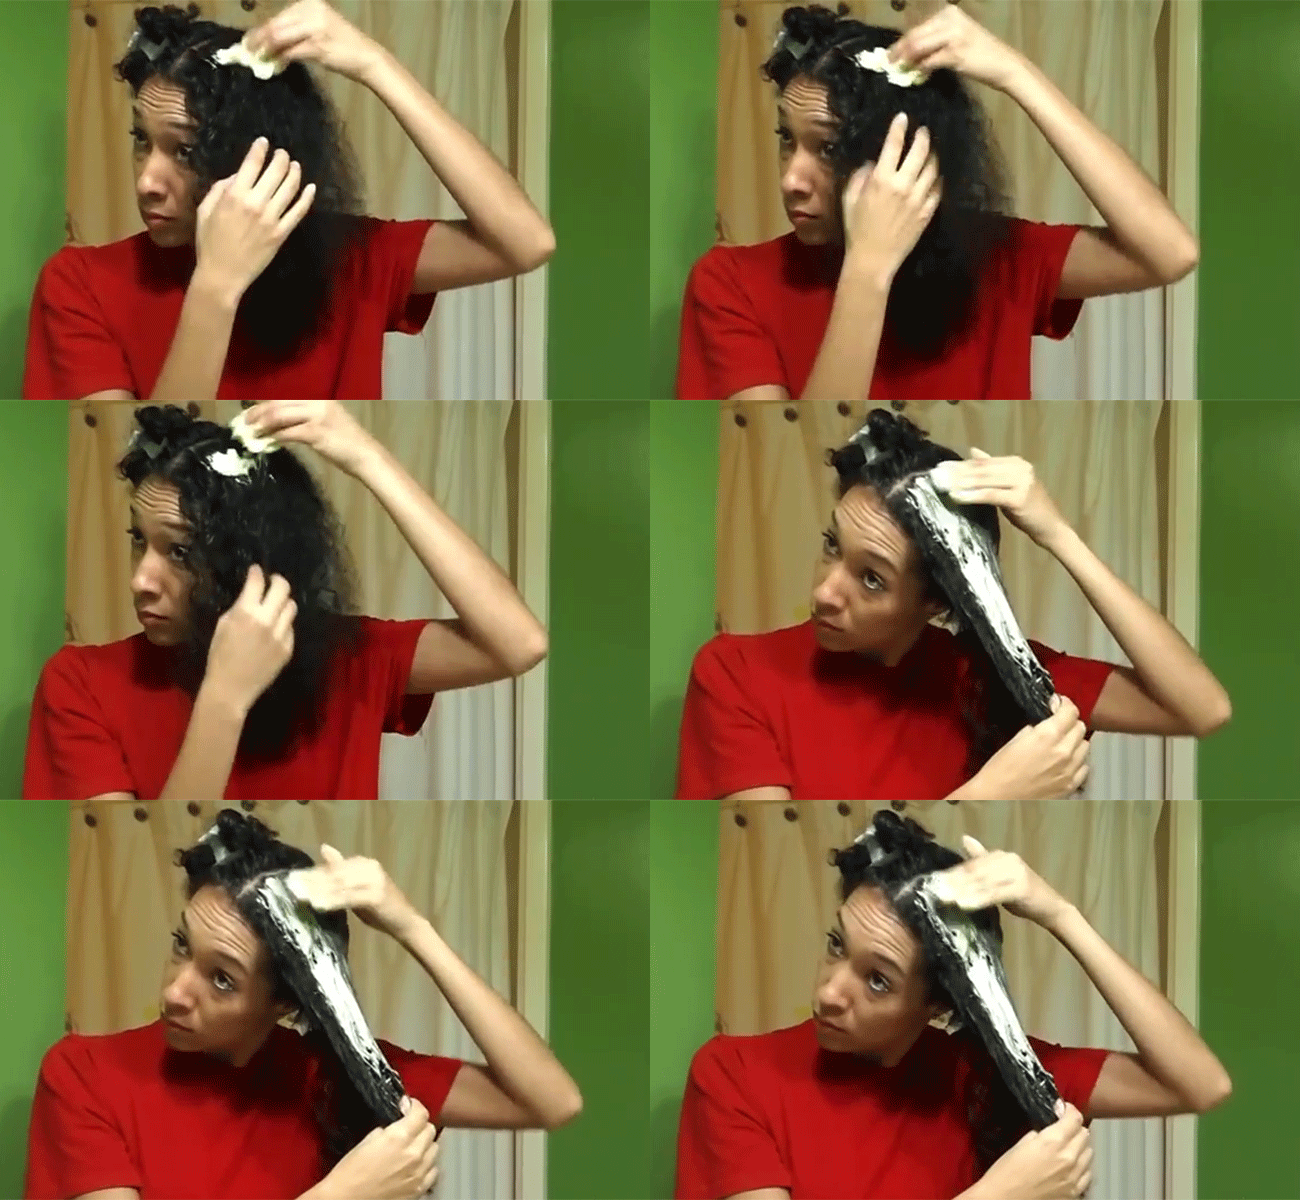
2. Apply your mask to hair in sections.
When working with DIY treatments and masks, it’s easier to apply the treatment only when hair has been separated into different sections because you’ll have less knots to work with at a time. I have fine hair, low density, and a small head. For me, four equal sections work. I secure each section with a durable clip to keep the rest of my hair out of the way when applying the treatment.
3. Wear a t-shirt you don’t mind getting dirty.
There’s a huge chance that things will get messy. Sure, you could probably scoop some of the treatment into a squeeze bottle, but more often than not, you’ll make a mess. It’s best to wear a shirt that you don’t mind getting dirty. I like to apply my DIY treatments using my fingers because it’s the easiest way to detect any knots that need gentle detangling. You can also feel where your hair is most dry or brittle and pay extra attention to those areas when smoothing on the treatment.
4. Start from the roots and work your way down.
While we are looking to achieve healthy and stronger hair, the area at the root is the strongest because it is what is growing directly from your head. Focusing on that area first will ensure that it remains the strongest and will be least likely to break. If you are applying a deep conditioner, start from the bottom and work your way up since it is usually the ends that need the most moisture. Take your time in applying any deep treatment, ensuring that you are thoroughly coating each section and every strand. No curl left behind! After you are done with one section, clip it up and move on to the next.
5. Leave it in for up to 45 minutes so it actually works.
If you are using a hard protein treatment like a DIY gelatin treatment, the duration will be much less since your hair will harden. One thing I like to do is cover my hair with a plastic bag to help trap the heat rising from my head. The heat assists with opening the hair cuticle, which allows for further penetration of the treatment. Another way of indirect heat would be to sit under a hooded dryer.
6. Rinse the treatment out with lukewarm water.
It might be best to work with one section at a time to ensure that you are getting all of the treatment out. Don’t forget to massage your scalp to lift any treatment that has been sitting on the scalp; you don’t want to risk clogging your hair follicles! Rinse your hair until the water runs clear. Most treatments don’t need to be followed with any cleanser or conditioner. Hard protein treatments should always be followed with a deep conditioner to ensure that moisture is replenished!
Do you have any extra tips on applying an at home hair mask?
Subscribe to my YouTube channel, RisasRizos & follow me on Instagram @RisasRizos
If you’re transitioning from damaged hair to healthy curls, you might value the importance of rapid hair growth remedies. I’ve got an unlikely one with a secret ingredient that’s packed with benefits for a healthy scalp and healthy hair.
The main ingredient: Cinnamon
Not only does it help with rapid hair growth, but cinnamon is also a huge factor in preventing hair loss. This powerful remedy stimulates circulation to the scalp by improving blood flow. It’s also packed with essential nutrients that your body–and hair follicle–needs for proper function. Applying cinnamon mixed with other scalp strengthening ingredients will ensure that your new growth curls will be strong, less prone to breakage and growing at a faster pace.
The hair & scalp benefits of cinnamon
- antibacterial
- antifungal
- antiseptic
- anti-inflammatory.
Another fun benefit of cinnamon
Cinnamon has been rumored to naturally lighten your hair. In many cases, you cannot see a difference unless you step out in the sun. Personally, I have never seen a change in my hair color.
Do a patch test, first
It is important that you test a small area first before committing to applying this DIY cinnamon paste to your entire scalp, as with any homemade beauty recipe. Unfortunately, most people who have sensitive skin won’t be able to tolerate cinnamon application to the scalp.
The ingredients you will need to make this cinnamon paste is:
- 1 tablespoon of cinnamon
- 2 tablespoons of honey
- 2 tablespoons of Warm extra virgin olive oil
Mix all of the ingredients together to create a dark brown paste like treatment.
Apply to your scalp in areas that are most prone to breakage or where your hair seems less dense. If you have been experiencing thinning edges or bald patches, focus on applying some of the treatment in those areas. I have fine, low density curls and the area in which my curls are least dense would be the very top of my head and areas surround my face so I make sure to focus there. I then apply the treatment along parts in the different sections of my hair or rather anywhere that I can find a deep part. Once you finish applying the treatment, let it sit for about 20 minutes and wash it out thoroughly with a good cleanser and then afterwards a conditioner.
Try this out around once a week or before the next few washes. Do you have a personal favorite remedy or treatment that helps with hair growth? Let us know in a comment section below. Don’t forget to subscribe to my YouTube channel, RisasRizos!
I recently cut my hair and already, I am missing its length.
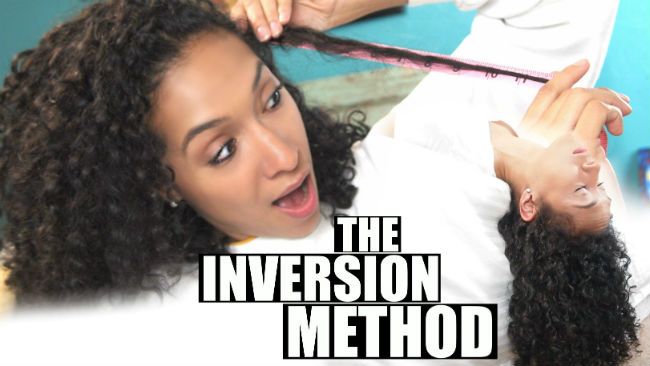
One of my subscribers asked me if I have ever tried the Inversion Method for rapid hair growth and I had no clue what she was talking about. After a looking into it, I was intrigued.
Here’s how it works
- Invert your head for a few minutes for faster rate of hair growth
- Do this method for 7 days straight, then wait a month before trying it again
Basically, the concept behind the Inversion Method is that when you invert your head for a few minutes, you are allowing all of the blood to rush to your head. The idea is that all of the nutrients beneficial for healthy hair will reach the scalp a lot faster, promoting hair growth at a much more rapid pace.
A simple scalp massage already stimulates blood flow to the area to promote hair growth, so inverting your head afterwards is said to boost the results to one inch in one week. Since there have been several success stories, I was really hoping this would work for my curls.
How I did the Inversion Method
- Use Jamaican Black Castor Oil and massaged my scalp for 4 minutes straight
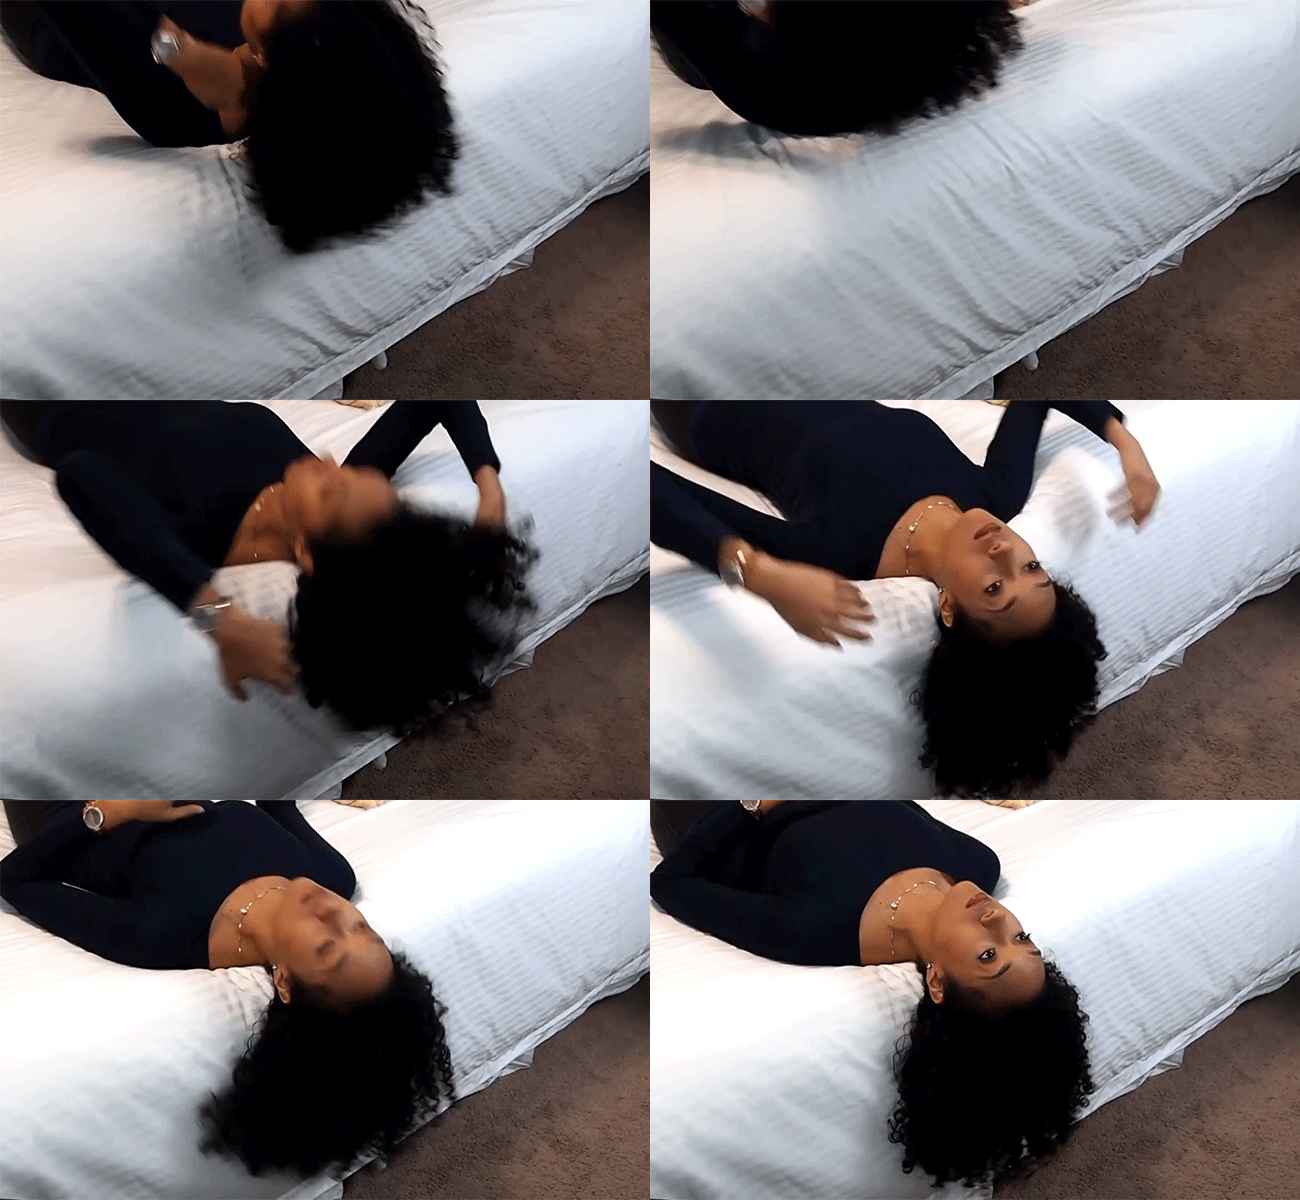
- Lay down and hang my head on the edge of the bed
While there are a few different ways to do this method, I chose to go with the most common. As instructed, I massaged my scalp for a solid four minutes first. Since I typically use Jamaican Black Castor Oil for the amazing scalp and hair benefits, I decided to include it in my massage for this method. After the four minutes were completed, it was time to invert. I did this a few different ways.
At times I would just flip my head down past my knees and just let the upper half of my body hang, while other times I would lay on my bed and allow for my head to hang over the edge.
I felt more pressure at my temples on nights where I had my head hang over the edge of the bed, so I assumed that was most effective in getting the blood to rush to my head. Once inverted, I had to wait 4 minutes.It is important to state that when the 4 minutes were up, I really had to get up slowly so as to not feel woozy. With that being said, I don’t recommend anyone who was pregnant or suffers from migraines or regular headaches to attempt this method. No sense in the risk.
Did it work for me?
Unfortunately, I didn’t really see much difference other than the top left side of my head having grown a little over an inch. I am not quite convinced that the growth came from the inversion method, though. It is recommended to do this method for 7 days straight and once the week has passed, wait a month before trying it again so that your body doesn’t get used to the method. Do I plan on trying this again next month? Probably not.
The first two or three days were filled with hope and excitement, thinking that I’d come out of this week looking like Rapunzel.
It gave me a headache at times and by day 4 though, I grew tired… sleepy. On one night I went to bed and forgot, then quickly got up and went through the steps. Mind you, I recorded the process so I had to set up the camera and lights, too.
For me it was just way too much work for not a lot of change.
Have you ever tried the Inversion Method? What were your results like?
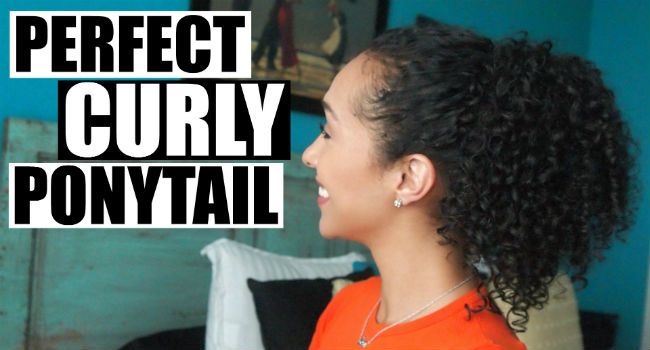
Achieving the perfect ponytail on my fine, curly hair can be a bit tricky.
I used to suffer with frizz while trying to make the ponytail voluminous. Sometimes I’d have little to no definition in my curls and my ponytail looked pretty boring. I have found a way to keep the volume and definition without dealing with frizz.
The best way to keep the definition in your curls is by working with second or third day curls or, in my case, styling my hair on day one and not touching my hair until it was 100% dry. After my hair dried, I scrunched to release the cast and then had a bit more volume that I could work with.
Styling Milk + Edge Control + Light Hairspray
1. I took a small amount of SheaMoisture Yucca & Plantain Anti Breakage Styling Milk because it helps with moisture and slicking my hair back. You can use any leave-in conditioner you favor most to smooth down the hair that will be pulled back.
2. Have lots of flyaways? Use some edge control. I like SheaMoisture Jamaican Black Castor Oil Edge Treatment to keep my edges healthy and strong. If you don’t have edge control lying around, try a light hairspray.
3. I gather all of my hair at the crown of my head to give my ponytail some height.
4. I take a hair tie and wrap it twice. I don’t like for the ponytail to be too tight because my edges would be prone to breaking (no curly girl wants that!”> Depending on the size of your hair tie, you might have to wrap it a third time. Just remember that if it feels too tight–it probably is.
5. Use a soft bristle brush if you want a sleeker look to smooth the hair. Personally, I like my ponytail with some texture. Since I don’t smooth my hair down with a brush for a sleek look, I always end up with bumps in my hair. All I do to get rid of the bumps is tuck them underneath hair that is flat to hide them away! For a bit more volume, I gently pull or tug on my curls at the top of my ponytail.
That is all there is to it!
My curls are always left defined, frizz free and filled with volume which was usually difficult for me to achieve before on my fine curly hair.
Watch my tutorial
How do you keep your curly ponytail frizz free? I’d love to know!
[prodmod]
 In honor of Hispanic Heritage Month, I have created both an English and Spanish version of the Search and Destroy Method for transitioning, curly hair!
If you are transitioning, growing out your hair or just trying to maintain length then try the Search and Destroy Method! I do this method once every other week just to maintain healthy edges without the risk of getting inches cut off at a salon when you only ask for a little trim! Keep in mind that if your hair is much shorter, doing this method will be difficult since you won’t really be able to see your ends closely. The purpose of this method is to single out a damaged strand and cutting off the split end itself without cutting off healthy hair.
Search and Destroy Method
Método de Buscar y Destruir
SheaMoisture is widely known for what it can do for your hair, but not many know that it has products for your skin, face, baby–even boyfriend, too.
Through tons of shameless product junkie trial and error, I have found staple pieces to contribute to my everyday routines. Here are my top 10 favorite Shea Moisture products of all time. Remember, they are available at your local Target, Walgreens, Bed Bath & Beyond, Ulta, and online at Shop.NaturallyCurly.com.
Jamaican Black Castor Oil Strengthen Growth and Restore Shampoo
This light lathering strengthening shampoo has helped with the growth and health of my hair. My fine curls are stronger, especially around the edges which I am thankful for after having dealt with breakage in the recent past.Yucca and Plantain Anti-Breakage Strengthening Conditioner
It has so much slip, making detangling in the shower a breeze! This extra creamy conditioner keeps my curls hydrated. The Yucca and Plantain scent is my absolute favorite.Raw Shea Butter Deep Treatment Masque
This deep conditioner is super thick and saves my hair from any damage from heat or over manipulation. Sometimes I like to add a little bit of JBCO to the masque for extra moisture. Honestly though, you cannot go wrong with any of Shea Moisture’s deep conditioners.Lavender and Wild Orchid Hand and Body Scrub
My favorite way to use Shea Moisture’s body scrubs: Shaving! I rub this scrub in circular motions on my legs for the closest shave leaving them looking and feeling silky smooth.Superfruit Complex Soap
Love a good squeaky clean feeling? Try showering with this! You really get a bang for your buck, too. The massive soap bar is just 5 dollars.Coconut and Hibiscus Kids Extra Moisturizing Detangler
My younger cousin has curls that are much curlier and dryer than mine. Detangling was so simple on her hair and left her curls moisturized, I had to get it for myself. Now I use it before a styler to make applying products easier.Coconut and Hibiscus Curl Enhancing Smoothie
My holy grail! I cannot get enough of this product–it leaves my hair moisturized, defined, frizz free, bouncy and really soft to the touch. Even though it’s a cream, it doesn’t weigh my fine curls down.Olive and Green Tea Body Butter
My skin needs moisture to keep from looking dry. I moisturize daily to help keep my skin looking youthful over time. This body butter smells divine and leaves my skin feeling hydrated and the anti-aging properties will help in the long run.Yucca and Plantain Anti-Breakage Root Lifting Styler
My top secret product for volume on my fine hair! I just spray and massage at the root and it gives me volume in ways no other product has. I am in LOVE!Jamaican Black Castor Oil Strengthen Grow and Restore Edge Treatment
For my updo-rocking days, I like to keep my edges tamed and the flyaways down. In this case, I like to turn to this edge treatment to help slick the baby hairs down and keep any stray hairs in their place for a clean look. [prodmod]What’s on your Shea Moisture wish list? Let me know!
If you are looking for another at home treatment to give extra care to your mane, try a Mayonnaise Hair Treatment. It’s the one ingredient with multiple benefits that can help spring your curls back to life. If you have been experiencing dryness or are trying to overcome heat damage, consider applying mayo to your hair. There are oils and proteins that help nourish your curls from outside and within that are found in this pantry item. Curious on how to apply mayonnaise onto your curls? I will show you!
Directions
I prepared my curls by spritzing warm water to my hair until it is damp. I found that it was easier to apply the mayonnaise into my hair this way.
I scooped some mayonnaise into a separate bowl so as to not double dip into the mayo jar! I applied the mayonnaise from the bowl to my hair in a way that I would normally apply conditioner. Focus on applying more mayo to the areas that you feel are more prone to dryness.
I then twist my hair in a bun and cover with a plastic bag to trap the heat from my head. This helps to open the cuticles of the hair strands to better absorb the moisture from the treatment.
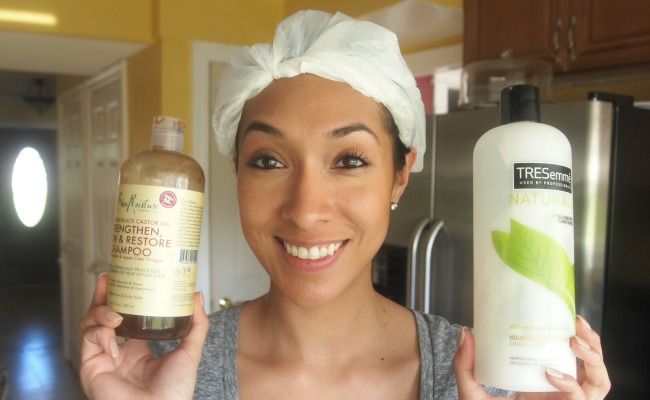
I added a warm towel to my head and covered that with another plastic bag to trap more heat. I left the treatment in my hair for about 20 minutes and rinsed it out with warm water and a sulfate free gentle shampoo. I used Shea Moisture Jamaican Black Castor Oil Sulfate Free Shampoo with Tresemme Naturals Conditioner. [prodmod]I really enjoyed using this simple mayo treatment because it is one simple ingredient. You could get fancy with it by adding extra virgin olive oil, eggs, or avocado to the mix. Always remember to test out a section of your hair with these treatments since you are adding protein to your hair, especially if you are protein sensitive. My 3b curls found this treatment effective, leaving my hair moisturized and shiny.
What at home ingredients do you like to use in your treatments?
For more curly hair recipes and tutorials, subscribe to my YouTube channel RisasRizos.
There’s nothing quite like frizz to ruin a good hair day. Luckily there are a few easy tips and tricks that you can do to smooth frizz in your regular routine.
- If you already have frizz and want to spot treat it, apply a light oil like jojoba oil, which won’t weigh your hair down.
- When washing and conditioning the hair, once all of the product has been removed I like to give my hair a final rinse with cold water, I find that it helps lock in my moisture.
- After I’m done washing my hair, I wrap my wet hair up in a t-shirt — not a towel! A microfiber towel works too, but you probably have an old t-shirt lying around the house that would work.
- When drying your hair with the t-shirt, don’t rub your hair with the t-shirt, don’t cause friction between your curls because that will lead to frizz. Instead, I blot and gently scrunch my hair.
- To style the hair, apply your styler and then do not touch! Let your hair dry 110% before you start to touch it, whether you’re scrunching them for soft, touchable hold or releasing the cast of your styling product. Wait until they’re dry.
- If you do all of this and you’re still experiencing frizz, then maybe your curls still aren’t getting the moisture they need. To quench their thirst use a deep conditioner like DevaCurl’s Heaven in Hair or SheaMoisture’s Raw Shea Butter Deep Treatment Masque.
- And if all of the above does not work and your hair is always frizzy, then it may be time to get a trim. If you recently had a trim and just want to maintain your ends, then perhaps try the Search & Destroy Method.
Watch the Video
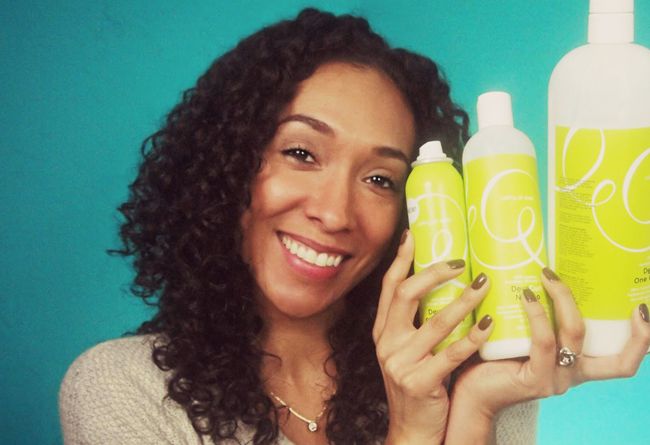
[prodmod]Finding the right products for your curls can seem daunting. I spend far too much time squatting in the hair aisle reading labels, 2nd and 3rd guessing whether the purchase will be worth it. I even watch full video tutorials and reviews on my phone in said aisle before fully committing to the purchase. So here is my review on a far too familiar line for those of you who have never tried DevaCurl and might just be squatting in a store, reading labels, and debating on your own purchase.
The Dynamic Duo
No Poo
This Zero Lathering Conditioning Cleanser has done the best job at leaving my scalp invigoratingly clean but won’t strip my hair of its natural oils. While my curls are clean, the No-Poo works well at conditioning and maintaining moisture.
One Condition
This conditioner does not contain silicones, so instead of just sitting on the hair shaft, it is penetrated and leaves my curls hydrated. I love the One Condition because I can use it as a co-washer, conditioner, or leave-In. It’s also lightweight, which makes it easy to wash out of my hair so I don’t get product buildup often.
The Distant Cousins
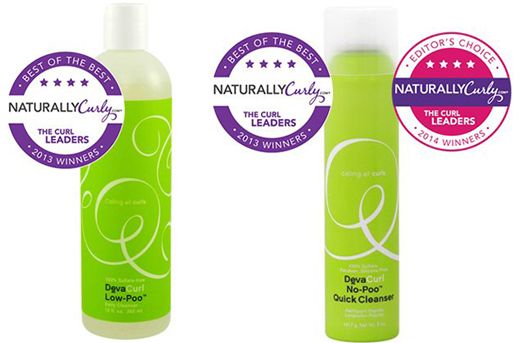
Low Poo
Because the No-Poo and One Condition work so well together, I always feel I get an adequate wash for my curls to stay clean, healthy and moisturized. I still experiment with other conditioners and stylers which may take a little more time washing out of my curls. If I do experience product build-up, I grab the Low Poo. It’s mild lathering and, in my opinion, mild clarifying. While it gets the job done, I’ve noticed that overusing it can dry out my hair so I always condition well after cleansing.
No Poo Quick Cleanser
It’s a moisturizing dry shampoo. If my hair gets oily around the scalp after a few days though, I typically just wash it. The dry shampoo has been ideal when experimenting with different stylers on clean hair that might not be moisturizing enough around the scalp.The Stylers
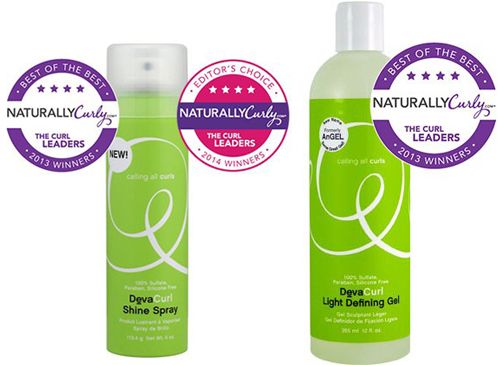
Light Defining Gel
When using this gel alone, I’m not too crazy about it. It’s less than light defining and applying it to my curls feel stripping since I don’t get much slip when applying. It’s not moisturizing. [Although I have not tried DevaCurl’s Be-Leave In Conditioner, I have found that it works pretty well with Kinky Curly Knot Today as a leave in conditioner.] The Light Defining Gel goes on much smoother with a leave-in and I did get a bit more definition because my curls were moisturized.
Shine Spray
This definitely adds shine but a little goes a long way. When using this product, I need to be cautious and light handed; otherwise my curls come out looking too oily and greasy to the touch. It’s supposed to combat frizz but I haven’t had much success using this product for that purpose. [Remember, this is not a hairspray so] it also won’t help to tame the flyaways or add hold to your style. It simply gives your curls shine.The Best For Last
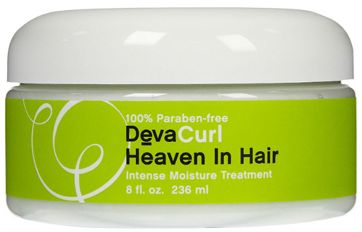
The Heaven In Hair Intensive Moisture Treatment
This is by far the best deep conditioner I have used in my hair. It leaves my curls feeling hydrated, which is especially important for the most stubborn areas [of my hair] that are prone to dryness. The treatment has a thin paste like texture that expands when rubbed together and feels ultra smooth when raking it in my hair.
I don’t need to slather on too much of this treatment to get the job done either. A scoop is all I need, which says a lot for a small 8oz container. It truly is heaven in my hair.
Watch my video
Have you tried any of these products? Let me know how they work for your curls! If there’s anything you have tried from this line that I have not mentioned, throw out a suggestion. The product junkie in me would love to try it!
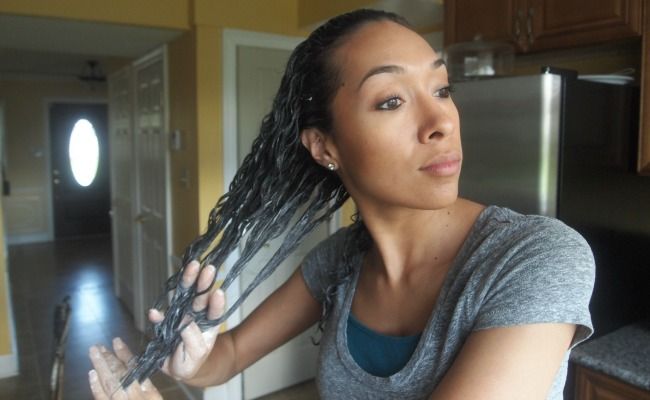
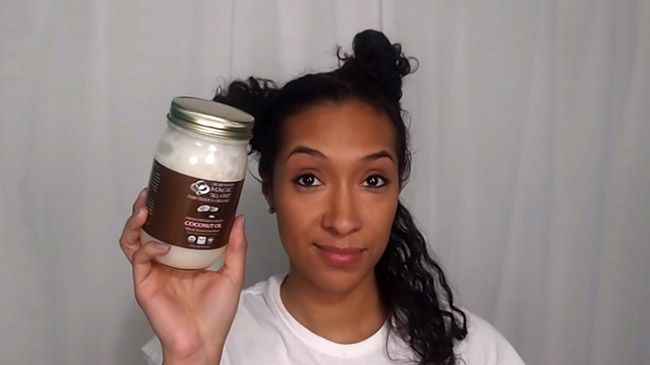
[prodmod]If you feel as though you have been shedding a lot recently, then it might be time to take a look at your shower routine. Finger detangling is the gentlest, most effective way to detangle your hair. It may take you a little longer than using your wide tooth comb, but because your fingers can actually feel the knots and pull them apart with greater sensitivity, it is the safest way to deal with tangles. A pre-poo is the second method I use to help retain my length and reduce breakage in the shower. A pre-poo is a treatment that you apply to the hair before you shampoo. In this tutorial I will be using coconut oil as a pre-poo, make sure you buy unrefined Utilizing both of these methods will help you reach your healthy hair goals. Here is how:
1. Before cleansing, divide the hair in half. Tie one side up into a bun just to get it out of the way.
2. Now take the loose half and divide that into two, tying up the top half in a bun. It should look like this:
3. Take a small amount of coconut oil and warm it between your fingers, and gently apply it to the length of your hair. Beginning at the bottom, start detangling and work your way up towards the root.
Now you are ready to pre-poo!4. Once you have fully detangled your first section, divide it into two and twist it, just to separate it from the hair you haven’t detangled yet.
Repeat this process until you have detangled and twisted all of your hair. Now you are fully detangled and have applied your coconut oil pre-poo throughout your hair. It should look like this:
5. Pin up twists, cover with a plastic bag. Layer the bag with a hot towel and tie another bag with a hot towel for about a half hour.
6. Take your twists down. Now you are ready to wash.
Watch how I do it
How do you detangle your curly hair? Do you use a pre-poo on wash day?
If you have been experiencing a lot of breakage lately or are trying to recover from heat damage, try this DIY protein treatment. It contains a special ingredient called Hydrolyzed Protein which coats the hair shaft and repairs damage on the outer layers. Hydrolyzed protein is also the main ingredient in the ApHogee Protein Treatment, so this is my homemade version. Although this treatment was shared with naturally curly heads in mind, it is beneficial to all hair types!
If you’re looking to repair your curls, improve your hair health or rebuild elasticity, this recipe is for you. Do this once every other month, and always deep condition after your treatment.
What you’ll need
- 1 packet of unflavored gelatin – I use Knox brand
- 1 cup hot water
- 1 teaspoon apple cider vinegar – I use Bragg
- deep conditioner – I use SheaMoisture Raw Shea Butter Deep Treatment Masque
- *optional – applicator bottle & wide tooth comb
Directions
- In a bowl mix 1 packet of unflavored gelatin with 1 cup of hot water. Mix well until the gelatin has dissolved.
- Add the teaspoon of apple cider vinegar and continue to mix.
- Store the mixture in the fridge. If you’re using an applicator bottle, pour it into the bottle before storing in the fridge.
- Wash your hair while the mixture is cooling in the fridge.
- Then apply the treatment evenly to your freshly washed hair in sections (I do 4 sections”>. Once it’s applied the hair is going to become stiff, so work quickly.
- Comb through the hair with your wide tooth comb if you want to make sure it is evenly coated, and then don’t touch the hair. Repeat with all 4 sections.
- Leave the treatment for 10 minutes or in until it has dried and hardened. You can use a diffuser or hooded dryer to aid in the drying process.
- Rinse the hair, wait until the hair has softened from water and then gently massage the treatment out of your hair with your fingers.
- Apply your favorite deep conditioner, this is an important step so don’t skip this.
Watch the Video
Naturally curly hair is completely versatile when it comes to styling! I created this soft retro curl updo to temporarily loosen my texture without any heat damage, with the help of some Curlformers.
Before you start
To begin, I apply a bit of Kinky Curly Knot Today Leave-In as a base to clean, damp hair. It helps get rid of tangles which is extremely helpful when installing curlformers. After raking that all in my hair, I followed with a lightweight styling product. I used SheaMoisture’s Frizz Free Curl Mousse because it helps fight frizz while giving flexible hold without the flaking. When using curlformers, you want your hair to be slightly damp so keeping a spray bottle mixed with water and leave-in conditioner on hand is helpful to spritz any areas that are prone to drying quickly.How to use Curlformers
- Section some hair from the back of your head and tie the rest up to stay out of the way.
- Insert the rod that comes with the Curlformers through one end and push it all the way through until the hook is outside the other end of the Curlformer.
- Twist a small section of hair at the scalp.
- Place the hair into the wand’s hook, keeping the open side up.
- Pinch the rubber opening of the Curlformer and gently pull the wand and hair through.
- Repeat this step all around your head and let your hair dry 100% before removing the Curlformers.
- Once your hair is dry, pinch the rubber ends and gently slide the Curlformers off. This leaves your curls shiny bouncy and soft to the touch without using any heat!
Styling
I added a few drops of jojoba oil to my fingertips and began to separate each curl. This added volume and gave my curls a more natural pattern. I then gathered a group of curls and gently combed through my hair with my fingertips. You can repeat the combing step until you have reached the volume desired. After combing through my curls, I gather some hair from the side of my head and secured it back with a few bobby pins. If you have bangs, set those aside for later and repeat the previous step. Again, gather some hair from the other side of your head and secure it back with bobby pins. Take your bangs and pull it in the opposite direction of your part. Begin rolling the tips around your finger towards the ceiling. Once you have rolled your hair a few times you can release your finger, pinch the curl and begin to roll towards your head. Push down on the curl to create a retro swirl. You can secure the swirl with a few bobby pins at the back of the curl. Smooth down fly aways or pin back any pieces that fell out of the swirl and the look is complete! You are left with soft retro curls with a swirl and curl bang!Watch my tutorial
This post was not sponsored by Curlformers.
The Rake and Shake Styling Technique
There are many styling techniques to achieve beautiful curls but one of my favorites is the Rake and Shake Method created by curly stylist, Ouidad. It’s the best method I’ve found that keeps your natural curl pattern in tact and hydrated, with very minimal frizz.
The key to doing this styling technique with no frizz is moisture, so you’ll want to do this on clean, wet hair and spray the hair with water regularly to make sure it doesn’t dry while you’re styling. Then apply a water-based leave-in conditioner throughout the hair and divide it into sections.
The Rake
Once you have sectioned your hair off, rub some light styling product between your fingers and take one small section of hair, running your fingers through the hair like a rake.
 The Shake
Once you’ve evenly distributed the styling product, rake your fingers through the section one last time. This time, smooth the hair through your fingers and when you reach the end, hold onto the ends and shake them back and forth. This ensures that your curls will be released in their natural pattern.
What you’ll need
- spray bottle of water to keep curls moisturized
- water-based leave-in, I love Kinky Curly’s Knot Today
- lightweight styling product like SheaMoisture Frizz-Free Curl Mousse, heavy cream can weigh down hair
- clips or hair ties to section hair
Watch my video tutorial
[prodmod]There are plenty of rinses known to help achieve healthier and stronger hair, but when you’ve got fragile curls like mine you would probably try just about anything to get your mane in the best shape possible. When I found out about a rinse that involved pouring beer into my hair, I was a bit grossed out. However, the benefits of a beer rinse for naturally curly hair made a lot of sense so I decided to give it a shot.
What’s in it?
Key ingredients to your typical beer are yeast, barley, water, and hops. There are essential oils in hops that are rich in antioxidants which can fortify and strengthen the hair.
Beer also contains B-vitamins and proteins which are great for conditioning. Maltose and sucrose sugars in beer help to swell and tighten the cuticle which add body as well as shine. I got satisfying results after trying this rinse! Surprisingly, my hair was softer, shinier and felt fuller to the touch even before it dried. Body is usually difficult to achieve with finer hair so this was impressive. The beer rinse is also said to improve elasticity and helps to revitalize the curl after heat damage so if this is an area that you are looking to fix, try the beer rinse!
What you’ll need
All you need is one bottle of lukewarm, flat, non-alcoholic beer. It helps if you leave the beer uncovered overnight. Depending on the length and thickness of your hair, you might need two bottles.
Directions
1. I began by co-washing my hair in the sink rather than in the shower. (I wasn’t too excited at the thought of beer running down my back”>.
2. After co-washing, I poured the beer all over my hair, coating every strand from the root to the ends.
3. Once I poured all of the beer into my hair, I let it sit for about 3 to 5 minutes and rinsed it out with warm water before rinsing again with cooler water to help get rid of the smell.
4. I tried really hard to make sure my hair wouldn’t smell like a pub when I finished so I added a bit of conditioner after the beer rinse. Believe it or not, this step is actually optional and many people go without the conditioner! I’m not quite sold on that yet since this extra step helps to eliminate the scent of the beer I used.
I finally rinsed the conditioner out with cold water to lock in the moisture and scrunched my hair with an old t-shirt to safely dry my curls. At this point, you can style your hair like normal. I only added a small amount of leave in-conditioner because I wanted to be able to tell if there was any change in texture or body and I definitely noticed a difference.
I will absolutely try this rinse again soon and maybe next time I will be brave enough to go sans condish!
Cheers!
Have you ever used beer in your hair? What did it do for your hair?


