Search Results: Peniel Tovar

Now, more than ever, people are educating themselves about the ingredients in their hair care products and the packaging they come in, so we’re always on the lookout for natural alternatives. Try out these eco-friendly brands; they will leave your curls and mind in peace.
1. LUSH
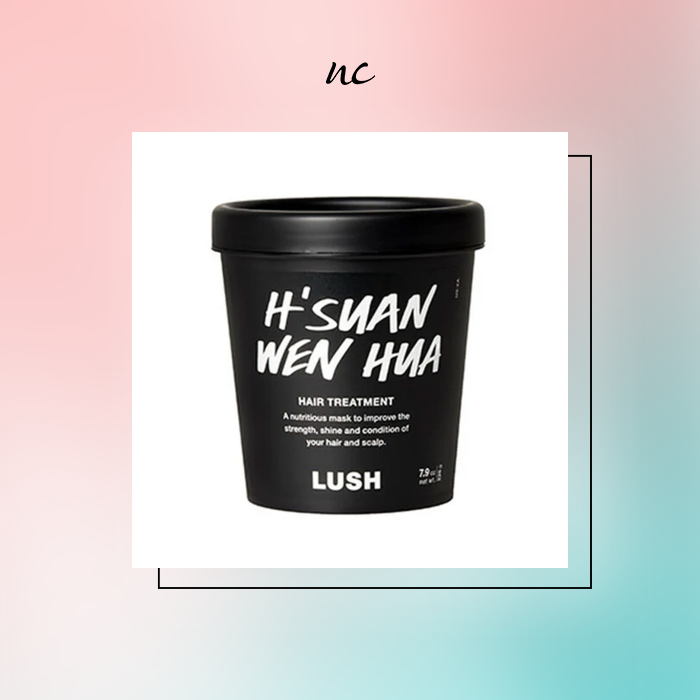
This brand is infamous for making all of its products from fresh fruits and powders. Each product is hand crafted with fresh ingredients and they are immediately sent out to the LUSH stores for sale. Many of their products like shampoo bars and bath bombs are sold with no packaging, making them zero-waste, and the packaging they do use is made responsibly with materials like 100% post-consumer plastic and biodegradable packing peanuts. As if that wasn’t cool enough, this brand is always actively fighting against animal testing.
Check out their: Lush H’Suan Wen Hua Hair Treatment
2. Desert Essence
This brand provides a unique set of ingredients, scents and benefits in every bottle. All the products by this brand have biodegradable formulas, come in recyclable packaging, and are approved by the USDA or NSF, certifying the ingredients as organic and non-toxic. They have shampoo, conditioner, styling products, oils, you name it!
Check out their: Red Raspberry Conditioner
3. Kiss My Face
This brand strives to diminish its footprint by using organic certified ingredients. The ingredients come from renewable sources and each product is made using sustainable manufacturing practices ensuring safety for you and the planet.
Check out their: Kiss My Face Hold Up Organic Mousse
4. Acure
No parabens, sulfates, phthalates, synthetic fragrances, harmful preservatives or artificial colors. These products are all curl friendly, earth friendly, and animal friendly! This family-owned brand wishes to honor their grandmother by keeping honest values while making their products. They also donate to the “Bright Pink” organization to provide free mammograms to women at risk for breast cancer.
Check out their: Acure The Essentials Marula Oil
5. Alaffia
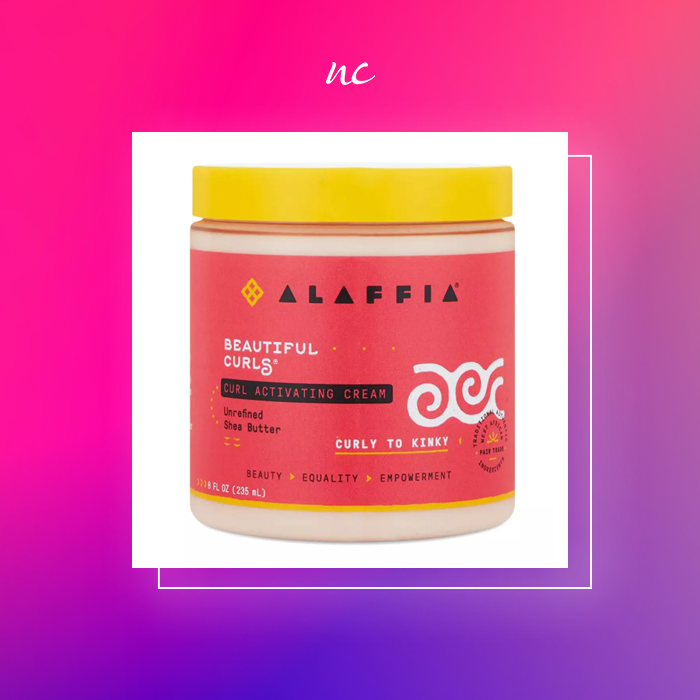
We saved the best for last. This Black-owned brand is sure to tug at your heart strings with their amazing values. Alaffia products contain shea butter that is hand crafted by African women in Togo, Africa. They donate 10% of their sales to Community Enhancement Projects in Africa and other parts of the world by fighting for women’s equality and providing children with bikes. The shea butter in these products is authentic, rich and fair trade.
Check out their: The Beautiful Curls collection with products for wavy, curly and coily textures
The product links in this article have been updated.
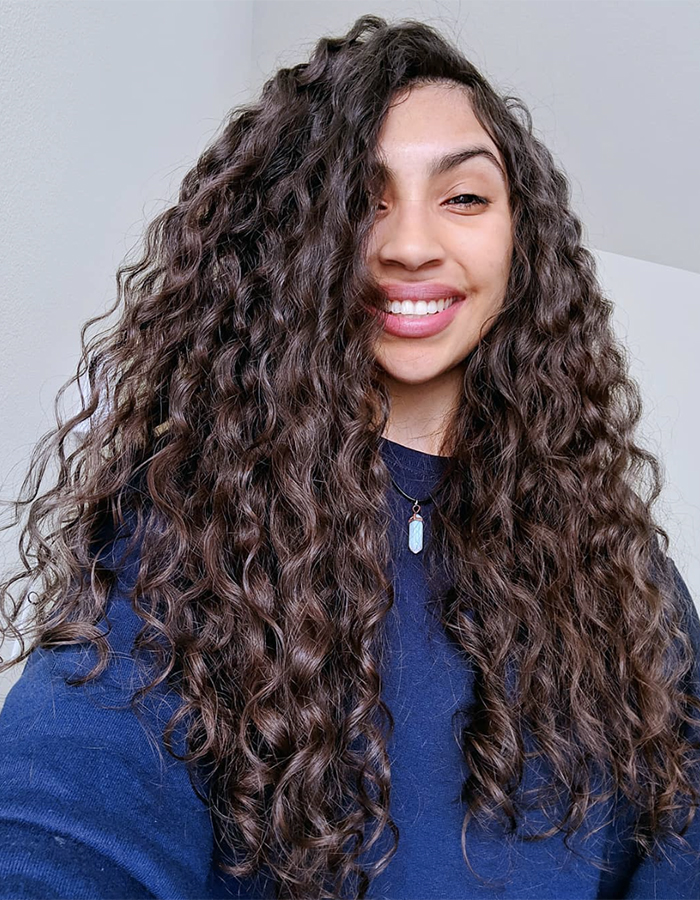
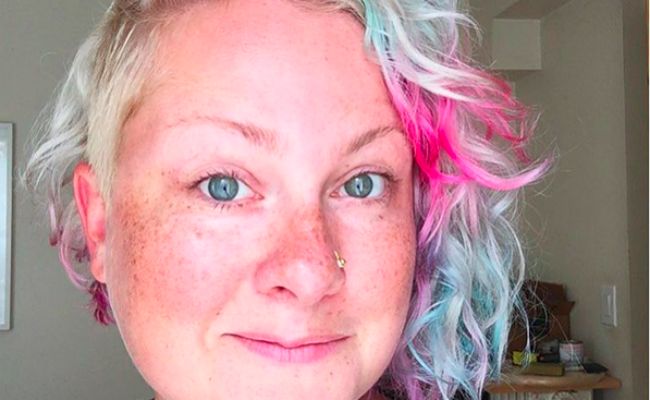
Image:@pennytovar
Are you having a hard time deciding if your hair is considered wavy, curly–or both? Don’t know how to adjust certain “curly hair rules” to fit the needs of your unique hair type? You’ve got questions, and YouTube hair guru CurlyPenny has got answers. Don’t worry, type 2c’s, 3a’s and all the curlies in between, we hear you loud and clear. Here is what we get asked in our Q&A section the most about your texture.
Still not sure about your hair type? Has it changed? Take our quiz!
If you have a question that you want answered by our NaturallyCurly editors and community members, post it here in our “Ask” section.
My 2c hair won’t curl at the roots.

Image:@pennytovar
Ah, the dreaded flat canopy. There are a few things that can liven up that flat canopy; getting layers will take weight off of the roots allowing the hair to curl more.
Flat roots can be (but aren’t necessarily always”> a result of product build-up. If you are susceptible to flat roots, keep products away from your scalp–besides shampoo, of course. Conditioners and gels on the scalp can build up easily, thus taking away volume, and putting weight on the curl, causing it to lose shape.
Clarify on a scheduled basis to get rid of product build-up. Below is an easy DIY clarifying rinse that I use. After the shower, twirl your hair at the top in sections to promote better curl formation. It is also important to remember that you can’t force your hair to be another curl type. Some hair types are naturally loose at the top, and there ain’t nothing wrong with that! If you’re concerned about the effects of baking soda on your hair, check out this article for more info and tips on how to use it effectively!
Embedded content: https://www.youtube.com/embed/U7ua9k8jtAgWhat’s my hair type–2c or 3a?
Which oil is the best for my hair type?
Really, the oil that is “best” for your hair differs from person to person. In general, any carrier oil can be used–it mostly depends on the effect you are seeking. Every carrier oil has a unique impact. In my opinion, olive oil is the best all around–it nourishes the hair while adding softness and shine. Coconut oil is very popular because it strengthens the hair and can help add curl definition while fighting breakage. Argan oil is often referred to as liquid gold due to its ability to fight breakage, and add luster to dead hair. Jojoba oil is adored as well because it is very thick, it lubricates the hair, and creates a protective barrier to prevent breakage and help with length retention. Castor oil is an oil everyone raves about due to it’s rumored ability to help with faster hair growth and hair thickness. There are dozens of oils, and you can have your choice of them all. Experiment with any oil you are curious about and see how your hair reacts to it.
Embedded content: https://www.youtube.com/embed/ubAqHqZSy1sHow often should I deep condition my hair?
For the most part, it is said that deep conditioning should be done at least once a week to fight against breakage and help keep the hair moisturized. A rule of thumb for wavy or curly hair: The drier your hair is, the more it needs to be deep conditioned. Those with high porosity hair tend to have hair that is more thirsty, so deep conditioning should be done more often to compensate for its moisture losses. Whenever your hair feels thirsty, quench its thirst with a good deep conditioning session. You have to listen to your hair and do what gives you the best results. Here are some good products for the wavy gals out there, including some deep conditioners to try.
Are you a 2c curly who has dealt with or had questions about some of the things shared above? Tell us about your experiences: how do you deal with flat roots? Have you tried baking soda as a clarifier? Share it all with us in the comments below! This article was originally published in 2015 and has been updated to incorporate reader feedback.
Make people go gaga over your big, bouncy curls – without using a curling wand. Flexi rods allow you to get defined, voluminous curls without all the damage you get from a curling iron. Definition, frizz control, and volume with no heat?! What’s not to like about a flexi rod set? Once you have flexi rod set hair you can either leave it down or put it up in an updo. The possibilities are endless.
Tools
- Flexi rods
- Styling product
- Boar brush
- Hair ties or clips
Directions
- Section your hair into three equal horizontal sections and tie them up.
- Start with the bottom section and brush it out with the boar brush.
- Apply your styling product to the bottom section and split the bottom section into three vertical sections.
- Wrap each section around a separate flexi rod. You should have three flexi rods in the bottom section.
- Secure the flexi rod by wrapping it into a tight doughnut.
- Loosen the next section and repeat the same process.
- Leave them in to set for at least three hours or overnight; the longer the better. Do not take them out if your hair is not 100% dry or they will unravel and look loose and mushy.
- Gently take them out, shake your head, and voila! Sexy flexi curls!
Watch Now
Follow Curly Penny here:
YouTube, Facebook, and Instagram
This article was originally published in October 2014.
PHOTO BY OnlyOneJess
If you feel like your hair won’t hold onto moisture no matter what you apply to it, it’s likely you have low porosity hair. Here is a moisturizing routine that was created just for you. Be forewarned, this is not a quick and easy process for the lazy natural – but the key is it works. If this process looks altogether too lengthy, read on for a simplified version.
What is the maximum hydration method?
The maximum hydration method is a regimen that is mostly directed to naturals with low porosity, 4C hair to achieve intense maximum moisture. It was created by Pinke Cube, an active member of Black Hair Media, and blogger MsDeeKay has been a strong advocate of the method. This regimen must be done every day for one week because the goal is to open up the hair cuticles so they can absorb a ton of moisture. After one week the regimen can be done every three days, but no longer stretches than that. Even if your 4C hair isn’t low porosity, give it a try! Other textures can use this method but with few adjustments. These steps must be done consecutively.
How to do the maximum hydration method
Pre-Step: Cherry Lola Caramel Treatment (optional”>
For low porosity hair, the Cherry Lola Caramel Treatment must be the first thing done. It prepares the hair for optimal moisture absorption by lifting and opening the hair cuticles. After the first time, it can be done once every two weeks, but no more than that. Doing this treatment every two weeks is not necessary, especially not for high porosity hair. In general, doing this treatment a few times a year is fine.
Step 1: Clarify
What you need
- Baking soda
- Conditioner
- Empty spray/normal bottle
Directions
- Mix ½ tbsp. of baking soda and 1/3 cup of conditioner into a bottle
- Saturate hair in sections
- Let sit in hair for 10-30 min
- Rinse out
This step is best done the night before washing your hair and before the next step.
Step 2: Co-wash and Detangle
What you need
- Botanical conditioner
- Shower cap
PHOTO COURTESY OF MS. DEE KAY
Step 3: Bentonite Clay Rinse
What you need
- 1 cup bentonite clay (ideally recommended”>, 1 cup rhassoul clay or Terressentials can be used instead of bentonite clay
- 1.5 cup apple cider vinegar (optional”>
- 1 tbsp. raw honey
- 1 tbsp. olive oil
- 1.5 cup warm water
- Bowl
- Shower cap
Directions
- Mix everything into a bowl
- Apply to hair in sections
- Let it sit for 15 min with a shower cap
- Rinse out
Step 4: Botanical Leave-In Conditioner
What you need
- Botanical leave in conditioner
Directions
- Apply thoroughly in sections
- Apply using any technique you’d like (raking, smoothing, etc.”>
Step 5: Botanical Gel
What you need
- Botanical gel
- Oil (optional”>
Directions
- Coat hair in gel using any styling technique
Optional: Apply any oil to hair, but apply before the gel and after the leave in
Step 6: Stretching (optional”>
- Section hair and twirl/twist/roll/french roll and clip it into place
- Leave the clips in for about 30 min and then take out
Helpful Tips
- The easiest way to do this regimen is to clarify at night, right after clarifying deep condition overnight and rinse out the conditioner in the morning and continue with the next steps.
- Start this regimen on the weekend so you can get an idea on how much time it takes you to do this regimen for the upcoming week.
- If you have high porosity hair you may want to cut down on the amount of ingredients and the timing of each step.
- The Cherry Lola Treatment is not done every time you do the regimen. It can also be done at any point after starting the regimen.
You can watch OnlyOneJess use this method to revive her dry curls here:
Simplified Maximum Hydration Method
Like we said, this method is time-consuming, so if you don’t have time for the full and complete maximum hydration method that is understandable! Faye in the City has created an abbreviated version of this method that she says does the job of moisturizing hair in less time. Here are the steps she follows:
Skip the Pre-Step
Faye skips the Cherry Lola Treatment. It’s important to note that she has medium porosity hair so she does not find this step necessary. She recommends using a pre-poo with heat rather than following the Cherry Lola Treatment.
Step 1: Clarify with a clarifying shampoo
Rather than making a DIY with baking soda, use a pre-formulated clarifying shampoo. Faye uses the melanin haircare African Black Soap Reviving Shampoo. Here are more gentle clarifying shampoos to choose from.
Step 2: Co-Wash & detangle
Again, Faye skips the DIY and uses a co-washing product. She uses the Soultanicals Butta Shampoo.
Step 3: Rhassoul clay mask
Faye doesn’t prefer the way bentonite clay makes her hair feel “rough,” so she uses rhassoul clay instead. Bentonite clay draws out impurities and helps to restore the pH balance of your hair, while rhassoul clay can remove product buildup while moisturizing and softening hair. You can learn more about the difference between bentonite and rhassoul clay here, so you can make an informed decision on which is going to work best for your hair.
What you need
- 1/2 cup rhassoul clay
- 1 cup apple cider vinegar
- 1 tbsp. raw honey (optional”>
- 1 tbsp. olive oil
- 1 tbsp. glycerin (optional”>
- 1 cup warm water
Directions
- Apply thoroughly in sections
- Put on a shower cap, leave on for 15 minutes
She mixes Life-flo rhassoul clay with apple cider vinegar, honey, glycerin, and water (instead of measuring these she eyeballs this to save time”>. Section and apply the mixture, cover with shower cap and let it sit for 15 minutes.
Step 4: Leave-In Conditioner
What you need
- A silicone-free leave-in conditioner like Kinky-Curly Knot Today
Step 5: Styler
What you need
- A silicone-free styler like Uncle Funky’s Daughter Curly Magic
- For extra hold add a gel like Curl Daze Glossy Shine Gel
You can watch Faye’s full routine here, and follow her for more of her hair journey:
This article was originally published in 2014 and has been updated to include the simplified maximum hydration method.
I think it’s safe to say that men and women of all hair types will agree that embracing their natural texture has taught them to listen to their hair. Doing this has led us to creating many unique practices, like co-washing, oil sealing, the LOC method, and clarifying with apple cider vinegar.
What is a pre-poo?
A “pre-poo” is a treatment, typically with oil or conditioner, applied to hair before shampooing or cleansing. It can help provide your hair with moisture and prep your hair for detangling. Many curlies mix their own pre-poo (check out this olive oil pre-poo“>, and then massage it into the scalp and apply it to the hair’s length. You can leave your pre-poo in 15 minutes before you shower or even overnight, depending on what your hair needs.
Do you need to pre-poo?
Whether you have never pre-pooed before or you do not see the point in it, here is a list of signs that may indicate your hair needs a pre-poo.
-
A Bunch Of Breakage
This is a curly girl’s worst enemy. A lot of breakage usually happens during the cleansing process inside the shower; the vigorous rubbing can cause hair strands to rub up against each other and rip. Pre-pooing the hair can lubricate the hair strands and protect them from ripping easily. In the long run, the treatments can contribute to length retention by protecting the hair during the cleansing process.
-
Squeaky Scalp
We all like to have a clean scalp, but nothing makes me cringe more than that horrid squeaky feeling after cleansing my hair. For some people, that squeaky sound is the sound of a job well don. It lets me know, however, that my detangling process afterwards is going to be full of knots and pain. If you want to avoid that squeaky feeling, pre-pooing will do just the trick. By lubricating your hair before washing it the cleanser won’t be able to remove all your sebum, most of its suds will only work through the pre-poo, thus retaining moisture in your hair.
-
Suffering Slow Growth
If you plan to grow your hair ‘faster’, adding a pre-poo to your washing regimen will be your best bet. As you massage the treatment onto your scalp, you promote blood circulation. This helps deliver more nutrients to your hair follicles thus helping to promote longer, thicker curls. Massaging will also help grow back your baby hairs and receded hairlines. A popular hair growth pre-poo is Jamaican Black Castor Oil.
-
Tons Of Tangles
If you find yourself constantly struggling with knots and tangles in the shower, a pre-poo can loosen your tangles by lubricating and softening your hair. You can also finger detangle your hair before the shower with a pre-poo to get rid of any big knots.
Do you pre-poo?
,0 1px 10px 0 rgba(0,0,0,0.15″>; margin: 1px; max-width: 658px; padding: 0; width: calc(100% – 2px”>;” data-instgrm-version=”4″>
Move aside, ombre and balayage–there’s a new girl on the block of modern hair trends and she’s stepping out making her own bold moves.
You may already be familiar with the trendy “mermaid” or “unicorn” hair colors.
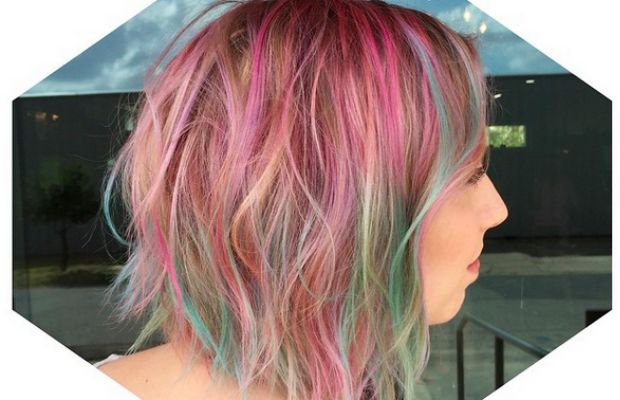
Although mermaid hair is a close cousin, opal hair is way different. The latest hair coloring trend was created by a talented hair colorist by the name of Aura Friedman from Sally Hershberger Salon. The origin of her idea was sparked by the inspiration of a beautiful and mystifying stone, the Opal gemstone. Fun fact: The Opal is the national gemstone of Australia and the birthstone for October babies.
How to get opal hair
The hair is to be bleached as light as possible (or as light as desired”> and the base color is a pearly hue which serves to emulate the mesmerizing translucency of the opal gemstone. After the pearly layer is applied, you can add any (and all of the”> pastel color that your heart desires–pink, green, purple, blue, red, orange, and yellow. If you want to get really creative, ask your colorist to mix the dyes and create a unique color combination to rock something no one else will have.
Unique, bold, and beautifully crafted, this hair color is everything packaged in one look. The only downsides to having this hair are pretty obvious–possible damage and upkeep. This look requires tedious retouching to keep the colors looking fresh, although the colors don’t really look that bad as they fade away because it adds to the opaque gemstone effect.
If you need inspiration for your stylist/colorist, check out these 5 awesome girls who rock opal hair:

@TasselFairy
Amina Mucciolo is a fashion and lifestyle blogger and she often refers to herself as a mermaid and unicorn. This black beauty rocks long luscious locs in many cute cotton candy colors.

@Larayia
Larayia Gaston is a creative director on apuletown.com and she rocks long locs in the colors blue, mint, pink, purple, magenta and pearl white.
@nailart_nailedit
This awesome lady has a photography account on instagram and a cool nail art blog, too. She is rocking simple opal hair and her pearl undertone hue is spot on.
@singi.vo.peters
Singi Vo-Peters is a hairstylist and colorist in the heart of Texas. She likes to go big with the newest hair trends and she tried out opal hair on one of her clients @tyler_leann and the result was a gorgeous rose pink mixed with streaks of blue and green.
@_rchlelzbth
Rachael Phizacklea has a YouTube channel where she posts vlogs and tutorials on her hair dye experiments. Here is her latest dye job and it’s a beautiful pearl blue with streaks of magenta, green and pink.
Opal hair= Yay or nay? Let us know what you think.
We do not need a rocket scientist to tell us if our hair is dry. For most curlies, that is completely natural. But there are many factors that can make our hair even thirstier. I have a few tricks up my sleeve that will finally quench your parched locks’ thirst.
-
Stop using sulfates
This is a no-brainer. Sulfates are harsh detergents in many shampoos (and laundry soap”> that strip the hair of sebum, the natural oil our scalp produces to moisturize itself. If you want to retain moisture, you need to avoid sulfate shampoos.
-
Start co-washing
Sometimes, even sulfate-free can be too drying for curly hair. Using conditioner to wash the scalp is an alternative to shampoo. You can use any daily conditioner or you can buy specially formulated co-washes. Co-washing moisturizes dry hair and prevents it from becoming stripped of its natural oils.
-
Deep condition regularly
I am sure that many of you already deep condition, but here’s the thing, it’s time to buy a real deep conditioner. A lot of curlies like to save money by making DIY masks or using regular conditioner to deep condition, but no mixture will do what a specially formulated deep conditioner can do. Splurge on a good deep conditioner, your hair needs it! And although deep conditioning is recommended once or twice a week, it’s okay to deep condition your hair every time you shower. For a deeper condition, put on a shower cap to trap the heat in.
-
Seal with oil
Curly hair tends to be dry because the hair cuticle is naturally raised thus leading to moisture loss. Help your dry hair retain moisture by oiling it immediately after showering. The oil seals in all the water and conditioner from your wash and go and create a barrier to prevent moisture loss and promote shine. Any oil is fine, coconut oil is very popular for its strengthening properties.
-
Condition everyday
You have heard people say to not shampoo every day, but no one ever said you can’t condition every day. If your hair becomes parched by the end of the day then it won’t hurt for you to give your hair the thirst-quenching moisture that it needs. You can just jump into the shower and condition your hair every morning. Conditioning every day will also lead to hair with less tangles!
-
Sleep with satin
Protect your hair overnight to retain moisture. Sleep on a satin pillow case or sleep with a satin bonnet. Cotton is very absorbent and can steal the moisture from your hair while you sleep. Satin is a sleek material that won’t cause frizz and will help with moisture retention.
Four fellow YouTubers decided to try out one product to see how it would affect their different hair types and here are the results. The YouTubers who collabed together for this idea were:
- RisasRizos, 3a/3b
- DiscoCurls, 3b/3c
- LivingWithOsa, 4c
- CurlyPenny, 2c
This styling cream is packed with hydrolyzed jojoba protein to strengthen the hair cuticle, rosemary extract to give the scalp and hair an amazing mint sensation and aroma, and panthenol which is a lubricating emollient. To top it all off, it smells like a tropical island. As we all know, all DevaCurl products are 100% sulfate free, silicone free and paraben free, what’s not to love about Lorraine Massey’s creations?
What RisasRizos thought
Rocio was actually the one who gathered everyone for this collab, so let’s give her the honor of sharing her experience with the product first!
The first thing she points out is that the bottle has a pump that you can’t open, so whatever amount you get out of the bottle, you will either have to use it all or wipe some on your towel (since you cannot get the leftover cream back inside the bottle”>. It’s a small manufacturing detail, but it’s worth mentioning.
Rocio was able to use the cream in many different ways–she used it alone, cocktailed with other creams, applied it on wet hair, as well as on dry hair.
In general, Rocio liked the results the cream gave her, but she did not like it mixed with gel because it caused her hair to become crunchy. The cream gave her curls shine, definition and moisture.
What DiscoCurls thought
Rochelle shared that her hair is fine and is sensitive to heavy creams, butters and oils. They cause her curls to be weighed down easily. The cream gave Rochelle favorable results. The cream acted like a gel for her fine curls and she did not notice any limpness with using it.
This styler gave her a lot of shrinkage, which she thinks works great if she wants to rock a small fro for the day. At the end it gave her small, tight curls that looked amazing when shaken and picked out.
What LivingWithOsa thought
Osa immediately mentioned that the product has a high content of glycerin. As soon as she saw this ingredient she knew her hair would revert to its original shrinkage if she attempted to stretch her hair with the cream. However, for the sake of the review for the product review, Osa used the cream alone. She did her regular wash and go routine, twisted her hair with the cream, then put perm rods on the ends of the twists.
The cream gave her non-sticky, non-greasy and non-crunchy results, which she adored. Overall, she liked the cream, but wished it had more slip and a lesser tendency to flake.
What I thought (Curly Penny”>
The first thing I liked was that the cream was sulfate free, silicone free, and paraben free. I also like that the cream has protein, protein helps to give me more curl definition. I used about a dime size after my shower, but once my hair dried I noticed that I should have used more.
The cream is lightweight, moisturizing, and it gives great hold. It worked like a creamy gel. Overall, the cream gave me moisture, definition and volume so I liked the cream for my sharp s waves.
Keep the review going! Have you tried this cream? How did it work for you? Let us know down below.
It can be hard trying to begin your healthy hair journey when there is so much advice out there on what you should be doing for your texture. To make things easier, lets go back to the basics. This is what every curly should know–and avoid.
-
Don’t brush your hair.
Everyone knows that it is never a good idea to brush curly hair because your curls will lose all their definition, immediately. Brushing your hair is not all evil though. It’s good to have a deep detangling session at least once a month, but if you wake up in the morning and brush your hair that’s why you are struggling. Put the brush down and let your hair be! Take knots apart with your fingers instead.
-
Don’t blow dry.
When I say don’t blow-dry, I mean never blow-dry without a diffuser. If you blow dry without a diffuser you will greatly hinder your curl formation and end up with a bird’s nest. Also, use the dryer on a cool setting to avoid heat damage.
-
Don’t towel dry.
Now, this will be a hard habit to stop. I am sure all of our mothers did this to us growing up–wrapping our hair in a towel turban. Here’s the thing, terry cloth towels have extremely big fibers that frizz up the hair cuticle immensely. The turban can cause the curls to dry in weird lumps. Use a t-shirt and scrunch the water out of your hair instead and air dry.
-
Don’t mindlessly buy products.
This may sound shocking, but just because a bottle says, “For curly hair” does not mean it is for curly hair. If your hair is dry and frizzy, you need to pay closer attention to what you are using–and it’s all in the ingredients. Many shampoos and conditioners contain sulfates and silicones which strip the hair of the natural oil our body produces called sebum. Buying sulfate free and silicone free products will allow your body to keep its sebum thus helping to add moisture and definition to your hair.
-
Don’t sleep with wet hair.
There’s a reason why you use flexi rods on damp hair–it molds to its environment. Your pillow is a flat surface and if your hair is wet while you sleep your curl shape will be lumpy and oddly-shaped. Sleep with hair that is 100% dry and in a protective style. On a side note, wet hair is insanely prone to breakage so that’s definitely not a good idea to toss and turn all night with vulnerable hair.
-
Protect your hair overnight.
This is crucial. The reason your curls go away in the morning is because you’re not taking any precautions to prevent it’s unraveling overnight. Always sleep with hair in a protective style to keep the curl formation tight and the frizz at bay. The pineapple method is extremely popular among the curly hair community, learn how to do it here.
-
Don’t sleep on a cotton pillow case.
Now, cotton material isn’t the devil. The reason cotton pillow cases should be avoided is because they’re not slippery. If you toss and turn all night on a rough surface, your curls will get tangles and frizz like no tomorrow. Sleep on a slippery surface to prevent disasters in the morning. Good slippery pillow cases can be made from silk, satin, or polyester.
FINALLY, don’t hate your hair.
Your hair is beautiful, unique and it makes you you! Instead of being ashamed of your hair use it as a confidence tool. Play with it and show it off! In a world that’s obsessed with straight hair we have to stick it to the man and show the world that curly hair is beautiful too. The best part about curly hair? When you show it love and care, it will show you love back.
Watch my video and let me spell it out for you.
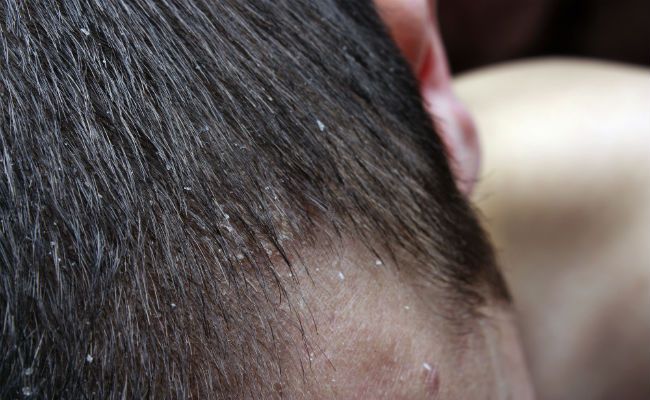
Psoriasis is a lot more common than you think, according to the National Psoriasis Foundation, psoriasis is the most prevalent autoimmune disease is in the United States with approximately 7.5 million Americans impacted. Those who are impacted know that it is a struggle to find proper treatments while trying to use all natural ingredients, especially when your doctor is always prescribing you medical shampoos. There is a trick you can use at home to self-medicate your scalp–and it is all natural.
The secret? Emollients.
An emollient is a substance that helps soothe, hydrate and smoothen the skin. It is important to understand that an emollient cannot cure psoriasis, but it can lessen the severity of the irritation and flakes. For the best results, they must be applied on a regular basis on the troubled areas.
Where can you find emollients?
You can order these online or go to a health food market, such as Whole Foods. Here are some suggestions, according to Organic Glow.
-
Jojoba oil
-
Castor oil
-
Shea butter
-
Cocoa butter
-
Vegetable glycerin
-
Mango butter
How to use
Emollients work best by sealing in moisture, according to Papaa. They will work optimally when applied to the scalp right after the shower. After you shampoo, condition and style your hair grab an emollient and rub it in your hands. Start by massaging your entire scalp or you can work on a specific trouble area. Rub in the emollient softly using a circular massaging motion to help soothe and loosen the patches. These emollients work by softening the dry patches and relieving irritation while making the patches look less noticeable. They create a protective barrier by preventing the skin from drying out any further and preventing infection from any pathogens.
If your hair does not get weighed down from oils you can do this process more than once a day, working the emollients into trouble areas. For fun, you can try out this easy DIY patch soother to use at home.
DIY Psoriasis Emollient Butter
Make your own Psoriasis Emollient Butter as a natural scalp treatment.
-
Tea tree oil
-
Shea butter
-
Castor oil
-
Stove
-
Container
-
Double boiler
Directions
-
Get a clean container
-
Set up your double boiler on the stove
-
Melt 1 cup of shea butter
-
Mix in 1 tablespoon of castor oil
-
Mix in 5-10 drops of tea tree oil
-
Let it cool down for an hour
-
Keep it stored in a cool, dry place
The shea butter in this DIY mix will create a thick protective barrier on the scalp to prevent it from drying out. The castor oil will help soothe the flakes and patches, making them less noticeable. The tea tree oil will help prevent infection by pathogens while fighting against fungal infections as well. Before attempting any homemade recipes, make sure to try out every emollient to see which one works best for you.
Which emollient is your favorite? And how does it help your Psoriasis?
But what exactly is protein sensitivity? Protein sensitivity is a problem that a lot of people face with their hair. Basically, if you expose your hair to proteins your hair becomes hardened and brittle, according to Black Hair Information. This is why some people love coconut oil and why others hate it. Livestrong says some peoples’ locks are more sensitive to the strengthening properties of proteins, thus causing their hair to become overly hard.
How can you test?
The only way to find out is to expose your hair to protein and see how it reacts. You can test your protein sensitivity with products or foods that contain protein such as greek yogurt or eggs.
- STEP ONE: Wet a section of hair
- STEP TWO: Rub the protein ingredient on the wet test section
- STEP THREE: Let the test patch dry
- STEP FOUR: Look at your results
It is normal for protein to harden the hair whether you are protein sensitive or not because they add resilience to the hair. But if your hair gets to the point where it crackling and breaking, bingo, you are protein sensitive.
So what can you do about your protein sensitivity?
First off, do not avoid protein.
Proteins are essential for healthy, strong hair. Find styling products that contain little to no proteins, but make sure to compensate by doing a protein treatment once a month. To balance out the power of the protein make sure to use a good protein-free moisturizer so get rid of the crunchiness.
Watch my Q&A video–and don’t forget to subscribe to my channel for more of these clarifications!
1. When you go grocery shopping you come back home with hair products instead.
2. Remember that product you bought two months ago? Don’t throw it away! You might need it in a desperate situation six years from now. 3. You have never actually used up a whole bottle of anything.4. You constantly say, “This is it! I think I have found the one!” And you still keep looking for new products anyway.
5. You have multiple bottles of the same. exact. product.
6. You immediately buy a product when you see it’s on sale, even if it’s a product you don’t like that much.
7. You get irritated when a friend says, “You’re going to buy another product again?”
8. Whenever a gift-giving occasion arises everyone already knows you’re going to ask for hair products.
9. Your bathroom contains enough products to last throughout an apocalypse.
10. The look you give someone when they say, “Don’t you think you have enough?”
11. When you hear that CVS has a BOGO sale you immediately drop everything you’re doing and run to your car.
12. When browsing through your stash you have said this at least ten times, “I forgot I had this.”
13. You have bought a product that you hate multiple times hoping that your hair would change its mind and like it this time.
14. You know you would make a great worker at any store because you have tried all their natural products.
15. You drop by Sally’s every chance you get just in case you forgot that you needed a product.
16. All your pocket money goes to a new leave in conditioner every month.
17. When you’re thinking of buying a new product so you look up dozens of reviews, but there’s no point because you’re going to buy it anyway.
18. You don’t need any products, but you go down the entire hair care aisle anyway just to look.
19. You need to convince yourself why you need a product so you won’t go through buyer’s remorse.
20. Your mother tells you you’re too obsessed with your hair.
21. You could set up a shop with all the products you have.
22. When you shop online you have a cart full of dozens of products, and even if you don’t end up buying them you just leave them there just in case you need them someday.
23. Even though you already own all of Shea Moistures products you enter their giveaways anyway.
24. When you think to yourself, “If I don’t like it I can always return it…”
25. After all the products you have used, you are still on the hunt for that holy grail.
So fess up, are you a Product Junkie?
Your alarm didn’t go off, you are running late and your ends look a mess, in this time of desperation a quick hairstyle is needed to control your hair and to tuck in those ends. Why not try a big messy bun? This messy bun is quick, cute and it will keep your ends safely tucked and away from any possible split end hazards.
What you need
-
Bobby pins
-
Hair tie
-
Edge control product (optional”>
What to do
-
Put your hair into a tight high ponytail
-
Slick back your edges, if you want
-
Split ponytail into 3 sections
-
Take one section and wrap it around the other sections in a donut shape and pin down the ends
-
Wrap the second section around the donut and pin those ends down
-
Grab your last section and wrap it around the previous donuts and pin those ends down.
Watch the tutorial
What style do you want to see me do a tutorial for next? Leave a message in the comments below.
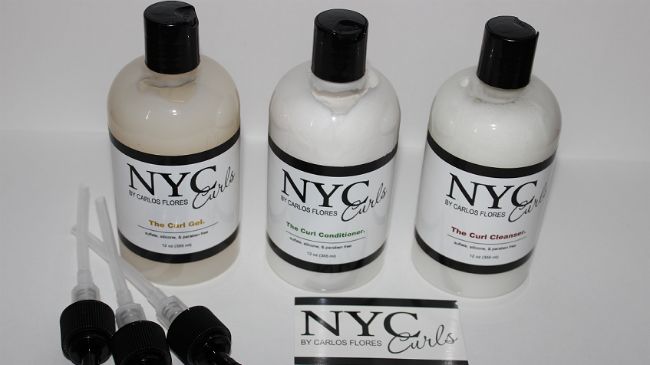
NYC Curls Curl Conditioner is one of our Top 20 Silicone-Free Daily Conditioners, and I had the opportunity to put that proclamation to the test. I used the Curl Cleanser, the Curl Conditioner and the Curl Styling Gel and I want to share with you all my opinions on the system and how it affected my wavy curls.
[prodmod]
First off, I immediately liked the fact that all their products are sulfate-free, silicone-free and paraben-free.
Each product also has unique extracts such as ginger, olive oil and peppermint. So far, the Curl Cleanser is my favorite of the whole system because you can really feel the ginger and peppermint. I personally love the fresh minty feeling on my scalp and this cleanser gave me just that. And I should let you know that it is not a sulfate free shampoo, it is actually a co-wash, but it cleansed well for a cowash. The cleasner left my curls clean and moisturized and not feeling stripped.
Although I liked the cowash, I am not a huge fan of the conditioner.
My hair is normal porosity and I feel like the conditioner did not penetrate my hair strands, I felt like it sat on top of my strands. I feel that the conditioner would do well as a leave in rather than a rinse out, but I think that the conditioner would have been more moisturizing if I added an oil to it. It could also be useful as a curl refresher in the morning.
I avoid using styling products because my fine hair strands are easily weighed down by even the smallest amount of product
I avoid using styling products because my fine hair strands are easily weighed down by even the smallest amount of product, but I was pleasantly surprised to find that the gel was very light and it gave my hair great definition and shine. My wavy parts were encouraged into a nice twirly curl, which I really liked.
Now here are the cons, in my opinion.
The smell is insanely strong, like, super strong. It will fill your shower with a ginger aroma, which I personally didn’t mind–but I know some people may be sensitive to fragrances, so beware.
Also, this system is not the most economical. Each product costs $18.99, and I am a person who thinks SheaMoisture is expensive so this price almost gave me a heart attack. You can get it here in Curlmart to test it out for yourself.
Watch my video review
Giveaway
We’re giving away 2 full sets of the cleanser, conditioner and the gel. Simply comment below!
Two winners will be randomly selected on Friday, January 23.
This giveaway is open to U.S. residents only, as per our Terms and Conditions.
This post is not sponsored.
*Please make sure you have liked us on Facebook, so that when we can notify you if you’ve won.
This giveaway is now closed.
Let’s go back to the basics! (pun intended”>.
Check out this simple DIY clarifier that features the star ingredient–baking soda. And remember, you should always follow up with an acidic rinse after you do a basic rinse to re-close the cuticle, apple cider vinegar is usually used for this purpose. You can clarify as often as you see fit, some curlies even replace their shampoo with baking soda. Just make sure you pay attention to your hair’s reaction to the mix and dilute as necessary.
Baking soda is known for its ability to degrease stoves and to scrub off grime practically anywhere in your home, but it has also gotten its fair share of fame in the natural hair community. According to the United Nations Environment Programme, baking soda has a high pH of 9, which means it is a basic solution.
pH simply refers to the concentration of hydrogen ions within a substance. A low pH means there is a high concentration of hydrogen ions within the substance and a high pH means there is a high concentration of hydroxide ions. A substance with a low pH is called an acid, such as lemon juice, and a substance with a high pH is called a base, such as baking soda. When a basic solution is applied to the hair the cuticles open allowing the products to be released and absorbed more easily.
Because baking soda has this effect on the hair it is a great clarifier that will give your curls a great pick me up. Most clarifying shampoos contain harsh sulfates that dry out hair beyond belief, so baking soda is a great alternative.
Watch the Video
Few of us are exempt from experiencing the frustrating effects of a stubborn hair tangle. Whether it’s a result of a professional updo followed by an all-night party, or a symptom of a curly head in need of a haircut, it can be managed without taking extreme measures or breaking out the peanut butter! Before you start snipping, read on for several detangling steps that don’t involve scissors.
Isolate The Knot
Go in front of a mirror to get a good look at the knot. It’s helpful to pull back the rest of your hair so that you can clearly locate the snarl and not be distracted by the rest of your strands.
Work The Knot
Next, start working hair away from the knot, but be careful how you go about this. Pulling on the hair strands above the knot will only tighten the knot. Instead, focus on pulling strands from the bottom of the knot to the top. Once you’ve done what you could here, move on to the next step.
Add Slip
You know how when you’re applying conditioner to your hair, and your fingers slide right through? We call that slip. So, you know what to do here: Grab your conditioner or a detangling product (we’re partial to Kinky-Curly Knot Today“>, and proceed to apply a generous amount to the knot. Adding slip will help hair strands slide and loosen with less friction. After you apply conditioner, repeat the process of gently pulling strands apart again from the bottom of the knot to the top. Depending on the size and tightness of the tangle, this may or may not be the last step.
Utilize Your Hair Tools
If your knot is still being stubborn, now’s the time for tough love. Use a spray bottle to spray the knot with water, and apply some more conditioner as well. Then, grab a comb and stick one “tooth” smack dab in the middle of the knot, and gently pull the tooth through the tangled hair. Comb from the bottom of the knot to the top by sticking the tooth in the snarl.
Be Patient
You may need to use a combination of loosening the knot with the comb and then pulling the loose hairs out with your fingers. If your patience is wearing thin, take a break and step away, then come back when you’re feeling up to it. A short fuse and a tough knot are a recipe for disaster.
Above all else, prevention is the key. If your hair is generally unruly and/or difficult to manage, don’t sleep with it loose. Take care to moisturize your hair every day, and be conscious of your tresses when you feel them rubbing against your clothes or furniture, as these movements could lead to snags and knots. If you do wind up with a tangle, take your time working out the snarl. It’s not a bad idea to try to detangle before every wash; it may seem like a laborious task, but it’s definitely worth it.
When it comes to shopping for your best friend you can just buy her favorite styling product, easy as pie. But what about when it comes to your hubby–or your brother, father, or best guy friend? If you are stuck on what kind of product to buy for your guy here are some nice ideas that are sure to keep him looking well groomed and sharp, and they are super inexpensive, too!
1. Hair Wax
Hair waxes help control stray hairs and frizz while adding shine. They give the rock hard look without the rock hard hold allowing the hair to have some natural movement for the perfect clean yet messy look.- Samy Under Control Molding Wax
- Aussie Men Texturizing Wax
- FX Special Effects Molding Wax Pliable Hair Wax Flexible Hold
2. Pomade
Pomades are confused with hair waxes very often, but the main difference is that pomades are used for slicked back styles rather than a tousled look. Pomades are sure to make any man feel sophisticated.
3. Styling cream
Styling creams work best for men with thirsty, twirly locks. They help add moisture to the hair to control frizz while giving definition and control to nail any style.- OGX Curl Cream Hydrate + Defrizz Kukui Oil
- Sheamoisture For Men Three Butters Styling Smoothie
- Old Spice Cruise Control Foaming Crème
4. Gel
Hair gel is perfect for the type of guy who likes to rock daring styles, mohawks and spikes. Gel will provide all the hold and shine he’ll need to rock that daring look.
5. Hairspray
For the guy who always seems to be on the run, hairspray is the best option. Hairspray is great to refresh a style that has loosened throughout the day, and it is the finishing touch to a look to keep it in hold all day.
- Paul Mitchell Professional Freezing Hairspray
- Schwarzkopf got2b Guardian Angel Frizz Taming Hairspray
- Salon Grafix Professional Shaping Unscented Super Hold Styling Mist
I was born with straight hair, but as I got older and went through puberty my hair become really frizzy, poofy and it was out of control. The worst part was that my mom’s hair was the same way but she didn’t know squat about curly hair so she just put her hair in a braid every day. Growing up I hung out with the “popular” girls and the popular girls had one trait in common, straight hair.
Relaxers, in general, are meant to destroy the bonds in our hair strands that make our hair curl, and once these bonds are broken they can stay straightened out for long periods of time. Are relaxers used mostly by those with a coilier texture? Yes. Does that mean women with wavy and curly hair don’t use them? Nope.
I definitely felt pressured to straighten my hair.
I was thirteen years old and I was still trying to fit in by copying the looks of my peers. I remember hanging out with my friends and we’d all be in the bathroom putting on makeup and passing the straightener around to flatten out our imperfections.
I felt like an ugly misfit with my poofy hair so I washed, brushed, blow dried and straightened my hair every single day for a year until I decided to relax it because I thought it would be a better alternative for me.
I thought, wow, straight hair for a month without having to heat style every day? Awesome! Yeah, I know, I wasn’t educated about hair back then, if you can tell. But at the time, I thought a relaxer was the perfect permanent solution to my poofy problem.
I kept my relaxed hair and continued to color it and straighten it as well, and I noticed that my hair had gotten thinner and drier. As I got older I went to a new school, and I had new friends and I had gone through new experiences. I was beginning to appreciate my natural beauty more and more. I was obsessed with makeup and straight hair when I was thirteen and fourteen but once I turned fifteen I realized I did all those things out of self-hate.
Every morning I would change my persona because I hated the person that God made me, and I finally realized that I was wrong. There’s nothing wrong with a little primping now and then, but when your makeup and straight hair becomes your mask and identity you feel empty without them. Whenever I came out of the shower with a fresh face and my poofy hair I felt disgusting and I immediately took action to cover up what I hated about myself. I created a hazardous self-hate zone that I carried everywhere with me, and it was something I needed to change.
One day, I decided no more makeup and no more relaxers, or straightening or hair dyes. I went cold turkey and man, was it hard. But here I am now. I haven’t heat styled in three years, not even once. I haven’t dyed my hair in three years and I only wear makeup on super rare occasions. I am really proud of how far I have come. I embrace my natural face and my natural hair, and I have never been more confident I my life.
So why did I relax my hair? I did it out of self-hate.
And why did I decide to stop relaxing, straightening and dyeing? Because I wanted to be more confident in who I was, who I truly was, naturally, not the fake persona that I made up every morning. I am still not quite sure why my hair turned curly out of nowhere, but I’m really glad it did because I have learned how to love myself how God intended.
What inspired you to quit relaxing your hair and return natural?
- 1
- 2

