Search Results: Nina Sultan
Shampoo and Conditioner:
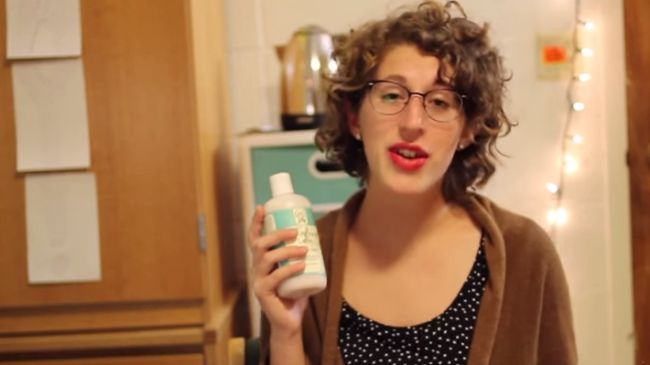
Currently, I have been using the SheaMoisture Retention Shampoo and the Restorative Conditioner and I’m really loving this line because they are incredibly moisturizing. They have really helped my curls fight against dryness and damage. Occasionally I switch out the restorative conditioner for my All Natural Conditioner by EO. This conditioner has mint & rosemary essential oils, which not only help to stimulate growth, but also act as a cleansing agent. Therefore, I use this conditioner for my co-washing routine as well. The shampoo and conditioner are inexpensive (under $10″>, smell great, are gentle, fight dryness, and have great natural ingredients in them such as sea kelp, shea butter, and argan oil. This shampoo and conditioner are my second favorite next to the Coconut & Hibiscus Shampoo and Conditioner. If you are looking for a good winter cleanser and conditioner, give these products a try.
Styling Routine:
- LOC Method – leave-in, oil, and styling cream
To keep my curls moisturized, I swear by the LOC method because it consistently keeps my curls soft and moisturized all season long. For my leave-in, I have been using SheaMoisture Jamaican Black Castor Strengthen Grow & Restore Leave-In Conditioner. I have actually been using this product all year round, as it gives my curls excellent moisture that lasts. It has organic shea butter, Jamaican black castor oil, and peppermint in it which is the perfect combination of ingredients. This leave-in is about $14 but lasts for a long time, and a little of this product goes a long way. This would be a great leave-in to try this season simply because it is so incredibly moisturizing.
Oil:
For my oil, I alternate between my Moroccan oil, and my Dr. Bronner’s Organic Virgin Coconut Oil. Moroccanoil smells divine and is great for giving my curls enhanced shine. It also leaves them feeling incredibly soft. Although it is a bit expensive ($40″>, I get great results and the product lasts for a long time. Coconut oil does the exact same thing but is a more natural oil. I tend to use the coconut oil more than the Moroccanoil for the fact that coconut oil is less expensive ($10″>.
Styling Cream:
I have been alternating between my SheaMoisture Coconut & Hibiscus Frizz-Free Curl Mousse ($10″>, and my Curl Complete: Taming Butter ($20″> by Pureology. Currently, I have been using the taming butter more because it gives my curls more moisture than the mousse. The taming butter is actually a leave-in but I also use it for my styling cream as well. This butter smells incredible and has coconut oil, sunflower seed oil, soybean oil, and shea butter in it. The one thing I do not like about the taming butter is that it is not 100% organic like the mousse is. It is 100% vegan, however, and gives my curls the moisture and definition that I love.
[prodmod]
What kinds of products are you into this winter season for your wash-and-go?
Let me know in the comment section!
In my previous video on co-washing I had been using the Curly Twirls Custard Styling Gel and while I got ok curl definition from that product, it was definitely not my favorite. In the past, I’ve mostly just used gels and styling lotions to style my curls. Realizing this fact, I wanted to change up my curl routine and try mousse. I used to use mousse when my hair was much shorter and I remember how great it was. I wanted to see if I would still like it now that my hair is longer. I love Shea Moisture’s products and especially the Coconut & Hibiscus line. I noticed their mousse and their misting spray when I was out shopping for products. I bought the two of them together to try a whole new approach to curl definition. Here is what I discovered:
What I Tested:
Frizz-Free Curl Mousse
Pros
- it does not weigh my curls down
- it has a nice scent
- it is moisturizing to my curls
- it gives me great curl definition
Cons
- none!
This mousse is about $10 and is available at your local Target, and online in Curlmart. While the product is $10 it does last a long time. I like mousse simply because a few pumps go a long way. I have been using this product for a couple of months and have fully incorporated it into my styling routine. I ended up being quite pleased with this product because it is light and it does not weigh my curls down. It is easy to apply and I absolutely love the organic ingredients and the fact that it is cruelty free. It has a very nice light coconut scent to it, which I find to be quite refreshing. This product is moisturizing and also gives my curls great definition. Because this product is so moisturizing, it has really helped my curls fight dryness. I can happily say that I didn’t really have any complaints about this product.
Overall
All in all, I give this product 4 out of 5 stars. I would highly recommend this product to other curlies who share my curl texture. This is a really nice mousse and while it might not be my holy grail, this is a product that I will definitely be going back to for sure.While I enjoyed the mousse, I unfortunately did not share the same enthusiasm for the Hold & Shine Moisture Mist.
Hold & Shine Moisture Mist
Pros
- it is cruelty free
- it has great organic ingredients
- it is moisturizing to my curls
Cons
- it did not give me any noticeable shine
- it did not provide hold for my texture
This spray is also $10 and is available at your local Target and online in Curlmart. Like the mousse, a few spritz of this spray goes a long way and therefore it lasts a good long time. I have been using this product for the same amount of time and as frequently as I have been using the mousse. I have to say I was a bit disappointed with this product. While it has the same great organic ingredients, is cruelty free, and has a similar coconut scent to it, I did not get much enhancement to my curls from the spray. It did not give my hair any noticeable additional shine and I also faced the problem of not experiencing much hold from using this product. This could possibly be due to me having a thicker curl texture. Either way, I was very unimpressed. However, the one thing I did like about this product is that it is really moisturizing. I liked that aspect of it because my curls tend to be quite dry especially now that winter is approaching. However, additional moisture was the only thing I noticed and liked from using this product.
- All in all, I give this product 3 out 5 stars. I probably would not recommend this product to other curlies who share my curl texture. I was not crazy about it–what do you think?
Have you tried these products? Do you like them? Let me know in the comment section below!
Hey guys! Welcome back. Today I’m answering 4 frequently asked questions about short curly hair and pixie cuts from NaturallyCurly.com’s Q&A section.
1. How many times can I co-wash my short hair?
“I’m from the Dominican Republic and I have trouble styling my hair in the morning so sometimes I co-wash; however, I think I’m wetting my hair too much.”
Co-wash as frequently as you’d like. But keep in mind that there is such thing as over conditioning which will weigh them down and make you lose your curl. To counter this, I’d suggest doing a clarifying treatment once a month to get rid of all that product build-up. Another thing you can do is get a spritz bottle full of water and conditioner–this is a great curl refresher if you’re having trouble styling in the morning. Finger detangling is lot more gentler on your curls. Start detangling from the bottom and work your way up so you experience less breakage.
2. My haircut won’t let me pineapple. How can I keep my curls while I sleep?
“I have type 3b hair and I do sleep on a satin pillowcase.”
You can do what I do, which is take the hair that does manage to stay in a pineapple. The rest of the hair that does not stick in my pineapple are pinned up with bobby pins. You can also do a ‘multi-pineapple’ on multiple sections of your hair. Another option is to wear a scarf to get the 360 coverage.
3. Would a pixie with my kind of curls look good?
“I have 2c/3a hair, not sure which one. Probably both.”
As a veteran of the big chop and someone who has done the big chop, I can tell you: absolutely! Pixie cuts are wonderful. Everyone should try it–it’s low maintenance, liberating, and cut my routine time in half. Make sure it is something you really want to do; it does take some time to get used to. Google and do your fair amount of research because it will not look like a pixie cut on straight hair.
You can also check the NaturallyCurly photos section, StyleNook, for curly pixie cuts. If you have a short haircut, upload your photo to inspire other curlies!
4. Is it healthy to do nothing with your hair?
“I have a pixie cut and I do co-wash, but I don’t use any other products right now.”
Absolutely not! I think it’s all a matter of preference. When I had a pixie cut, sometimes all I did was smooth it down with some water. As it grew out a little bit, I started using a volumizing gel or curly custard when my hair would stick up in wonky places.
Watch my video
What video would you like to see from me next?
Hey, curly friends! Welcome back. This is Nina Sultan here. Today I’m doing another basic hair care tutorial on how to co-wash fine, curly hair.
What is co-washing?
Conditioner washing. Instead of using a shampoo, you use a conditioner. It can be done how frequently you need to do it–every other day, weekly, monthly, whatever. As we know, shampoo can be harsh on curly hair. Continuous shampoo usage can really dry out your curls–this is why us naturally curly girls like to co-wash instead.
Co-washing makes your hair feel softer, conditioned, naturally shiny, and defined. However, I will say that you don’t want to overdo it. You can get hydral fatigue from over conditioning your hair. In order to prevent this, I will wash my hair with a sulfate-free shampoo one time, then next time I’ll use a conditioner to cleanse. To get rid of scalp build-up, I recommend clarifying once a month or so as well.What you need
A moisturizing, cleansing conditioner + styler
I use EO All Natural Conditioner. It has rosemary essential oils and mint which my scalp loves. It is also great for finer hair types.
I take a copious amount into my palms and distribute it evenly from the roots of my hair to the ends. If I need to repeat the process, I will. But 95% of the time, I’m good with just 1 co-washing.
I gently massage my scalp, then rinse it out. I quickly finger detangle and then style as usual.
I still like to scrunch my hair with a t-shirt (“cup and scrunch””>.
Once my t-shirt has absorbed the extra moisture, I love to use SheaMoisture Jamaican Black Castor Oil Leave-In to seal and moisturize. Although I think this leave-in was originally intended for coilier textured hair, but this was the last product on the Walgreens shelf and I actually have fallen in love with it.
I like to use a Custard Styling Gel by Curly Twirls. A little goes a long way, so I apply a little bit from the roots to the ends.
Then I air dry to about 50%, then diffuse for more definition that will last.
How do you co-wash and style your fine hair?
[prodmod]Hey, guys! It’s Nina Sultan here. Today I’ll be doing another basic curly hair care routine video for you.
What is clarifying?
It is like using a shampoo on steroids. Clarifying is an essential part of your routine that is usually done once or twice a month, depending on the porosity of your hair. Clarifying is so important–how often you do it depends on what your hair type is and how badly you need it. Since I have very short and fine 3a curly hair, I only need to do this step once a month. I have a personal goal of one day using all organic products, so in the future I hope to transition to just clarifying with diluted apple cider vinegar (which some people call an ACV rinse”>. For now my store bought clarifying treatment works well for me.
[prodmod] It restores your hair’s body and shine–and gets rid of all that product build-up from your styling product, conditioner, shampoo, and any other products you apply to your hair. If you have the feeling that your hair reacts well to products and then over time it “gets used to” them, you may be experiencing the effects of product buildup. If your hair looks and feels dull and is not reacting well to products that usually work for you, it could be time to try a clarifying treatment. If you have not incorporated monthly clarifying washes into your curly hair routine, it’s important to start doing it now! Without further ado, let’s begin.What you’ll need:
- MopTop Clarifying Rescue Treatment to clarify.
- SheaMoisture Superfruit 10-in-1 Conditioner for moisture.
I like to try and get every single hair follicle, my roots, my ends, all over my hair. For about 3 to 5 minutes, I let the product sit and work into my hair. Usually this is my time to wash my body and shave. When the time is up, I rinse out my clarifying treatment thoroughly.
Once my hair is rinsed out, I like to restore the moisture back into my hair with SheaMoisture’s conditioner. Although the scent is artificially fruity, it is so moisturizing–so I actually really love it. Then, I rinse out my conditioner and style my curls as usual. It is a very simple and easy (but necessary”> routine!
Watch the video
What do you use to clarify?
If you have ever attempted to grow a beard, you know the journey is not always a cakewalk.
Sometimes it doesn’t grow in right, or you keep shaving it off because you can’t seem to stay committed to the idea. Men who have successfully grown–and maintained–a beard know how much patience, commitment, the right kind of tools, and attitude it requires. Writers Rodney Cutler of Esquire and Steve of beards.org collectively give us 9 tips on how to get your beard where you want it to be.
#1: Commit to it
Perhaps the most important tip on the list. Once you make the decision to start growing, stick with your plan! If you do this you will have nothing to lose! Experiment and have fun! If it turns out not to be for you, it’s not the end of the world.
#2: Pick a time
It is important to pick a time where you know you will be relaxed or perhaps if you are looking to do something different. Now that fall is approaching, it would be the perfect time to try something new. Be brave.
#3: Stop shaving
This tip might seem obvious but it is critical when you are just beginning. Steve recommends refraining from shaving and sculpting your new fuzz for at least four weeks. Steve warns that if you start to shave and sculpt too soon, you may accidently cut more off than you would like. So relax, put away your razor. However, if you would like to keep your five o’clock shadow neat and under control, Rodney recommends using a stubble trimmer everyday or two like Philips Norelco Stubble Trimmer ($40″>.
#4: Define your neckline
Steve recommends that once the four weeks are up, you should consider defining your “neckline” which is located along the bottom of your beard around your neck. Steve recommends having this done by a professional stylist or barber or even better, a stylist who specializes in beard styling. Once your neckline is defined, Rodney recommends trimming and cleaning up that area with the Oster Voreq ($60″> every three or four days.
#5: Don’t let itching ruin everything
If you are itching, do not despair. This is only temporary! In the meantime, Steve recommends using regular shampoo daily and occasionally a conditioner. If this is still not enough relief, apply baby oil or a moisturizing lotion to the itchy areas.
#6: Give your beard some TLC
Once your beard is a little longer and scruffy, it is time to maintain it! Rodney suggests trimming with something that has a heavy-duty motor like the Wahl Designer ($65″> once or twice a week. He recommends first combing your beard down to get rid of unruly edges, then against the growth to poof it up. This allows your beard to be easier to cut. Do this before you begin shaving.
#7: Good hygiene
Most men wash their beards with either regular shampoo or soap. Pick one and use the one that you like best. But if you want to avoid residue, Rodney suggests using a wash that is specially formulated for washing beards like Bluebeards Original Beard Wash ($14″>. Once your beard is nice and squeaky clean, gently pat your beard dry with a towel–don’t blow dry it.
#8: Don’t give up
Steve recommends setting a goal for yourself. He recommends waiting at least six weeks before making the decision whether or not to get rid of it.
#9: Have confidence
Once you have your beard, rock it! Do not let anyone else’s opinion ruin your groove–it’s your beard and it only truly matters what you think about it.
[prodmod]
Having a change of heart?
If it turns out that having a beard is not for you, not to worry–however, you need to be especially careful. Trim away as much hair as you can first before making the big shave.
Growing beards can be a tough and committing process. But in the end, you will have something to show for it. If this is your first time truly committing to growing a beard, it takes a little bit of confidence and courage. If you succeed, great. If you found that it was not for you, then you can’t say that you didn’t try!
What do you think it the hardest part about the growing experience? Leave a comment below.
Compared to a daily conditioner that gently cleanses your scalp and softens your curls, a deep conditioner does that on steroids (not literally”>. After shampooing or co-washing, you put your D.C. on for a certain amount of time. Because my hair texture is fine, my curl pattern is 3a, and I have low porosity curls, I deep condition for about 30 minutes once every other week in the summertime. In the winter, I step by game up and deep condition once a week.
What does deep conditioning do for my curls?
Admittedly, I don’t really protect my curls from heat or the elements. This is why deep conditioning is important to my curly hair care routine. In addition, it strengthens curly hair, prevents further weakness and breakage from happening, and improves elasticity (bounciness”> in my curls.
What I use
- My favorite cleanser/sulfate-free co-wash
- Coconut and castor oil
- Deep conditioner
- Shower cap
- Heat wrap
- Moisturizer
- Favorite styling product
- Diffuser or towel
Step 1. Cleanse & Detangle
I like to start off with my Curl Junkie Daily Fix Daily Conditioner. I like to gently finger detangle my curls with this, too.
Step 2. Apply my coconut-castor oil
This is optional, but I highly recommend it. I like to saturate my curls with Jamaican Black Coconut Castor Oil for a lot of moisture, softness, and shininess. I also love it because it promotes healthy hair growth and slows down the process of hair shed!
Step 3. Apply my deep conditioner
I like to use Eden BodyWorks All Natural Jojoba Deep Conditioner and completely saturate my curls. I have been using it forever. I pay extra attention to my roots and ends. Again, I gently finger comb throughout my hair to make sure the product is distributed evenly.
Step 4. Seal with a shower cap
I use a plastic shower cap (or saran wrap”> to seal in my deep conditioner and coconut-castor oil goodness. It’s worth looking goofy for 30 minutes, trust me.
Step 5. Apply heat
This step is also optional, but I love to wear my heat therapy wrap for about 20 minutes. It really intensifies my deep conditioning treatment by penetrating my follicles.
Step 6. Chill out
For 30 minutes, I let my hair get its deep conditioning goodness on.
Step 7. Rinse, moisturize, style
I take off my heat cap and rinse out the deep conditioner and oil from my hair. Then I moisturize, diffuse, and style per usual.
Watch the video
How do you deep condition?
Are you looking for a simple and inexpensive way to curl your hair? If you have straight hair or random curls that don’t act in unison, this curly hair hack is just for you.
While there are many exciting ways to curl hair, toilet paper is probably not the first thing that would come to mind. However, it turns out toilet paper can give you some funky, uniform, springy fun curls. Mickey Crazy 1 and Noelle Bean show us their secrets to getting some fun and easy curls. Literally all you need is some toilet paper. If you have curly to coily hair and want large barrel waves, try the Toilet Paper Method on a blowout.
Step 1: Section off your hair according to what look you are going for (fewer sections for barrel curls, smaller sections for tight spirals”>.
Step 2: Begin with two squares of toilet paper and fold the two squares in half. Fold the square in half again. This will act as one ‘roller’.
Step 3: Take a section of hair and wrap your hair around both your finger and the toilet paper (this will make things easier”>. Once you have wrapped it around, pull your finger out and roll it up to your scalp and tie the ends together.
Step 4: Repeat this process until each of the sections of your hair are covered. Then, go to sleep! Let these sit in your hair overnight.
Step 5: The next morning, untie the paper from your hair and voila! You get beautifully uniform, clumped, thick ringlets!
Noelle’s Toilet Paper Method takes just a little bit longer.
This is the tutorial to follow if you have pin-straight hair and want to style your hair into loosely tousled beachy waves.
Step 1: Take your hair into three sections. Two parted down the middle, and then put the rest up at the top. If you have bangs, clip them up and out of the way. Start with four squares of toilet paper. (This will act as one roller”>.
Step 2: Take a medium section of hair, put the toilet paper underneath your hair, and criss cross over your hair. Slide it down to the end of the section and roll it up.
Step 3: Once you roll it all the way up to your scalp, tie it in a bow and repeat on the next sections. Be gentle.
Step 4: Go to sleep to seal in the retextured hairstyle.
Step 5: The next morning, gently untie your paper and add a curly styling product for hold. Use a curling iron for any random pieces that fell flat overnight.
Step 6. Blow dry and tease your hair to get that effortless big tousled wave look.
Which should you use?
If you want thicker spiral curls, follow Mickey’s method. On the other hand, if you want messier, fuss-free curls, I would try Noelle’s method. What do you use to curl your hair? Have you tried the toilet paper method? If so, what did you think of it? Let me know in the comments below.
Unlike my experience with leave-in conditioners, I have actually tried several different conditioning products. Despite my tendency for experimentation, I seem to always return to Shea Moisture’s Coconut and Hibiscus Curl and Shine Conditioner. In my most recent Product Junkie pursuit of a new daily conditioner, my goal was to find a conditioner under $10 and that would give my curls the moisture they need. I also wanted to find something with ingredients that were specialized for giving naturally dry, curly hair more shine and help to detangle easily.
Then I came across Elucence Moisture Balancing Conditioner in Curlmart and noticed it was only $8.
This conditioner is currently quite popular as my research found it popping up all over the internet, its amazing Curlmart reviews put me over the edge. I added it to my shopping cart because I wanted to see what all the commotion was about. I can honestly say that I was pleasantly pleased by this conditioner.
I wanted to find something that was under $10 and that would give my curls the moisture they need. I also needed something that gave my hair more shine and detangle knots easily.
It is not only a great daily and cleansing conditioner, but I was able to use it as a moisturizing leave-in, too. I found the product works well for me both ways. It is incredibly moisturizing and I love the olive oil and coconut derived ingredients that this product is made with.
While it did wonders for my Type 3a hair, I must say, I was a bit disappointed by the scent. This conditioner smells like a sickly sweet chemical mixture. I really had wished for the scent to be more appealing and natural. While I was not a fan with the product’s scent, there are 245 reviewers of this product, many of which state that they enjoyed scent.
That was the only con that I noticed while using this product. However, I ended up liking this product despite the scent in the end simply because the scent is actually quite weak and makes it all the more easier to cover up with scents from my styling cream and oil. I give it a 4 out of 5 curl rating. This product is fantastic overall and does more than just condition hair. This product is the best dual-purpose conditioner I have used thus far.
The bottom line
Elucence Moisture Balancing Conditioner is inexpensive, it has ingredients targeted to providing your curls with the ultimate moisture they need, and eases the detangling process. This moisture balancing conditioner really is a dual-purpose product–it is great as both a conditioner and leave in. It has a smooth consistency that is easy to apply and distribute, and finally it gives your curls the desired shine, softness, and silkiness we all crave.
Watch my review
I’m eager for suggestions on what you use next, and what you think I should try. Let me know in the comments section!
[prodmod]Today I’m going to review Kinky Curly Knot Today Natural Leave-In Conditioner. Watch, read, and enjoy!
Ever since I began my curl journey I have not been the most adventurous when it comes to trying new products. Once I find one that I like, I tend to stick with that product. Currently, my holy grail leave in conditioner is Curl Junkie’s Smoothing Assurance Lotion and Leave In Conditioner. I love it, however, it is quite expensive ($20 in CurlMart“>. Due to wanting to save money as well as wanting to explore my cheaper options, I began looking for a new leave in conditioner. In my research, I came across Kinky Curly’s Knot Today Leave In / Detangler. This product received a lot of positive feedback in the reviews as well as being extremely popular in CurlMart. The other thing that I noticed was that it was under $15. Excited, I decided to give it a try.I must say after using this product, I was disappointed.
While it was moisturizing, the smell of the product was not great. This product smells like a cheap fruity gel and is quite strong. I ended up not liking this product because of that. However, because I use the LOC method (Leave in, Oil, Styling Cream”>, the smell from the oil and styler ended up masking the scent of the leave in. Therefore, it made the scent much more tolerable. However, I do not like products that do not smell good.
The Pros
It is inexpensive ($12″>, it has all natural organic ingredients, it is cruelty free, and this product also has a very nice consistency. It is smooth and slightly thicker than Curl Junkie’s leave in. Overall, this product kept my curls very moisturized. It is also very easy to apply and distributes nicely throughout your curls! It also detangles nicely. I could easily finger comb through my curls without any problems. While the scent could be improved, it definitely does the job in making sure your hair is moisturized and cared for. If you are looking for a cheaper leave-in, you should try this product. It is does a decent job for its price. If the smell is also something that is a big factor for you, consider that there are ways to get around it.
I would recommend using the LOC method. If you do, the scent will not carry over and you will still have gorgeous moisturized locks as well as saving yourself a few pennies.
While I was not a fan of how it smelled, others who reviewed this product liked the scent. If I had to rate this product out of 5 stars I would rate a 3.5 due to scent being such an important factor to me. While the scent was a deal breaker for me, what do you guys think? Do you use this product? Do you like the scent? Do you not? What leave-ins are you loving right now? I am still investigating my new Holy Grail in the meantime. Give me suggestions. And watch my review of Curl Junkie’s Leave-in here:
What leave-ins are you loving right now?
We have all had those products that we never ended up using in its entirety.
Whether it was a product that maybe you tried and ended up not liking, or maybe went through a phase of using certain products but found a better product that suited your needs better–now you are finding bottle after bottle of products in your cabinets, drawers, and all you are thinking about is how to get rid of them.
Perhaps your first instinct would be to either throw them away or simply pour them down the drain. However, there are so many better ways to dispose of gently used products! Renée Rouleau and Umbra give some great methods in how to efficiently do just that! By following their suggestions, not only will the environment thank you but also people who are in need.
While pouring products down the drain or throwing them away may be the easiest and quickest solution, it is quite problematic in the long run for the environment. Not only do products get into our rivers and oceans but also contribute to the pollution on land by going to the landfills. If your products contain a lot of chemicals, are flammable or corrosive, do NOT pour them down the drain. Why not? The sewage treatment plants and plumbing systems are not designed to handle such chemicals and products, but rather just human waste and sewage. This also counts for hair oils as well.
While you may not think oils can be a problem, they indeed are–for human waste and sewage!
While oils start off as liquid, they quickly cool down and solidify at certain temperatures. When oil is solidified, it easily plugs up and clogs plumbing. If you think that hot water may fix this issue, it does not! The hot water only assists the oily product further down the drain before it solidifies. So what can you do?
Option 1: Try using them in different ways than your originally did.
This might seem like a no-brainer but according to Umbra, trying to simply use up your products is a great way to get rid of them! Try cocktailing it or layering with another product for a different result. If the product is really not for you, then there is another option.
Option 2: Donate them.
Did you know that you can actually donate your gently used products? There are tons of women who are in need of hair products and are grateful to have someone come in and give away products that they didn’t end up using. Renée says you can donate anything that comes in either a bottle or tube. You can even donate hairbrushes and combs as long as you sterilize them first. You can also donate to the people at the household hazardous waste facilities as they will take some hair products as well.
Next time you want to throw away unfinished products, head on over to your local shelter or household hazardous waste facility and donate your products today.
If you are wondering how to keep your curls under control and looking great, here is a step-by-step tutorial on how I apply a styler. All you need is a little styling gel, an old t-shirt, and you are ready to go.
Things you will need
- A styling gel/ lotion like DevaCurl Light Defining Gel, Jessicurl Spiralicious Styling Gel, or Darcy’s Botanicals Curly Cream Gel
- Old T-shirt
- Diffuser
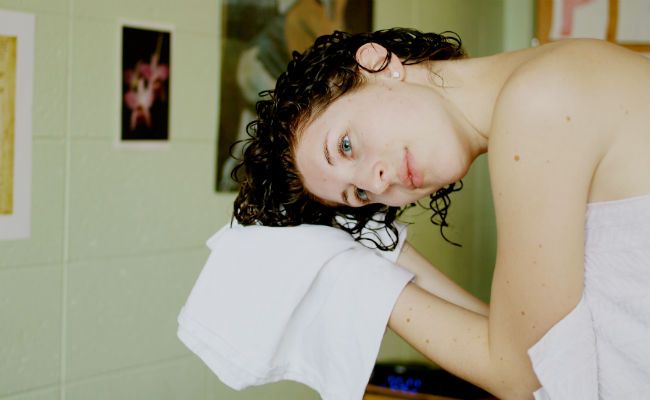
Step 1: After you get out of the shower, do not dry it yet! Leave your hair sopping wet!
Step 2: Before applying your styling gel, flip your hair over. This will help with distributing your gel evenly throughout your hair.
Step 3: Use 2 pumps of your styling gel and scrunch from the ends to the roots of your hair. I’m using Redken’s Curvaceous Ringlet Styling Gel.
Make sure to evenly distribute throughout!
Step 4: Flip your hair over again and scoop and scrunch your wet hair with an old T-shirt until it is no longer dripping wet.
Tip: T-shirts help prevent frizz!
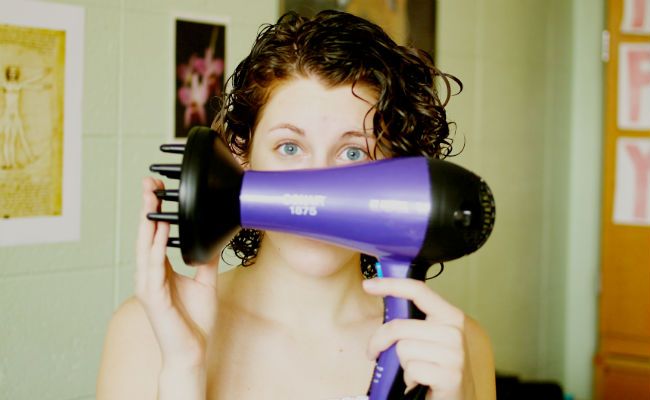
Step 5: After your hair is T-shirt dried, you can either diffuse or let your curls air-dry!
Tip: For best results, make sure your hair is about 50% dry before diffusing!
And voila! That is how I apply a styling gel and use a diffuser for definition. If you follow these steps, you will have gorgeous and defined curls with hold that last all day.
[prodmod]
Looking for an easy updo that you can quickly achieve with your short hair? When your hair is my length (above the shoulders”> it can be difficult to throw your hair up into a topknot, but this low braided updo makes it easy to keep the hair out of your face without hair coming loose throughout the day. I grew my hair out from a buzz/pixie cut so this isn’t necessarily “short” for me, but compared to bra strap length or longer, mid-back length cuts, this is a shorter cut. This elegant hairstyle will look fabulous throughout the work week. I have 3A curly hair, but this style is suitable for all curl patterns. Follow along with the photos, or watch my video tutorial!
Step 1
Take a one-inch section of hair, split it into three parts, like you would do to make a regular braid.
Step 2
Take another one-inch section of hair level with the first and leave a small gap between the two. Essentially you are now doing a reverse French braid.
Step 3
Twist the braid up and around to form the top of the heart. Use bobby pins to pin it into place.
Step 4
Repeat with the second braid, pinning it to the first braid to for the top of the heart.
Step 5
Connect the ends of the braids together where the bottom point of the heart will be. Pin in place with bobby pins and hide the ends of the braids with the rest of your hair and voila! That’s all there is to it!
Watch the Video
Are you looking for a new style for your fine naturally curly hair? Have you ever wanted your curls to look perfectly defined and bouncy, but you can never seem to get them to stay like that throughout the day? Now you can. Emily Meyer, also known as The Freckled Fox, is a fabulous and funky blogger who has her own method for getting her hair to have the perfect bouncy curlies down. And she shows us how she gets gorgeous bouncy, Shirley Temple-like ringlets on her fine curly hair.
You will need
-
A package of foam rollers
-
A hairbrush
-
Hair pins or clips (optional”>
-
Hair dryer (optional”>
-
A spray bottle (optional”>
Step 1
Take a shower! Because you are going to style your hair while it’s wet, but not sopping wet. Figure out where you are going to part your hair and separate your hair into 4-6 even sections.
Step 2
Distribute your curlers into groupings so every section of your lox gets the same amount. Start with one section and begin wrapping the hair around the curler beginning around the middle of your section. Start with the bottom sections first and then begin moving to the top.
Step 3
Emily recommends sleeping on them but if you’d rather not, you can blow dry them off and on throughout the day. Just make sure that they are completely dry before you remove the rollers, otherwise your curls will not last. To take them out, unravel the ends slightly then holding in one hand and tugging straight down with the other hand and BOOM. That is all there is to it! Easy, right?
Ways you can style it
Emily’s favorite looks are either wearing them in a high pony tail, a bun, pigtails, adding in a sparkly hair accessory or bow, or pull a bit back from the front for a half-up half-down look. So there you have it! A recipe for perfect, bouncy ringlets.
See more of Emily’s sexy wavy-curly hairstyle tutorials at freckled-fox.com.
As a little girl with curls, I liked the way I looked. I felt unique from the others and was comfortable with my appearance. I never really felt the pressures to change anything about it till I started middle school. Then something snapped. I began to hate my hair. I did not know how to manage my curls either, so they always looked poofy and awkward.
Then something snapped. I began to hate my hair.
I dealt with a lot of hatred towards my curls in school which made me feel ugly. I straightened them, and people would say to me, “You look so much better with straight hair.” This confirmed my thoughts that people thought my hair looked bad. For years I did everything in my power to hide my naturally curly hair. I felt like Mia from the Princess Diaries before she received her “makeover”.
Once I got to high school, I got a new hair stylist. I told her my woes of wanting straight hair. She told me I had beautiful hair and that I should embrace my natural curls, but I chose not to listen and asked her give me a straightened haircut. For the first time in a long time, I actually felt pretty. This was what I had been looking for. I asked my mother if I could own a flat iron; she was not keen on the idea. She loved my hair and always encouraged to love my curly hair. She told me how beautiful it was and how many women would die to have hair like mine. However, I couldn’t see the beauty that she was seeing. I continued to hate my hair for years. That insecurity would continue for quite sometime.
Most of the girls at school straightened their hair. They all looked so pretty that way and I wanted to look just like them. Since straight hair was so popular, I felt like I did not fit in with unless I had straight hair as well. That’s when I decided that I too would succumb to hide my curls away– once I finally did get my own straightener, I used it religiously for two and a half years everyday.
It was not until my junior year of high school that I began to notice how having straight my hair was not meant for me. It seemed that nobody had curly hair. I didn’t want to be like everyone else–I was sick of hating how I looked. I just wanted to be me and carefree. So I slowly began to stop straightening my hair. As my curls returned, I began to see what beauty I was missing out on. I got so sick of spending hours everyday in front of the mirror trying to make my hair do something it wasn’t born to do, plus after spending hours on it, it would never last long. I felt like a completely different person with straight hair. It wasn’t me. So I finally just let it go. It was hard at first, but I began to love my hair more and more with each passing day.
In celebration of going natural, I made the big decision to cut it all off and start over! So I got a pixie cut (big chop”> and cut away all the years of frying my hair to bits.
I can’t believe that I had ever hated my hair.
After years of doing this, I slowly began to realize how silly I was being. Having curly hair will always be a part of who I am. Why was I trying so hard to hide that? If I cannot love my hair then how can anybody else? After years of embarrassment about the way I looked, I began to look at my curls as something to embrace. So I stopped straightening, and started loving. I never thought my hair would become such a huge part in defining who I am. I have have returned to naturally curly for four years now and I could never be happier.
What was your journey to curly like?
We have all had a time in our lives where we wondered about using dry shampoo. But what exactly is dry shampoo? When is the best time to use it? What kind of benefits does it provide for your hair?
What does it do?
Dry shampoo is a fine powder that comes in either a shake-on, dust on or a spray on form. Dry shampoo’s goal is to soak up the excess oil that is on your scalp. This oil is the culprit for making our curls seem dirty. Kristin Ess of The Beauty Department describes the use of dry shampoo as facial blotting papers, but for your hair!
Make it work for your hair
Not only does dry shampoo help your natural oils stay locked into your hair for a longer period of time, but also makes sure your hair stays looking fresh. If you have wavy hair and bangs that are acting up, a quick spritz of dry shampoo can help lay them down. Apply a water-based paste on top to seal in the style. If you thermally straighten your curls with a heat styling tool (i.e. flat iron”>, using a dry shampoo can help prolong the life of your straightened look. Dry shampoo can also be effective when used before working out or going out on a hot day.
Apply directly to your roots on dry hair (NOT wet”> to protect from excess sweating and oil production causing your hair to be limp, stinky, and oily. If your hair gets dry, Kristin recommends lightly applying dry shampoo on the part only, and putting a little jojoba oil on the ends. The key is pat it in. Do not brush or wipe with your hands! Just pat the product gently in until it blends well. By doing so, you can avoid your hair from having a “powdery” look.
Do you need to use a dry shampoo?
The only people who might not need to use dry shampoo are those who do not produce as much oil in their hair or if they just have a naturally dry scalp.
The best ones for your hair type
Try Ambiance Volumizing Dry Shampoo–there’s one made especially for blondes, brunettes, and redheads. Try Tigi Catwalk Session Series’ Transforming Dry Shampoo, a fave among wavies with fine hair. Not Your Mother’s Clean Freak Dry Shampoo will refresh your hair with salon formula qualities at a drugstore, everyday price.
[prodmod]
Many of us curlies are self-proclaimed product junkies.
We’ll admit–we enjoy using at least one kind of product on a daily basis. That may not always be a good thing. Did you know that some hair products can cause redness, itching, or even swelling? If you are having any of these symptoms you may be allergic to your hair products! Board-certified Miami based dermatologist Dr. Leslie Baumann enlightens us on some of the most common products that can cause allergic reactions and what alternatives we can use to avoid having these symptoms in the future!
1. Hair color
For the curlies who enjoy highlighting their curls or dye simply to cover up gray hairs use extra precaution! Hair coloring products are the number one most common products that have been reported to cause redness and swelling. Blame the ingredient called paraphenylenediamine (PPD”> for this reaction. The second ingredient that can cause irritation is called toluene which is also an active ingredient found in nail polish.
Alternative coloring methods
If you are allergic to these ingredients, Baumann recommends either using a veggie dye such as henna to darken or hide grayness in your curls or If you would like to highlight, consider getting a stylish ombre since the highlighting is placed at the ends of your curls rather than at your scalp.
2. Hairspray
We all love hairsprays especially ones that smell good! However, fragrance is often the most cause for why we can get allergic reactions such as irritation, redness, and swelling. The two other ingredients that have been reported to cause reactions are propylene glycol which give your curls moisture and finally acrylates, which form a film around your curls.
Alternative sprays
While Baumann does not offer any particular kind of alternative spray, she does recommend taking note if a reaction occurs and consider what products you have used in the previous 24 hours. If you still are unsure, consult a dermatologist for patch testing. However I would recommend making a DIY chemical free spray in the meantime!
3. Hair conditioner
As curlies we love our conditioners. We cannot live without them, and can never use enough in our hair– unfortunately, they can also have a negative effect on our skin. The problem with some conditioners is that some of them contain an ingredient called isopropyl myristate. This ingredient can give us acne, especially when it touches our face, back, and chest in the shower.
Alternative conditioners
If you are noticing that you have consistent acne, check the label on your product to make you are washing with a salicylic acid cleaner after washing and conditioning your curls.
4. Hair extension glue
Take into account that anything that is made to stay in your hair and withstand washing and tugging, might cause some irritation on your skin regardless. The main ingredient to watch out for when buying hair glue is ethyl cyanoacrylate. If you begin to notice any adverse side effects, Baumann recommends trying a different hair extension technique.
Alternative extension glues
Considering other options, Baumann recommends trying either thermal bonding or sewn-in extensions.
If you have curly hair then you may have seen the term “wash and go” used around the curly hair community. If you’re not clear on what this means, a wash and go is when you wear your hair in its natural curl pattern, without manipulating the style with tools, braids or stretching. Some women wear their hair in a “wash and go” every day, while some never do. So if you have Type 2 or 3 wavy and curly hair then you can totally rock a wash and go, but if you are anything like me then you’ve probably discovered that some days your curls work with you, and some days they work against you. Here are the tools, products and steps you can use for a mostly consistent wash and go.
You are going to need
- A sulfate-free shampoo or cleansing conditioner, like SheaMoisture Curl & Shine Shampoo
- Daily moisturizing conditioner, like SheaMoisture Curl & Shine Conditioner
- Moisturizer/Leave-in, like Curl Junkie Smoothing Lotion
- Styling Gel, like Redken Curvaceous Ringlet
- Old T-shirt / microfiber towel
- Diffuser, like Conair
Directions
- Wash/Cleanse. The one I’m using is a great, natural shampoo. It also doesn’t lather much, which I like.
- Rinse.
- Apply a moisturizing daily conditioner. The Coconut & Hibiscus helps condition my hair and keep it from getting brittle. I use quite a bit through my entire hair from my scalp to the ends.
- Cup and Scrunch. I flip my hair over, wrap a t-shirt around my curls. T-shirts are great frizz fighters, too.
- Moisturize & Style. I use my Smoothing Lotion through the ends of my hair. Once that is complete, I use my styling gel to lock in the style.
- Diffuse or air dry. I like the luscious feeling and volume that I get from diffusing. I use low air flow, and high heat settings.
Watch my tutorial
Thumbs up if you like! Comment if you have any questions. See you next time!