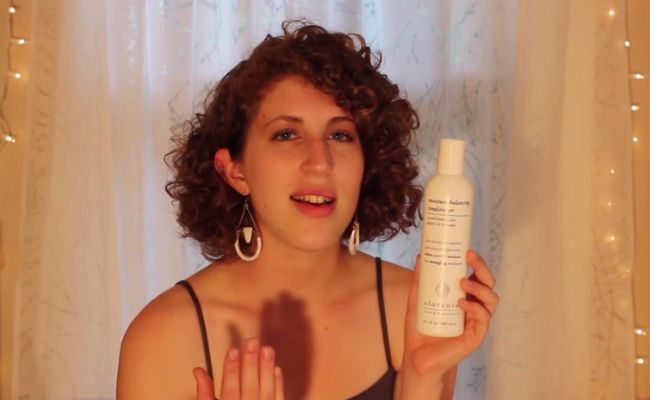
Search Results: Nina Sultan

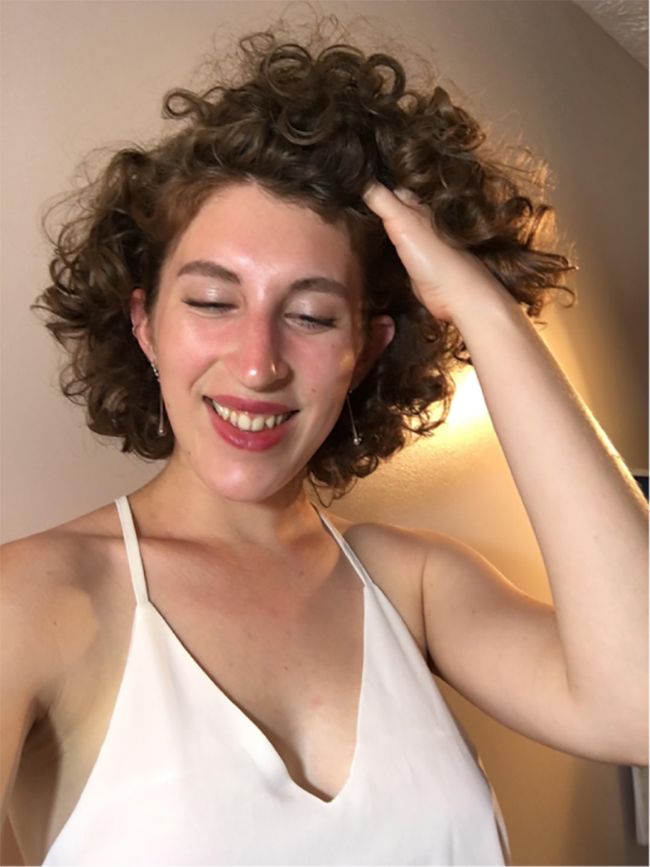
While I can appreciate complex styles, I feel that on me, a more simple/minimalist look works best.I have found that a simple hairstyle can look just as elegant and beautiful as an intricate style without having to spend hours pinning it up. All you need is some cute clips, bobby pins, and your choice of fun accessories, and you are all set! Here are 3 easy styles that are my wedding event go-to’s.
Look 1: Bobbies and a flower
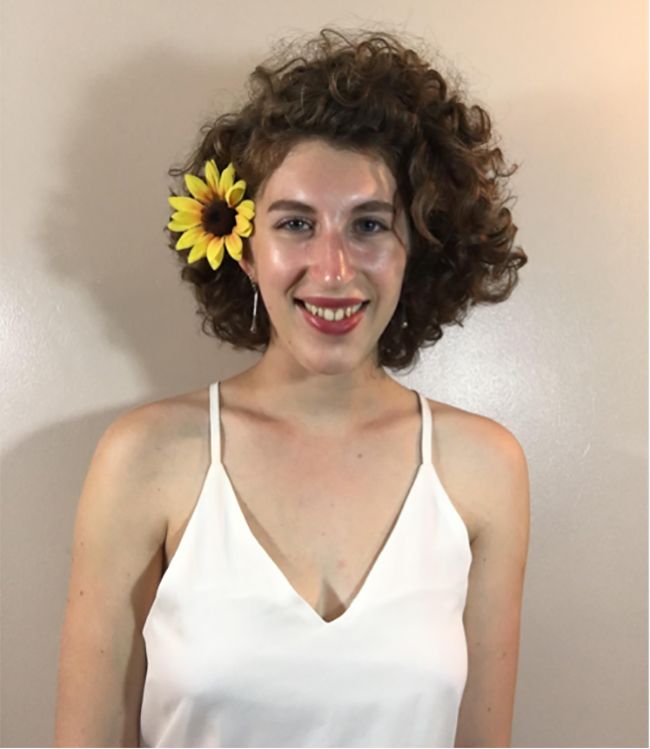
Styling your hair with a couple bobby pins and a flower can be a really elegant look for a summer wedding that you could put together in just a few minutes. All you need is 5 bobby pins and a flower that goes with the wedding’s theme. For this tutorial I went with the traditional summer wedding sunflower.
Creating the look
1″>. Fluff out your hair on the side that you aren’t going to pin.2″>. Take the side that you are going to pin back (I chose the right side”> and put in 5 bobbies side by side. You can pin as high or as low as you please depending on what you feel looks best on you.
3″>. Lastly, pick a flower and pin it/rest it behind your ear and voila!
If you aren’t a fan of the flower, you can opt for something more creative like an oversized pin or a fancy clip with crystals or stones attached. Those would work just as well!
Look 2: Double Braids and Bobbys

This next look is a little more fancy, but still a stress-free look you can easily accomplish. I love this style because it keeps hair out of your face and still gives you some options to get fancy with clips, flowers, or pins in the back!
Create the look:
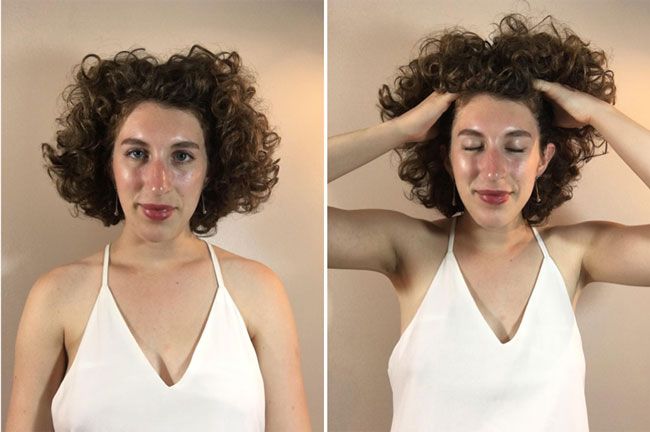
1″>. Start with your hair parted down the middle and fluff it up a bit
2″>. Pick a side and take a small section of curls towards the top, reverse French braid that section and pin it in the back.


3″>. Repeat step 2 to the other side
4″>. Then pick a side and take another small section of hair and braid underneath the first braid you made and repeat on the other side (should end with 4 braids total”>
5″>. Pick a fancy clip, flower, or pin (I am using my favorite sun bobby pins”> and clip your braids together in the back! That’s all there is to it!
Look 3: Up and bobby
This final look stays in the “simple but pretty” realm and is another great way to keep hair out of your face. I like it because its an easy way to create a delicate and pretty look perfect for a wedding. While it looks like I’ve just let my hair go natural, I’ve really just secretly pinned it back.
Create the look:
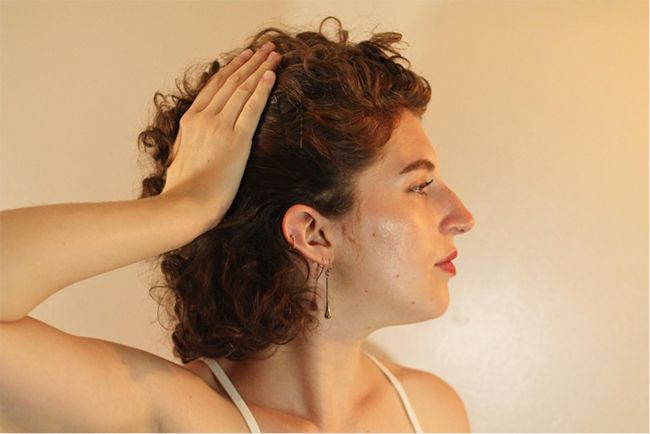
1″>. Pick a side and take 4-5 bobbys and pin them up side by side in a row against your head. I like to pin them up higher but if you prefer to pin them lower you can do whatever you think looks best on you.
2″>. Repeat with the other side and voila!
If you think this look is too understated you can always change it up with some big earrings and a bold lip. I feel like that balances it out sometimes.
My hairstyles tend to be more on the simple side, however I have found that they really do work as appropriate and beautiful styles for weddings. While I find beauty in minimalism, what kinds of styles do you like for your curly hair? Do you like simple and elegant or more complex? Let me know in the comment section below!
Hello curly folks, Nina Sultan here! Today I am going to show you a very easy method in managing your curls.
It’s important to do curl maintenance every couple of months to ensure your curls always look on point. I like to trim my hair about every 6 weeks. Trimming your hair is pretty easy to do yourself and if you aren’t afraid of clippers, can end up saving you money in the long run! Here is how I trim my curls.
Some tips before snipping…
- Make sure you have a good pair of hair clippers. Using just regular scissors or the wrong kind of scissors — especially if the blade is dull — can often do more harm to your curls than good. Having a pair of scissors that are sharp and are specifically made for cutting hair will ensure you get a clean smooth cut when you are trimming your hair.
- Keep in mind is to trim your hair while it’s dry. It makes your life a whole lot easier in that, it’s easier to see and manage the frayed ends. It’s hard to tell what your curls will do when it’s wet because it could look quite different when your hair is dry.
The way I trim my hair is simple
The first thing I do is take each curl and look at the end. If the end is frayed, I snip it off. It’s very much like trimming split ends except you are snipping off more hair. You only need to cut the ends that are frayed and when you cut it, make sure you are cutting the end straight across.
I like to trim my hair in sections. I will trim each and every curl on the right side of my hair, then move to the left side and do the same thing, and finally, trim the back of my hair. I shake my hair throughout the process to make sure there are no curls that I am missing. After trimming your hair when it’s dry, you can always shower and do a touch up while your curls are wet. Trimming the back can be tricky since you can’t really see back there unless you have a mirror. An easy way to trim the back of your hair is to take each curl and lift it up above your head so you can see it clearly. Like the other curls, trim it the same way by snipping straight across.
One thing to know before you trim
Trimming your hair can be time consuming since you are going through each and every curl.
However, it is nice to not have to spend money for someone else to do it. It is also perfectly okay to see a professional stylist to trim your hair if you aren’t comfortable doing it yourself. I think something to keep in mind is that you aren’t cutting that much of your hair off. It’s only the ends of your curls that are getting snipped. I love trimming my own hair, and I never go to the stylist unless I want to do something drastically different. This method of trimming may not be for everyone but it certainly works for me and I love it! I honestly can’t tell the difference between when I trim vs. when a stylist does it. That’s all there is to my method of trimming!
Have you tried to cut your own hair?
Did it go well, or was it a disaster? Let me know in the comment section below!
Growing out your bangs can be an exciting and frustrating experience. It’s so fun to play around with new hairstyles as your bangs grow out, but it’s frustrating when they misbehave. When this occurs, it is oh-so-tempting to reach for the scissors… but back away, woman! Here are tips that will help you resist the urge to chop it all off.
Stay in line
As your bangs grow, some parts of your bangs will grow faster than others. This is where the temptation to cut begins. Unless you are comfortable with trimming your own hair (which is awesome”>, you can visit a stylist every few weeks who is specialized in cutting and styling curly hair. They will help you trim your bangs the right way, which will keep your mind off of cutting them shorter and shorter. For stylists in your area, visit our salons page.
Lay down flat
If you have curls or waves or just hair in general, this will always be an issue. If your bangs keep flipping up, you have a few options. You can flat iron them to keep them in their place or use a large round brush and blow dry them down straight (we like this method because you can avoid creases from flat irons”>. Headbands placed at the top of the crown where bangs begin can also help keep them in place.
Get out of my face
Another annoying phase of growing out your bangs is when they get to that length where they are constantly getting in your face and mouth. An easy way to keep your bangs from doing this is to use bobby pins and head bands to actually push them out of your face. Added bonus: you’ll see what you’ll look like without bangs altogether. One of our favorite ways to tame long bangs is to sweep them to the side. If you have an oval-shaped face, this style will look especially beautiful. It will also draw the eye towards your best facial features.
The greatest feature of bangs? The ability to look sleek and styled or messy and sexy, depending on your mood. Whether you want to chop them at a certain length or let them grow out, they don’t have to be as frustrating as you think!
Have you had an awkward growing out phase? How did you tackle it? Comment and let us know!
As I have mentioned before, my curly hair routine is quite minimal as of late.
Recently, I have been trying products that act as a 2-in-1. About a year ago, I gave Elucence Moisture Balancing Conditioner a try and liked it a lot for that very quality. I decided to buy it again.
This conditioner can be used as a regular cleansing conditioner, a daily conditioner, and it can be applied to the hair as a leave-in as well.
If you are also trying to cut down on your product stash this fall by using multi-taskers, trying the Elucence Moisture Balancing Conditioner is a must. In addition to this product being able to be used for many purposes, here are some of my other favorite qualities about this conditioner.
Pros
- Inexpensive
- Moisturizing
- Organic
- Dual purpose
Cons
- Scent
It is affordable
This conditioner only costs $9 dollars on NaturallyCurly, providing me with 10 lovely ounces of product to enjoy. Formulated especially to moisturize curls and derived from olives, this formula contains a magical nourishing ingredient called squalane. Curly girls can benefit from the reviving, replenishing, and restoring moisture for especially dry curls.
Its light consistency makes for easy distribution
This product is incredibly light–it almost feels like a milk and is easy to distribute. The conditioner does not weigh down my curls at all. When using it as a leave-in, I like to apply it to sopping wet hair, working it from the ends towards my roots. I have also found that it enhances my styling product that I use after apply it as well.
Moisture, moisture–and more moisture
This moisturizing conditioner encases and coats every hair follicle and as a result, I notice a huge difference. For days at a time, my curls feel soft and hydrated after using this product–I never have to worry about brittle or dry curls.
The ingredients are beneficial
In addition to the ingredients being formulated especially to provide my curls with intense moisture, the ingredients are organic. That way, your curls can enjoy the full natural benefits of this product without having to worry about the harsh chemicals or other stripping ingredients most conditioners contain.
My one complaint:
I am still not crazy about this product’s scent. It smells like a sweet chemical mixture. While it is faint, I still notice it. However, as I have mentioned before, because the scent is faint, makes it all the more easy to cover up with the scent of whatever styling product I layer it with.
Have you tried this conditioner?
Do you use this as a co-wash, daily conditioner, or leave-in? What do you think of the scent?
Thumbs up my video and let me know in the comment section!
[prodmod]
While I embrace my naturally curly hair, it can be difficult to ignore the new straight hair trends constantly getting attention on social media.
,0 1px 10px 0 rgba(0,0,0,0.15″>; margin: 1px; max-width: 658px; padding: 0; width: calc(100% – 2px”>;” data-instgrm-version=”7″>
The latest hair trend that I have come into contact with is bun dropping: People all over the world are posting slow-motion videos of themselves dropping down their buns, to reveal their long, silky and gorgeous straight hair.
Before I grew to love my curly hair, I always felt the societal pressure to straighten it.
In fact, I did wear my hair straight for many years due to a constant sense of insecurity and a fear of daring to be different than everybody else. Back then, bun dropping would have only added to the oppression that I felt that the world was telling me: straight hair is beautiful, and curly hair is ugly. All of my favorite actors back then had long, straight hair as well, which played a big role in driving me to style my hair that way.
Now when I look back old pictures of myself, I know how absolutely ridiculous that was.
When I finally began to learn to love my hair, I stopped caring what everyone else’s hair looked like. I ignored the media and those around me. I came to realize that having straight hair wasn’t me– now when I see viral fads like bun dropping, they no longer have an effect on me. Now I have an immense sense of pride because I embrace my hair, whether it is straight or not.
For those who do have naturally long and straight hair, everyone has a right to embrace it. I cannot argue with what makes someone else feel beautiful and I think it is nice that this trend exists to encourage confidence and self-love. However, I have to admit that I am proud of the insane amount of love–and maybe pride–for my unique texture that I have developed over the years.
While I am happy that people are embracing their hair on social media, I do wish that there were more viral trends that catered to short, curly folks like myself.
Even though it is getting better today, I do feel that are still too many instances that glamorize straight hair. Whether it is the intention of these trends or not, bun dropping could potentially have some negative effects on the short and curly folks like myself who might not have fully embraced their true selves. Whether it is straight or not, everyone should love their own uniqueness. Whatever makes someone feel confident and beautiful is all that matters.
Bun dropping is great way to show off that self-love for straight hair. If more trends for curly hair were to emerge, I think that people who hate their curly hair would learn to love it instead.
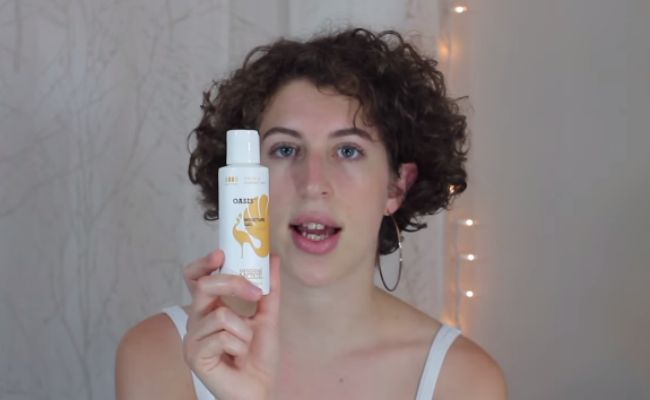
Hello curly friends! Nina here and I am super excited to review Oasis Moisture Gel for you.
This product has become one of my new favorite styling products for summer. I have been using this gel for a couple of months now and absolutely love it. As always, I was on the hunt for new products when I found this one.
Now that it’s summer, I am getting away from the heavier ingredients like shea butter. While I like using them in the wintertime, it’s hot out and I am turning more towards gels and styling milks. I came across a gel by Oasis and read the reviews before trying it out. While there were few of them, all of them had good things to say, so of course, I wanted to try it out.
Scent
This product while not having a distinctive smell is very light and pleasant. It’s not overpowering yet, it gives your curls just enough scent to smell fresh and clean for a while.
Price
This product is more on the pricy side, in my opinion. It’s $12 dollars on Curlmart However, on the plus side, it does last a long time. You do not need much–a little goes a long way.
Key Ingredients
The ingredients from this product are not 100% certified organic from a natural source, but it has things like aloe leaf juice, jojoba and essential oils that give your curls the moisture they need without the aid of harmful chemicals.
Texture & Application
This product is a gel so it is very slippery. It is milky and slimy in appearance but is very easy to apply. Depending on the thickness and texture of your hair, how much you may need to use may vary. I have fine 3A short curly hair so all I need is a dime size amount to get the moisture I need. I apply it from root to tip and gently finger comb the product through to wet hair for a nice even distribution.
Moisture & Definition
Compared to other gels that can often leave hair feeling crunchy, this gel instead leaves your curls feeling moisturized and incredibly soft. It also provides your curls with great definition. What is nice about this product is that depending on your texture, this product can be used as a 2 in 1. I use this both as my leave in and as my styler. It gives me a great balance of both moisture and the curl definition that I always crave. It also is so light and doesn’t weigh down my hair at all. I can confidently say that after using this, I have always left the house with soft, light, and wonderfully defined curly hair!
Pros
- It can be used both as a leave-in and as a styler
- it’s lightweight
- it has a pleasant scent
- it lasts a long time
- it is easy to distribute
- it gives curls an overall balance of moisture and great curl definition
Con
- it’s a little pricy at $12
Final Review
I have really fallen in love with this product. If you are on the hunt for a light product that gives you an equal balance of moisture and definition, I would highly recommend curlies who share my curl texture to try this out! I would rate this product 4.5 out of 5 stars. This, along with the occasional addition of coconut oil, are the only products that I have been using to style my curls this summer.
Have you tried this product before?
If so, what are your thoughts? Which products do you tend to go for during the hot summer season? Let me know in the comment section below.
While it seems that many curlies right now are trying to achieve length goals, I have almost always kept my curls relatively short on purpose.
Why?
In addition to this being my favorite length, I believe that having shorter hair comes with more perks than having longer hair. Here are the benefits and reasons why I love having short hair.It keeps me cooler
I have found having long hair makes me feel really hot and weighed down, especially in the summertime. My 3a hair is quite thick. I have found that wearing shorter hair keeps me cooler and literally keeps the extra weight off of my shoulders and back.
I use less products
Having short hair means using less product! I only need a tiny amount when applying which makes my products last longer and therefore helps me to save a more money in the long run.
Styling is a breeze
While one might think that short hair is limiting with ways to style it, it actually gives me options. Bobby pins are my best friend. Headbands, too, can be an awesome accessory that I enjoy wearing from time to time. I am much more of a minimalist and I have to say, it is incredibly nice to let my hair do whatever. I get great satisfaction knowing that I almost don’t have to do anything to my hair when I get up in the morning. All I do is let my hair down from a pineapple, fluff it a bit, spritz if needed, and then I start my day.
Washing is easy
The amount of time that it would take you to wash your hair if it’s long is literally cut in half if you have short hair. Again, all you need is a little shampoo or conditioner, rinse it out, and boom you’re done. Another plus to my wash time is that I don’t shed as nearly as much as I do with longer hair; it is much easier to finger detangle and typically dries quicker.
It gives me confidence
I feel incredibly liberated and confident having short hair. It makes me feel empowered and beautiful. I love that I can wear my big earrings and other accessories to emphasize my facial features. Everyone should experience having short hair at least once in their lifetime. It really makes life much easier. However, short hair may not be for everyone, and that is OK. Having long hair can have its perks as well; we all have to find that length that makes us feel the most confident and empowered.
Short hair may not be able to give you that messy bun look, or that fancy braided style, but I think the fact that having short hair is so lively and fierce makes up for it. What is your favorite length?
Hello curly community! This is Nina Sultan. It has been about a year since my last video on my morning routine. Since then, it has changed so I thought it was time to make an updated video. Not only will I show you my current morning routine, but also my nighttime routine.
As you may know, I am trying to transition to using all-natural products for my skin and hair. The products that I mention below are likely to change in the future–right now, I have really gotten attached to using these. Almost all of the products that I use for my skin are organic or almost 100% natural and I have found these products to really help restore it back to health. I hope you enjoy this routine series and find it helpful.
Morning
Face
- When I get up in the morning, the first thing I like to do is brush my teeth and cleanse my face with my Neutrogena Naturals: Purifying Facial Cleanser ($7 at Target”>.
- Then, I rinse it off and apply my oil-free moisturizer. The one that I am into right now is the Alba Botanica: Hawaiian Oil Free Moisturizer ($11.19 at Target”>. I apply it with a finger dab amount to both sides of my cheeks, forehead, t-zone, and neck.
- Next, wash my hands and apply my makeup. I will have a separate series on that coming soon to my channel!
Hair
- Once I’ve finished applying my makeup, I wash my hands thoroughly and then begin to refresh my curls. My curl routine has not really changed all that much.
- First, I make my curl refreshing spray and put it in a spritz bottle. This consists of water that has been diluted with a few drops of an essential oil. Lately, I have really been into using grapefruit essential oil. Once I’ve made my spray, I shake it well so that my spray is mixed thoroughly.
- I then gently take off my hair tie and let my hair down from the pineapple hairstyle.
- Then, I massage my scalp, gently shaking my curls all around my head. Once I’ve shaken up my curls a little bit, I lightly spritz the roots and ends of my hair and continue to shake them to allow the spray to evenly distribute. Once I’ve finished applying my spray, I wash my hands once again, have some coffee, and I am ready to begin my day!
Night
Face
After my day is over, I start off by using my Neutrogena: Makeup remover cleansing towelettes *Night calming* ($7″> to remove my makeup.
Hair
Once my makeup is off, I wash my hands and gather my curls to the top of my head where I put my curls back into the pineapple hairstyle.
Face continued…
- I then brush my teeth and cleanse my face with my exfoliating Neutrogena Naturals: Acne Foaming Scrub ($8.61 at Walmart”>.
- Once I’ve finished gently exfoliating my face, I then rinse that off and apply my organic toner.
- I take a few cotton rounds and gently apply the toner all around my face and neck. The toner that I have been using lately is the one by Thayers: Alcohol-free Rose Petal Witch Hazel with Aloe Vera ($11.96 at Walmart”>. Finally, I apply my Alba Botanica: Hawaiian Oil Free Moisturizer once again.
Once that is complete, I am ready for bed. That’s all there is to it!
What are your morning and night routines like? How do you like refresh your curls for the day? What skin care products are you into right now? Let me know in the comment section below.
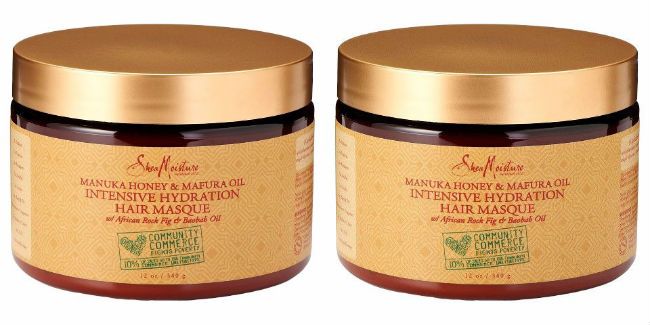
Hello curly community! This is Nina Sultan here, and today I’m doing another product review on SheaMoisture’s new Manuka Honey & Mafura Oil line. Specifically, I will be reviewing their Intensive Hydration Hair Masque. This product is inexpensive ($12″> and you can find this product at Target, your local drug store, and online.
Regarding trying new products, I usually always try to branch out and try different things.
However, regarding deep conditioners, I have not been so good at that. The only deep conditioner that I had ever used is Eden’s All Natural Deep Conditioner. I have been using this product for my entire curl journey and while I like that deep conditioner a lot, once I ran out I decided that it was time for a change. The Manuka Honey & Mafura oil line had been out for a couple of months now and I was hearing great things about it so naturally I wanted to get my hands on it too.
After trying this masque I can definitely conclude that it is one of my holy grail products!
My first impression
- Texture
When I bought it, the thing I noticed immediately was the wonderful creamy texture. The product itself is extremely similar to cocoa butter. It is easy to distribute evenly and thoroughly to my hair. Compared to the Eden BodyWorks Deep Conditioner, in which I found to feel a bit thicker and heavier, this masque is quite the opposite. It is incredibly creamy, light, and fluffy. I love how smooth and how it makes the masque easy to apply.
- Fragrance
In regard to the scent, one thing that I have noticed about a lot of SheaMoisture’s products especially their conditioners, tend to smell a bit like plato. This hair masque carries that same tendency but it is not nearly as strong as it is in some of the other SheaMoisture conditioning products. Compared to the Eden deep conditioner, I love how this masque smells. While the Eden deep conditioner smells a bit like medicine and peppermint, this product smells like sweet honey mixed in with the other natural and certified organic ingredients. While I am picky about scents being too strong, I actually like how fragrant this masque is. I can’t stop smelling my hair after I use this masque.
- Moisture
In addition to loving the scent and texture of this product, perhaps the most important thing about this masque is that it moisturizers my curls incredibly well.
Every time I use this masque my curls are left feeling incredibly soft, defined, and refreshed. While the Eden deep conditioner also gave my curls moisture, I really noticed a remarkable difference in softness while using this product. I have found this masque to be incredibly 3A curl texture friendly and I would highly recommend this product to other curly people who share my curl texture.
Other pros
- This line perhaps is the first and only SheaMoisture line that I have seen that actually fights poverty!
According to their website, about 10% of sales go to helping support women-led businesses who supply SheaMoisture with their ingredients that the company uses to make their products! While 10% is not a huge percentage, it is still a step positive towards making a difference.
The cons
Honestly, none that I can think of!
[prodmod]
My final review
- Overall, this is an incredible moisturizing hair masque for fine curly hair and has definitely become a favorite of mine.
I would rate this product a 4.5 out of 5 stars. I would highly recommend this product to other curlies who share my curl texture. What do you think? Have you tried this line or product yet? Let me know what deep conditioners you are into right now!
Don’t forget to subscribe to my channel for more curly hair reviews and tips.
In my previous video on co-washing I had been using the Curly Twirls Custard Styling Gel and while I got ok curl definition from that product, it was definitely not my favorite. In the past, I’ve mostly just used gels and styling lotions to style my curls. Realizing this fact, I wanted to change up my curl routine and try mousse. I used to use mousse when my hair was much shorter and I remember how great it was. I wanted to see if I would still like it now that my hair is longer. I love Shea Moisture’s products and especially the Coconut & Hibiscus line. I noticed their mousse and their misting spray when I was out shopping for products. I bought the two of them together to try a whole new approach to curl definition. Here is what I discovered:
What I Tested:
Frizz-Free Curl Mousse
Pros
- it does not weigh my curls down
- it has a nice scent
- it is moisturizing to my curls
- it gives me great curl definition
Cons
- none!
This mousse is about $10 and is available at your local Target, and online in Curlmart. While the product is $10 it does last a long time. I like mousse simply because a few pumps go a long way. I have been using this product for a couple of months and have fully incorporated it into my styling routine. I ended up being quite pleased with this product because it is light and it does not weigh my curls down. It is easy to apply and I absolutely love the organic ingredients and the fact that it is cruelty free. It has a very nice light coconut scent to it, which I find to be quite refreshing. This product is moisturizing and also gives my curls great definition. Because this product is so moisturizing, it has really helped my curls fight dryness. I can happily say that I didn’t really have any complaints about this product.
Overall
All in all, I give this product 4 out of 5 stars. I would highly recommend this product to other curlies who share my curl texture. This is a really nice mousse and while it might not be my holy grail, this is a product that I will definitely be going back to for sure.While I enjoyed the mousse, I unfortunately did not share the same enthusiasm for the Hold & Shine Moisture Mist.
Hold & Shine Moisture Mist
Pros
- it is cruelty free
- it has great organic ingredients
- it is moisturizing to my curls
Cons
- it did not give me any noticeable shine
- it did not provide hold for my texture
This spray is also $10 and is available at your local Target and online in Curlmart. Like the mousse, a few spritz of this spray goes a long way and therefore it lasts a good long time. I have been using this product for the same amount of time and as frequently as I have been using the mousse. I have to say I was a bit disappointed with this product. While it has the same great organic ingredients, is cruelty free, and has a similar coconut scent to it, I did not get much enhancement to my curls from the spray. It did not give my hair any noticeable additional shine and I also faced the problem of not experiencing much hold from using this product. This could possibly be due to me having a thicker curl texture. Either way, I was very unimpressed. However, the one thing I did like about this product is that it is really moisturizing. I liked that aspect of it because my curls tend to be quite dry especially now that winter is approaching. However, additional moisture was the only thing I noticed and liked from using this product.
- All in all, I give this product 3 out 5 stars. I probably would not recommend this product to other curlies who share my curl texture. I was not crazy about it–what do you think?
Have you tried these products? Do you like them? Let me know in the comment section below!
Hey guys! Welcome back. Today I’m answering 4 frequently asked questions about short curly hair and pixie cuts from NaturallyCurly.com’s Q&A section.
1. How many times can I co-wash my short hair?
“I’m from the Dominican Republic and I have trouble styling my hair in the morning so sometimes I co-wash; however, I think I’m wetting my hair too much.”
Co-wash as frequently as you’d like. But keep in mind that there is such thing as over conditioning which will weigh them down and make you lose your curl. To counter this, I’d suggest doing a clarifying treatment once a month to get rid of all that product build-up. Another thing you can do is get a spritz bottle full of water and conditioner–this is a great curl refresher if you’re having trouble styling in the morning. Finger detangling is lot more gentler on your curls. Start detangling from the bottom and work your way up so you experience less breakage.
2. My haircut won’t let me pineapple. How can I keep my curls while I sleep?
“I have type 3b hair and I do sleep on a satin pillowcase.”
You can do what I do, which is take the hair that does manage to stay in a pineapple. The rest of the hair that does not stick in my pineapple are pinned up with bobby pins. You can also do a ‘multi-pineapple’ on multiple sections of your hair. Another option is to wear a scarf to get the 360 coverage.
3. Would a pixie with my kind of curls look good?
“I have 2c/3a hair, not sure which one. Probably both.”
As a veteran of the big chop and someone who has done the big chop, I can tell you: absolutely! Pixie cuts are wonderful. Everyone should try it–it’s low maintenance, liberating, and cut my routine time in half. Make sure it is something you really want to do; it does take some time to get used to. Google and do your fair amount of research because it will not look like a pixie cut on straight hair.
You can also check the NaturallyCurly photos section, StyleNook, for curly pixie cuts. If you have a short haircut, upload your photo to inspire other curlies!
4. Is it healthy to do nothing with your hair?
“I have a pixie cut and I do co-wash, but I don’t use any other products right now.”
Absolutely not! I think it’s all a matter of preference. When I had a pixie cut, sometimes all I did was smooth it down with some water. As it grew out a little bit, I started using a volumizing gel or curly custard when my hair would stick up in wonky places.
Watch my video
What video would you like to see from me next?
Hey, curly friends! Welcome back. This is Nina Sultan here. Today I’m doing another basic hair care tutorial on how to co-wash fine, curly hair.
What is co-washing?
Conditioner washing. Instead of using a shampoo, you use a conditioner. It can be done how frequently you need to do it–every other day, weekly, monthly, whatever. As we know, shampoo can be harsh on curly hair. Continuous shampoo usage can really dry out your curls–this is why us naturally curly girls like to co-wash instead.
Co-washing makes your hair feel softer, conditioned, naturally shiny, and defined. However, I will say that you don’t want to overdo it. You can get hydral fatigue from over conditioning your hair. In order to prevent this, I will wash my hair with a sulfate-free shampoo one time, then next time I’ll use a conditioner to cleanse. To get rid of scalp build-up, I recommend clarifying once a month or so as well.What you need
A moisturizing, cleansing conditioner + styler
I use EO All Natural Conditioner. It has rosemary essential oils and mint which my scalp loves. It is also great for finer hair types.
I take a copious amount into my palms and distribute it evenly from the roots of my hair to the ends. If I need to repeat the process, I will. But 95% of the time, I’m good with just 1 co-washing.
I gently massage my scalp, then rinse it out. I quickly finger detangle and then style as usual.
I still like to scrunch my hair with a t-shirt (“cup and scrunch””>.
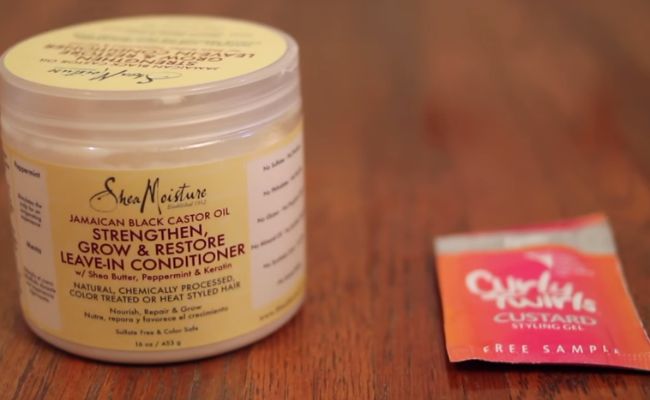
Once my t-shirt has absorbed the extra moisture, I love to use SheaMoisture Jamaican Black Castor Oil Leave-In to seal and moisturize. Although I think this leave-in was originally intended for coilier textured hair, but this was the last product on the Walgreens shelf and I actually have fallen in love with it.
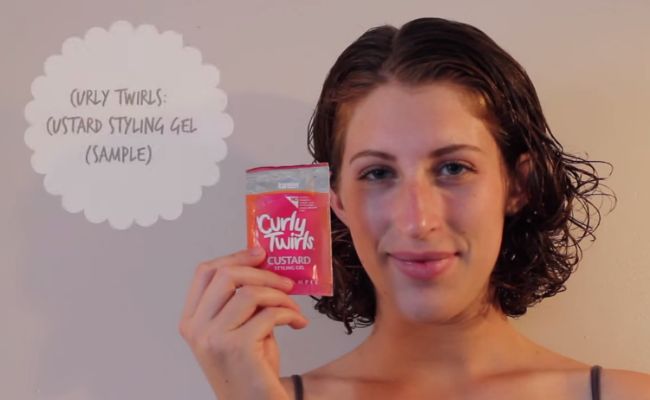
I like to use a Custard Styling Gel by Curly Twirls. A little goes a long way, so I apply a little bit from the roots to the ends.
Then I air dry to about 50%, then diffuse for more definition that will last.
How do you co-wash and style your fine hair?
[prodmod]Hey, guys! It’s Nina Sultan here. Today I’ll be doing another basic curly hair care routine video for you.
What is clarifying?
It is like using a shampoo on steroids. Clarifying is an essential part of your routine that is usually done once or twice a month, depending on the porosity of your hair. Clarifying is so important–how often you do it depends on what your hair type is and how badly you need it. Since I have very short and fine 3a curly hair, I only need to do this step once a month. I have a personal goal of one day using all organic products, so in the future I hope to transition to just clarifying with diluted apple cider vinegar (which some people call an ACV rinse”>. For now my store bought clarifying treatment works well for me.
 [prodmod]
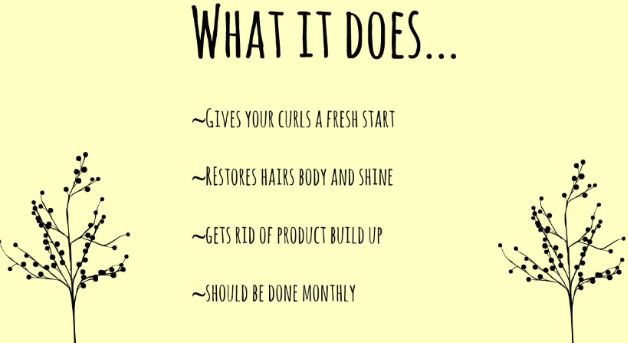
It restores your hair’s body and shine–and gets rid of all that product build-up from your styling product, conditioner, shampoo, and any other products you apply to your hair. If you have the feeling that your hair reacts well to products and then over time it “gets used to” them, you may be experiencing the effects of product buildup. If your hair looks and feels dull and is not reacting well to products that usually work for you, it could be time to try a clarifying treatment.
If you have not incorporated monthly clarifying washes into your curly hair routine, it’s important to start doing it now! Without further ado, let’s begin.
What you’ll need:
- MopTop Clarifying Rescue Treatment to clarify.
- SheaMoisture Superfruit 10-in-1 Conditioner for moisture.
I like to try and get every single hair follicle, my roots, my ends, all over my hair. For about 3 to 5 minutes, I let the product sit and work into my hair. Usually this is my time to wash my body and shave. When the time is up, I rinse out my clarifying treatment thoroughly.
Once my hair is rinsed out, I like to restore the moisture back into my hair with SheaMoisture’s conditioner. Although the scent is artificially fruity, it is so moisturizing–so I actually really love it. Then, I rinse out my conditioner and style my curls as usual. It is a very simple and easy (but necessary”> routine!
Watch the video
What do you use to clarify?
Compared to a daily conditioner that gently cleanses your scalp and softens your curls, a deep conditioner does that on steroids (not literally”>. After shampooing or co-washing, you put your D.C. on for a certain amount of time. Because my hair texture is fine, my curl pattern is 3a, and I have low porosity curls, I deep condition for about 30 minutes once every other week in the summertime. In the winter, I step by game up and deep condition once a week.
What does deep conditioning do for my curls?
Admittedly, I don’t really protect my curls from heat or the elements. This is why deep conditioning is important to my curly hair care routine. In addition, it strengthens curly hair, prevents further weakness and breakage from happening, and improves elasticity (bounciness”> in my curls.
What I use
- My favorite cleanser/sulfate-free co-wash
- Coconut and castor oil
- Deep conditioner
- Shower cap
- Heat wrap
- Moisturizer
- Favorite styling product
- Diffuser or towel
Step 1. Cleanse & Detangle
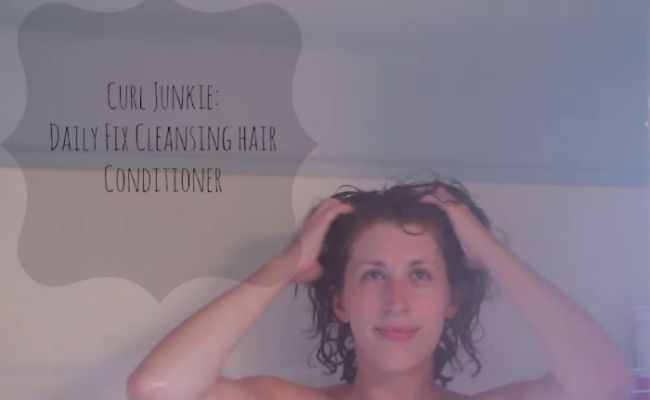
I like to start off with my Curl Junkie Daily Fix Daily Conditioner. I like to gently finger detangle my curls with this, too.
Step 2. Apply my coconut-castor oil
This is optional, but I highly recommend it. I like to saturate my curls with Jamaican Black Coconut Castor Oil for a lot of moisture, softness, and shininess. I also love it because it promotes healthy hair growth and slows down the process of hair shed!
Step 3. Apply my deep conditioner
I like to use Eden BodyWorks All Natural Jojoba Deep Conditioner and completely saturate my curls. I have been using it forever. I pay extra attention to my roots and ends. Again, I gently finger comb throughout my hair to make sure the product is distributed evenly.
Step 4. Seal with a shower cap
I use a plastic shower cap (or saran wrap”> to seal in my deep conditioner and coconut-castor oil goodness. It’s worth looking goofy for 30 minutes, trust me.
Step 5. Apply heat
This step is also optional, but I love to wear my heat therapy wrap for about 20 minutes. It really intensifies my deep conditioning treatment by penetrating my follicles.
Step 6. Chill out
For 30 minutes, I let my hair get its deep conditioning goodness on.
Step 7. Rinse, moisturize, style
I take off my heat cap and rinse out the deep conditioner and oil from my hair. Then I moisturize, diffuse, and style per usual.
Watch the video
How do you deep condition?
Are you looking for a simple and inexpensive way to curl your hair? If you have straight hair or random curls that don’t act in unison, this curly hair hack is just for you.
While there are many exciting ways to curl hair, toilet paper is probably not the first thing that would come to mind. However, it turns out toilet paper can give you some funky, uniform, springy fun curls. Mickey Crazy 1 and Noelle Bean show us their secrets to getting some fun and easy curls. Literally all you need is some toilet paper. If you have curly to coily hair and want large barrel waves, try the Toilet Paper Method on a blowout.
Step 1: Section off your hair according to what look you are going for (fewer sections for barrel curls, smaller sections for tight spirals”>.
Step 2: Begin with two squares of toilet paper and fold the two squares in half. Fold the square in half again. This will act as one ‘roller’.
Step 3: Take a section of hair and wrap your hair around both your finger and the toilet paper (this will make things easier”>. Once you have wrapped it around, pull your finger out and roll it up to your scalp and tie the ends together.
Step 4: Repeat this process until each of the sections of your hair are covered. Then, go to sleep! Let these sit in your hair overnight.
Step 5: The next morning, untie the paper from your hair and voila! You get beautifully uniform, clumped, thick ringlets!
Noelle’s Toilet Paper Method takes just a little bit longer.
This is the tutorial to follow if you have pin-straight hair and want to style your hair into loosely tousled beachy waves.
Step 1: Take your hair into three sections. Two parted down the middle, and then put the rest up at the top. If you have bangs, clip them up and out of the way. Start with four squares of toilet paper. (This will act as one roller”>.
Step 2: Take a medium section of hair, put the toilet paper underneath your hair, and criss cross over your hair. Slide it down to the end of the section and roll it up.
Step 3: Once you roll it all the way up to your scalp, tie it in a bow and repeat on the next sections. Be gentle.
Step 4: Go to sleep to seal in the retextured hairstyle.
Step 5: The next morning, gently untie your paper and add a curly styling product for hold. Use a curling iron for any random pieces that fell flat overnight.
Step 6. Blow dry and tease your hair to get that effortless big tousled wave look.
Which should you use?
If you want thicker spiral curls, follow Mickey’s method. On the other hand, if you want messier, fuss-free curls, I would try Noelle’s method. What do you use to curl your hair? Have you tried the toilet paper method? If so, what did you think of it? Let me know in the comments below.
Unlike my experience with leave-in conditioners, I have actually tried several different conditioning products. Despite my tendency for experimentation, I seem to always return to Shea Moisture’s Coconut and Hibiscus Curl and Shine Conditioner. In my most recent Product Junkie pursuit of a new daily conditioner, my goal was to find a conditioner under $10 and that would give my curls the moisture they need. I also wanted to find something with ingredients that were specialized for giving naturally dry, curly hair more shine and help to detangle easily.
Then I came across Elucence Moisture Balancing Conditioner in Curlmart and noticed it was only $8.
This conditioner is currently quite popular as my research found it popping up all over the internet, its amazing Curlmart reviews put me over the edge. I added it to my shopping cart because I wanted to see what all the commotion was about. I can honestly say that I was pleasantly pleased by this conditioner.
I wanted to find something that was under $10 and that would give my curls the moisture they need. I also needed something that gave my hair more shine and detangle knots easily.
It is not only a great daily and cleansing conditioner, but I was able to use it as a moisturizing leave-in, too. I found the product works well for me both ways. It is incredibly moisturizing and I love the olive oil and coconut derived ingredients that this product is made with.
While it did wonders for my Type 3a hair, I must say, I was a bit disappointed by the scent. This conditioner smells like a sickly sweet chemical mixture. I really had wished for the scent to be more appealing and natural. While I was not a fan with the product’s scent, there are 245 reviewers of this product, many of which state that they enjoyed scent.
That was the only con that I noticed while using this product. However, I ended up liking this product despite the scent in the end simply because the scent is actually quite weak and makes it all the more easier to cover up with scents from my styling cream and oil. I give it a 4 out of 5 curl rating. This product is fantastic overall and does more than just condition hair. This product is the best dual-purpose conditioner I have used thus far.
The bottom line
Elucence Moisture Balancing Conditioner is inexpensive, it has ingredients targeted to providing your curls with the ultimate moisture they need, and eases the detangling process. This moisture balancing conditioner really is a dual-purpose product–it is great as both a conditioner and leave in. It has a smooth consistency that is easy to apply and distribute, and finally it gives your curls the desired shine, softness, and silkiness we all crave.
Watch my review
I’m eager for suggestions on what you use next, and what you think I should try. Let me know in the comments section!
[prodmod]Today I’m going to review Kinky Curly Knot Today Natural Leave-In Conditioner. Watch, read, and enjoy!
Ever since I began my curl journey I have not been the most adventurous when it comes to trying new products. Once I find one that I like, I tend to stick with that product. Currently, my holy grail leave in conditioner is Curl Junkie’s Smoothing Assurance Lotion and Leave In Conditioner. I love it, however, it is quite expensive ($20 in CurlMart“>. Due to wanting to save money as well as wanting to explore my cheaper options, I began looking for a new leave in conditioner. In my research, I came across Kinky Curly’s Knot Today Leave In / Detangler. This product received a lot of positive feedback in the reviews as well as being extremely popular in CurlMart. The other thing that I noticed was that it was under $15. Excited, I decided to give it a try.I must say after using this product, I was disappointed.
While it was moisturizing, the smell of the product was not great. This product smells like a cheap fruity gel and is quite strong. I ended up not liking this product because of that. However, because I use the LOC method (Leave in, Oil, Styling Cream”>, the smell from the oil and styler ended up masking the scent of the leave in. Therefore, it made the scent much more tolerable. However, I do not like products that do not smell good.
The Pros
It is inexpensive ($12″>, it has all natural organic ingredients, it is cruelty free, and this product also has a very nice consistency. It is smooth and slightly thicker than Curl Junkie’s leave in. Overall, this product kept my curls very moisturized. It is also very easy to apply and distributes nicely throughout your curls! It also detangles nicely. I could easily finger comb through my curls without any problems. While the scent could be improved, it definitely does the job in making sure your hair is moisturized and cared for. If you are looking for a cheaper leave-in, you should try this product. It is does a decent job for its price. If the smell is also something that is a big factor for you, consider that there are ways to get around it.
I would recommend using the LOC method. If you do, the scent will not carry over and you will still have gorgeous moisturized locks as well as saving yourself a few pennies.
While I was not a fan of how it smelled, others who reviewed this product liked the scent. If I had to rate this product out of 5 stars I would rate a 3.5 due to scent being such an important factor to me. While the scent was a deal breaker for me, what do you guys think? Do you use this product? Do you like the scent? Do you not? What leave-ins are you loving right now? I am still investigating my new Holy Grail in the meantime. Give me suggestions. And watch my review of Curl Junkie’s Leave-in here:
What leave-ins are you loving right now?
We have all had those products that we never ended up using in its entirety.
Whether it was a product that maybe you tried and ended up not liking, or maybe went through a phase of using certain products but found a better product that suited your needs better–now you are finding bottle after bottle of products in your cabinets, drawers, and all you are thinking about is how to get rid of them.
Perhaps your first instinct would be to either throw them away or simply pour them down the drain. However, there are so many better ways to dispose of gently used products! Renée Rouleau and Umbra give some great methods in how to efficiently do just that! By following their suggestions, not only will the environment thank you but also people who are in need.
While pouring products down the drain or throwing them away may be the easiest and quickest solution, it is quite problematic in the long run for the environment. Not only do products get into our rivers and oceans but also contribute to the pollution on land by going to the landfills. If your products contain a lot of chemicals, are flammable or corrosive, do NOT pour them down the drain. Why not? The sewage treatment plants and plumbing systems are not designed to handle such chemicals and products, but rather just human waste and sewage. This also counts for hair oils as well.
While you may not think oils can be a problem, they indeed are–for human waste and sewage!
While oils start off as liquid, they quickly cool down and solidify at certain temperatures. When oil is solidified, it easily plugs up and clogs plumbing. If you think that hot water may fix this issue, it does not! The hot water only assists the oily product further down the drain before it solidifies. So what can you do?
Option 1: Try using them in different ways than your originally did.
This might seem like a no-brainer but according to Umbra, trying to simply use up your products is a great way to get rid of them! Try cocktailing it or layering with another product for a different result. If the product is really not for you, then there is another option.
Option 2: Donate them.
Did you know that you can actually donate your gently used products? There are tons of women who are in need of hair products and are grateful to have someone come in and give away products that they didn’t end up using. Renée says you can donate anything that comes in either a bottle or tube. You can even donate hairbrushes and combs as long as you sterilize them first. You can also donate to the people at the household hazardous waste facilities as they will take some hair products as well.
Next time you want to throw away unfinished products, head on over to your local shelter or household hazardous waste facility and donate your products today.

