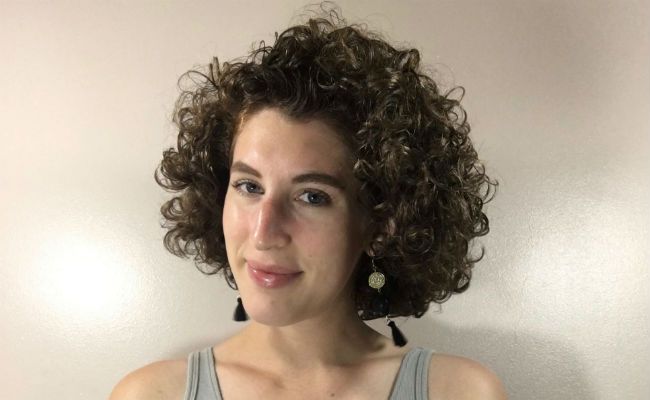
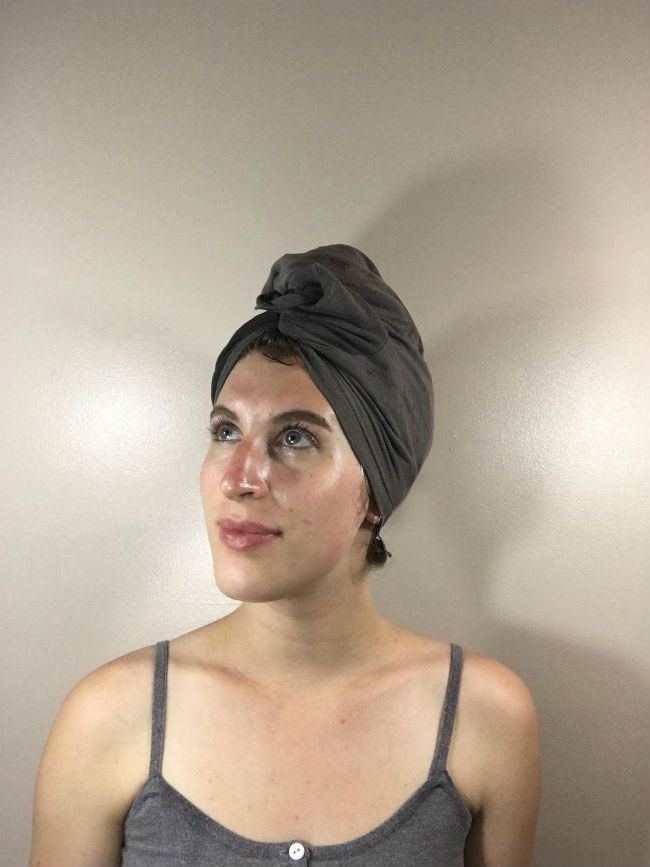
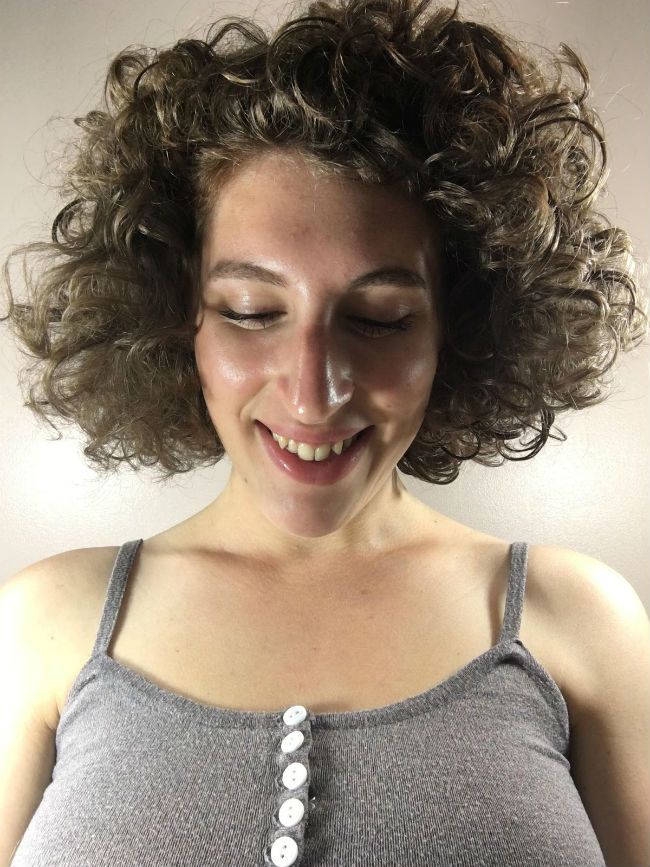
Search Results: Nina Sultan


Pictured: @withlove.aayah
If you are impatient like I am, and like your curls to dry quickly, diffusing can be a great tool. When used correctly, diffusing can enhance volume and dry your curls effectively with minimal damage while embracing your curl pattern. While the diffuser is meant to make your life easier, if you are experiencing frizz instead of definition, then you might need to revisit your drying techniques. You could either be using the wrong products, or you are diffusing incorrectly! In case you need a refresher, here are some diffusing techniques for frizz-free curls.
1. The Right Products
Using the correct products for your curl texture is everything. For me, I like to keep my product application simple and hassle-free. I will typically use a leave-in like Curls: Blueberry Bliss Reparative Leave in-Conditioner and a gel like Curls: Blueberry Bliss Curl Control Jelly. I apply about a quarter size amount of each product to prevent weighing down my curls.
2. Waiting Matters
While you can diffuse your hair while it’s sopping wet, to get the best frizz-free results, try applying your products to sopping wet hair as usual and then allow your hair to dry about 75% before using the diffuser. This will allow your products more time to soak into the hair cuticle and work there magic. For me, I find that when I immediately diffuse out of the shower, it always leaves my curls a little frizzy, however, I embrace my frizz so it’s not a problem for me. However, if the frizz bothers you try waiting a bit!
3. Hot and Windy
Make sure that you are diffusing on the correct settings. If you are using the dryer on the highest heat temperature and highest airflow setting, that is just a recipe for frizz disaster. For me, I like to diffuse on the high heat flow and low air flow setting. If you still find that this setting makes your hair frizzy, you can try lowering the heat to medium.
Writer Nina Sultan
4. How’s your head?
When I diffuse, I like to hang my head sideways/upside down and let sections of my curls fall into the bowl. I then simply move the diffuser gently all around my head and pull the diffuser towards my head. This way it heats up my roots and encourages volume.
5. Scrunch, Scrunch, Scrunch!
As your curls get drier and drier, it helps to scrunch your curls up towards your scalp. I find that scrunching encourages my curl pattern and expedites the drying process.
6. Fluff & Go
Once your curls are 80-90% dry, for increased volume, It really helps if you shake your hair from the roots. Don’t touch your hair otherwise and don’t go too crazy with the shaking or fluffing. Just gently give your roots a couple of gentle shakes and then leave it alone!
Which diffusing techniques are your favorite? Let me know in the comment section below.
While I used to always put my hair up in a pineapple before going to sleep at night, over the years, I have gotten a little more relaxed with my routine. Now, I have actually found it to be more comfortable to wear my hair down and sleep on a satin pillowcase. In the morning, my hair is pretty crazy, but reviving it is easy and barely takes me any time at all. Here is my updated curl refreshing routine.
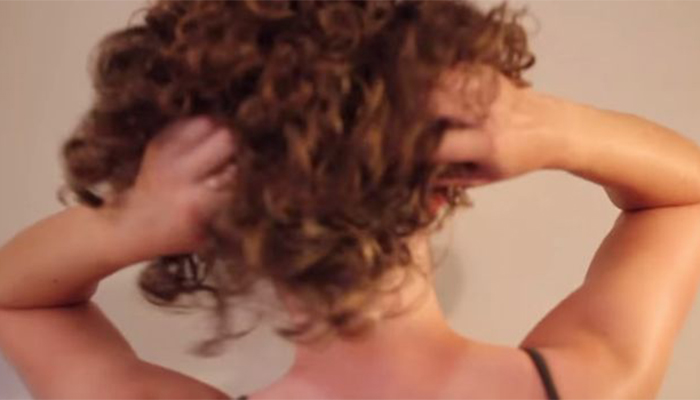
The first thing I like to do is shake my curls all around to get them out of bed head mode.
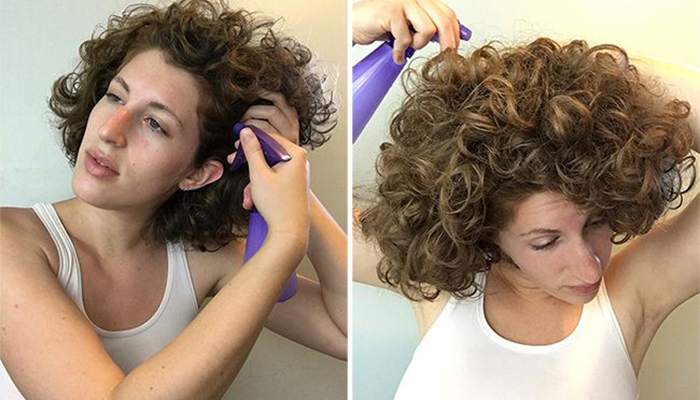
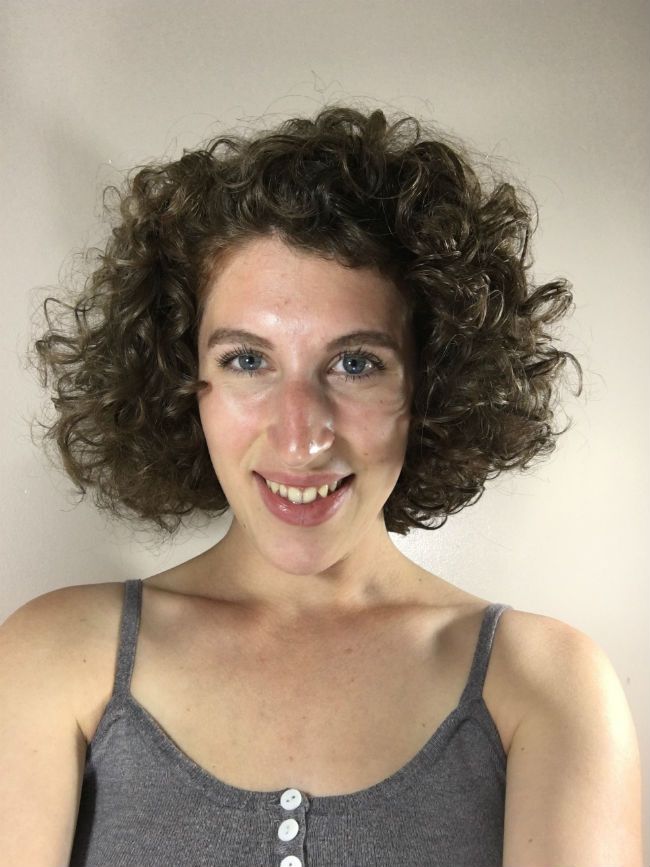
As you can see, in the morning I have quite the lion’s mane. A lot of curls have become loose over night and will need a little pick me up. After shaking my curls all over so that they are nice and poofy, I have two methods that I alternate between.
Method 1
If my curls look mostly defined with just a few undefined curls, I will soak my hands with filtered water, add a few drops of essential oil to my hands, rub them together, and will scrunch that into my curls all around by giving myself a quick scalp massage. The last thing I will do is add a drop or two of finishing oil, scrunch it in, and be done.
Method 2
On the other hand, if my curls are all over the place and have really lost their definition as you see pictured above, I will need to give my curls a little more TLC. In situations like this, I will use a spray made up of filtered water infused with an essential oil and sometimes a leave-in if my curls are feeling dry. Method 2: is what I will be showing you in this article. The three essential oils that I like to use to rejuvenate my hair are lavender, peppermint, or rosemary oil.
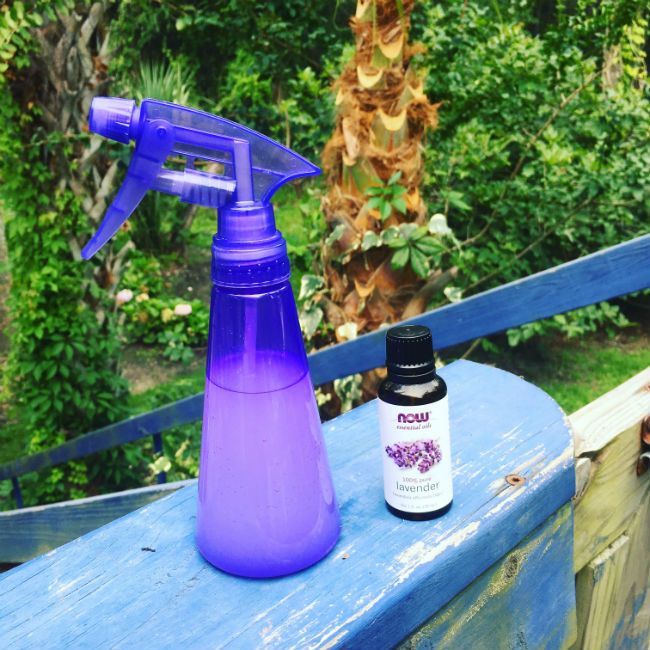
I start off by filling up my spray bottle with filtered water. For the purpose of this routine, I chose to add a few drops of lavender essential oil along with a few of drops of Carol’s Daughter: Hair Milk Original Leave-In.
Once my oil and leave in are added, I shake up the bottle for a minute or so to thoroughly mix my spray. Once my spray has been made, I will use it for a couple of weeks.
After my spray is mixed, I spray it all over my curls, giving extra attention to the curls that have become especially loose and undefined.
Once I’ve sprayed, I gently massage my scalp and scrunch my curls all around allowing the mixture to stimulate my roots and soak into the rest of my hair.
After spraying, my curls are wet but since they aren’t soaked, it doesn’t take long at all to let it air dry. I usually let my curls air dry, or if I’m in a rush, will diffuse it dry.
Once my curls are dry, I will gently use my fingers to shake my curls gently all around to enhance the volume. If I feel like I need more volume, I will use my trusty hair pick at the top of my curls by gently raising the roots to fluff it out a bit.
For a finishing touch, I will sometimes add a small dollop of finishing oil for enhanced softness and shine. I like to alternate between using my MoroccanOil or my Ouidad: Mongongo Oil.
As you can see with a little scalp stimulation, spray, and finishing oil, my curls went from looking like an un-kept bird’s nest to looking like brand new freshly washed defined curls. This routine may look like it is time consuming, but I promise that there is hardly any effort that is required and it takes no time at all.
What does your curl reviving routine look like? Which method is more your style? Do you prefer to use a spray or do you like to use your fingers? Do you use just water or do you like to add anything additional like an essential oil or a leave in? Let me know in the comment section below!
We get that chin-length curls may not seem “short” to you (we’ve rocked everything from pixie cuts to buzzcuts in the NaturallyCurly office”> but this is relatively short for people who use the pineapple method in their routine. If your hair is too short to pineapple, we recommend sleeping with a satin bonnet or silk scarf instead. If you have tighter curls and coils, check out Amanda’s tutorial for taking down her Type 4a pineapple. Here is our writer Nina’s sleeping and morning routine for her Type 2-3 curls.
Hey, curly friends! Nina Sultan here! Today I’m going to show you how I like to revive and refresh my fine, short curly hair. If you follow these steps for your Type 2 to 3 fine curly hair, you should also have fabulous curls two to four days after you have washed it.
The Pineapple + Satin Pillowcase Method
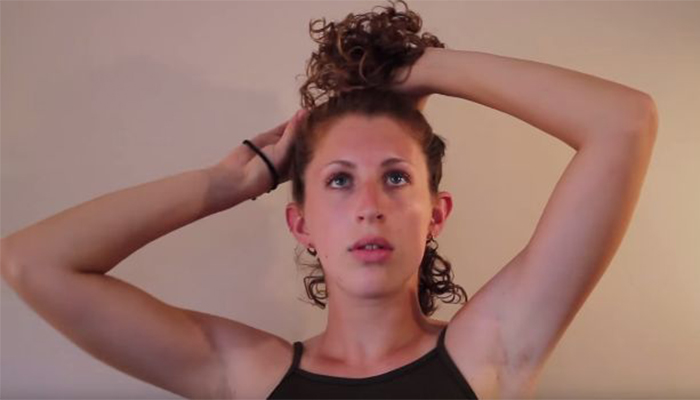
If you don’t know what the pineapple method is, it is basically a top knot that is a surefire way to make sure your curls are more manageable and easier to style the next morning.
Unlike cotton, satin pillowcases do not encourage frizz and breakage, especially on fragile, fine curly hair. I use both of these for dual protection while I am sleeping. Here is what you will need to follow this method:
- Satin pillowcase
- Hair tie
- A spray bottle with an adjustable nozzle, filled up halfway with water
- Depending on your hair length, bobby pinsto take care of the hairs in the back that don’t reach your pineapple scrunchie
Before Bedtime: The Pineapple
I take my scrunchie hair tie, gather my curls at the top of your head into a loose ponytail (AKA a pineapple”>. I love this hairstyle–it really does make my hair look like a pineapple.
I have a lot of short ‘baby’ hairs that cannot go into the pineapple. I use bobby pins to keep them into place so they are not flopping around everywhere while I sleep. You don’t have to—whatever your preference is.
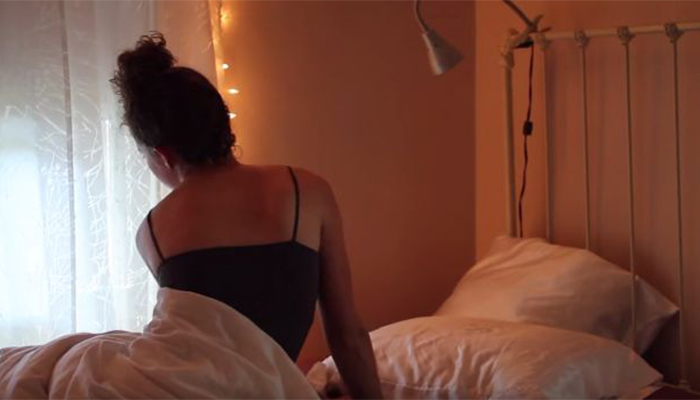
I get into bed, catch some zzz’s and let my hair do its thing while I sleep.
The Next Morning: Restyling/Refreshing
This routine keeps my curls looking voluminous, fresh, and healthy until the next time I wash it.
I untie my hair and bobby pins, gently pull my hair apart, and let my hair fall down. This is what it looks like when I take my hair out of a pineapple.
I like to give my hair a little scalp massage, shake, separate, and part my hair where I want the curls to sit. This wakes them up.
I don’t want to put too much water in my hair, but I use a little bit to reactivate and wake up my products from the day before. This allows them to work through days 2 and 3. I need to wash my hair more often than others since my hair is finer in texture than some curl types. Spritz, scrunch, and fluff.
Watch my routine
How do you sleep with and refresh your short, curly hair the next day? Share your experiences in the comments section, below.

Why use a hair drying diffuser?
Personally, I usually always choose to use my hair dryer diffuser over letting my curls air drying them; I don’t like the feeling of wet hair clinging to my skin for a long period of time. Therefore, I prefer to have my hair dry faster. Since my hair is shorter, it takes me less time to diffuse compared to if I had longer hair. If you are like me and like to diffuse, there is a proper way to do it. While using a hair dryer diffuser seems straightforward, you can diffuse incorrectly, too. Diffusing incorrectly can cause unwanted frizz, loss of curl shape, and dried out strands. Diffusing correctly, on the other hand, can leave your curls defined, volumized, and looking fabulous. Here are 5 tips for achieving curl diffusing gold.
Tip 1: Prep!
When you are getting ready to diffuse, apply your favorite leave-in and styling product first. The leave in will help to keep your curls moisturized and soft, while the styling gel will help to keep your curl shape intact through the drying process. For styling, I apply my favorite BounceCurl Light Creme Gel and my Ouidad Mongongo Oil as a leave-in.
Tip 2: Air dry for a bit first!
For the best results, it’s best to let your curls be about 70% dry before diffusing. This minimizes your drying time and allows your products to soak in as well as encourages them to have more volume when you do diffuse. When diffusing your hair when it’s wet — while that works — you do have to use the diffuser on your hair for a longer period of time. I find that you also don’t get nearly as great volume as you do when you let your curls slightly air dry.
Tip 3: Set your temperature and air flow!
When you are getting ready to diffuse, setting your dryer to the right temperature and air flow, is crucial. When I set my diffuser, I set it to a high heat temperature — for a faster drying process — but on the low air flow setting (to control frizz”>. Setting my dryer this way, allows me to have more control over frizz while allowing my curls to dry in a timely fashion. If frizz is something that really bothers you, you can always set it to a cool temperature. I like to embrace and love my frizz, so I find that high heat works better for my curl pattern.

Tip 4: Change your hair position!
This ensures for an even drying process. Take the diffuser and gently raise it up so your curls collect in the bowl. Continue raising it up until you are touching your scalp, leave it there for about 10 seconds, and repeat all over your head. Flip your hair in different directions throughout as well for a balanced drying process (Ex. upside down, sideways”>.

Tip 5: Fluff, fluff, fluff!
After diffusing, if you are still wanting your curls to be even more volumized, gently take your hands and shake your curls at the roots for enhanced life. You can also use a hair pick to achieve the same effect.
How do you prefer to dry your curls?
Let me know in the comment section below!

Want more tutorials?
Check out Curly Penny or Ilona Maria’s video tutorials!
Hey everyone! It’s Nina Sultan here. As you all know, I love experimenting with and trying new products. I have been really into trying products from the DevaCurl line lately and wanted to test out their Light Defining Gel. Here is what I found.

After getting out of the shower and scrunching my hair with a t-shirt, I applied a little more than a quarter-size amount of the product by gently finger combing it through my curls. Overall, the application process was easy. I tend to like gels for that reason.


Once the product was applied, I scrunched my curls all around and let the product set in for a few minutes. I then waited until my curls were 70% dry, diffused my hair, and waited.

My Results
The first time I used the product, I found that while my curls were nicely defined, what I was surprised about was that my curls felt pretty dry and kind of crunchy. The gel is supposed to be a crunch-free styler, but somehow they ended up feeling crunchy anyway. I then realized that I cannot use this product by itself to style. The next time I used this product, I applied a cream (DevaCurl’s Coconut Supercream“> before the gel and a finishing oil (Ouidad: Mongongo finishing oil“> afterwards. I was MUCH happier with results the second time around.
With the help of some additional moisture products, this gel provided nice definition and I liked that the gel is so light. I wasn’t too into the scent of the product. It was light and had that artificial berry smell to it. I tend to like products that smell natural, so this was not my favorite. I was a bit disappointed that I couldn’t use this gel by itself, however, with the leave-in and oil, this product works great for my curl pattern! I pleasantly discovered that I don’t always need to use the finishing oil either. The curl curl cream in combination with this gel did the trick just as well.
Concluding thoughts
This gel overall is a decent product. I appreciate that while it is $17 dollars, you get twelve ounces of product, and it lasts a long time since you only need to use a little bit. I probably would buy this gel again, but I have to say that my BounceCurl Light Crème Gel is still my favorite styling product to use.
The Pros
-Lasts a long time
-Lightly scented
-Easy to distribute
-Doesn’t leave your curls feeling heavy
-Provides definition
The Cons
-Pricey (17$”>
-Smells artificial
-Need to use an additional product that gives moisture such as a leave-in or oil
-Not moisturizing
What products are you into right now? Have you tried this gel? Did you get the same results? Let me know in the comment section below.No matter what length your hair is, curl maintenance is always important.
While you may think one length may be more manageable than another, curl maintenance never has to be a hassle.
However, I will say that if you do have shorter curly hair, maintenance is lighter simply because you have less hair to work with. Speaking from personal experience, I have had short hair for years and I really do enjoy the simplicity of my curl routine. Over many years of trial and error, I feel that I have mastered what works for my curls. Below, I offer you my ultimate guide to taking care of shorter curly hair.
Do: Trim your curls regularly
Trimming your curls regularly not only preserves your curls’ shape, but it also gets rid of all of those dead ends and unruly edges. Personally, I trim my own curls every 6 weeks or whenever I feel my curls need a little cleaning up. If you aren’t comfortable with trimming your curls yourself, you can always see a professional stylist, preferably one who specializes in cutting curly hair.
Don’t: Use or apply too many products
You don’t want to apply too many products to your hair regardless of its length. For short hair, I typically stick to two products which usually consists of a leave in and styling gel. On rare occasion, I’ll also apply an oil. Applying product after product will just make your hair feel greasy and heavy. Stick to products that are on the lighter side such as
No matter what styling product you use, you only need a small amount to achieve lasting definition. For those with short hair especially, this means no more than a dime to quarter size amount of product for styling. If you use more than that, you may find your curls feeling crunchy and oily.
Do: Deep condition
Even short curls need a little TLC. Deep conditioning is an essential part of maintaining your curl’s health. Deep conditioning not only deeply provides your curls with the moisture it needs but it also gives your curls the ultimate rejuvenation. This applies to those who especially have dry and brittle hair like myself. I deep condition my curls once a week or whenever they are feeling extra dry. Some good deep conditioners to try are
Don’t: Use a lot of heat
While using heat styling tools, such as straighteners and curling wands, may make your short hair look rad temporarily, they can also do a really good job of destroying your hair health as well! If you must use them use them, use them sparingly and always with a heat protectant such as:
- Curl Girl Moisture Fix Daily Shine Oil
- SheaMoisture Jamaican Black Castor Oil Strengthen & Grow Thermal Protectant
Having short hair is something to embrace. Short hair is something that often gets overlooked by the media when it is in fact, quite a unique contribution to the naturally curly world.
How do you maintain your short curly hair?
Let us know in the comment section below.
For more information on how to maintain short curly hair, check out these articles:
3 Editors Share What It REALLY Feels Like to Big Chop to Short Hair
Being a curly girl, I have routinely used hair styling products on my curls for years. However, throughout that time, I have definitely had moments where I have gone a couple days without applying anything to my hair — whether that was due to traveling, being in a rush or laziness. Whenever I would do this, I never really noticed that big of a difference in my curls regardless of whether or not they had product in them or not. They still looked soft, were defined, and felt light.
Because of this result, I couldn’t help but wonder what it would be like to not use any hair styling products in my curls for an entire week.
Did I really need to be buying all these products? Were my curls actually benefitting from them? Eager to find out, I did the experiment for 7 days! Here’s what I learned.
- Day 1: The first day of my experiment, I cleansed my curls with Jane Carter Solution Moisture Nourishing Shampoo and deep conditioned with their Nutrient Replenishing Conditioner;”>. At first, it was quite strange to not apply any hair styling products — in fact, I found it pleasantly easy to just scrunch with my t-shirt and then diffuse them dry. Overall, I was actually quite pleased overall with how they looked: they felt soft, were defined, and smelled great.
- Day 2: The second day I could immediately see that my curls were losing their shape. I actually was not bothered by this because I was able to achieve a wavy lazy hairstyle. For me, I don’t feel like I have to have my curls always defined to perfection. While it’s nice. I also enjoy just letting them naturally kind of fall apart. My hair definitely looked like a style from the 80’s and I was all about it.
- Day 3: I felt like wearing my short curly hair up; as a result, my curls completely fell apart and lost all definition and shape. However, I simply wore my hair up for the rest of the day and planned to revive it the following morning.
- Day 4: After my bun day, I rinsed my hair completely through using just water and my curls sprung back to life. I was actually surprised by how great they looked and felt despite not having added any product to them. However, by the evening my curls felt pretty dry and had begun to lose their shape again.
- Day 5: Since it had been a few days, I felt that my curls needed to be cleansed. I co-washed them with my OGX Detoxifying + Pomegranate & Ginger Conditioner. Once again, my curls felt very soft, looked defined, and smelled great.
- Day 6: By the time day 6 had rolled around, my curls had lost their shape from the previous day’s wash. While I still had some of my curls, I noticed that I had a lot more waves as well. I tried to use a little water to give them a pick me up but found that the hold did not last long. Therefore, I just kind of let them be as they were.
- Day 7: The last day, I decided to give my curls a little water and once again while it helped. The hold and moisture did not last, though. I once again let my curls be loose, dry, and wavy.
The takeaway?
I found this experiment to be eye-opening for many reasons.
I realized how unbelievably liberating it is to not applying anything after cleansing.
It made my routine so much easier and I felt that my hair actually, for the most part, looked acceptable. The only real issue was that my curls would often be quite dry and therefore I wish that I had had some lasting moisture since using just water to revive my hair wasn’t enough.
I would definitely do this challenge again, but for a much shorter period of time.
Furthermore, I think giving our hair a break from products is a great idea. It gives your curls a chance to breathe and just be themselves to their truest degree. (Hair Styling Product “>
I found that through this experiment, I certainly do not “need” to use styling products at all.
While it takes a bit more work to achieve defined curls, it is possible! However, I will admit how nice it was to go back to using styling products my curls again. My curls had much longer lasting definition and moisture compared to without them. In conclusion, while you don’t “need” to use products, it ultimately all comes down to deciding what is best for you and your curls!
Would you ever try going styling product free?
Let us know in the comment section below!
Read this next: ;”>Should You Go Product Free?
As most of us curlies know, our curls need extra moisture in the winter time. When it comes to curlies with low porosity hair like myself, thick styling products and heavy oils would be ;”>way too much. As a result, I have to be mindful when it comes to the products I choose to moisturize my hair with.
The LOC Method
During the winter, I like to follow the LCO Method, an alternate method to the traditional LOC method which stands for:
- Liquid/Leave-in
- Oil
- Cream
This is one of the most well-known methods in the naturally curly world that is known to lock in the moisture our texture craves. What’s fun about the LCO Method is that there a couple of ways to switch it up.
For example, there is the LCO and then the LOCO version — Liquid, Oil, Cream, Oil. Any of these methods can work — it just depends on using the correct products for your texture. One may work better for you than another so it is important to experiment.
It is difficult to find a product that doesn’t leave my low porosity curls feeling greasy and weighed down. However, with the right order and the right products, I have found that the LCO Method works the best for my curls in providing them with the moisture they need.
My Cleansing & Conditioning Routine
I typically like to co-wash my hair more than using my other gentle cleansers. Currently, I have been using OGX Detoxifying + Pomegranate & Ginger Conditioner as a co-wash and find that it works great! For my wash and go routine, I like to switch back and forth between Carol’s Daughter Sacred Tiare Shampoo and Conditioner;”> and my new favorites, Jane Carter Solution Moisture Nourishing Shampoo and Nutrient Conditioner. Both products are gentle, smell great, and I feel satisfyingly clean after I use either of these lines.
My Styling Routine
After showering, I like to style my curls with my Jane Carter Solution Revitalizing Leave-in Conditioner, BounceCurl Light Creme Gel, and Ouidad Mongongo Oil, in that LCO order.
How I Apply Product
I apply these products to sopping wet hair, scrunch in between applying each product, and gently finger comb the products through evenly.
Once my products are in, I use a t-shirt and plop my curls for about 10 minutes.
Depending on the kind of time I have, I typically diffuse my curls on the high heat setting and the low airflow level. When I have more time, however, I like to let my curls air dry.
Depending on how dry my curls are feeling, every 1 to 2 weeks I deep condition with my SheaMoisture Tahitian Noni & Monoi Hair & Scalp Weekly Therapy, a product that I have found to be a godsend for fine, curly hair. It never fails to define and hydrate my curls. This product always leaves my curls smelling like a tropical paradise.
How I Deal with Buildup
Since I typically use more products in the winter than I do in the warmer months, my curls do experience build-up.
Therefore, I like to use either water diluted apple cider vinegar or my Moptop: Clarifying rescue treatment to revive and cleanse my curls 2 times a month.
That’s all there is to it! This routine is my absolute favorite because it never fails to leave my curls moisturized, smelling great, defined, and soft.
What does your winter curl regimen look like?
Let me know in the comment section below.
Follow me on Instagram for more @ninaandthecurls
Dry shampoo can be a godsend when it comes to finishing up a heated workout at the gym or having a gruesome day of traveling.
It gives our hair that little pick me up when a shower is nowhere in sight. If used correctly, dry shampoo can be a handy tool but is something that must be used tenderly and only when you feel it is necessary. Here are 6 easy steps to applying this product correctly.
The Dos
Step 1: Prep your hair
This product should be applied to dry hair only.
Step 2: Shake the can
This helps to activate the product before you apply it
Step 3: Hold spray can 5-10 inches away from your head
This way the product is evenly distributed.
Step 4: Apply product
Apply the dry shampoo sparingly on your roots while focusing the product on the top half of your head only.
Step 5: Let it sit!
Before you do ANYTHING to your hair, let the product soak in for 2-3 minutes. This step is crucial in allowing the product to do what it was made for.
Step 6: Massage it in
Once the product has thoroughly soaked in, gently blend the product in with your fingers by gently massaging your scalp.
Enjoy!
Now that you know how to apply dry shampoo, here is a quick list of what NOT to do when using dry shampoo.
The Don’ts…
Use it without a good cause.
Dry shampoos are best after travel or working out. Or something handy to have if you want to put off showering for one more day. It by any means should NOT be used as a permanent substitute for your regular wash days. Dry shampoo cannot cleanse your scalp of impurities like your regular shampoo can. Therefore, it should be used with this in mind.Spray it all over your head.
Dry shampoo works the best when applied to the top half of your head. Otherwise, your hair will feel chalky, sticky, and dry.Spray it too close to your head.
If you apply the dry shampoo too close to your roots, you could end up with it hair that looks extremely chalky and gross.Rub it in right after application.
Doing this prevents the product from working effectively. Make sure you’re allowing the product to soak in thoroughly first.There are many dry shampoos out there that all aim at refreshing your curls. While some are more simple, there are some that contain nourishing ingredients. Below, I list off some of my favorites.
- ;”>Cantu Refresh Apply Cider Vinegar Dry-Cowash: This nourishing product contains a formula of apple cider vinegar, tea tree oil, and shea butter. A perfect blend to making your hair is feeling oil-free and refreshed. The best part of this spray is that it is affordable ($7″> and you don’t have to worry about any pesky white chalky build-up.
- ;”>Hask Monoi Coconut Dry Shampoo: I recently tried this spray for the first time and loved it. This product is lightweight and left my curls smelling like coconuts. Most importantly, my hair felt incredibly refreshed afterward. This product quickly soaks up excess sweat and oil thanks to the ultra-fine rice starch that’s in the spray. I would definitely recommend trying this product.
- ;”>Briogeo Scalp Revival Charcoal + Biotin Dry Shampoo: This was another product I recently tried for the first time. While I loved the product, for the size, this product is expensive ($24″>. However, this product will last you awhile since you only need to use a little of it at a time. It comes in a powder rather than a spray. I love the way this product smells and how easy it is to apply. My curls felt refreshed and oil free. Not only does this refresh your hair but the nourishing combo of witch-hazel, biotin, and bamboo help to stimulate the scalp and encourage healthy hair growth. I would recommend trying this product if you have extra cash to spare.
- ;”>Batiste Original Dry Shampoo: If you are looking for a classic and effective dry shampoo, this is the product for you. No bells or whistles, just strictly refreshes your curls quickly and easily.
- ;”>Macadamia Professional Style Extend Dry Shampoo: This all texture friendly product, while pricey ($20″>, does a lot more than just refreshes your hair. While many dry shampoos can leave your curls feeling dry, not this one! The passion flower and aloe vera leaf extracts work towards providing your curls with moisture, balance, and nourishment.
Want to know more about curly hair and dry shampoo?
Visit SHOPNaturallyCurly for more product suggestions from the community.
Moving to New York City was something that I had romanticized about doing for years.
I had always dreamt about what it would be like pursue my dream career of becoming an art therapist and “making it” in the big city. As a young woman coming from the cornfields and soybeans to the concrete jungle, I have a lot to adjust to. The city of New York is fast paced, full of anxiety, and a place where there are so many people who are in need. I have found the noise, dirt, and pace of the city to be at times overwhelming, a complete change from my midwest town of 132,600. However, I have also discovered how much I love New York. Moving here has brought about exciting changes, especially as a curly girl.
One of the things I love about New York is that everything is happening here.
Whether it’s the culture, fashion, food, art, or music, there is always something new to see or a new place to go. Being a curly girl in New York has been especially exciting for a number of reasons. First, all of my favorite brands such as Devacurl, Sheamoisture, Carol’s Daughter, and Ouidad are all based here! Secondly, there are so many people here who have naturally curly hair and fully embrace it. It’s so refreshing to go out and always see someone with curly hair. I feel that there is much more of a curly community here than my town back home.
Another thing that has been fun is that many of the curly women who I follow on social media live here as well.
There are events they host like curl brunches and other opportunities to get together and celebrate having unique hair textures. Another event I am excited about is CurlFest. Now that I live here, I can actually attend that festival. It has been so much fun to now have opportunities to go to these events and meet some really lovely people. That has probably been one of the most freeing and exciting things about moving here so far.
In regard to products, finding them has been about the same.
Since I do most of my product shopping online, finding products hasn’t been that difficult for me. When I’m not online, finding them at the grocery store or pharmacy has not been an issue.
Another exciting feature of living in the big apple is that I now have access to professional hair salons who specialize in cutting curly hair, like the Devacurl Devachan salon. Unfortunately, most places who are professional curly stylists are a little out of my price range, but I would love to get a cut by a professional curly stylist someday. That is the one thing I do not like about living in New York. Everything is very expensive. I know those cuts would be worth every penny though. I am excited to see what all New York has to show me within the next few years!
What’s it like being curly where you live?
Let us know what the curly community is like where you live.
I am always looking for ways to update my wardrobe and explore different styles.

Some of my biggest sources of fashion inspiration are the fashionistas and models I follow on Instagram.
They all have their own unique sense of style, which I try to emulate parts of in my own fashion sense. This month, model Chrissy Teigen caught my eye with the recent launch of her new clothing line with Revolve. Chrissy’s collection consists of fun fluffy jackets, gorgeous black floral poly slacks with matching crop tops to match, delicate dresses, and fierce tall heeled boots. While there are a couple items that are a little far out for my style, I am in love and completely obsessed with most of her collection! These are my top three faves.

Matcha pants and crop tops
These are perhaps my favorite items in the whole collection. They have a beautiful floral design with a silky, velvety, and comfortable looking aesthetic. I love how she incorporated clasps on the sides of the pants. I wonder if traditional Chinese clothing was the inspiration behind them. I also love that these pants have two different tops. One is a more off the shoulders crop top compared to the bralette style top. This would be a perfect outfit to wear on a night out on the town! Now that it is getting colder, I think having the right blazer jacket or cardigan could really rock this outfit no matter what season!

Thai Tea Top & Pants
Similar to her Matcha items, I am absolutely obsessed with her Thai Tea Pants. I love the shimmery fabric and color. These would be pants that I would wear to completely lounge around in and yet something I would also wear for a nice evening out. If worn with the right shoes and accessories, I would even go as far as saying wearing them to a fancier event!

By Raye Como Boot
At first, I wasn’t quite sure what to make of these boots. Pink is usually my least favorite color, however, I find that these boots are fierce and sexy in an unexpected way. I think it’s neat when designers mix up our idea of what we traditionally think of as ‘fierce.’ When I think of the word, traditional colors of black or red come to mind. However, I think Chrissy was able to pull off fierce successfully with the pink color! Also, I think it definitely wouldn’t have the same effect if the boots were shorter. The length is definitely what makes them work; wearing these boots with a cute denim dress or the white sweater dress that she features them in looks amazing.

I find Chrissy’s style to be really out there.
She is confident, sexy, and the collection truly reflects who she is as a person — fun, fierce, and not afraid to be herself!
What do you think of Chrissy’s collection?
Do you find it sexy, empowering, fierce, or something else completely? What is your favorite article of clothing in the collection? Let me know in the comment section below!
Photos courtesy of Revolve.
Deciding on a Halloween costume can be tricky.
Even more tricky? Finding one that will help maintain your curls. One of the easiest ways to maintain your curls is dressing like a character with curly hair! There are so many fun ideas and inspirational people — whether fictional or not — that have beautiful curly hair. Examples include Baby from Dirty Dancing, Napolean Dynamite, Eleven from the latest season of Stranger Things, Slash from the band Guns and Roses, Willy Wonka from Willy Wonka and the Chocolate Factory, Claire from The Breakfast Club, Andie from Pretty in Pink, Buddy from The Elf, and many more.
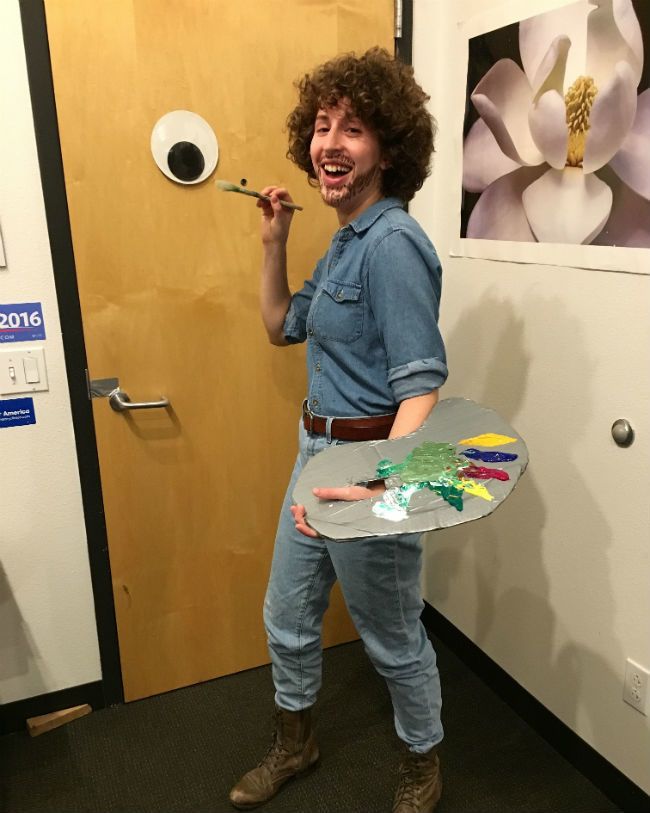
Last year, I dressed up as Bob Ross on Halloween and had an absolute blast.
The costume was super low maintenance and let me embrace my shorter natural hair. Here, I provide a simple and fun Bob Ross Halloween tutorial.
What you’ll need
- Eyeliner or a fake goatee
- High waisted blue jeans
- button-up shirt or denim jacket
- belt (preferably thin and black”>
- large paintbrush
- painting palette
- paint
- hair pick (optional”>
- TWA to shoulder-length curly hair
- combat boots or loafers (optional”>
The outfit
Bob Ross always wears high waisted blue jeans and a nicely tucked in button-up shirt. He switches it up between pink, white, blue, striped, and sometimes, even denim. Really any nice button-up shirt will work if you stay within those colors. Once your shirt is on, make sure you have a few buttons undone. Once you have your pants and shirt, you will need a belt — ideally, one that is thin and black. Lastly, if you have loafers or combat boots, break out those bad boys! Otherwise, any shoe similar to that will do. And that is all you need for the outfit!
The hair
This costume works especially well if you have shorter curly hair. Take your hair pick or wide-tooth comb, and pick your hair out as much as you can. If you need to, you can also fluff it out to get the most volume. I would even go as far as brushing your hair out carefully with a wide-tooth comb to really achieve that Bob Ross ‘fro effect. If you have longer hair, you can always pin it up with some bobby pins.
For the beard, you can always take some liquid liner that matches your hair color and draw on your bread with short quick strokes! If you don’t want to bother, you can always buy a fake beard to stick on your face. Just make sure it’s short like Bob’s! Lastly, Don’t forget the chest hair! That’s super important.
The palette
For the palette, you can buy a cheap plastic or wooden one at any craft store. Otherwise, you can make your own out of duck tape and cardboard! Simply take the cardboard, cut out a palette shape, then wrap it up in any kind of duck tape. The last thing you’ll need is some cheap acrylic paint. Acrylic is ideal since it dries quickly. Grab your large paintbrush, and you’re ready to go paint some happy trees!
Who are you dressing up as this Halloween?
Here’s some inspiration for your next look.
If you’re a minimalist like me, you aim to keep your curl care simple yet effective.

There are multiple methods to choose from when it comes to maintaining healthy hair while you sleep. Below, I provide 3 tips on how to care for fine curly hair at night.
Tip 1: Don’t treat or deep condition overnight.
While some choose to deep condition their curls while they sleep, for me, it’s too heavy for my curl texture. Furthermore, there is research arguing against deep conditioning while you sleep as it can actually cause more harm than good to your curls by over moisturizing them. Additionally, I find that I get the best results by keeping my regular treatments short, sweet, but effective. When I do a protein or deep conditioning treatment, I leave it in for 20 to 30 minutes, but no more than one hour. That is the key to ensuring that you maintain healthy hair, whether it is day or night.
Tip 2: Apply treatments or style in the late afternoon or early evenings.
As a general rule, I always treat and style my curls in the late afternoon to early evenings to allow my treatments to soak in and work their magic with time left over to wash it out. In addition, I find that the treatments and styling products work better when I don’t have to worry about being on the go and exposing my curls to the sun, wind, or the pollution of NYC. I can just relax after a long day, and let my curls treat themselves by spending the night in.
I feel that my curls are their healthiest when I go to bed with curls that have been dried, treated, styled, and are ready to go. They smell great, are moisturized, and look amazing and healthy! Furthermore, it makes for a quicker stress-free morning routine where I can simply do a quick refresh and be ready to go out the door!
For styling, as always, I have been loving Light crème gel by Bouncecurl and following up with a light finishing oil like Ouidad Mongongo Oil. For deep treatments, I have been using SheaMoisture Tahitian and Monoi Weekly Scalp Therapy. When I do my protein treatment, I use a ratio of 1 raw egg and 1 large spoonful of coconut oil.
Tip 3: Protect your curls while you sleep!
To ensure that your curls have lasting definition, doing either of these simple methods can make all the difference in regard to keeping your curls protected while you sleep, as well as help prevent them from giving you a crazy case of bedhead.
- Sleeping on a satin pillowcase.
While the pineapple method can be a bit tricky for us shorter haired curly folks, lately, this is the method that I have been doing to protect my curls overnight and it couldn’t get any easier. I sleep with my hair down on my favorite satin pillowcase and that’s it. If you have curly hair, then you have probably heard that using cotton pillow cases aren’t the best as they can cause unnecessary friction, frizz, and damage. Satin pillowcases are easily affordable and can be purchased right off of amazon. They are so worth it, and your curls will thank you. I find that even though this method is simple, it defines and protects my hair enough to my satisfaction while I sleep.
2. Wear a silk scarf.
For even more protection and fuller coverage, you can also wrap your curls up in a silk scarf. If you don’t have a silk scarf, you can always flip your satin pillowcase inside out. With the satin side surrounding your hair, you can wrap it up in that and sleep with it that way.
To see a curl sleep method in action refer to my video tutorial here.
Watch another great video from Gabriella Gatehouse here
Ultimately, it’s up to you to experiment and find the sleeping method that works best for your fine curls.
What do you do to keep your curls healthy at night? Let me know in the comment section below.
While I keep my curl routine generally pretty minimal, the products that I do use, I cannot live without. This goes for beach days, too.
Here’s how I beach prep my curly hair
Before spending a day on the sand I like to add a little coconut oil to my hair because of its natural SPF. I do so by gently scrunching a quarter size amount of oil all around my curls. it Even though the SPF level in coconut oil is very low — close to 1 — it is better than nothing. Sometimes I like to alternate between that or using my Ouidad Mongongo Oil, which can also be used as a heat protectant. Additionally, the product is super light on my curls.
On the beach
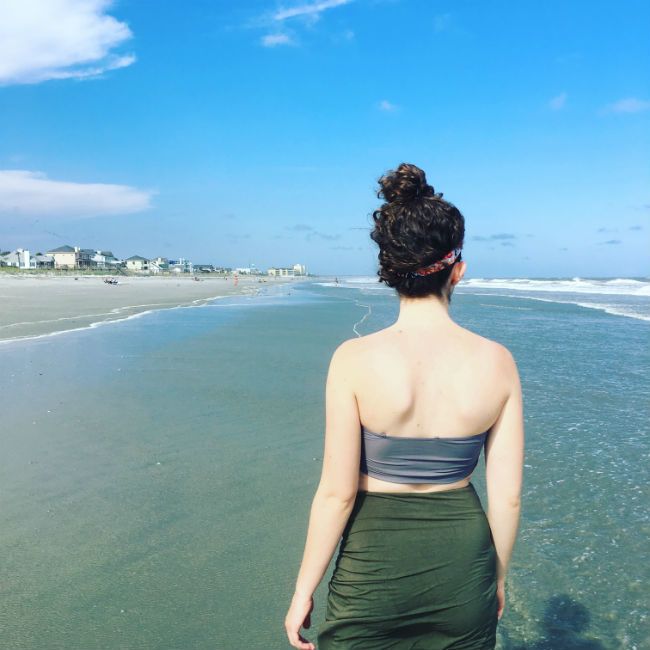
Once I am on the beach I will often wear hairbands, bobby pins, or wear my hair up in a protective style like a bun or pineapple to get the hair out of my face. This is especially helpful when I am swimming in the ocean or just feeling like being a total beach bum.
Usually, I am on and off the beach periodically throughout the day. This is an important step because the middle of the day is when the sun is at its hottest.
Post swim
After going swimming and while taking a break from the sun, I will rinse the saltwater out of my hair by using my DIY refreshing hair spray. My mix contains filtered water infused with lavender, peppermint, or rosemary essential oil — it depends on what oil I’m in the mood for since I usually don’t wash my hair until the end of the day when I am done swimming.
Finally, as the day goes on, I will reapply coconut or Mongongo Oil as I see fit throughout the rest of the day especially since I am out in the sun for long periods of time.
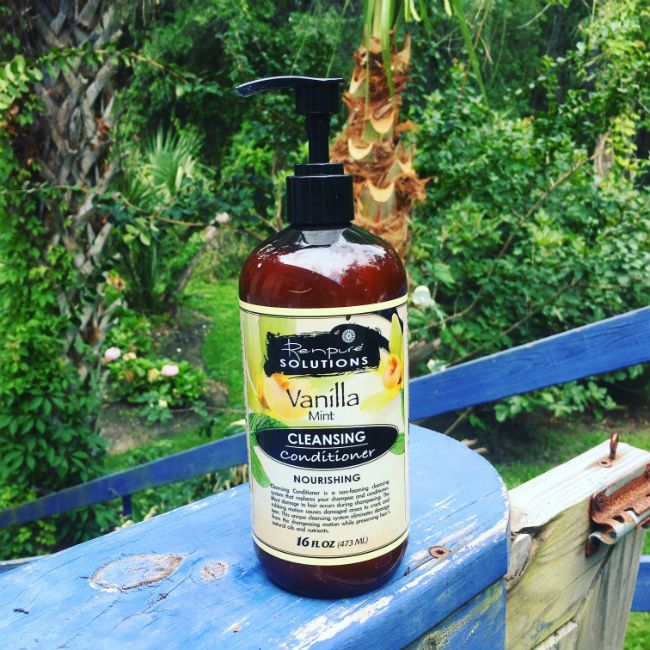
With regard to my overall curly hair care routine post-swim, I absolutely cannot live without my co-wash, which I will use every day. I am typically only at the beach for a week or so at a time, so my Renpure Solutions Vanilla Mint Co-Wash works fine for this instance.
If I’m itching to style my hair
I typically like to use my Bounce Curl Crème Gel for styling and that’s it! I will add one of my oils as a finisher if my curls feel too dry. To dry my curls I usually alternate between a using a diffuser or letting them air dry (since they dry pretty quickly in that kind of heat and sunny weather”>. However, whenever I do air dry my hair, I do not get that big volume that I love, so I will either use my trusty hair pick, shake my curls with my fingers, or follow up briefly with my diffuser to give it some more life.
A week later
Finally, at the end of the week, I will follow up with my weekly deep conditioner, SheaMoisture Tahitian Noni Monoi Oil Smooth & Repair Hair Scalp Therapy to restore moisture back into my hair.
How do you prep your curly hair for a day at the beach?
Let us know your routine in the comments section!
And follow us on Facebook to see what we’re talking about right now.
Hey NaturallyCurly Community! It’s Nina Sultan here.
After years of experimenting with all kinds of different products, I can officially say that I have found my ultimate set of holy grail products. I have been using them religiously for the past 6 months and my curls have never looked so moisturized and defined.
I usually start styling my curls right after I get out of the shower. Using a t-shirt to scrunch my curls, I wrap my curls up and leave them for about 10 minutes. Once I take off the t-shirt I continue to scrunch any excess water out of my hair before I begin to apply any styling and finishing product.Leave-in
The first product I use is my DevaCurl Supercream Coconut Curl Styler as a leave-in. I use about two pumps and rub the product between my palms before gently finger combing the product all throughout my curls for a nice even distribution. I love this leave-in because it doesn’t weigh down my curls at all, is easy to distribute, and has a lovely coconut scent. It’s 100% free of sulfates, parabens, and silicones which I love, and it gives my hair incredible moisture. I have found this leave-in to work really well with fine curly hair, which is perfect for me.
Styler
The next product I apply is my Bounce Curl Light Crème Gel with Aloe Vera and nigella sativa.
I use slightly over a quarter amount and rub the gel between my hands, and again, gently finger comb throughout. I love this gel because it doesn’t leave my hair feeling crunchy or sticky, rather, it soaks into my curls and leaves them with incredible definition. The combination of the DevaCurl with this product, never fail to make my curls look amazing each and every time I use both of these products. This product also has a light fruity scent to it which I find to be quite pleasant.
Finisher
The final product I add to my hair is my Ouidad Mongongo Oil as a finishing product. I use two pumps of this and again, rub it between my hands, and then lightly scrunch the ends of my curls with this all the way around my head. I love this oil because you can use it for many different reasons such as a leave-in, heat protectant, or a finishing oil. This product really provides my curls with the enhanced shine and softness that I desire. It smells like a light mixture of essential oils and is a lovely oil to try if you are looking for something that will leave your hair feeling soft and looking naturally shiny.
Dry
After my products have been applied, I give my curls a gentle shake or two to allow them to fall naturally before I begin to dry them. Before, I used to let my curls air dry for about an hour before diffusing, but lately, I have started diffusing my hair almost immediately after all of my products have been applied. While there is some controversy that doing that isn’t good for you hair, I have been doing that for months and so far and haven’t noticed any damage to my hair. I love the enhanced volume I get from diffusing that I wouldn’t get otherwise from air-drying alone. Once I’ve finished diffusing my curls, I shake them gently to fluff and even them out.
Hack for even more volume
While diffusing and shaking gives my curls incredible volume, I have been into really big curly hair lately so I have been using my little hair pick to add even more volume to my hair. This is optional because sometimes shaking and diffusing can be enough, but for my purposes, I take the pick and slide it gently near my roots and fluff upwards to get that desired extra height.
What products are you loving right now?
Do you prefer diffusing or letting your curls air-dry? Let me know in the comment section below!
Read next: How I Trim My Own Curly Hair
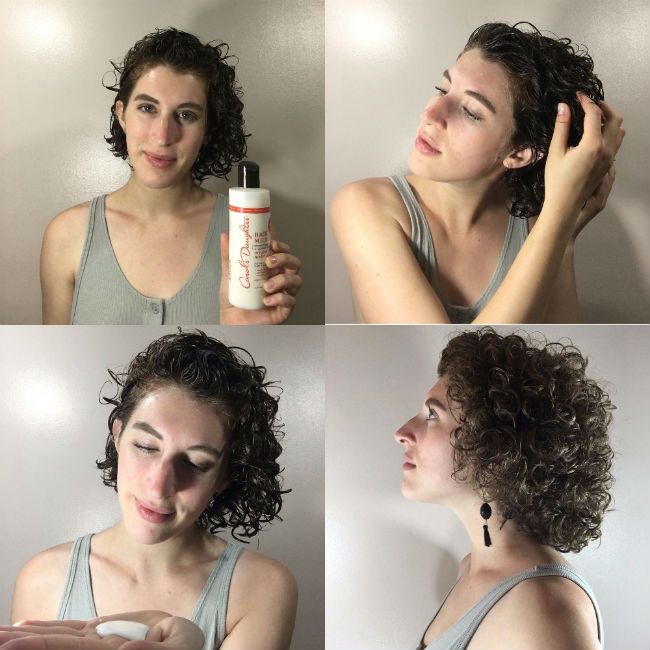
While traveling this summer, I ran out of leave in conditioner and wanted to switch it up once again.
Before, I had been using DevaCurl Supercream Coconut Curl Styler as a leave-in for the past couple of months and was loving it. While I loved this product, it was a bit expensive. Therefore I wanted to switch to something new and a bit cheaper. For cleansing, I have been using Carol’s Daughter Sacred Tiare duo products and have been wanting to try one of their leave in products for awhile, so I decided to try out their Hair Milk Leave-In Moisturizer ($12″>. You can buy this product pretty much anywhere. This is what I thought of the product.
Carol’s Daughter Hair Milk Original Leave-in Moisturizer
Application
- Once I got out of the shower, I used a little over a quarter size amount of product.
- Then, like always, I gently finger-combed the product thoroughly through my sopping wet curls. The product itself is white and truly milky in consistency. I liked how easy it was to distribute and apply.
- After applying a leave-in, I paired it with my all time favorite crème gel by Bounce Curl, and applied it the same way. With both products lightly and evenly distributed, I then plopped my curls for about 10 minutes.
- After plopping, I let down my curls and gently scrunched them before diffusing them dry.
The results
Once my curls were voluminous and dry, the first thing I noticed was how soft my curls were. Surprisingly, they felt even softer than when I just use the Bounce Curl Gel by itself. Additionally, I was pleasantly surprised with how well it paired with the styling gel, in that, my curls neither felt weighed down, heavy, nor crunchy. My curls were defined beyond my satisfaction as well as made my curls smell amazing. While the scent present, it is light and lovely. Furthermore, while this product is not a 2 and 1, like I typically go for in the warmer seasons, if I feel like my curls are drying out this summer, I know what leave-in to use to support and give my curls that desired moisture this summer.
My review
While this product is a bit pricy, it is way cheaper than Devacurl and it does last since you only need to use a little. Regarding sizes, there are two options: 2 ounces or 8 ounces. Depending on your hair length, if you have short curls like me, the 8-ounce will last you for several months.
I would definitely recommend this product to curlies with my hair type.
The pros
- it lasts a long time for 8 ounces
- it has a lovely scent
- it is easy to distribute and apply
- it doesn’t leave your curls feeling heavy, weighed down, or crunchy
- it deeply moisturizes, adds softness, prevents frizz, and gives great definition to your curls
- it is for all curl types
- it is paraben, petroleum, and mineral-oil free
The cons
- it is pricey
Have you tried Carol’s Daughter Hair Milk Leave-in?
What was your experience with this product like? Do you like Carol’s Daughter products in general? Let me know in the comment section below.
Read the reviews and visit SHOP NaturallyCurly to purchase this product.
Now that summer has arrived, I have cut down the products I use for styling in half by using products that act as 2-in-1s. I have been using Bounce Curl Light Crème Gel with aloe, $18.00, since November and can honestly say that the product revolutionized my styling routine. Why do I love it? Because I can use this gel all year round and gives my curls the same great definition I am seeking each time.
Pros:
- the 8-oz. bottle lasts a long time
- it has a lightweight, enjoyable fruity scent
- it’s easy to distribute
- it doesn’t leave curls feeling heavy, weighed down, or crunchy
- it deeply moisturizes and gives great definition to your curls
- it is silicone, sulfate, and paraben-free!
Cons:
- it’s on the expensive side ($18″>
My Bounce Curl Light Crème Gel product review
- First impression: The product itself is milky-white in appearance and is incredibly light to the touch. It smells slightly fruity without the artificial scent to it, which I enjoy. I always apply this product right out of the shower. I have used this product with and without plopping and got similar levels of definition but have found that I get the best definition results when I plop with this creme-gel.
- Styling application: I use a little over a quarter size amount and gently finger comb the product through my hair when it is sopping wet. I then scrunch with my hands gently before wrapping my curls up in a t-shirt for approximately 10 minutes. Once I have let my curls hang out in the t-shirt for as long as I desire, I let it down and gently scrunch some more and typically diffuse blow-dry it to get the desired volume I love as I do not typically get that when I let my curls air dry.
My results
Once my curls were dry, I could immediately see the results regarding how soft and defined my curls appeared and felt. I really love this product because it is a crème and a gel it acts as moisturizer and as a styler. Additionally, the aloe vera and nigella sativa work to make your curls feel moisturized and super soft. My curls have never looked so defined and felt so hydrated before.
I have found that this product is also great to pair with other products too without making my curls feel weighed down, crunchy, or heavy. My favorite products to pair this with are the DevaCurl Coconut Supercream Coconut Curl Styler and my Ouidad Mongongo Finishing Oil.
To sum it up
While this product is a bit pricy ($18″>, it does last a for awhile. There are two sizes available: 8 or 12-ounces. I was pleasantly surprised that even though the size I got was 8oz, it lasted for months! Out of all the products I have tried over the years, this product by far is my holy grail styling product. I would definitely recommend this product to curlies with my hair type.
What products are you into right now? Have you tried this gel? Did you get the same results? Let me know in the comment section below.
Do you have type 3 hair? Take the hair type quiz here.
Hello, NaturallyCurly Community! It’s Nina Sultan here. Today I am going to share with you my travel curly routine.
So typically whenever I travel I like to attempt to do so as lightly as possible. If I brought all the products I use normally my bag would weigh 100 pounds as to why I usually cut my normal routine in half. The only substantial thing I like to bring with is my hair dryer and diffuser but transfer all of my relevant products into their respective travel size containers. The following is my standard travel routine when I am on the road.
Cleansing
On the go I co-wash my hair much more often than using a sulfate-free cleanser. If I end up using a shampoo at all I bring a couple of sulfate-free sample packets — I have accumulated a bunch of these over the past couple months as they have become a convenient traveling accessory! They are also a great excuse for me to try out different products without them adding weight to my bag.
Styling
For my styling routine I typically use a 2-in-1 styling product like Bounce Curl Light Crème Gel. This is a product I will squeeze into a smaller bottle to take along with me on my trips. I love this product because it is good for keeping my curls moisturized and defined at the same time. The only other product that I like to bring is my Ouidad Mongongo Oil. I like this oil because it acts as a heat protectant, finishing oil, and makes my curls appear shinier and feel softer. Additionally, this oil is great for the beach or trips that cause me to get a ton of sun exposure.
Other items:
In addition to my products, there are a couple of other essential items that I bring with me on my traveling excursions. First, is my satin pillowcase. I like to bring it along because often hotels or other places usually just have cotton pillowcases and therefore, if I were to just use those would make my hair crazy in the morning. The satin pillowcase I have fits over almost any pillow and keeps my curls manageable while I travel.
Another item I like to bring along is my Cricket Ultra Smooth Hair Pick Comb. It is a light and helps me easily be able to achieve the big volume I’ve been desiring lately. I also bring my standard t-shirt to be able to plop and gently dry my curls so I don’t have to use a plain towel and worry about damaging or frizzing up my hair.
Last but not least, I bring my hair dryer and diffuser. I love having big hair and knowing that I can diffuse the heat without giving myself substantial heat damage through using a hair dryer without one.
To sum it up: travel light but effective.
I do this to avoid having to carry heavy bags.
What does your travel routine look like?
Do you like to bring a bunch of products or do you like to cut down your routine like I do? Let me know in the comment section below!
Subscribe to Nina’s YouTube channel for more curly hair care tips.


