Search Results: Nikki Walton

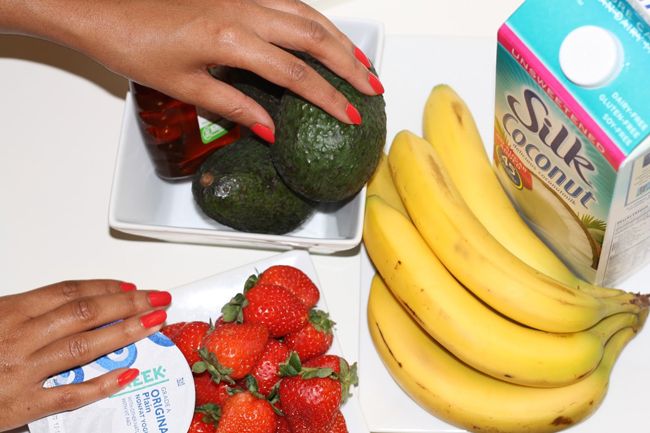
For my hair there’s absolutely no way around regular deep conditioners. Even when I’m not in the mood, I know that without some sort of deep conditioner, my wash-n-go will be dry and frizzy, my roller sets will look like hay, and I’ll be compromising my precious, precious, ends. Here are a few of the DIY hair masks I use that you can actually eat. These are super easy, you don’t even need a recipe, you can totally eyeball it. Just mix, apply, and use your idle time to snack.
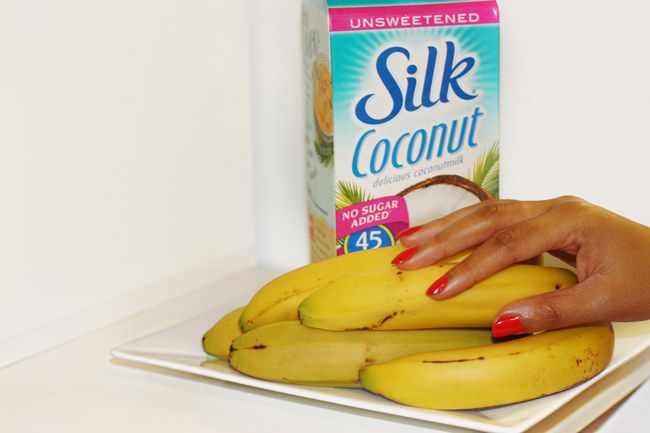
Banana & coconut milk
First up, banana and coconut milk. Coconut milk is a natural conditioner with proteins and good fats. You can use it on its own or dilute it with water and make a daily mist spray. Bananas have potassium that strengthens hair, plus they have plenty of natural oils (and water”> that dry hair will just eat up.
I like to overdo it and use two (or more!”> bananas for my thick hair and mash them with about a cup or two of the coconut milk. Whatever’s left of my mixture gets warmed up and served over rice. You can even sprinkle a little cinnamon on top if you’ve got it.
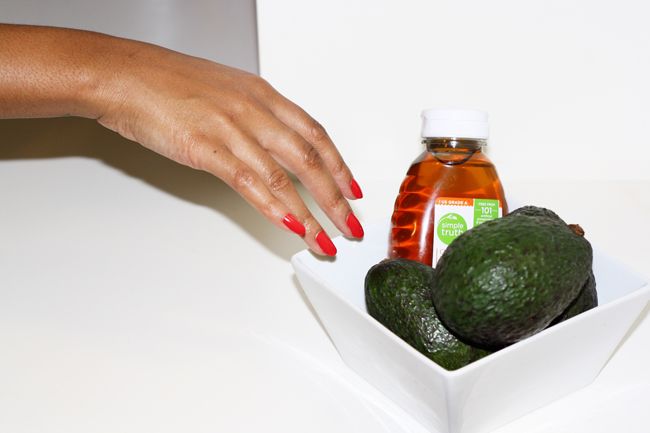
Honey & avocado
Avocados have tons of Vitamin B that help with hair growth, Vitamin E which is good for a healthy scalp, and good fats that help with elasticity. Honey is a natural humectant and attracts moisture— you know what that means— more shine!
I like to add a bit of water to this mix, since the honey can be hard to work with. For the snack version, spread avocado on toast, drizzle a little honey, and add sea salt.
Strawberries & Greek yogurt
Strawberries are packed with alpha hydroxy acids that can remove dead skin from your scalp and Greek yogurt (as we all know”> is an amazing conditioner. The protein in Greek yogurt really saved me when I was transitioning, plus it’s more gentle than store bought products.
If you like to do protein treatments often, I suggest using Greek yogurt and taking the gentle route. Get a big jar and a few extra berries to munch on.
I am so tired of the natural hair rules. I’m so serious! Here are 5 rules that the natural hair community should just forget and let others learn what’s best for them in their own hair journey:
Using Silicones
Silicones are artificial oils that firmly coat the hair strands. Now I may get the clapback, but silicones aren’t as bad as everyone makes them out to be. Just like with everything you use and eat, moderation is the key when using products with silicones. They do provide great slip, combat frizz, are used for heat protectants, and do a great job when detangling the hair.
Using Shampoo With Sulfates
There are naturalistas that want and need shampoos with sulfates. Sulfates are great to cleanse your scalp and hair from any product buildup. You do not need to use sulfate shampoos weekly. Try changing up to bi-weekly or even once a month. If it strips your hair to where you hair is feeling dry, try doing a hot oil treatment to build protection around your strands before you wash your hair.
Not Moisturizing and Sealing Daily
Who really has time for that? Personally, I usually moisturize and seal one good time before the hair goes up in a bun for the week. Creamy moisturizers and butters tend to last longer than mists and oils. When wearing braids, weaves, or another long term styles, you do not need moisturize and seal daily. Moisturize your hair according to what style you are wearing, how long you will wear it and your personal hair needs.
Not Wrapping Hair For The Night
You may not feel like wearing your bonnet for the night, because it’s too hot and humid. Using a satin scarf or a bonnet is not the only way to protect your hair at night. Sleeping on a satin/silk pillow case can accommodate you if you don’t want to sleep with a bonnet. Your hair will not fall out overnight if you forget your bonnet. Let your hair breathe for the night and continue wrapping your hair the next day.
Using Heat
Many would think that it is important to not use heat at all on your hair to keep it healthy. But really if you have healthy hair practices before flat ironing your hair and keep the heat under 320 degrees, healthy hair is possible.
What are the ‘natural hair rules’ you tend to break?
This article was written by Desire My Natural via GlobalCoutureblog.net and published on CurlyNikki.
Recommendations
Do you have natural friends? Who is their stylist? Do you even like the results you see when they leave the salon? These are all important questions to ask. If after receiving the answers you decide you like the salon (or stylist”>, it may also be a good idea to go with your friend to the salon. See how the stylist treats her hair. After you’ve done al these things, if you’re satisfied with what you see, then that may be a great place for you, but hey, not so fast, there are still other factors to take into consideration.
Don’t have natural friends? Google it! I love Google. There’s nothing that I won’t look up and a salon is no exception. In this day and age you’re literally just a few clicks away from seeing what others think about the salons in your area. Find reviews, check out their Facebook page, heck some of them even have YouTube channels now. If all of these things fail you and you can’t find enough information, take a visit. See if they are even doing other customers’ hair that resembles your own texture. Maybe even call ahead before your visit to see if they may have a curly/kinky textured client coming in soon. Then ask them what they think of the place and how long they’ve been going to this stylist. Have they followed them from another shop? It won’t hurt to ask, I’m sure they’re more than willing to share.
Consult
Does this stylist that you’ve researched have consultations? Call and see! A consultation is an opportunity for the stylist to get to know your hair before actually styling it. It is a separate appointment from an actual hair appointment, consider it a pre-appointment. Finding a new stylist is like dating for your hair. You can discuss your hair texture, length goals (or any hair goals you have”>, allergies, and any other pertinent information about your hair. This is not a one sided Q&A, let the stylist ask you questions. They may want to know things like your own daily styling techniques, what styles you wear most, if your hair has been colored, and what issues your hair has that you want to deal with. This is also a time when you, for a change, can let someone touch your hair! That is why you came to the shop in the first place, right?
If you haven’t decided on a particular stylist, and have only narrowed your search down to a salon you can use these consultations, or your observations to see what you like and dislike about certain stylists.
Environment
Are you a good fit? Do you enjoy your time there? We all know how long hair appointments can be, don’t let it be a boring and miserable experience. If you don’t like the stylist’s attitude, or if other people in the salon make you feel uncomfortable, you shouldn’t want to spend your hard earned money there. This is supposed to be a relaxing experience for you, a day off if you will. You should be in a stress free, friendly environment. When you analyze your stylist one of the major obstacles is making sure they are listening to your wants, despite what they think is best. You should definitely take their advice into consideration, but it is YOUR hair and you have the final say.
There’s nothing worse than a pushy stylist that makes you feel bullied into a style you don’t want. Don’t let a stylist force you to get a trim, style too tightly, or rake through your hair (detangling can make or break a stylist I’m considering”>. If you warn them about it once (heck even give them a second chance”> and they continue doing whatever it may be or give you attitude for speaking up, don’t go back. If it really bothers you, don’t even let them finish.
Sometimes the problem isn’t a pushy stylist, but a distant one. If she’s silent the entire time and that’s not the stylist-client relationship you were looking for, then you may need to continue looking at others. If she passes you off for entire processes, that may also be a problem for you. I once had a stylist back when I was relaxed that ignored me with perm in my hair (ouch!”>, and the washing was the only part she participated in. She completely left the building and when she realized I was going to leave without paying, without a style, and completely dissatisfied her resolution was to have an entirely different stylist finish my hair. She ran through my hair very quickly to get back to her client and needless to say, I did not go back! These things really matter, because you have the purchasing power, without you (the customers”> they are out of business and word of mouth is a powerful medium because there are others who really want to hear from you before they waste their time with a rude hairdresser.
TEST the Waters
Emphasis on the word test. Don’t go into your first appointment and tell her you want a complete makeover. Get to know one another before you leave serious styling in her hands. Even with a stylist you’ve had for a while has a chance at giving you a style you don’t like as much as you envisioned, so you really shouldn’t trust a stranger with that much responsibility.
Last piece of advice, don’t go salon crazy. If you find a stylist that you absolutely love and meets all your criteria, that’s amazing! However, remember that you had been doing your hair for a while before found her and you’ve taken great care of it up to that point. No amount of salon visits are as valuable as sticking to your typical regimen. If you go to the salon just for heat styles, then I really discourage frequent visits.
Let me know how it worked out!
Did you find a salon that you love? Were this tips helpful? Have you got some tips of your own? Share them here and let me know about your salon experience in the comments.
This article was written by ChayNaturals.com and published on CurlyNikki.
Tea tree oil
Tea tree oil has major benefits. I like to use it by adding it to my shampoo. You can also search for shampoos with it as an ingredient. Here are a few benefits of tea tree oil:
- It has powerful antibacterial and anti-inflammatory properties that help to treat itchy scalp
- It moisturizes your hair and scalp. It is one of the best solutions for dry and itchy scalp.
- It helps get rid of the dead skin cell buildup and dirt on the scalp which creates a better environment for healthy hair growth and scalp health
It is important to note that you must always dilute the tea tree oil before applying it to your scalp!
Apple cider vinegar
Apple cider vinegar (ACV”> is a great natural way to relieve dandruff, dry scalp, and buildup in your hair as well. Apple cider vinegar contains enzymes and properties that act as a fungicide and cleanser at the same time. The acidity of apple cider vinegar changes the pH of your scalp in turn killing off the fungus that causes icky dandruff, dry and itchy scalp. When I start to notice massive amounts of dandruff, I like to treat my hair with an apple cider vinegar rinse. I mix a half a cup of apple cider vinegar with a half a cup of water. I usually just put it in a spray bottle and spray all over my hair and scalp. Make sure to dilute with equal water to ACV, it is very acidic. I use a shower cap, leave it on for from 15-30 min. and then wash it out. This technique usually combats my dandruff well.
Coconut oil
Cues music….” I’m in love with the coco” “I use that on everything” Ok I’m done! I really do use coconut oil for everything, though!
Coconut oil is one of the most used oils and it also serves as a remedy for dry scalp. It helps to restore moisture to the scalp and helps prevent your hair from becoming dry and flaky. I usually massage the oil on my scalp, leave it on for 30- 45 minutes, and then rinse (pre-poo”>.
What will you be using on your scalp during the colder months to help combat dryness?
This article was written by Michelle Thames of HappilyEverNatural.com and published on CurlyNikki.
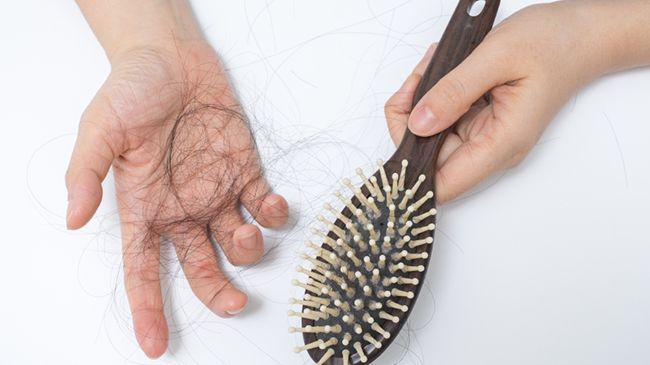
Hair loss can occur due to many different factors and health issues. If this is an uncommon occurrence for you check out my simple solutions to common causes for abnormal hair loss.
Abnormal hair loss can occur due to any of the following:
- Stress
- Lack of rest
- Illness
- Hormonal imbalance
- Heredity
- Vitamin deficiency
- Styling the hair in high tension styles
- Scalp infections (usually fungal”>
- Side effects of new medications
- Use of too much direct heat
- General anesthesia for surgery
- Post childbirth
- Poor/Imbalanced diet
- Trichotillomania
- Over manipulation of hair
If you notice a great deal of hair loss and this is abnormal for you, it is a good idea to go to your physician for a health evaluation. Hair loss can be a sign of an underlying health issue. And often, hair ‘growth aids’ aren’t a solution. So before you stop popping unnecessary (and potentially harmful”> supplements, check out the list of solutions, below!
Solutions
- Stress: Mediation, exercise and talking to friends/family.
- Lack of rest: Sleep longer and relax more often. If this is due to insomnia or sleep apnea see a doctor for referral to a sleep specialist.
- Illness: See doctor for a health examination.
- Hormonal imbalance: see doctor and gynecologist can provide treatment as well.
- Heredity: See a physician or trichologist about options for scalp stimulation treatment, implanting hair, etc…
- Vitamin deficiency: Get blood work done and develop a plan with doctor and nutritionist.
- Styling the hair in high tension styles: Do low manipulation styles with less/no tension.
- Scalp infections (usually fungal”>: See dermatologist/ trichologist.
- Side effects of new medications: Consult with doctor for other options.
- Use of too much direct heat: Begin wearing styles that are heat-less more often such as roller sets, updos, buns, twist/braids, twist outs and braid outs.
- General anesthesia for surgery: Consult a doctor.
- Post childbirth: This is normal for many people but the amounts of hair loss varies greatly. If it is excessive or causing concern speak with your doctor.
- Poor/Imbalanced diet: Using a food chart to better plan your meals and consult a nutritionist
- Trichotillomania: Consult a trichologist.
- Over manipulation of hair: Do low manipulation styles that will keep your hands out of your hair on a regular basis.
Hopefully this has been helpful to you. If you have any questions feel free to ask in the comment section.
Disclaimer: I am not a physician and only share what I know, have done or recommended for others. Always consult a physician for your primary medical care.
This article was written by Emilia Obiekea of Adorebotanicals.com and published on CurlyNikki.
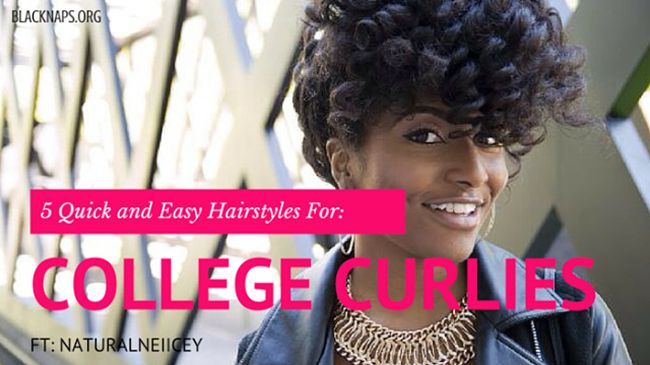
Campus life has been back in full swing for a minute so right now, it’s all about the grades. Some days you won’t have extra time to spend on your hair so it’s nice to have a few go-to styles in your repertoire just in case. To help you sail through this semester with perfect grades and fly hair to match, we’ve got some tips to help you maintain your natural hair without having to manipulate it too much. So no excuses!
Always have a gameplan
How and when you style your hair will depend on your school schedule and your workload for the week. (You definitely don’t want to try a brand new style the night before a big test!”> Styling your hair can be fun- therapeutic, even, but also time-consuming, so be wise about when you do it.
Choose a day that doesn’t compromise your study time and get all of the products you’ll need ready before you start. Set a timer to help yourself move quicker. For instance, if it usually takes you 45 minutes to detangle, aim to do it in 30. It’s important to still be careful but you’ll find that setting a timer will keep you from getting lax or becoming distracted and will ultimately save you time.
When all else fails, protective style
I lived in box braids and twists throughout my time as an undergrad because they were easy and nearly effortless. All I had to do was keep them moisturized. Plus, I learned how to install them myself which kept my budget happy, too.
Find a low-maintenance style that works for you. It could be box braids, twists, or even bunning. You won’t always have time for full blown wash days, especially around exam time, so protective styling is great for times like these. Also, you can rely on protective styling around holidays like Thanksgiving so you can focus on prepping for finals when you return, or around Christmas, when all you really want to do is relax and spend much needed time with family and friends.
Have some backup hairstyles prepared
Get yourself a few backup hairstyles that are quick and easy to do for those days when you’re running late or your hair doesn’t turn out how you want. Your hair is not an excuse to skip or be late for class!
In this video, NaturalNeiicey shares 5 quick and easy styles that you can wear on your natural hair.
This article was written by Kanisha of Black Naps and published on CurlyNikki.
How have you been rocking your natural hair this school year?
My no heat hair regimen
I have not blow-dried my hair in the past four years *gasps* and I honestly do practice and advocate for a no heat hair regimen. Cutting out heat from my hair routine has completely helped me not only retain length, but minimize breakage and damage associated with heat styling techniques. Of course, everyone has their own personal preferences and some prefer to blow out and/or flat iron their natural hair, no judgment here girl. To each his own.
Why I chose to straighten
My hair is currently heat stretched, and has been so for about a week now. Again, you’re probably wondering why on earth would she break her no-heat rule? I washed and blew out my hair because I was due for a much-needed trim, and so in order to accurately trim it, I decided to straighten it. In fact, I did more than trim, I cut about three or so inches off. *Gasp some more*
Why I chose to cut
You see, long hair does not always equal healthy hair. My personal hair journey is focused on HEALTH and RETAINING the hair that joyfully sprouts from my scalp, rather than chasing length. Why you ask? Because healthy hair practices will ALWAYS result in healthier hair, and promote hair growth. So it’s like killing two birds with one stone. Chase HEALTH and LENGTH will follow, it really is that simple.
I cut my hair because my ends needed a new lease of life! And I am not opposed to cutting off a couple of inches to give my hair what it needs. Now, I’m not saying go crazy and cut three inches off your hair, but pay close attention to your ends, are they splitting, are they frayed? If so, you may be due for a trim!
This experience was completely nerve-wracking for me, I haven’t let another individual do my hair in over four years, and so it was difficult and terrifying to give that control to someone else. Needless to say, I was very vocal and communicated exactly how I wanted to have my hair done-which is SO important. If you are going to visit a salon, make sure the stylist is open to doing your hair the way YOU want it done. Especially when it comes to the temperature of the tools involved, and the amount of hair you’re comfortable with trimming.
How to care for your hair
Remember to wash your hair with a sulfate free shampoo to ensure you don’t overly strip your hair. Follow that up with your conditioner of choice, and make sure to give it about 10 minutes to soak in before rinsing.
Carry your leave-in conditioner with you, as well as your preferred oil(s”> and a heat protectant! Blow dry on low heat, even if it frustrates your stylist it’s what is best for your hair.
Snip snip snip and you’re done! Until next time beloved ones.
This article was written by Yvette Mumanyi and published on CurlyNikki.
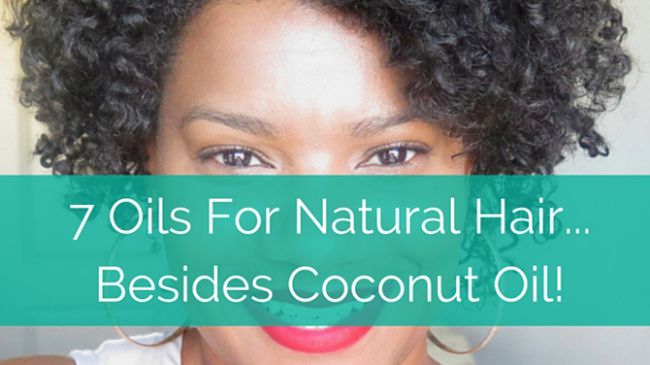
I love coconut oil just as much as the next person; however, there are several other oils for natural hair that reap the same, if not better benefits. Don’t get me wrong, coconut oil is great! I use it as an as a substitute for lotion, a makeup remover, for cooking purposes, and even oil pulling (that one time I tried oil pulling lol”>; however, let’s explore other impressive oils for natural hair that you should try. But first, do you know the difference between an essential oil and a carrier oil? If not, keep reading to find out.
Carrier oils
Carrier oils are vegetable oils derived from the fatty part of a plant, usually the seeds or kernels. Some are able to penetrate the inner cortex of the hair shaft for conditioning while others also work well to seal moisture through creating a light barrier on the exterior of the hair cuticle. When used in conjunction with essential oils, they “carry” the oils to your skin and hair, given that essential oils are extremely light weight and evaporate quickly.
Essential oils
Essential oils are plant-based oils distilled from leaves, bark roots and aromatic portions of a botanical. With an extremely concentrated smell, essentials oils also have small molecules that evaporate quickly within the scalp. Due to their light, molecular weight and water-like consistency of these oils they are not used for sealing moisture. However, essential oils are great as scalp stimulators.
7 Amazing Oils for Natural Hair
Avocado oil (carrier oil”>
I know I just talked about avocado oil last week in my CurLUXE naturals review; however there’s no harm in mentioning it again simply because I love it so much. My fascination with avocado oil includes its light weight and molecular ability to penetrate the hair shaft for intense deep conditioning when combined with other ingredients. Vitamin rich and full of fatty acids it also helps to heal damaged, weak hair.
Babassu oil (carrier oil”>
Babassu Oil is extracted from the tree nuts of babassu palm trees grown in the tropical forests of Brazil. Babassu oil is light weight as well and locks in the hair’s natural moisture, adding luster, shine and elasticity to the hair. For skin care, its emollient properties are also claimed to help in the relief of itchy scalp, eczema, and psoriasis, which is also similar to a few benefits of coconut oil.
Peppermint oil (essential oil”>
This essential oil not only smells wonderful but can be used weekly to treat yourself to a scalp massage in order to promote growth. Peppermint oil, similar to a few other essential oils, are known to stimulate blood flow to the scalp, helping with hair growth. Just remember to combine a few drops of this oil with another carrier oil for best results. No worries, I’ve included a DIY recipe for you to pin or print below.
Wheat germ oil (carrier oil”>
A little less widely talked about, wheat germ oil is not one to be skimmed over quickly. As the name suggests it is a plant derived oil and is very rich in linoleic acid, similar to avocado oil, which is very rich is omega 6 fatty acid. As the richest source of vitamin E than any other natural oil, use wheat germ oil for extremely dry hair to add moisture and softness. Due to its thick consistency, mix with another carrier oil, add to your spray bottle of water and aloe vera juice or add a little to your favorite conditioners. Since it has high emollient properties it also works well to be added to your favorite deep conditioner.
Rosemary oil (essential oil”>
Fully packed with loads of antioxidants, Rosemary oil is one of the best oils for natural hair known to stimulate hair growth as well as retard premature thinning and graying. As with many essential oils, rosemary oil helps to soothe and condition the scalp, helping with dandruff and itchiness.pumpkin seed oil
Pumpkin seed oil (carrier oil”>
In a Fall mood and obsessed with pumpkin like everyone else? Pumpkin oil is said to block the androgen hormone dihydrotestosterone (DHT”>, which causes hair loss. You can purchase this in the form of a pill or just a jar of oil. Click here to see how one woman used it to fight alopecia.
Ylang ylang (essential oil”>
This essential oil is best for healthy scalp maintenance as it helps to normalize sebum production on the scalp. Since naturally curly hair is prone to be drier given our natural sebum has to work harder to travel from root to tip, this may or may not be of concern for you depending on hair type. However, if you feel your hair produces more oil than normal, you might want to give this essential oil a test.
Easy DIY Healthy Hair Oil Blend Recipe
- 2 Tbsp. avocado oil
- 2 Tbsp. jojoba oil
- 6-10 drops of peppermint oil (3-5 drops per tsp.”>
Mix all oils inside plastic bottle, shake well, and apply to scalp for massage or apply to hair for sealing moisture!
This article was written by Charlene Walton from Textured Talk and published on CurlyNikki.
Have you ever woken up one morning and had no idea how to begin to tackle the madness that is your hair? Story of my life, honey! I will keep it real with you guys– I am a long term protective style junkie but once in a while, I like to switch it up a little to give my hair a break and enjoy my length. I may look put together, but trust me girl, it takes work! I honestly could not keep up if I had to style my hair every few days, I love the simplicity and low maintenance of my two strand twists.
Anywhoo…wearing my hair out has meant that my hair does not retain moisture for as long as it usually does when I have my hair in twists. Not to mention, tangles on tangles on tangles (it’s like inception: a tangle, within another tangle, inside of yet another tangle, living in a web of hair. I think you catch my drift”> I was so overwhelmed trying to tame my tresses that sometimes I opted to wear a turban and channel my inner Ms. Badu.
You are not alone sister, this very hair that I spend so much of my energy trying to nurture can sometimes drive me up the wall. Just don’t do anything irrational like pulling out your hair, which you will come to regret later. Instead, breathe, take a step back, and follow my tips toward stress-free hair care…
Keep it 100
You have to be honest with yourself. Us naturals get it wrong when we set unrealistic hair goals and targets, and then get frustrated when our hair does not make the cut. It’s like setting yourself up for failure. You can’t start off with a TWA and expect to be waist length in a span of one year sweetie, it doesn’t work like that. Like I said in aprevious post, natural hair takes commitment, and you need to be both realistic and patient.
Appreciate, don’t equate
The worst mistake you can make is to compare yourself to another naturalista, big no-no! Others’ natural hair journeys (mine included”> should serve as an inspiration for your own, not as a benchmark for you to constantly measure up to. Each of us are individuals, which means we can never be exactly like someone else. Which means, that though your hair may resemble someone else’s, it is still YOURS and unique to YOU! What works for one person may not work for another, so it’s best to find what works for your hair and stick with it-ditch the comparisons because 9 times out of 10 you’ll find your hair won’t ‘match’ up which can completely demoralize you.
Focus on health and length always follows
At the beginning of my hair journey, what motivated me was length. I’d see all these naturals with hair flowing down their backs and go green with envy. I tried every ‘trick’ possible in the race to grow my hair, and put unnecessary pressure on myself with quarterly length checks to check my progress. In the quest for longer hair, I lost sight of one of my fundamental principles-LISTEN TO YOUR HAIR, CATER TO ITS NEEDS. Once I began to focus more on maintaining the hair I already had on my head and stopped chasing new growth, my hair began to thrive. Healthy scalp and hair is the foundation for hair growth, so focus your energy on finding the right products, regime, and styling techniques that work for you and your hair and you’ll see a difference.
P.S- I love you
I love protective styling, that’s no secret. One thing that has helped me curb my natural hair melt-downs is planning my hair care around my lifestyle. Because I find it way too taxing to style my hair every morning, it works for me to have my hair in twists which hold styles for up to a month (with sufficient re-moisturization and maintenance”>. Find a style regimen that not only works for you, but that helps you accomplish your hair goals. Protective styling helps me maintain my hair in a stretched state which decreases tangles, retain length due to low manipulation and protection of my ends as well as allows me to save on time spent styling daily.
Love the skin you’re in, and love the hair you’ve been blessed with. None of these tips hit home at the end of the day if we forget about self love. Appreciate yourself and embrace your hair, and you’ll find your frustrations carried away on angels’ wings. Peace and positivity.
This article was written by Yvette Mumanyi and published on CurlyNikki.
How do you deal with natural hair frustrations?
Tiffany writes:
“I did some small twists and wore those for a few days and now I have the best twist out I’ve ever had. But I can never seem to keep the results for more than a day, and I REFUSE to put all those twists back in every night. Anybody have any suggestions on how to maintain the definition overnight? I usually just put my bonnet on and pray for the best in the morning!”
Jamila responds:
As with any protective style, always remember to moisturize. Before setting your hair for the night, I suggest spritzing with water or another moisturizing agent and sealing your ends with an oil or butter. Here are two simple ways to maintain your twists and twist outs for days!
Retwist in Big Chunks
It may seem like a pain, but retwisting your hair at night is one of the best ways to maintain the definition of your twists. Don’t worry– you don’t have to do mini twists every night to get the same look, you can retwist in bigger sections and get similar results!
- Take a big section of hair and stretch it out a bit
- If sections are frizzy, take shea butter or other creams and smooth it over each chunk
- You might want to stick with a lighter product so it doesn’t weigh down your twists
- Get the twist really tight at the root, otherwise it will unravel
- If ends unravel, take a little bit of styler and twirl it on your ends for hold
- Sleep with a satin bonnet!
- In the morning, separate them like normal and fluff at the roots
Scrunchie Method
This is taken from Naptural85. Watch her maintaining routine starting at 5:15.
- Spritz your hair with water at night to moisturize
- Secure your hair with a satin scrunchie and make a bun
- Make sure your ends are secure in the scrunchie
- Cover your hair with a satin bonnet!
- In the morning, shake it loose and re-mist with water.
- Separate your twists with your fingers for some extra volume.
Pineapple
Pineappling refers to putting your hair at the crown of your head and securing it with a loose ponytail. Check out CurlyNikki’s pineappling method! If your hair is shorter, you will need to try the multi-pineapple. Here’s a guide on how to pineapple for all lengths…from twa to bsl.
This article was written by ForTheFabulousandFrugal and published on CurlyNikki.
Ladies, how do y’all maintain your twist outs at night?
What happens when you take ALL the shortcuts? A disaster, usually. But not this time.
I watched several YouTube tutorials on crochet braids and wigs and since I was strapped for time and a bit impatient anyway, I decided to take a few shortcuts to get my desired look. I wanted a very full, classic halo Afro shape, but you can tweak these steps for a heart-shaped fro, asymmetrical cut, or curly bangs style. The whole shabang is pretty cheap. Here’s what you’ll need:
A stretchy net cap, a wig head, a interlocking needle, and the kinky hair of your choice. I went for the stretchy cap so I wouldn’t have to be bothered with attaching combs, and I chose 10 inch hair to limit the amount of cutting and shaping I would have to do when the wig was complete. All I really needed was a big poof of kinky hair, I figured I could do a roller set or twist-out on the finished wig to add dimension at the end if I ended up wanting something with more shape.
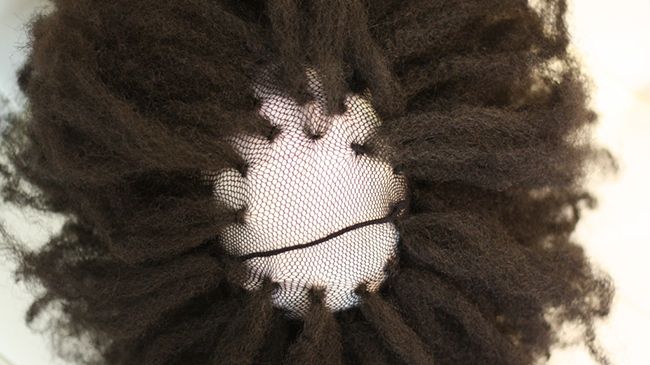
Start by pulling the cap over the face of the wig head. It’s more important to get a feel for the center of the net than to try to work around the physical features of the wig head. As long as you can keep everything in relation to the center seam of the stretchy net, you’re good.
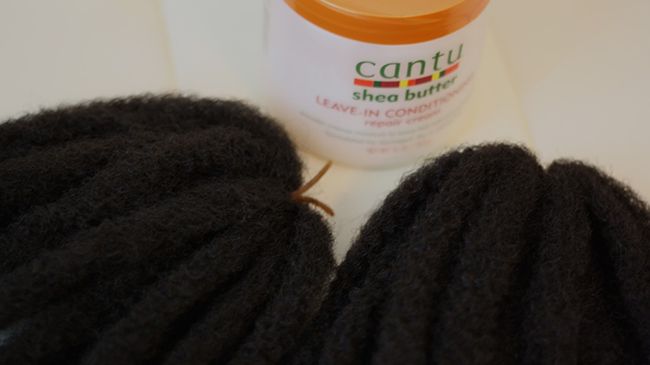
The hair comes sectioned off, I split each mini loc in half and into thirds when I got to the top of the wig. I coated them with a bit of water and leave-in conditioner for softness.
The actual “crocheting” process was pretty easy. Go under the net with an open hook, hook facing downward. Then go through the net, insert your hair, close the hook. Then pull the hair through the loop and secure. You can choose to make another knot but this hair was so kinky it really didn’t need it. Boom, another shortcut.
I tried to separate every knot by two finger spaces but for a look like this, the thicker the better. I fluffed as I went and started to make the knots closer together toward the center. Any wig that doesn’t involve a part can be done this way. If it starts to look like a mushroom thats okay, you can cut and shape at the end.
Since I went with short hair I barely had to do any trimming. I tried a few techniques I learned from the video below this video but I actually could have worn it as is. Not to shabby for a shameless cheater? Lol
This article was written by Jascmeen Bush and published on CurlyNikki.
It’s officially been almost one year and six months that I’ve been natural. I couldn’t be more enthused about the current condition of my hair and the things I have learned along my journey. However, like many naturals, I recently hit a growth plateau. In other words, my hair just didn’t seem to be growing (or retaining”> at the same rate as it did at the beginning of my natural haircare journey. Here are some useful tips that can help naturals get over the hump:
Examine your routine
There is a saying that, “if it isn’t broken then don’t fix it.” I totally agree with this sentiment. However, the flipside of this notion is that if it is broke, then fix it. If something in your routine seems to not be working i.e. styling products, moisture regimen, protective styling, etc.…then you should figure out exactly what it is and either modify it or remove it completely from your routine.
Safeguard against breakage
When naturals say their hair isn’t growing they are oftentimes mistaken. In reality, all hair grows, even curly hair. Despite this, curly hair has more curves and bends which it make it particularly prone to breakage. This implies that while curly hair grows, it is breaking at the same rate. Find ways to minimize breakage and retain the length you’ve fought hard to achieve. My personal favorite methods are: finger detangling, protective styling, using a wide tooth comb, and adding an oil to my conditioner for slip.
Trim those ends
Being natural usually means our hair is in a much healthier state than when we permed our hair. Not only are we using products designed for multiethnic hair but we are no longer using chemicals, and very infrequently using heat. This means that our hair doesn’t need to be trimmed at the standard 6-8 weeks that many stylist recommended when we were relaxing. On the other hand, I still recommend doing a trim at least every four months, or three times a year. This will keep your spilt ends from turning into breakage.
Continue to educate yourself
I know some of you naturals may feel bamboozled by the thought of continually seeking out natural haircare information but this keeps you well aware of how to care for your natural hair. Reading that low porosity hair appreciates less protein and more moisture will prompt you to ditch your hardcore protein regimen and amp up on a hardcore moisture regimen.
Give your hair a break
Many naturals prefer washing and styling their hair on a weekly basis. However, constant manipulation can result in weaker hair and more breakage. Longstanding protective styles can give your hair a much needed break. I remember installing twist with my own hair for about three weeks and noticing how my hair grew. If you want to keep your hair growing then give your hair a break every couple of months.
Sometimes, the simplest tweaks in our routine makes the biggest difference. For example, during the winter months, I like to moisturize my hair twice a day. This keeps my hair from becoming brittle and unnecessarily breaking. While your routine should remain the same if it works, make sure you change it if doesn’t. By being open-minded and proactive, you’ll be well on your way to long, healthy hair.
Follow Cyn (pictured above”> here:
This article was written by by Keora Bernard and published on CurlyNikki.
I’ve become a straight hair natural… And I like it!! That’s right, I said it. I’ve been natural for 15 years, big chopped twice, and have nothing to prove. I love my natural curls. However, right now, I love the convenience and ease of straight hair a lot more! And, sometimes, that’s really all there is to it.
I’m about to share why I began straightening my hair regularly and how I have managed to do so for the majority of the last year without suffering heat damage (the latter of which always seems to be the mythical unicorn of the natural world ;”>.
Why I became a straight hair natural
I started straightening my hair around the 5th month of my pregnancy last year. When I realized that I could get at least 4 weeks out of straightened hair (sometimes 6″>, it was a no brainer given my increasing ungainliness and fatigue. When I had Wyntr in January, it again made sense as taking care of a newborn is two full-time jobs and I needed to give up my part-time (i.e. my hair on wash day”>. Then, as I was coming up on 3 months post-partum, I decided to straighten as a preemptive move to combat the threat of post-partum shedding. I figured that it would allow me to comb my hair between wash days in order to get rid of excessive shedding, making detangling easier when I did get around to washing it.
taking care of a newborn is two full-time jobs and I needed to give up my part-time (i.e. my hair on wash day”>
That’s the why. Following is the how. But first, two caveats. Number one: I do not care about having perfect hair 24/7. I don’t aim for bone straight hair and I live in a bun 99% of the time (Hello!! 8 month old!!”>. So, if you are looking for advice on keeping your natural hair straight and “laid” without heat damage … ummm … this may not be for you. Number two: I don’t have scalp issues, so I can easily go 4 weeks between wash days without excessive scalp build up/flakes.
How to prevent heat damage
Following are the steps I take and my products of choice. I don’t straighten my hair any more often than once every four weeks and if I can stretch it longer, I do.
First, prepare & protect
- Pre-poo to moisturize – with virgin coconut oil mixed with Aubrey Organics GPB and/or Honeysuckle Rose
- Clarify to start with a clean base – with Kinky Curly Come Clean Shampoo
- Protein treat to strengthen – with Sally’s GVP Joico K-Pak
- Deep Condition to moisturize – with Sally’s GVP Matrix Biolage Conditioning Balm
- Apply a leave-in* conditioner – with a small amount of Kinky Curly Knot Today mixed with aloe vera juice
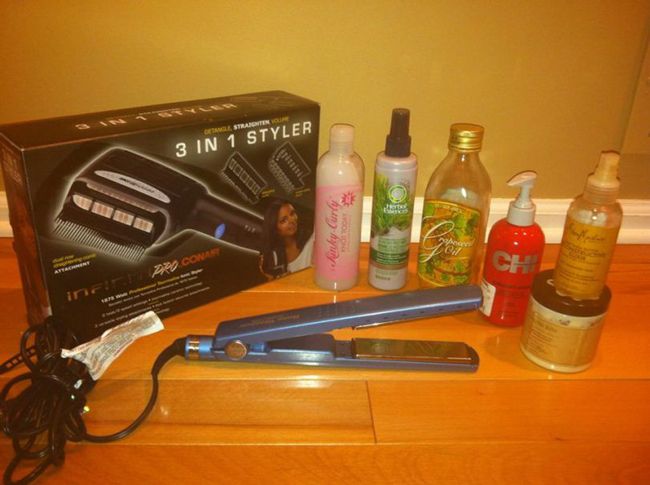
- Apply a heat Protectant* – with Herbal Essences Tea-Lightfully Clean Blow Dry Prep Mist
*Note: I’ve found that it’s very important to use a leave-in and heat protectant that are light and don’t leave my hair tacky. This allows my hair to glide/flow once straighten and reduces the amount of lint and dust that it attracts.
When I realized that I could get at least 4 weeks out of straightened hair (sometimes 6″>, it was a no brainer
Straightening
There are two ways you can straighten your hair, I recommend choosing one or the other to control the amount of heat used on the hair:
Blow dry
- Use a quality tool – I use the Conair Infiniti Pro 3 in 1 Styler with double comb attachment
Flat iron
- Use a quality tool with temperature control – I use the BaByliss Nano Titanium Pro
- Use lower temperatures (280-320º max”>
- Take small 1″ sections
- Gently comb section well using a medium to fine tooth comb
- Two to three passes of the flat-iron on each section max
- Seal/Shine with Shea Moisture Raw Shea Reconstructor Elixir and/or Sally’s GVP Paul Mitchell Skinny Serum
Preserve your straight hair
- Never re-apply heat between washes (that’s a surefire way to cause heat damage”>.
- Use heat free styling techniques between wash days: braids, buns, rollersets, curlformers, flexirods, pin curls, etc.
- Bun, braid, pineapple, or pin-curl hair at night.
- Use a satin bonnet or scarf and sleep on a satin pillowcase.
- Use an edge control paste/gel (Ampro Protein Gel mixed with moisturizer – IKR??? Who knew?!; Curls Blueberry Bliss”>
- Use a terry-lined shower cap.
- Forget the umbrella for the rain, use a raincoat with drawstring hood.
- Apply a light moisturizer that doesn’t cause reversion, as needed – Wonder Curl Get Slick Hair Smoothie; Carol’s Daughter Healthy Hair Butter.**
- Apply a light oil as needed to seal moisture/add shine – Shea Moisture Raw Shea Reconstructor Elixir and/or Sally’s GVP Paul Mitchell Skinny Serum.**
- Oil scalp, as needed – Wild Growth Hair Oil.*
- Exercise with hair bunned and use an open-ended wig cap under a sweatband. (I’ll admit, I haven’t worked out with any type of consistency since the baby and my work-outs have been moderate in intensity. But, thus far, this has worked for me.”>
**Note: Again, it is important to use a light moisturizer and oil for maintenance to avoid tacky hair that attracts lint and dust. By reducing the amount of dirt the hair attracts, straight hair can be maintained for longer.
Finally, I do take a break between straight cycles sometimes with a stretched braid-out, twist-out, and even a WnG once! I also henna or henna gloss when I can. And those are my tips! Hope they help!
p.s. My hair is the longest that it’s ever been and the fullest it’s been in a long time following this regimen.
Have you ever heard of “curl envy?” It’s a phrase in the natural hair community that describes the desire to have someone else’s hair/curl pattern instead of your own. Sometimes the phrase is thrown around jokingly when you just really like another girl’s hairstyle, but if you truly have curl envy, you may want to reevaluate your natural hair journey. Especially if you’re a new natural, curl envy can be a real threat to your hair journey. It’s great to follow other naturals and have favorites who inspire you: this is a community, after all. But be careful not to start wishing you had someone else’s hair because this could easily translate over into how you treat your own hair. Here are some ways that curl envy can actually ruin your natural hair journey.
You’ll begin to hate your own hair
One of the first signs of serious curl envy could be that you start to dislike your own curl pattern because you find another person’s curl pattern more desirable/admirable. And when you hate your hair, you won’t be inclined to treat your hair with love, which could ultimately result in damage. It’s important to learn and love your own hair, so spend time discovering what your hair likes and dislikes, instead of observing someone else’s hair more than your own.
You’ll try to make your curl pattern look like theirs
Once you realize your curls just don’t act the way hers do, you may unknowingly find yourself doing anything to get your hair to cooperate the same way, from over-manipulating the hair to wasting money trying to buy the perfect product, and engaging in hair practices that only lead to damaged hair. Refrain from using heat, henna, or even color as just a means to alter your curl pattern. All curl patterns and hair types are beautiful, so focus on embracing what you have. Your own hair is unique, beautiful, and worthy of the proper care and maintenance to allow it to reach its fullest potential.
Related: Why Your Curls Don’t Look Like Hers (Even Though You’re the Same Curl Pattern”>
You’ll have unrealistic expectations
You have to spend time getting to know your hair in order to know what’s going to be the best routine for your curl pattern and texture. When you have curl envy, you may find that you have unrealistic expectations of how a certain style or product will make your hair look and feel. It’s not good to base your expectations of your hair off of someone else’s because you’ll be let down every time. Sometimes even if you have the same curl pattern as another girl, your hair still won’t act like theirs because other factors are involved, like moisture, porosity, thick vs. fine hair, or even how much damage the hair may have suffered. We always say that natural hair is not a one size fits all, so stay in your lane and take care of your hair. When you nurture your hair from the inside out, it will thank you for it. Type 4 hair can be undoubtedly prone to dryness and breakage, but it’s no less beautiful. It’s kinky, coily, curly, and awesome, so love it, embrace it, and enjoy the journey.
This article was written by Kanisha of BlackNaps.org and published on CurlyNikki.
Weigh in!
When I first began pondering my decision to go natural, I did several ‘prep myself’ sessions. This meant I inundated myself with everything natural. In retrospect, these ‘prep myself’ sessions were good because they gave me some information about what to expect after my big chop and what products to use on my hair. On the other hand, these sessions served as somewhat of a wish-list for what I thought would surely happen during my process. The following are my tips for how to deal with the unexpected when going natural:
Dealing with damage
While going natural is a beautiful thing, there are often unrealistic expectations of how natural hair should feel and look. Every natural’s head is different and contrary to popular belief, not everyone ends up with shiny, bouncy ringlets of hair. Even more significant, some naturals continue to deal with the after effects of previous chemical and heat usage. In essence, give your hair time to recover. It has probably been through a lot over the past several years.
Drier than a desert
Returning back to our curly textured hair will be liberating but also frustrating. Many of us were accustomed to perming our hair and how it functioned in a relaxed state. Becoming natural requires that you relearn everything about your hair and how it operates. The curves and bends make it difficult for moisture to travel down our hair shaft which causes dryness. Understanding why it happens and how to properly moisturize your hair will save you heaps of frustration and bewilderment.
Forget the stylist
I fondly remember the days of getting my hair freshly permed by my childhood stylist. Back then I loved the look, and my edges were always nicely laid by a pomade or gel. However, going natural means YouTube becomes your new hairstylist. It’s either that or pay a ridiculous amount of money to get a style you can do on your own. Embrace doing things for yourself and the tricks you learn along the way.
Slow motion for me
During our permed days, we should have adopted a motto that said, “Wash, set, and go!” This process may have appeared long to us but if we knew how much longer it would take to style our natural hair, we would have been more grateful. Styling natural hair takes considerably longer because of its density and propensity to tangle. Regardless, it’s much healthier and fuller than our permed hair was. If you’re feeling overwhelmed then break everything down in stages, and take breaks when needed.
Try by trial and error
During the days of Luster’s Pink Lotion and Dax, we were all pretty much using the same products. In its relaxed state, our hair all looked the same. However, now we have a variety of textures and hair concerns. This means that our natural hair may appreciate a completely different product than the next natural head. At the beginning, try our different techniques and products and then stick with the one that works for you.
Caring for natural hair isn’t a cakewalk but I think it’s a general consensus that naturals don’t desire to go back to relaxers. Deciding to go natural was the best decision of my life, giving me confidence in my Black features and overall power as a woman. On the other hand, going natural has a very feminine element to it. It shows us how to relinquish control and nurture what is before us. Love on those kinks, curls, and coils because your deepest essence supports it.
This article was written by Keora Bernard and published on CurlyNikki.
In a previous post we discussed the importance of conditioners to your hair care regimen. It is, in my opinion, the most important part. Given the role this product has in maintaining the health of our hair, we need to examine what we’ll likely find in conditioners that make them so important.
The main conditioning agent in conditioner is what’s called a cationic surfactant. Cations are positively charged particles and they are attracted to our negatively charged strands. They adsorb onto our hair meaning that they sit on our hair; they don’t penetrate. Additionally, they resist being washed off by water alone. They improve the hair’s softness, aid in detangling, help to seal the cuticle and make the hair more manageable.
The main conditioning agent in conditioner is what’s called a cationic surfactant.
Common cationic surfactants include:
• Behentrimonium methosulfate
• Cetrimonium chloride
• Cetrimonium bromide
• Stearalkonium chloride
Other cationic ingredients include the polymers. A polymer is a large molecule composed of repeating structural units. A cationic polymer therefore is a positively charged polymer used in skincare and haircare to increase conditioning and softness. Due to the positive charge these types of polymers will adsorb to our skin and hair, forming films and resulting in the following to the hair after the product is rinsed from the hair:
• Increased moisture
• Enhanced softness
• More flattened (as opposed to lifted”> cuticles
• Increased shine
Some cationic polymers are:
• Polyquaternium 7
• Polyquaternium 10
• Polyquaternium 4
• Polyquat 44
• Honeyquat
More about good conditioners
- Common Ingredients in Conditioners
- Characteristics of a Good Conditioner
- Secrets to Super Slippery Conditioners
- 4 Reasons Slip is Everything for a Curly Girl
- Ingredients for the Slip-Addicted Naturalista
- The Slip Awards: 6 Products with the Best Slip
This article was written by Susan Walker of Earthtones Naturals via Three Naturals and published on CurlyNikki.
Follow Christina Afrique here:
Do any of the conditioners you use contain any of the above ingredients? How does your hair look and feel after you use them?
We love wearing our naturally curly hair, but on the days that we choose to change things up and rock straight hair we want everything to go smoothly (pun intended”>. Nobody wants to spend 2+ hours straightening your hair and giving your arms a serious workout, only to step outside and have your hair instantly curl all over again. Or to find that at the end of an arduous straightening session you are not left with silky straight hair that blows in the wind, but a head of hair that feels stiff as straw. And the worst possible outcome would be that after this short-lived trip to the straight side, we discover that our curls have been damaged and won’t be coming back.
Emilia Obiekea of AdoreBotanicals has found that she can avoid all of that by following this pre-flat ironing routine.
The biggest issues for naturals when flat ironing
- Premature reversion
- Maintaining moisture
- Avoiding heat damage
Maintaining my hair when I have flat ironed it used to be a losing task. I have found that moisturizing my hair starts before ever applying any direct heat. This is my go to process:
Preparing the hair for straightening (2 weeks prior”>
- I prepoo my hair overnight with an infused carrier oil blend. Usually coconut oil.
- In the morning lightly detangle to remove shed hair. Wash my hair with a clarifying shampoo.
- Do a mid-level protein treatment. I use commercial and diy protein treatments. For more info about the diy version read more here.
- Follow up with a moisturizing deep conditioning mask. I apply it and use the hooded dryer for 30 minutes.
- Lastly, I use a protein rich leave in conditioner and layer on a blend of ceramide rich oils. This combo is wonderful for reinforcing the strength in hair.
- I’m sure to style my hair in low tension and low manipulation styles for the week. This reduces the likelihood of experiencing unnecessary breakage.
Flat ironing process
- Prepoo the hair overnight with an infused oil blend. (again”>
- The following morning detangle and cleanse with a moisturizing shampoo. Since I only used water soluble ingredients, the week prior, there’s no need for another clarifying shampoo wash.
- Use a moisturizing deep conditioner for 30 minutes under a hooded dryer. Allow the conditioner to cool completely before rinsing out with cool water.
These are the most vital steps to lock in the moisture
- While the hair is lightly damp apply an anti-humectant moisturizer.
- Apply an oil blend + a silicon based serum. Be sure not to use any carrier oils that are heavy (ex: castor oil”>. Heavy oils weight the hair down. I like to use Daily Dew oil.
- Detangle from the ends to the roots. Twist the hair. Let it air dry in the twist. This prevents it from tangling.
- Once fully dry section the hair. Flat iron at no higher than 250° in small sections using the chase method. Do not do more than 2 passes with the flat iron. The temp for the flat iron is up to you. Generally there’s no need to go above 350°.
Fini!
You can blow dry the hair prior to flat ironing if you like. I do not like to use direct heat often and i find that there is no need to blow-dry before straightening. I’ve never had heat damage or premature reversion with this method. Also my hair remained moisturized for 2 weeks due to this process.
This process addresses and resolves all 3 of the main issues we naturals have with straightened hair. Give it a try and let us know how well it has worked for you as well.
This article was written by Emilia Obiekea of AdoreBotanicals.com and published on CurlyNikki.
Follow Natalie (pictured above”> here:
Win-win!
What you’ll need
- 1 whisk
- 1 bowl
- A few ice trays
- 1 dye applicator bottle
- 2 cups of raw aloe vera gel
- 1 can of full fat coconut milk – Gotta have the fat. My hair isn’t on a diet lol. Besides it is wonderful for your hair so no need for any substitutes.
- *Optional: You can add some essential oils to the mix for fragrance or necessity. It is good to use an essential oil, such as tea tree, if you have dandruff.
Directions
- Mix both items together with a whisk.
- Pour a few ounces into a dye applicator bottle. Usually 2-4 oz is enough for most lengths of hair. Adjust the amount accordingly.
- Pour the remaining mix into ice trays. Freeze them and store in freezer safe zip lock bags.
How to apply it
- Use the dye applicator bottle to apply the solution to the scalp. Massage the scalp very well for about 1 minute.
- Apply the remaining mixture to the length of the hair. Use a smoothing motion to fully saturate your hair.
- Pin up your hair, complete your shower routine and then rinse and massage your hair and scalp clean.
The results
This leaves the hair and scalp feeling very clean and refreshed without drying them out. This cleanser is most effective if only water soluble products are used on you hair. If you use products that are difficult to remove, it is best to use a cleanser with a mild surfactant.

