Search Results: NaturallyCurly

Our Product Junkie spending habits may have us too strapped for cash to purchase a steamer, but we all want to add as much moisture as we can into our hair.
One of our curly users, KorkScrewQT, informed our members in CurlTalk how to steam our locks without actually having to purchase a steamer.
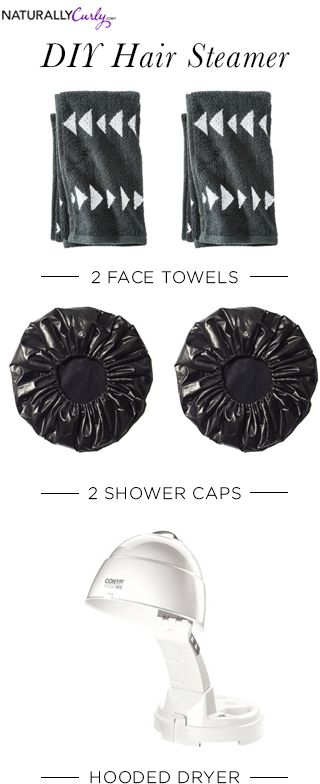
What You’ll Need
- 2 Face Towels/Washcloths
- 2 Plastic Shower/Processing Caps
- Hooded Dryer
Directions
- Add deep conditioner to wet hair.
- Wet both face towels and both shower caps with warm water (don’t soak them”>.
- Place one face towel on top of your head.
- Secure one shower cap on your head.
- Place the second face towel on top of your head.
- Add the final wet shower cap.
- Sit under your hooded dryer for about 20 to 30 minutes on high.
Of course, the heat settings depend on your own personal preference. However, do keep in mind that if you lower the amount of heat, this increases the time you should sit under the dryer.
Thanks, KorkScrewQT for sharing this helpful information! And curlies, keep ’em coming.
Visit our CurlTalk forum now and browse through to see what everyone’s talking about now.
FACE TOWELS TARGET, SHOWER CAPS TARGET, HOODED DRYER CONAIR
What’s the first step to healthy natural hair? Moisture, duh.
And how do you get it? Moisturize!
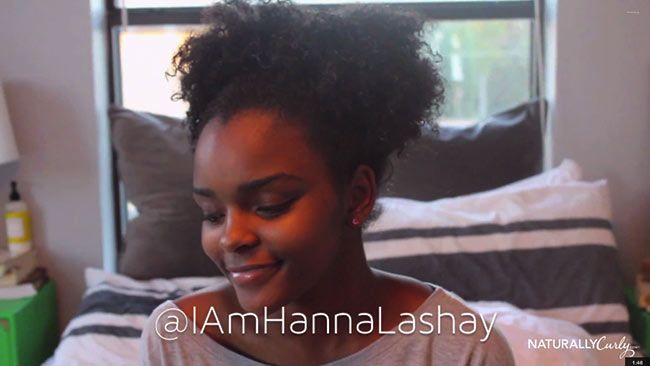
But it doesn’t have to be a chore, in fact taking care of your curls can even be fun. We hung out with natural teen Hanna Lashay on her typical Sunday afternoon to see how she pampers herself, and her hair, with a few beauty treatments.
Hanna’s mom owns a hair salon in Austin, TX, and her sister is a natural hair vlogger, so she was definitely brought up to take care of her hair health! She likes to deep condition and detangle with the SheaMoisture Organic Raw Shea Butter Deep Treatment Masque because she likes its all-natural ingredients and it makes her hair feel soft.
If you want to see more of Hanna, check out her YouTube channel IAmHannaLashay!
This post is sponsored by SheaMoisture.Eve used You Be-Natural products and the tension method to blow out her natural hair before she got started. Then she pinned each section and finished the look with a retro bang.
If you want to make your own DIY hair rat like the one in the video, you can read a complete tutorial by our friends Around the Way Curls.
This post is sponsored by You Be-Natural.We recommend this hot oil treatment to add shine, strengthen curls and if used regularly, lengthen your hair as well. The essential oils provide a minty, floral scent that reminds us of the winter season. Not only do these natural ingredients smell lovely, they double as a hair and scalp reconstructor, too.
- 3/4 cup avocado oil
- 1/8 cup safflower oil
- 1/8 cup sweet almond oil
- 8 drops lavender; 6 drops lemongrass oil and rosemary; 4 drops geranium (essential oils”>
- Mix fixed oils (first three ingredients”> in order given in a non-reactive bowl.
- Heat 40 seconds in microwave-safe bowl. Using individual droppers, drop in essential oils in order given; swirl to mix.
- Test on back of wrist to make sure temperature is acceptable (not too hot”>.
- Divide hair into small sections; secure with clips or bobby pins.
- Apply warmed oils to scalp and ends of hair. Massage in.
- Put on a shower cap or other plastic head wrap. Let oils continue to warm using body heat and sunlight if available for 45 minutes.
- Shampoo and style as usual. Remainder can be stored in sterile jar for later use as long as you keep it pure (no water”>. It is okay to double this recipe for longer hair.
At the NaturallyCurly headquarters we are constantly surrounded by gorgeous curly inspiration. Here are the looks, products and trends we resolve to try in 2014!
And be sure to let us know in the comments: What are your hair and beauty goals for the New Year?This hairstyle is quick and simple yet elegant and sophisticated–perfect for a happy hour with the ladies after work.
How to Achieve the Look
- Divide hair in two equal sections.
- Use your index fingers to create a part on the outer edge of each half.
- Take your thumbs, stick each of them into a part, and flip your wrists.
- Switch each strand between your thumbs and index fingers.
- Grab a piece of hair from the outer edge of one half.
- Add that piece of hair under and into the other half.
- Repeat this process.
- Use a little finishing spray to tame fly-aways if you need to.
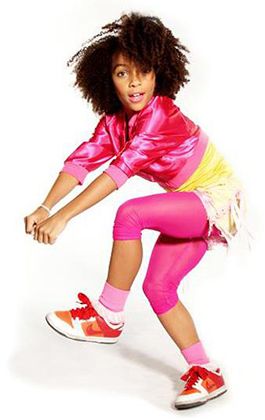
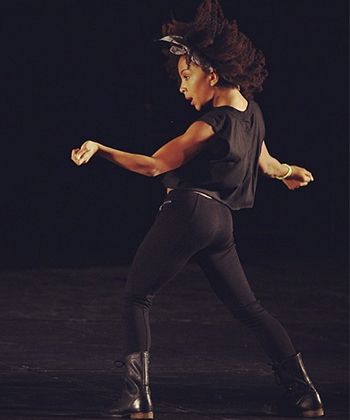
“Did you see that girl dancing to Yonce on Beyonce’s Instagram?”
If you haven’t been asked this question at least once this week, brace yourself. The name Charlizey1 (full name Charlize Glass”> is on the lips of Beyonce fans, naturalistas, and dancers alike right now. The post already has 436 thousand likes, and that’s only the beginning.
Here are the top 5 reasons WE love Charlize Glass.
5 Reasons to Love Charlizey1
 One of our curly users, curlgirl3902, shows us how to achieve length, moisture, and volume with this recipe.
What You’ll Need
- 1 tablespoon of olive oil
- 3/4 cup of mayonnaise
- 2 large eggs
- 1 tbsp honey
Directions
Combine all ingredients in blender (or mix by hand”>. Cover with a shower cap. Leave in hair for 30 minutes – 1 hour. Rinse with cold water.
For more easy and awesome curly recipes, check out our Curly Mixology page.
For many curlies, it can take years (even decades”> to discover the right way to style their curls. Watch how Megan gives her naturally loose curls definition and body with just a light mousse and a touch of diffusing.
Megan starts by blotting excess moisture out of her very gently with an old t-shirt. Then she applies a leave-in conditioner by scrunching the product through the ends of her hair, avoiding the roots. She follows up with a light mousse and then wraps her hair in a turban made from an old t-shirt.
Being able to watch the styling routines of so many innovative curly-haired women on YouTube makes us wonder: how did we ever survive without it?
What You’ll Need
- ORS Curls Unleashed No Boundaries Leave In Conditioner
- ORS Curls Unleashed Let It Flow Shine & Define Mousse
- V.swish Universal Diffuser Attachment
On Living Almost Naturally, we saw this banana and egg recipe that can be used to give moisture to dry or damaged hair and just had to share it.
What You’ll Need
- 2 ripe-overripe bananas
- One egg
- Bowl
- Blender
- Take 2 ripe-overripe bananas and place in blender. Add in one egg into blender and mix until the bananas are completely smooth. (You want to make sure that there are NO chunks left in your bananas because that will be difficult to remove from your hair.”>
- Pour into a bowl and then smooth over your hair making sure to cover your ends especially. If you have a shower cap you can place that on but if not take a hair clip and pin hair on top of your head.
- Letsit for 10-15 minutes and then wash out in shower.
‘Tis the season! And, as you prepare for a cold winter holiday, or a busy rush of friends and family or, even a relaxing vacation on the beach, chances are you’re time may be a bit limited. That’s why having a little “must have” kit for your curls can always be helpful. Picking out your favorite products may be a bit difficult, especially if you’re limited to just five. However, once you have your must haves kit together, you’ll see just how much time you can save.
Every curly varies in curl type, so finding the right product may take some experimenting at first. Here are a few suggestions to pick from for your top five:
The Must Haves List
 Olive Oil & Honey Conditioner
We love olive oil, and we love honey – so this conditioner recipe was a natural progression! NaturallyCurly user parisienne_girl shared her simple recipe for an olive oil and honey conditioner anyone can enjoy. If your hair is fine or you don’t like the smell of olive oil, NC member IM1Curly1 substituted a light olive oil and said it worked a charm.
What You’ll Need
- 1 Tbsp honey
- 3 Tbsp extra virgin olive oil
Directions
- Mix the ingredients into a bowl until they make a paste
- Lightly shampoo and use a light condition if you need to detangle knots
- Work the paste though your hair from roots to tips
- Wrap up in plastic and leave it for 10-15 minutes
- Rinse in the shower, never the bath, unless you want to get covered in oil!
For more curly mixology recipes, or to share your own favorite at-home treatments, go to our Recipes section.
Time, gym fees, social engagements – we know there are a million reasons standing between you and your workout, but hair should never be one of them.
In this video Nikki demonstrates how she keeps her curls frizz-free all week long with regular work outs and a busy schedule. She uses the at-home You Be-Natural Keratin Strengthening & Conditioning System to fight frizz but KEEP her curls.
We know the Naturally Curly World had a lot of questions about the new You Be-Natural Keratin Strengthening & Conditioning System, so the folks at You Be-Natural sent us their products and we put them to the test. These products contain no formaldehyde, no hydroxide and no thioglycolate. They claim to make hair humidity resistant, so we put them to the test in Texas heat and a few rigorous workouts! Watch the video to see how Nikki’s curls held up against push-ups, squats and sit-ups.
This post is sponsored by You-Be Natural
 The winter season may be a great reason to give yourself the gift of silk and satin – well, to give your hair the gift of silk or satin.
Sleep Well
The benefits of using these materials for curly hair are numerous, and most curlies agree that they notice less to no breakage when they use a satin or silk pillowcase at night. Satin and silk pillowcases help to retain the much needed moisture in your hair.
With the winter months being very dry, your curls will need as much moisture as they can get. These pillowcase will also help if you have problems with tangles and knots. (PS they also make great gifts for young curly girls! sating pillowcases in hot pink, purple and bright green are sure to “wow” a young one, and keep her curls in shape too!”>.
If you’re someone who loves natural fibers, try a silk pillowcase instead of satin. Though the satin pillowcases may be less costly and easier to find, you may want to try one of each and see which one works best for you, and your hair.
Once you start using a satin or silk pillowcase, you will certainly notice the difference and may just get addicted to the way it feels not only on your hair, but your skin as well.
Tie it Up
And you don’t have to limit yourself to silk and satin in the bedroom – try some silk scarves this winter too. They can be a curl’s best friend in dry, cold winter weather. Silk and satin scarves come in endless patterns, colors and lengths – you’re sure to find a few that work for you. Use scarves to tie your hair up at night and secure with some metal clips; wear out to work, or protect your hair from cold winter winds. You can change to wearing the same scarf around your neck, or even as a belt, once you get to work or a festive holiday party.
Put a Lid On It
Silk and satin bonnets are also a great way to protect your hair at night. If you’re trying out twists, braids or other styles, using a silk or satin bonnet can help keep your hair soft, defined and well moisturized as you sleep.
Give your locks the gift of silk and satin this winter, you’re sure to notice a difference in just a short time, and your curls will thank you.
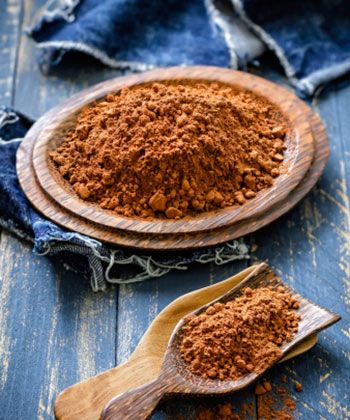 December 13th is National Cocoa Day! And what a perfect time of year to celebrate Cocoa. The warmth and delicious smells from hot cocoa are always a favorite around the holiday season.
Cocoa trees, it’s believed, first grew in South America, and today, cocoa trees can be found throughout the world. Like wine, cocoa varies on taste depending on where it comes from , therefore, you may just notice different flavors in certain favorite chocolates from time to time. And, take the time to appreciate that delicious cup of cocoa or chocolate bar because it takes about 300 to 600 cocoa beans to make two pounds of chocolate!
Cocoa & Your Curls
So what about cocoa and curls? Cocoa butter is the substance that is obtained from cocoa beans, it’s a by product of chocolate – and curlies know that cocoa butter is a must for cold weather, frizz and soft skin too!
What will you use cocoa butter for? Use it as a deep conditioning treatment once or twice a week, depending on your hair type. You’ll notice how much softer and easier to manage your hair will become. Cocoa butter won’t weigh your hair down and it will help to moisturize your hair and scalp. You can also use it as a pre-shampoo conditioning treatment.
Try it!
Put some cocoa butter (found online or in health food stores”> in a cup and melt it in your microwave until it’s a liquid. Apply the oil/liquid to your hair for about 15-20 minutes then shampoo.
You can use cocoa butter as a pomade to help style your hair and keep frizz away as well. Just rub a small amount of cocoa butter in your palms, and smooth over your hair. You can mix a bit of coconut oil or an essential oil with it to give it a scent as well.
For brunettes who want to add some sheen and a tint of color depth to their hair, a cocoa hair mask may be something to try out too:
Mix a cup of pure aloe gel, 1/2 cup of pure cocoa powder and 1/4 cup of honey, 1 tblspn of favorite conditioner (Suave coconut is a good one to try”>. Mix the ingredients in a bowl and you’re left with a great smelling treatment for brunettes.
There are also a number of products on the market that feature cocoa butter blends for your hair and skin. Darcy’s Botanicals, Cocoa Curl, Shea Moisture and Dr. Bronner’s are just a few.
This is a different kind of Christmas story, one you haven’t heard before. But we have a hunch you can relate to the heroine in this tale – and the monster!
NaturallyCurly’s resident curly comic Tall N Curly tells the tale of a princess, the queen and a familiar villain, the Abominable Frizz Monster.
 The cooler temperatures are upon us and you may be noticing some changes in your child’s skin, bodies and hair too.
The effects of cooler weather and less humidity are usually welcomed by curls, but, they too may take some time to transition into a new pattern. Arranging for a healthy bed time routine can make it easier for you, and your child, to keep after their curls.
Adjusting your bed time routine for the change in weather can be a challenge, but keeping up with it will, in the long run, make thing easier for you and your child.
As you create your routine, if your child is old enough, talk to them about why you’re making a routine, or making changes to an existing one. Let them be part of your conversation and planning.
Steps for good night (easy morning”> curls:
-
Clean your child’s hair up with a good cut or trim. Ask your stylist for suggestions if you need help with an easy to keep style for your child.
-
Use a child-friendly shampoo and conditioner. Visit CurlMart for suggestions on natural, non-toxic products. Be sure not to “overwash” – you may only need to shampoo on every other night and continue to condition and add moisture to your child’s hair as you see needed.
-
Detangle when your child is in the tub. Use a wide-tooth comb on their wet locks to make it easier and tear free. If your child is a little older, show them what to do as you work product into their hair and detangle.
-
If you notice dry ends or scalp, try some leave in conditioner. There may also be a favorite leave-in spray that can be easier to apply for younger ones.
-
Once they’re out of the bath, add a favorite gel or styling product in moderation. Try a little less than you would normally use as there may be less humidity in the air and less need for heavier (or more”> products.
-
Like you may do with your own curls, you the “plopping” method with a wet towel to slightly dry their hair afterwards.
-
You may want to wrap their hair in a silk scarf to sleep, or try a satin pillow case for them to sleep on at night – there are some great colors and patterns for kids – they’ll love having a “special hair” pillow case!
Have patience. Routines are periods of time where patience is well tested. See what works for you, and what doesn’t. But within just a few short weeks you’ll have a routine that works for you and your child.

