Search Results: NaturallyCurly

What IS African Threading?

Within the natural hair community, there are a lot of tried and true secrets to great hair.

It’s our job to make sure those secrets don’t stay that way, and share looks, tips, and tricks from everyone and everywhere with our readers. And speaking of spreading the word, have you ever heard of African threading? If you haven’t you’ve probably got a few questions. What even is African Threading? Is the thread African? The technique? And what part of Africa are we talking about anyway?

Calm yourselves, curlfriends, we’ve got the answers for you! Let’s take a closer look at this hair method that has been a part of the natural hair community for generations.

What is African threading?

Well, let’s start with what it’s not. We’re not talking about threading like threading needles. Or threading like how you get those extra hairs away from your otherwise perfect eyebrows. Nor is this about the fun multi-color wraps that you might get on a few strands of your hair for a pop of color. What it really is, is a technique for lengthening your hair without having to reach for the heat tools.

African threading is actually a protective style in its own right and involves taking black thread (or whatever matches your hair color”> typically, and wrapping it in a corkscrew fashion around about a pencil sized section of strands from root to tip. The hair is not completely covered as with a fun thread wrap, instead, you’ll see it ‘poof’ out from the thread as it spirals downwards. This tradition has been a part of hair care in many Subs Saharan African societies for generations, and is called Nywele in regions where Swahili is spoken. People choose this method of styling with protection and the ability to help retain length in mind. When hair is wrapped in thread, it leads to less manipulation which is great for your strands. Since your hair isn’t exposed to as much breakage from overhandling, you can also get length retention as a sweet bonus. African threading can also be used for stretching hair to avoid shrinkage, and if you do want to be bold, it’s also a great way to create an easy style. There’s also no hard and fast rule saying you absolutely MUST wrap your hair in a neutral color, and in fact: many intricate styles can be created by using colored thread instead! The stiffer “locks” that the threading creates also lends a buildable property to your hair and allows for a wide variety of gravity defying looks!

Should I Try African Threading?

We know you’re excited, but as always curlies, you’ve got to pump those brakes just a tad. There are a few considerations prior to trying this hair method (but what else is new, right”>. While most hair types are well suited to this method, you will need to make sure your hair is completely detangled—otherwise, you’re not doing anything but protecting and preserving some knots. Not exactly ideal. You also want to make sure your hair is well moisturized. That’s a given at any time, but it’s especially important to make sure your hair is getting some extra TLC while in a protective style. Another thing to keep in mind is the type of thread you choose. While you can choose more of a matte looking thread, a glossier nylon option will give hair a lovely sheen. A glossy thread will also be slightly gentler on your strands during the removal process—no rougher bits to snag your strands! You can also use yarn over thread, but it’s best to use yarn that’s 100% cotton to avoid tugging. And again, keep your spray bottle on hand, cotton does like to sip moisture from our coils. If you go with thicker more absorbent thread, don’t leave the style in for more than a week to prevent your hair from getting too thirsty!

Want to learn more?

When is the answer to that ever no? Check out 4C curlista Miss Sharz as she stretches her TWA into a fine, fierce ‘fro!

True magic.

Interested in trying this for yourselves, curlfriends? Hit up a fabric store, and be sure to tag us @naturallycurly with your results!

Photo credits:

Model| @teminikan__

Makeup| @ghunueffect

Photography| @mr_adore

Studio| @rainbow__studios

Hair| @hairbyope_smade

Can Vitamins Really Help Prevent Hair Loss?

Every day the average person loses about 60-100 strands, but what do you do if you begin to notice more drastic hair loss?

@grasiemercedes
Changes and/or sudden development in hair loss is an issue people around the world face, so if you feel like you’re losing hair, you’re not alone. You may have already begun to research different ways to prevent and treat further thinning of your hair, and you have probably come across “natural” hair crèmes or infomercial type pills that vow to stop hair loss in its tracks. However, the idea that there is a perfect supplement or vitamin that is capable of fully alleviating hair loss is an oversimplified one, and there are many things to consider before determining the right option for you.

Is there a vitamin that helps with hair thinning?

While there are plenty of vitamins that tout themselves as being able to prevent hair thinning from happening, as well as stopping current hair thinning, it is important to note that the Food and Drug Administration does not regulate supplements. Basically, the FDA does not validate the claims of vitamins to actually do what they say they do.

So, while there may not be a cure-all solution for your thinning hair, that doesn’t mean you don’t have options.

Studies have shown that there are elements of nutrition that supplements help to address that may make a difference. According to an article in Huffington Post, certain essential vitamins are a must have for hair health, “Daily multivitamins or prenatal supplements help to fill gaps found in our diets,” said Dr. Piliang, a doctor at the Cleveland Clinic, “We tend to restrict carbohydrates or fats for weight loss or replace them with juices, but vitamins contain important nutrients like biotin, zinc, and B-complex that help to enhance the health of our hair.”

Should you take a vitamin reported to help with hair thinning?

The answer to this will depend on a few factors.

  • As with any type of supplement you are considering adding to your routine, you should always consult your doctor to make sure it is a good idea.
  • Something else to consider is whether or not the supplement uses concentrated levels of elements known to help with hair loss or thinning. For instance, a hair loss supplement may say it has iron or B5, but it may have more filler than those key ingredients.
  • Do your research! It is imperative to read labels and understand the ingredients you are putting into your body if you aim to achieve optimal health benefits from a new supplement or vitamin.

Remember to always check with your doctor before adding vitamins to your routine, because you could be risking your health if you don’t. Some vitamins that may be beneficial for hair growth may affect other parts of your body in dissimilar ways. For example, if you aren’t currently having an issue with low iron, but you add it because you read low iron affects hair vitality, you can overload on iron to the point of increasing your risk for cancer, heart disease, and other dangerous conditions.

What are the best supplements to ask my doctor about for my thinning hair?

Photo Courtesy of @grasiemercedes Instagram

There are a few key vitamins that everyone needs to some extent in order to keep your body and hair as healthy as possible. If you feel hesitant about adding supplements of the listed vitamins to your routine, another option is to simply make sure you eat a well-balanced diet consisting of foods that are rich with those vitamins. Again, you should consult your doctor if you have questions. Here are the top vitamins associated with hair health.

• Vitamin D

• Iron

• B Complex

• Zinc

According to Healthline, there are certain guidelines to follow when adding these vitamins in supplement form.

Iron issues should be discussed with your healthcare provider. Zinc is usually only an issue for excessive sweaters or athletes, but again, you can check with your doctor. The 2015-2020 Dietary Guidelines for Americans make the following recommendations regarding B complex and vitamin D:

• Adults over age 50 should take a vitamin B-12 supplement or add foods fortified with vitamin B-12 to their diets. Many breakfast cereals and some soy products are fortified with B-12.

• Older adults, people with dark-colored skin, and people who don’t get much sunlight exposure should take a vitamin D supplement or add foods fortified with vitamin D to their diet. Some dairy products, soy products, orange juice, and breakfast cereals are fortified with vitamin D.

At the end of the day, losing hair is normal.  However, if you feel that your hair loss is excessive, or even if you want to start supplementing vitamins as a part of your healthy hair routine, there are many nutritional factors to consider. There is no one, concrete answer, because every body and every hair strand is different. There is a general consensus though, that the key to healthy hair lies in a well-balanced intake of essential vitamins, which can be supplemented through diet or a combination of diet and supplements.

3 Ways to Use a Toothbrush on Your Hair
@missj0hnson

We have all dealt with flyaways. They can pop up unannounced and certainly unwelcomed, but there is a fast and easy way to take care of this pesky problem. Did you know you can tame flyaways with a toothbrush and hairspray? While this trick of the trade might not be a new concept, it is certainly a helpful one to know. Here’s how to remove flyaways with a toothbrush and hairspray, as well as a few other uses for a toothbrush in your hair care routine.

1. Tame flyaways

For this simple yet helpful beauty hack, you need a toothbrush and your favorite hair spray or gel. Simply spray your toothbrush with the product and begin brushing flyaways away from your hairline until they disappear back into your hair. This is a great way to smooth these pesky hairs, and you can even carry it with you in your bag since a toothbrush weighs next to nothing!

2. Edge control

Aside from flyaways that creep up throughout your style, you can also get great edge control with a toothbrush since it lets you apply product more evenly distributed throughout these delicate strands than using your fingers. This is also great if you tend to be a little rough on your edges or too heavy handed with the product since it gives you a nice, even application. It is also a good way to get a particular style or shape that you want to create.

Here is a video that shows this method to shape edges:

3. Touch up color

A toothbrush is a great way to touch up your roots when the color starts to fade. Simply dip the brush in the color and apply starting at the root out towards the shaft until you get the coverage you want. It should be noted that for this you want to use a brand-new toothbrush for the best results. If you use an old one that might have hairspray residue on it, the brush might have a harder time picking up the coloring solution and applying it evenly to your roots.

When it comes to making styling a little easier, a toothbrush is one of the easiest ways to get great coverage without damaging fragile areas of your hair line. Add this inexpensive tool to your routine and see the difference! 
Jamaican Black Castor Oil for Hair Growth

If you’re anything like us, and we know you are, then you’re obsessed with oils for your hair. Wavy, curly, kinky, girl – it doesn’t matter. Oils are often a miracle product for every hair type out there. Well, except for straight haired ladies, but that is only because their natural oils do the job for them. (One point team straight-hair? I mean, us curlies do get to try new products all the time, so maybe it’s a tie.”>

So when we heard about Jamaican black castor oil, we had to know what was up. Like many of you, we have tried new oil products before only to hate the weight, hate the grease, or hate the smell (seriously, fig oil? Not a good all-day smell”>. So we caught up with Delroy Reid, the owner and entrepreneur behind Sunny Isle Jamaican Black Castor Oil, to get the down and dirty details.

Reid explained that after being laid off during the national financial crisis, he was in dire need of a tropical vacation. So he headed down to visit his relatives in Jamaica where he noticed his aunt using black castor oil. Immediately, he had flashbacks to his childhood where his mother and his grandmother before her using the oil for their hair and their acne. Noticing how long and thick his relatives’ hair was, and how clear their skin was, he immediately started exporting the oil to the United States.

What can Jamaican black castor oil do for wavy, curly and kinky hair types?

Jamaican black castor oil works for all hair types. It will moisturize, thicken, strengthen and rapidly increase hair growth. It increases blood flow to the scalp, supplying valuable nutrients to hair follicles. Jamaican black castor oil will also prevent hair breakages, dandruff, eczema and dry, itchy scalp. Jamaican black castor oil has crossed over into other ethnic groups, and is now being used widely for some of the same purposes, as well as new found uses including eyelash and eyebrow hair growth and as massage oil. This versatile oil carries many varied uses.

Is there a specific hair type that will benefit the most?

A healthy scalp means healthy hair. It works for all hair types because the oil works on the hair roots/follicles and not the hair itself.

OK, so what is different about Jamaican black castor oil versus other castor oils?

Over the last ten years, it is an established precedent that Jamaican black castor oil is more effective than the clear pharmacy castor oil because of the ash content due to roasting of the beans. Therefore, it stands to reason that the more ash content, the more effective the oil. This is not a myth; it is evidence based on scientific facts.

Other than hair growth, are there any issues Jamaican black castor oil can solve for textured women?

Jamaican black castor oil will solve the following: Dry brittle hair, hair breakages, dandruff, dry itchy scalp, eczema, thinning hair, alopecia, bald spots, and will rapidly increase hair growth including eyebrows and eyelashes.

So what’s in it? Is it organic? Sulfate-free? Anything we should know?

The scientific name for the castor bean is Ricinus Communis. It is organic and sulfate-free. There is nothing in it that will harm your hair. Although Jamaican black castor oil can be used as a laxative, we do not encourage that because we are not doctors. Therefore, it should only be used externally.

Got it. And where did this product come from originally? What is its story?

Castor oil has been used medicinally for over 4,000 years for all kinds of ailments. The castor bean is native to Eastern Africa and made its way to Jamaica via the slave trade. Today, the castor oil is manufactured the old fashioned way in Jamaica. Authentic Jamaican black castor oil is dark brown in color and accompanied with the traditional burnt smell.

So, we know, we know. You stopped straightening your curls for a lot of reasons, and one of them was definitely to not smell like a burning building all the time.

Read on for Delroy’s personal instructions on how to use the oil, and you’ll see why Jamaican’s aren’t putting it down.

Use JBCO for Hair Growth & Moisture

  1. Apply small amounts of Jamaican Black Castor Oil (also available in Lavender and Extra Dark“> daily to your hair roots and scalp. Then massage the oil into your scalp using your fingertips. You may leave the oil on your scalp overnight. The oil will not soil your pillow as it is easily absorbed into your scalp.
  2. Once per week, use Jamaican Black Castor oil as a hot oil treatment, preferably on the weekends. Use generous amount and really massage it into your scalp and hair.
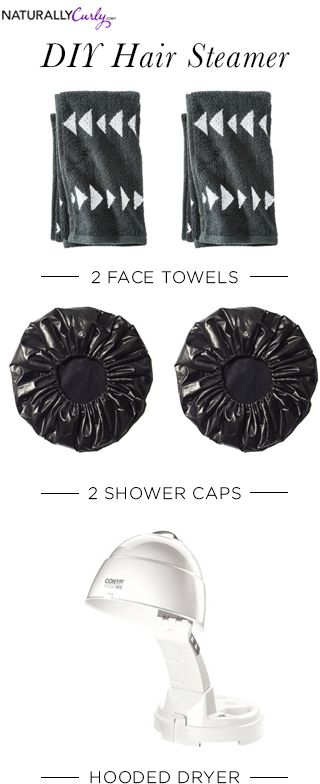
  3. After applying JBCO to your scalp and hair, cover your hair with a plastic cap and go under the dryer for 15 to 30 minutes.

You should begin to see results in two weeks after original date of usage.

[prodmod]

For Eyelash & Eyebrow Growth

Jamaican Black Castor Oil will help your eyelashes and eyebrows to grow thicker and longer, and keep them from breaking. It also helps promote new growth in bare areas of your eyebrows caused by over-tweezing. Massaging a little over the base of your eyelashes before bed prevents thinning and promotes rapid growth, leading to thicker and fuller longer lashes.

  1. Wash your face with a mild soap and remove all traces of makeup from your eyelashes and eyebrows soap and remove all traces of makeup and dirt.
  2. Dip a mascara wand or a cotton swab into Jamaican Black Castor Oil, tapping off any excess oil. It is important to only apply a thin layer, so use a clean tissue to dab away drips from the wand/Qtip if necessary.
  3. Brush the oil evenly through your eyebrows from inner to outer tip. Then use the wand/cotton swab to apply the oil to your eyelashes, just as you would mascara, from root to tip.
  4. Leave the JBCO on overnight and rinse off with a mild soap in the morning before you apply your makeup/ moisturizer.

Try it out, ladies, and let us know how the treatment works. Hair growth seems to be so elusive, but this treatment may have captured it in a bottle!

Easy Wash & Go For Back to School

No one ever said school was easy…

Well, maybe a few people did, but it doesn’t mean you’re not taking time to run to class, run to the library, run…late. It’s a lot!

So for the curly student in a hurry, the wash and go is a life saver. It lets you get a great no-fuss style and definition without a lot of time spent. Best of all, it keeps your curls well cared for and properly moisturized when done right! For the busy natural on campus, finding an easy wash and go for back to school is a must-have weapon against bad hair days, and bad morale! Hey, we all need a boost sometimes. In keeping with keeping up, here’s a fast five-minute, easy wash and go that can make your hair care routine a little quicker and easier.

  1. Co-wash your hair as usual. Make sure you use enough product to fully saturate your strands. The product you use should be natural, hydrating, and gentle such as Carol‘s Daughter Hair Milk Co-Wash Cleansing ConditionerSheaMoisture Coconut & Hibiscus Co-Wash Conditioning Cleanser, or your favorite gentle wash—provided there’s a good conditioning element to it. As long as it’s gentle on your strands and offers hydration, you are good to go!
  2. While the product is still in your hair, make sure you take the time to detangle strands. Using your fingers to gently break up tangles BEFORE you rinse and dry to save yourself any tearing and additional time!
  3. Rinse well. You’ll want to make sure all the product is out, since even the gentlest cleansers can leave itchy buildup if they dry on you. But you also want to make sure you fully saturate your hair since you need the water exposure to have the humectants in your products work!Squeeze out any excess water before you step out. You want hair to be damp, but not soaking wet—it’s a style hazard and a safety hazard!
  4. Apply your favorite gel to damp strands to get the best definition for curls. A few great options include Aunt Jackie’s Curls & Coils Don’t Shrink Flaxseed Elongating Curling Gel, and DevaCurl Ultra Defining Gel, but keep in mind that you want to consider your hair’s individual characteristics before you pick a gel! Protip: You don’t have to totally envelop your strands to get definition, depending on your porosity level. Check out your type and porosity level with our new and improved Hair Typing Quiz, then get shopping from there!
  5. When applying products, use the praying hands method. This will ensure you don’t create new tangles while working and that you get an even distribution of product.
  6. Once you have applied your gel throughout your hair, let it air dry.
  7. If you are concerned with your roots need a little lift, you can also blow dry at the roots, finish with a cool shot, to add a little volume to the look. Sure, you’re kind of taking out the “n’ go” part of your wash n’ go, but school ACs and running around in the winter might force your hand a little! That or your personal sense of style. It’s all valid!

For a better look at a quick and easy wash and go for back to school, check out this helpful tutorial:

Be sure to share your back to school looks with us between classes, and best of luck to all of our curlfriends hitting the books this year!

Why You Want to Try Tomato Juice In Your Hair

Tomatoes are one of nature’s most powerful sources of antioxidants and vitamins. While you may know they are good for you to eat, they are also great for your hair when applied directly to your curls.

iStock Images

Here are a few benefits of putting tomato juice in your hair that might be news to you!

  • One of the biggest benefits of putting tomato juice in your hair is to add a glossy sheen to tired, dry strands. When used as a conditioner, tomato juice can help increase the pH levels in your hair to make it more balanced. This can help take hair from lifeless to glossy thanks to the acidic nature of a tomato.
  • Tomatoes are also high in levels of vitamins such as A and C which can help make strands stronger. A tomato hair mask can help improve scalp circulation thanks to the nutrients while the acidic nature can help with issues such as an overabundance of fungus on the scalp which can inhibit growth.

Here are a few ways to use tomato juice on your hair.

Tomatoes Only

This recipe uses just a tomato and is easy to do!

Simply juice a tomato, or use organic tomato juice already squeezed, and apply a small amount to your scalp. Massage the scalp and apply tomato juice to strands. Put on a shower cap. After 3-5 minutes, rinse the juice out of hair. Make sure you don’t leave the juice on too long or it may negatively affect the pH of your hair.

Tomato and Honey

For a recipe that uses the powers of tomatoes mixed with the super moisturizing properties of honey, this is a great hair mask for when hair needs a boost.

Mix two ripe tomatoes in a blender. Add to a bowl with two tablespoons of honey. Stir until it takes on a paste consistency. Apply to your strands and put hair up in a shower cap.  Wait 30 minutes. When doing a mask that mixes tomato juice with a moisturizing property such as honey, you do not need to worry about quickly rinsing it because of the acidity. Rinse hair when time is up.

Lightening Trick

Since tomatoes are highly acidic they can be used much like lemon juice to help lighten hair. This trick will only work if you use a whole tomato as opposed to a store-bought juice since the tomato in an unprocessed form tends to have a higher acidity.  Taking slices of tomatoes, apply them to hair where you wish to highlight or lighten. Leave the juice there for around ten minutes and then rinse. The results will vary based on the natural color of your hair, and you may need to repeat this task more than once to get the level you desire, but this is a quick way to change up your color at home.

Tomato Juice for Skin

You can also use it for skin! It is perfect for when your face feels oily and needs a boost. The vitamins will pep skin up while the acidity will remove excess oils.

Simply mix one part tomato juice to equal part cucumber juice. Cucumber juice helps with the moisturizing so skin doesn’t dry out when those oils are removed. Apply it to your face with a cotton ball just like a toner. It works best when applied to the oiliest areas of your face such as the T-zone.

Try These Alternatives to Dry Shampoo!
Photo Courtesy of @ceciliagorgon Instagram

For most people, dry shampoo is great in a pinch when you need to soak up some excess oil. For curly girls, there are a few reasons to avoid dry shampoo. While dry shampoos are great for soaking up excess oil or moisture such as sweat from working out, they can dry out your scalp and strands. They also usually need to be brushed out to avoid a collection of white flakes at the root which can be a problem if you are dry brushing your curls. There are curl-friendly options for dry shampoo, but some naturalistas choose to skip this product category altogether. If you want the same benefits without the actual dry shampoo product, here are a few alternatives to dry shampoo.

Dry Texturizer

One way to avoid dry shampoo is to use a dry texturizer. When your hair is weighed down with dirt, it can become flat. If you give it a little texturizer in between washes instead of using dry shampoo, you will automatically help restore some of that texture and body. A few good ones for this would be AG Hair Cosmetics Texture Dry Wax Matte Finishing Mist or Macadamia Professional Texturizing Salt Spray. They both provide texture without drying out your hair and can help give it a cleaner look until wash day.

Refreshing Spray

Another one of the best alternatives to dry shampoo is a refreshing spray. A refresher is a gentle way to achieve second day curls without the sometimes-harsh dryness of dry shampoos. The process of refreshing your ends or the length of your hair typically creates volume and lift throughout the hair – especially helpful when your curls have gone flat at the roots. A few good ones for this purpose would be Ouidad Botanical Boost Moisture Infusing & Refreshing Spray, MopTop Herbal Detangler & Refresher, and Uncle Funky’s Daughter Defunk Hair Refresher Tonic.

Dry Conditioner

Dry shampoo and dry conditioner are two different things. Dry shampoo is used to absorb excess oil from your scalp and roots, while dry conditioner is used to add luster and moisture to your strands.  People with straighter texture may find that partway through the week their hair looks oily and in need of a wash. For curly and coily textures, you may find instead that your hair looks dry and parched mid-week, and in this event you may want to reach for a dry conditioner to create that just-washed look without using a wet product. A few popular options for this type of product would be Amika Silken Up Dry Conditioner or Tigi Rockaholic Dirty Secret Dry Conditioner because they both offer a glossy sheen with the added benefit of moisture restoration for a second-day hair vibe.

DIY Options

Of course, there are alternatives to dry shampoo that you might already have in your pantry. Best of all, most of them don’t even need to be made into a recipe and can be used as a stand-in for dry shampoo. For example, applying just a little bit of cornstarch or baby powder to your roots can help absorb excess moisture and give hair a cleaner look. You can also use one cup of oatmeal with one cup of baking soda to create a dry shampoo. The oatmeal helps loosen up dirt and oils while the baking soda absorbs them. If you have dark hair you may find that light powder formulas are too visible on your hair, in which case you can use this DIY cocoa dry shampoo recipe for a darker tint.

The Use of Hemp Oil in Hair Products
@alannanicolex

Your curls deserve the best. With this in mind, many hair care lines catering to curls have started using more and more natural ingredients. One of the most popular ingredients is hemp oil and for good reason.

The use of hemp oil in hair products makes sense since it is packed with proteins, fatty acids, and vitamins that help hair stay healthy and shiny. While hemp oil is great for your hair and scalp, some people shy away from it because they associate hemp with marijuana. Hemp oil is harvested directly from the marijuana plant, but it does not have the same properties so there is no mind-altering effect. So, why should you consider adding hemp oil hair care products to your routine? Here are the top three reasons.

Strengthens Hair

Hemp oil is a natural way to fortify your strands against breakage. It does this in a few different ways. Hemp oil provides the follicle with fatty acids and proteins needed to stay strong and keep the cuticle intact. Another way hemp oil helps keep hair protected against breakage is by deeply moisturizing strands. When hair is dry and brittle it is more vulnerable to breakage. It also helps keep the scalp balanced and a healthy scalp means healthy, strong hair!

Moisturizes Hair

While nearly any type of natural oil such as coconut oil or argan oil will likely give your tresses a healthy dose of moisture, hemp oil offers some of the longest lasting results in this area. The reason hemp oil is such a powerful moisturizer is because it helps prevent water loss. While some moisturizers simply provide moisture to dry hair or scalp, hemp oil provides moisture and locks it in for a longer period. Another great aspect of this type of oil is that it is fast absorbing without a greasy residue so the majority of the nutrients, vitamins, and proteins end up on your scalp and strands instead of on your hands.

Helps Grow Hair

One of the few natural oils to make such a claim, hemp oil helps prime your scalp for hair growth. We all know the scalp is the foundation of healthy hair. Hemp oil helps the scalp by improving circulation to help spread nutrients to all follicles. It is also full of much needed fatty acids such as Omega3, Omega6, and Omega 9, which are known to stimulate growth.

When it comes to adding hemp to your routine, it is easier than ever. You can buy hemp oil in its essential oil form, or find it in hair products. The hair care industry has certainly taken notice of the powers of hemp oil and it shows in their products. From shampoos to leave-in treatments, you can find hemp oil products everywhere hair care products are sold.

Check out these products if you want to incorporate hemp oil into your hair care regimen!

Here Are 5 Ways To Style Your Curly Bangs For The Summer

Having curly hair can be a challenge when it comes to styling it which is especially so if you want to use bangs in your looks since curly bangs can be tough to tame.

If you are someone who is searching for simple ways to style your curly bangs, here are 5 great suggestions that can make the process easier while also providing amazing style!

Middle-Part Bangs

Photo Courtesy of @claire_most 

One of the easiest and most appealing ways to wear your curly bangs is to part them in the middle. Do this when the bangs are wet, separating them into one-inch sections and styling them with light hair leave in conditioner. Use a texturizing spray to help you keep the bangs from looking limp.

A twist on this look can easily be done by pinning the curls back, giving you a softer shape against your face. You can also really comb out the look, for a more eye-catching take on the middle part bangs.

Braided Bangs

Photo Courtesy of @freshlengths

This styling option is best suited for people who have long hair because you need enough of it to be able to braid. You can get this look by making a few two-strand twists in the center of your head and then using a strong pomade to ensure there are no stray hairs sticking out. Once the braids are done, swoop them to one side, pin them in place, and enjoy a unique natural hairstyle.

You can use three strands, as well, for a more classic braided look, and some people have gone as far as doing French braids on their bangs. This, of course, will depend on the length of your hair is and the look you are trying to achieve.

Pineapple Bangs

Photo Courtesy of @alannanicolex

This can be a very fun look, but it does take some practice to ensure that it is done correctly. Your hair needs to be freshly washed for this look. Make a soft ponytail and pin it to the top of your head, allowing the ends to fall around your face.

If you do not have tight curls, which are ideal for this style, you can use a curling iron to achieve this look, but be sure to condition your hair substantially in order to have fully formed and healthy curls. The last thing you want is to dry your hair out, because this will damage the follicles and make it very difficult to maintain the look you want. Once you have finished styling the curls, add a bit of hairspray to maintain the shape and you are done.

Shaggy Bangs

Photo Courtesy of @volitionofcgw

This is a look that is easy to do and perfect for using every day. Allow for a little space between the two sections of bangs, and use an anti-frizz product to keep the look from getting too poofy. Run a comb through it to style as you like and apply a tiny bit of hairspray to protect the bangs. Something to keep in mind is that heat can make your hair very frizzy, so you want to let it dry naturally. If you do decide to use a hairdryer for convenience, be sure to use a lot of leave-in conditioner and heat-protection products.

Big Bangs

Photo Courtesy of @stylefeen

Why not let your bangs be as eye-catching as the rest of your hair? The trick here is to use the right volumizing shampoo and conditioner so that the hair has height and is not weighed down by too many chemicals. There are some things you should avoid as well like using heat to dry the hair since this can increase frizz and can even damage the curls. Allow the hair to air dry, but be sure to add a volumizing product at this stage too, to get the lift you want throughout your entire hair, including your bangs.

These five looks allow you to have a great set of curly bangs without fear. Most women with curly hair know that styling can take time and lots of different products, but the results can be excellent if you know what to turn to. Whether you want a classic look like a middle part set of bangs or something more modern like the pineapple bangs, there is no reason you should be afraid to try bangs, even with the curliest of hairs.

Thank you so much to our reader, Cassidy Flannegan, for submitting this story to us!

Cassidy Flannegan is a blogger for HairMotive and a passionate hairstylist. Her three favorite hairstyles are the upside down braid, the fishtail braid, and chignons. In her spare time, she tries to pass on her knowledge to her two little girls and to learn a new thing every day.

Want to pitch your story to NaturallyCurly.com? Shoot us your idea here!

7 Easy Updos for Type 4 Hair
Photo Courtesy of @africanmelaninnn Instagram
For women with curly hair, finding the time to care for and style our hair can seem time-consuming. Life is busy, but that doesn’t mean your style should pay the price! Here are 7 stylish, easy updos for type 4 hair that can save you time and give you a beautiful start to your day.

1. Pineapple

This look is one of the classics of easy updos for type 4 hair for a reason. It is a great way to show off the beauty of your natural texture while still keeping your hair up so you aren’t tempted to play with it throughout the day. This is also one of the fastest looks to pull off in a hurry!

2. 10 Minute Twisted Updo

For those mornings when you don’t have a lot of time, this look is perfect. It’s fast and easy to do! This style gives you a nice amount of volume on top while still protecting your ends.

3. Fab French Braid

The French braid has always been a feminine and pretty style. It’s perfect for the office or date night.  When put into an updo, it gives the French braid a more modern twist on the traditional style.

4. Flat Twisted Crown

When you want to keep your hair out of your face and completely put up, this protective style is the perfect option. It lets you create a summery look perfect for the beach or those days at the office when you’d rather be at the beach.

5. Twisted Pompadour

For a look that gives you a lot of volume on top with a sleekness in the back, the twisted pompadour is the one you want. It is easy to do and leaves you with a classy, stylish look perfect for any situation.

6. Twist N Bun

This style can be either a bun or a twist ponytail style. Either way, it is a cute and stylish way to keep hair back and protected. Whether going on a special date or just taking the kids to the park, this updo is a sleek look for the modern naturalista.

7. Mohawk

When you want a look with a little more attitude and edge, the Mohawk updo is where it’s at for curlies. This look is easy to do and popular on the curly hair scene.

Say Hello To Summer Hats and Goodbye to Hat Hair

Hats are a great way to keep the sun out of your eyes. They are also the perfect way to protect your skin from the damage caused by the sun’s UV rays that can lead to wrinkles, or worse, skin cancer.

The downside to wearing a hat is definitely hat hairNo one wants their hair to look flat and lifeless after taking off their hat. The good news is that you can learn how to prevent hat hair so you can look great and still get that stylish coverage from the sun. Here are a few tips on how to prevent hat hair to help avoid this flat fate.

1. Build volume

To combat the flat side effect of wearing a hat, use a root lifter or volumizing product such as Ouidad Playcurl Volumizing Spray or Jessicurl Gelebration Spray. If you apply this type of product to hair before wearing a hat will it lessen the effects, but you may still need to apply a little after taking off your hat, so carry travel sized versions of these products with you for added peace of mind.

2. Don’t put on a hat when hair is wet

Hair has a harder time drying trapped under a hat. When you put a hat on damp or wet hair, the air will dry in the shape of the hat. Avoid this by making sure hair is dry or skip the hat and opt for a head wrap instead.

3. Choose the right materials

Hats made out of thick materials such as wool or synthetic fibers will flatten hair more than options made of cotton or softer material like silk or satin. We love the silk and satin-lined hat options that are available for curly girls now!

4. Wear looser hat styles

Another contributing factor to hat hair is how tightly the hat sits on the head. Anything that forces your hair to be pushed against the scalp without proper space to move around can lead to hat hair. Avoid tight beanies, trapper hats or baseball caps that are adjusted too snugly to the head. Opt instead for options such as berets, bolo hats, and floppy styles that aren’t as tight.

Photo Courtesy of @missj0hnson Instagram

5. Take the hat off as much as possible

When you step in from the sun, you may be tempted to leave the hat on so no one sees your hat hair, but it is important to let it breathe when you can. Even if you only take it off for a few minutes, it can still help reduce hat hair later. It can stop the hat hair crease from becoming more secured.

6. Part your roots on the opposite side

If you are going to wear a hat, parting your hair on the opposite side than your usual routine can help later when you take the hat off. The hair will have more volume when you flip it back over to the other side.

When it comes to keeping your hair looking great, these tips on avoiding hat hair can make it a little easier. Say goodbye to that flat fate and still wear your favorite looks!

Benefits Of Acai For Curly Hair
istockphoto/Mizina

One of the hottest superfoods on the scene is açaí and for very good reason. This small berry offers several health benefits, but do you know about the benefits of açaí for curly hair? Let’s take a closer look at what this berry has to offer for both overall health and the health of your curls.

Euterpe oleracea Mart., commonly called açaí (pronounced ah-SIGH-ee”>, is a palm tree that grows in South America and in the rainforests of Brazil. The skin of the palm tree’s berry is the part that is garnering public attention as a super food with miraculous healing qualities.

Açaí for your skin

The excitement stems from the high amounts of age-defying antioxidants that the berry skin contains. These flavonoids block diseased cells. A recent study shows that the bioactive polyphenolics present in acai berry reduce the proliferation of certain leukemia cells in a dose and time-dependent manner.

Açaí berry is a holistic healing herb that can be consumed in capsule form that still benefits hair, skin, nails, and vitality. It can be enjoyed as a refreshing juice drink or added to a smoothie. Today, several skin and hair care products contain açaí berry.

Açaía for hair growth

The amino acids and essential fatty acids found in acai skin make it a popular ingredient for hair hair products such as shampoos, conditioners, leave-in conditions, gels, balms, and pomades. This is why.

The Vitamins
  • Vitamin B1 (Thiamin”> Vitamin B2 (Riboflavin”> Vitamin B3 (Niacin”> – While acai doesn’t contain the full B complex, the B vitamins it does contain are known to strengthen the hair and encourage hair growth. Deficient vitamin Bs in the system contributes to dry scalp, greasy hair, dandruff, retarded hair growth, graying hair, wrinkled skin, parched lips, dry skin, irritations and red complexion. These vitamins could be taken orally but many doctors are recommend getting them through foods, such as acai.
  • Vitamin C – When combined with protein — which açaí also contains — this vitamin creates collagen. Collagen is essential for healthy skin. Ample C deters sagging skin and wrinkles. Vitamin C is responsible for keeping the skin moist, preventing lines and crinkling, spider veins, tangled hair and hair breakage by regulating the sebaceous glands. In addition, vitamin C benefits the eyes, teeth, immune system and skin.
  • Vitamin E (tocopherol”> – Vitamin E is known to help prevent wrinkle and premature aging of skin and hair. Vitamin E also prevents dry, lifeless skin, hair breakage, and dandruff. It improves the healing of scars and wounds as well as overall circulation.
The Minerals
  • Calcium – This contributes to hair growth, strength and healthy condition of hair.
  • Potassium – This regulates the circulation improving hair growth and skin condition.
  • Protein – Hair is primarily made of the protein keratin. Diets deficient in protein lead to all sorts of hair problems, including hair breakage, slow hair growth and thinning. Adequate amounts of protein in the diet are believed to accentuate hair growth, strength, and condition.
Amino Acids

Açaí contains a healthy amount of amino acids. Amino acids are constantly required by the hair follicles to maintain hair growth.

Açaí in hair products

The combination of acai berry’s vitamins, minerals, phytonutrients, EFAs and chemical constituents come together to greatly benefit the hair and skin. When it comes to the benefits of acai for curly hair, one of the biggest concerns of many curly tops, whether it be wavy, curly or kinky, is frizz which açaí helps to eliminate. Another one of the best benefits of acai for curly hair is the way the vitamins can strengthen and moisturize strands to leave them healthier.  There are several hair care products that use this healing berry for just these purposes! The Surya Henna line uses açaí as a humectant and frizz buster. The Florestas natural hair care company also feature an açaí berry line. Açaí juice can be found in most well-stocked health food stores as well as acai supplements in capsule form.

istockphoto/Mizina

Açaí for your health

Unlike some distasteful health foods, the açaí berry has a vibrant taste similar to dark-chocolate-covered cherries or blueberry ice cream with chocolate flakes. It tastes very interesting, which entices us to enjoy it for its many other positive attributes.

Benefits reported include:

  • Greater energy and vitality
  • Increased stamina
  • Improved circulation
  • Improved digestion
  • Better sleep
  • Improved sexual function

Açaí berry contains an array of vitamins, minerals, amino acids and essential fatty acids. It has more protein in it than an egg. It also contains good concentrations of Vitamins B2, B2, E, and omega 6 and 9.

Essential Fatty Acids in Açaí

Acai contains the EFA’s Omega 3, 6, and 9. The fatty acid content is similar to that of olive oil. It is also rich in oleic acid a monounsaturated antioxidant. Here is a breakdown on the beneficial qualities of the EFA’s contained in acai berry.

Omega-3

Alpha Linolenic Acid is the primary Omega-3 fatty acid. Omega-3s are helpful in forming cell walls keeping them flexible and improving circulation as well as oxygen intake. Omega-3’s help with mental abilities and memory function. Deficient Omega-3 contributes to poor vision, blood clots, poor immunity, increased triglycerides and bad cholesterol at increased levels; high blood pressure, irregular heartbeat, learning disorders, slower growth levels in infants, children and fetuses. It also causes menopausal discomfort.

Omega-6

The Omega-6 in acai berry skin (Linoleic acid”> is significant because of its numerous overall health benefits. Linoleic acid is the primary Omega-6 fatty acid. Omega-6 can improve diabetic conditions, rheumatoid arthritis, PMS, skin problems like eczema and psoriasis and help with cancer treatments. While many of us get an excess of linoleic acid in our diets it is not converted into useful gamma linoleic acid (GLA”> because of metabolic problems caused by bad dietary habits, smoking, pollution, stress, aging, viral infections and other illnesses.

Omega-9

Oleic acid, called Omega-9, is not considered an essential acid however it still contains significant health benefits. Omega-9 lowers heart attack risk, arteriosclerosis, and helps with cancer prevention.

ORACs

ORAC is an acronym that stands for Oxygen Radical Absorbance Capacity, a measurement of antioxidants in foods. Healthy consumption of ORAC-rich foods helps prevent premature aging. Scientists believe we need between 2,400 and 3,000 units of ORAC for health benefits. One serving of pulp juice prepared from the açaí berry skin contains a whopping 3,800 units of ORAC.

Anthocyanins

Another important constituent of açaí is anthocyanin. This provides some of the health benefits of red wine, yet the amount of anthocyanins in acai berry contains 10 to 33 times more. It contains twice as much anthocyanins as blueberries.

Check out these products if you want to incorporate Acai into your hair care regimen!

The Dos and Don’ts Styling Curly Bangs

Many curly girls may have heard that bangs are for straight hair. This is simply not true!

Photo courtesy of @goldenn_xo

Bangs can work with a variety of textures and hair types. When it comes to styling curly bangs, there are a few tricks of the trade that can make it easier to get the look you want for these face-framing hairs. Here are some of the best tips on styling curly bangs.

  1. DON’T heat-style them every day. For lots of curly naturalistas, getting your bangs to cooperate in the mornings can be challenging and so they turn to heat tools. If you are having a hard time getting your curly bangs to work with you instead of against you, we recommend minimizing the amount of heat you use on your hair. Especially when you use heat on one spot repeatedly, you will want to be careful to avoid heat damage. Use heat as infrequently as possible (we would not recommend using it every day”> and always use a heat protectant. You may want to focus protein treatments and deep conditioning in that area as well.
  2. DO style them wet. One of the best tips for styling curly bangs is to style them while wet or damp because it is super easy and effective. Simply apply your favorite curling cream to damp strands and curl the strands of your bangs around your finger. For second and third day hair, use a spray bottle with water to style them wet in the mornings, as you may find that your bangs are sticking straight up when you wake up in the morning.
  3. DON’T rub them with a towel. The hair on your bangs is most likely fragile. If you rub it with a towel, even a microfiber towel, you run the risk of not only creating frizz by raising the cuticle, but also creating a breakage problem. To dry your bangs, simply squeeze them with a microfiber towel, being careful not to create any friction.
  4. DO style them separately. Bangs need more attention and different techniques than the rest of your hair, so many curlies find it useful to style their bangs after they’ve styled the rest of their hair. Keep a spray bottle with water handy so you can refresh them and style them at the end of your styling session.
  5. DON’T trim them yourself. Naturalistas are do-it-yourselfers at heart, and many like to trim their hair themselves. BUT did you know that most stylists will not charge to trim your bangs? DIY trims are not for everyone, so if you are someone who has any trepidation about cutting your hair, then you might as well have a professional do it for free.
  6. DO find a style that works with bangs. Bangs are a great way to show off your curls and frame your face, but not every style will work with bangs. Here are a few pretty examples of styles that work well with curly bangs. 
  7. DON’T pin them back on day 1. You may be tempted to pin your curly bangs back away from your face, sometimes you just need to breathe! We would not recommend doing this on day 1 of your wash week, because it will be difficult to wear them down due to creases on following days. If you typically wear your hair down or in a wash and go it would be best to do that for the first day or two of your wash week, and keep any pinned back styles for day 3 or 4.
Curlfest 2017 Was Your Instagram Feed Come to Life

When you’ve grown up accustomed to spotting one odd head of curls in a crowd, the connection you feel with that woman is magnified.

Most women with natural hair probably can’t imagine what it would feel like to be surrounded by thousands of other women who have embraced their texture. Thousands of naturalistas gathered in Brooklyn’s Prospect Park on July 15th to experience that feeling at Curlfest 2017.

Curlfest is your Instagram feed come to life.

You know the beautiful, painted women in your feed by makeup artist @moshoodat? They were walking around the festival, live, and covered in flowers.

The braids you’ve been Pinning to try this summer? They were being styled at Creme of Nature’s braid station, for free! Stylist Diane C. Bailey was working her magic at SheaMoisture’s pop-up salon. Tropic Isle Living was keeping our hair and our bodies hydrated with fresh cut coconuts. Mielle Organics founder Monique Rodriguez, along with her two daughters, launched their newest Mongogo Oil line. And this event wasn’t just about loving your hair, Iman Cosmetics had women embracing their skin tones as well.

And all of the natural hair gurus who inspire you daily were in attendance. All of them.

The festival, created by Curly Girl Collective, originally began as a meetup in the home of one of its founders, Tracey Coleman. What once started as an intimate group of women has grown to encompass men, families, and children. Some of the flyest styles at the festival were being rocked by the kids!

Here are some of our favorite looks and moments

” src=”https://diana-cdn.naturallycurly.com/Articles/Mv_MARK3817-1.jpg”>

Photos by Mark Clennon

What’s The Difference Between Dandruff and Skin Allergies?
iStockphoto

The scalp is the foundation for healthy hair. It is where the growth takes place and where natural oils are distributed from to properly moisturize your strands. When you have scalp problems, it can feel and look awful. The problem is that many people assume all scalp issues are the same in nature, when they are not.

When you have a dry, itchy scalp, you may make the assumption that it’s dandruff each time. However, there are many reasons your scalp could be having these issues, and if your assumption is wrong, you could be missing out on a treatment that would help. Many curlies often ask, “What is the difference between dandruff and a skin allergy?” Let’s look at the key factors to take notice of, and how to best treat them.

So, what is the difference between dandruff and a skin allergy?

You might be a little more familiar with dandruff since it is more common than an actual skin allergy. Dandruff leaves behind yellow flakes and makes your scalp feel dry and itchy. If left untreated, it will continue on this path and will eventually affect your hair health with symptoms like limp hair, irritated scalp, and dry scalp.

In contrast to this, a skin allergy tends to be more severe. Skin allergies will often be painful and look like a rash with raised, red bumps and maybe even blisters depending on the severity of the reaction. This is not to say that an allergic reaction is always this extreme. An allergic reaction can display itself as dryness and flakes, but the main difference is that there will be more discomfort than what is typically associated with dandruff.

The best way to know if it is an allergy is to pay attention to your symptoms. You should also consider if you have recently introduced any new products into your hair regimen that may be the cause of the reaction. If you have started a new product and are seeing rash-like irritation, discontinue the product to see if that makes a difference in your scalp health.

Another concern about dandruff versus skin allergies is that many people will mistakenly confuse dry scalp with dandruff. They assume that if their scalp is dry without flakes, it is still dandruff.

Dandruff’s main characteristics are the flakes of dead skin. If you incorrectly assume you have dandruff and you load up on dandruff products, you may end up making your dry scalp irritated. In fact, even an oily scalp can get dandruff. While many people think of dandruff as a dryness problem, it is actually more closely related to excessive oil production and other factors. According to an article in Everyday Health, “It is usually due to an overgrowth of harmless yeast,”explains Jessica Wu, M.D., a Los Angeles dermatologist and assistant clinical professor of dermatology at the University of Southern California Medical School.

In some people, the yeast starts to feed on the excess oil and dead skin cells on the scalp, causing the skin cells to shed more frequently and clump into flakes.” It is important to remember dry scalp and dandruff are two separate things.

When it comes to treating dandruff or dry scalp, it is best to watch for flakes and then proceed accordingly. If your symptoms continue it is recommended that you consult with a dermatologist, doctor, or even your hair stylist about your dandruff concerns to find the right solution.

Typically, an over the counter shampoo and treatment may be enough, but if it is severe, you may need to see your doctor because it might be an underlying medical condition.

Have you experienced an allergic reaction to hair products before?

Follow us on Facebook to see what we’re talking about right now.
For more helpful articles like this, sign up for our newsletter!
The Best Way to Clean Your Brushes and Combs

Products and tools can be an essential part of our healthy hair regimen, but with products and tools comes their upkeep, which many people tend to skip. For instance, when’s the last time you remembered to clean your brush? Like a serious deep clean? Never, Right? 

A dirty hair brush or comb can get pretty gross pretty quickly, and oftentimes we don’t even realize we are putting bacteria in our hair by not cleaning them often. It can also make the brush less effective at working out tangles because it is full of previously shed hair, dust, lint, and dirt.  The best way to combat this buildup getting back in your strands though is with an effective deep clean. Running them under the faucet isn’t quite enough, but the cleansing process is super easy and can be done rather quickly. So here are 0ur 5 steps for effective brush and comb cleansing!

Step 1.

Make a mixture of warm water and a few drops of shampoo. You need to use a bowl or mug that is large enough to soak the brushes or combs in for a fully submerged cleaning solution. If the shampoo still leaves buildup, you can try a white vinegar soak to remove excess oils. Let it soak anywhere from 10 minutes to 30 minutes, depending on the buildup. Make sure you remove any strands of hair from the combs and brushes prior to soaking.

Step 2.

Use an old toothbrush on your combs to clean thoroughly between the teeth. A toothbrush should be able to get all the buildup off after a good soak.

For brushes, run the brush under the faucet to remove the cleaning solution and dirt. You can also add a little extra shampoo and massage throughout the bristles prior to soaking to help loosen the buildup.

Step 3.

After soaking the brushes and combs, the next step is to use the comb to clean the brush and vice versa. You want to gently scrub the bristles of the brush with the comb to help remove any leftover strands.

Step 4.

Rinse the brushes and combs with, preferably hot water.

Step 5.

Set them aside to dry on a towel. Some people recommend drying them with a hair dryer when you are in a hurry, but be careful as heat might damage the bristles of the brush, depending on the heat used and the type of bristle.

When it comes to keeping your brushes and combs clean, we have found these steps are the easiest and quickest way to get the job done. Clean tools mean clean and healthy hair, and we all love that!

Want more tips on how we practice hair maintenance?

For more helpful articles like this, sign up for our newsletter!

Read next:  You’re supposed to clean your brush how often?

This Is How I Take Care Of My Hair While Deployed

*Location and Last Name have been omitted for privacy*

Being deployed and headed to a new place, I had very little idea of exactly how different the climate would be from my home town. When we arrived at base,  it was 29 degrees outside and in the middle of the rainy season. It rains about every other day and the rain comes in one of two ways, either a light constant drizzle or a torrential downpour. In the summer, the temperature rises  to about 130 degrees, and the wind feels like a blow dryer in your face on the hottest setting.

Having natural hair, I figured I would research the methods of the people who currently lived here to see how they took care of their hair. I Googled the “Indian Oiling Method” and proceeded to collect mass quantities of avocado, coconut, jojoba, tea tree, and Amla oil. While this method didn’t exactly work for me, I found a really strong routine that has helped keep my curls moisturized and protected. I also packed a ton of raw Shea butter, salon-size bottles of shampoo and conditioner, a handful of my go to moisturizers and products, and an empty spray bottle.

Between making sure my hair was constantly moisturized, utilizing protective styles, and also making sure my routine was quick, I think I found a good system that works for my hair while being deployed!

Photo Courtesy of Robyn

Daily Routine

Throughout my time being deployed, I quickly learned not to rely on buns for my hair, but instead with either cornrows or 2-strand twists. There is power in numbers and my hair felt noticeably better when it was clumped together.

Secondly, I would sweat just from standing still, so I washed my hair super often. In order to combat dryness from the increased wash days, I would use bottled water in my spray bottle, which I would use to spray my hair twice a day.

In the morning, I followed up with Cantu Shea Butter Leave In Conditioning Repair Cream then seal my strands with  Tropic Isle Jamaican Black Castor Oil depending on my daily activities.

For instance, if I knew I would be outside for most of the day or if it was the day before wash day, I would use a thicker oil and then use a lighter oil (such as coconut oil”> every other day. All products were also applied end to root, to protect my ends.

Photo Courtesy of Robyn – Flat Twist Example

Wash Day

My wash-day routine consisted co-washing with Shea Moisture High Porosity Seal Co-wash every week, and every three weeks I would use EDEN BodyWorks Tea Tree Oil Shampoo and Tea Tree Oil Conditioner. After each shampoo use I would deep condition with TGIN Honey Miracle Hair Mask and follow with the LCO (liquid, cream, oil”> method.

Before using shampoo, I would oil my hair the day before to try to protect it from losing too much moisture. I still managed to do a protein treatment every six weeks, just like back home, but because of time, I found a holy grail product in the Two Minute Intensive Keratin Reconstructor by ApHogee. You don’t get very much time in the shower, so my wash day routine had to be spot on and efficient. I currently wash my hair in twists/braids and then redo them afterwards. This method helps me to to ensure that every strand gets moisturized.

Take Aways

My biggest takeaways since I have been deployed have all been focused on moisture and protecting my hair. Here are my top 4 tips I learned for managing a different climate and keeping my curls in tact:

  1. Don’t skip wash days. It does get busy and you don’t have much time, but your hair and scalp will appreciate the consistent love.
  2. Protective styling is my best friend. Between flat twists and two strand twists, I have an entire routine down for styling my hair on the fly and locking in moisture.
  3. Unless you have a TWA, it’s not a good idea to leave your hair out. It will definitely dry out faster, so this is where the protective styles come into play.
  4. Moisturize! Moisturize! Moisturize! Especially during the summer months, and oh yeah, moisturize!

Thank you so much to our reader, Robyn F., for submitting this story to us!

Born in Jamaica and raised in Florida, Robyn is an active duty member of the United States Navy. She started blogging and vlogging her curly hair journey after being deployed overseas and needing to find a way to take care of her hair. She has a passion for creating art through various mediums, with writing being one.

Want to pitch your story to NaturallyCurly.com? Shoot us your idea here!

Is Hemp Oil Safe For Children’s Hair?
Photo Courtesy of @serenity_v_skye

There are many natural ways to reap the benefits of nature’s finest ingredients. From green tea extracts to coconut oil, nature has provided us with various healing properties that can be used for your hair. If you are familiar with essential oils, you know they offer several forms of healing benefits for hair and skin. When it comes to using essential oils for your children, a question that comes up a lot would be is hemp oil safe for my children’s hair? You don’t have to worry any longer, below you’ll find out the benefits of hemp oil and few ways to cocktail it at home for you and your little ones.

Is it safe?

You will be relieved to know that hemp oil is indeed safe for your child’s hair. In fact, hemp oil can be used on babies without any recorded side effects or negative consequences. Hemp oil is great for use on curly hair because it is rich in fatty acids such as Omega 6 and Omega 3. These nutrients are known to help make hair stronger and healthier. Hemp oil is perfectly safe for your little ones! Maria Angeles Fernández-Arche, PhD and professor at University of Seville and colleagues found in a study that some components in hemp oil, including  sterols, aliphatic alcohols, and linolenic acids, contain an abundance of fatty acids that offer many types of advantages for you and your body. The high amounts of linolenic acid (17%”> may have favorable nutritional implications and beneficial physiological effects on the prevention of coronary heart disease and cancer.” Hemp is a crop full of oils with potential health benefits! Below we introduce how you can incorporate it into your hair care routine.

How to Use

There are some dosage guidelines to follow when administering hemp oil as part of a diet, but when it comes to using it on the hair, there are no restrictions. You can use it on your baby, toddler, teen, and every age in between without worry. An allergic reaction is a rare and isolated event with hemp oil. There are many products which already include this essential oil for children. In fact, since most formulas with hemp oil in them tend to be all-natural. You can use products not intended for children in most cases.

You can also cocktail hemp oil in your hair treatments using essential oils. You can purchase organic hemp seed oil and simply add 1 tablespoon to your child’s leave-in conditioner a few times a week for an added measure. Another way to get the results you want from hemp oil is to apply it directly to the hair. The amount you use will depend on the length and porosity of the hair. When using this oil, you don’t need to rinse it out. Your child’s hair will see more benefits if the oil is left on overnight.

When it comes to hair care for your little ones, it may seem concerning trying to figure out the best options. With a little hemp oil, you can give them the TLC they deserve and watch their curls transform!

Have you used hemp oil for your littles one’s hair? We’d love to know what you thought.

Follow us on Facebook to see what we’re talking about right now.
For more helpful articles like this, sign up for our newsletter!