Search Results: Michelle Thames

Finger detangle
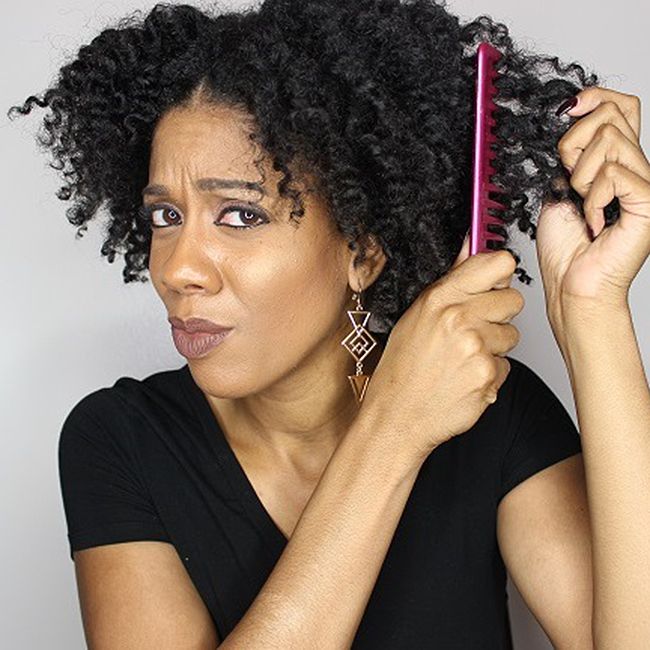
I try to do this process before anything else. I use my fingers to detangle my hair versus using a comb. This technique is good for me, because it is gentle on my hair. I don’t rush when doing this, because I simply want to take my time and untangle the knots in my hair one by one. It may be a lengthy and very thorough process, but it definitely gets the job done.
Detangle from ends to roots
You should never start detangling your hair from the scalp to ends, as it can cause major breakage. It’s best to gently start at your ends and then work your way up. It helps me, because I get through each section and get the job done.
Detangle with conditioner
This method works well for me. While I have my rinse-out conditioner in, I usually go through and detangle a little. The best time to detangle is when your hair is wet and covered in conditioner. Use a conditioner that has a lot of slip and you will be able to get through your detangling session with minimal issues. The more slip the conditioner has, the easier it is for me to get my comb, brush, or fingers through my hair without snags. This definitely helps you minimize breakage, because your hair is smooth and you don’t have to be overly rough to get the tangles out of your hair.
Detangle hair in sections
Please do yourself a favor and detangle your hair in sections. I have made this mistake several times trying to rush through my detangling session and not taking my time to do it in sections. By detangling your hair in sections, you make it easier for yourself. Trust me you don’t want to do this task with huge sections. Your arms will hurt and it will not be a wise choice for your hair. Use clips to help you section off your hair with the process to make life that much easier!
If you follow these tips, you will have less breakage and save more time. This is a process that no natural loves, but it’s important that you take the time to detangle properly for the health of your hair.
How do you detangle without causing breakage?
,0 1px 10px 0 rgba(0,0,0,0.15″>; margin: 1px; max-width: 658px; padding: 0; width: calc(100% – 2px”>;” data-instgrm-version=”7″>Are you newly natural and trying to find the perfect hairstyle while you transition to natural? When I first went natural the first two hairstyles that I learned about were twist-outs and braid-outs, and I still wear these hairstyles all the time. These two styles are probably the most popular hairstyles among naturals. I have always wondered whether naturals think one style is better than the other, so let’s take a look at each and talk about the pros and cons.
Twist-outs
I probably do this style the most. I think that it is probably the most popular style out of the two in my opinion.
Pros: I prefer twist-outs because I feel that they give me the curl definition that I am looking for. I prefer a curlier look and I get that from twist-outs. Also I love that my twist-outs last a long time. I am able to get seventh-day hair when I install twist-outs. In order for me to get seventh-day hair, it is vital that I pineapple at night or retwist at night. I also notice that when I do twist-outs my hair does shrink a bit, but that is ok because I love my shrinkage. As the days go on my twist-outs start to look even better.
Cons: Sometimes twist-outs can get frizzy if you don’t take them down correctly. Also, if you don’t like shrinkage, then this style may not be your favorite. Also, twisting your hair can be time-consuming, so if you are not willing to put the time in for this style, then it may not be for you. Make sure you hair is properly detangled before twisting your hair.
Braid-outs
Braid-outs really stretch my hair and give me a wavy look versus the curly aesthetic from twist-outs.
Pros: Braid-outs give your hair more elongation, so if you don’t like shrinkage, then braid-outs might be the choice for you. Braid-outs are typically known to be less frizzy than twist-outs.
Cons: Sometimes it is a hassle to take down the braids without causing frizz. Also, I find that it takes my hair a long time to dry when I do braid-outs on wet hair. Try it on dry, stretched hair for a quicker set time and more elongation.
I don’t think that one style is better than the other. I believe that it’s simply a matter of preference. Some naturals prefer twist-outs while others prefer braid-outs and that’s perfectly fine. Both styles have their pros and cons, which will differ from one person to another. The products you choose play a major role in your definition and the longevity of your style.
Which style do you prefer? Twist-outs or braid-outs?
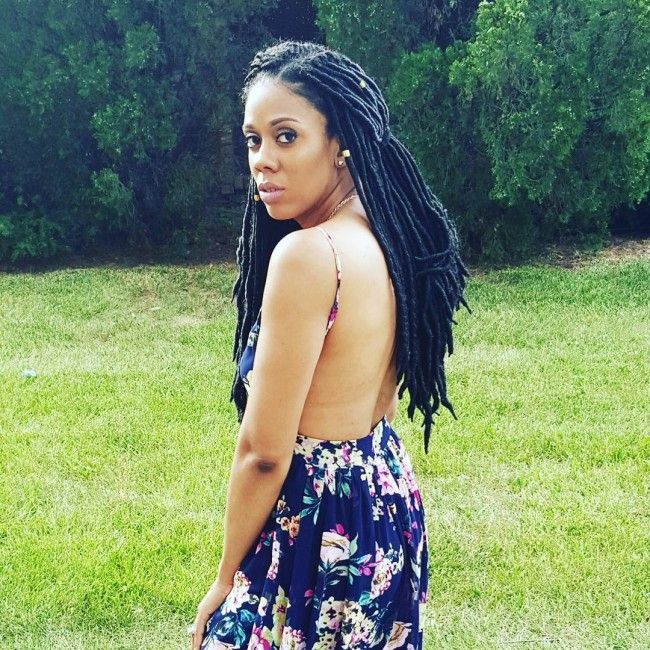
Goddess locs are sleeker than faux locs with a curled finish on the ends. You can thank trichologist, salon owner, and celebrity hairstylist Dr. Kari Williams for creating this super cute style. I remember first seeing this look worn by Meagan Good, who was styled by Dr. Kari Williams. When I first saw goddess locs I instantly fell in love with them, because the style is softer, wavy and more chic look than regular faux locs. Plus, the style looks amazing on anyone who wears it! I found that there are two ways you can install goddess locs. You can install the individual goddess locs or install crochet goddess locs.
How long do they last?
Goddess locs are known to last up to three months with proper maintenance. You should moisturize your scalp and protect your hair at bedtime, but I wouldn’t advise washing them, because it will cause frizz and loosen the locs. You can opt for a stylist to achieve this look, but if you DIY, here are some tips.
Prepping hair before installation
Make sure your hair is clean, deep conditioned, and well-moisturized so that you can get the most out of this style.
Choose the hair
As I stated earlier, you can either install individual goddess locs or crochet. Either way is cute, but choose the best option for you. If you go with individual goddess locs, you will need to choose two types of hair.
Individual goddess locs
The first hair that you will use will be for the base of the goddess locs, which will be a wavy texture. Marley hair will be the second texture that is wrapped along the hair shaft to form the loc.
Check out Donedo’s video on how she achieves flawless goddess locs.
Crochet goddess locs
If you choose to do crochet goddess locs, you will need to braid your hair underneath and then proceed to crochet the locs in. You will use pre-made crochet goddess loc hair for the crochet style. Check out this video on how to install crochet goddess locs.
Styling your goddess locs
I love wearing different styling options when I do any protective style. There are so many ways that you can rock your goddess locs: a bun, half up half down, ponytail, or low bun. The choices are just endless. Check out how Donedo styles her gorgeous goddess locs.
What do you think of goddess locs? Will you try goddess locs for your next protective style?
I transitioned for two years and it was a long process. Before I transitioned, I noticed that my relaxed hair would never retain length past my shoulders and I couldn’t understand why. When my hair was relaxed, I would straighten my hair every day, which caused breakage. One day I decided that I was done relaxing my hair and consulted my hairstylist before starting my journey to healthy hair.
During my transition, I noticed how my hair was changing. My once dull and dry hair began to maintain some moisture. I also noticed how my new growth was much different than my relaxed hair. I noticed the change of texture, because of the line of demarcation. This line is where your new growth or virgin hair meets your relaxed hair. I began to notice how beautiful, strong, and curly hair my new growth was. My new growth was definitely stronger and much healthier than my relaxed hair. Here are a few changes that stood out to me after my transition.
Length
After my transition, my hair began to retain more length. I started doing length checks on my journey, because back when I transitioned I was focused on my hair reaching a certain length. As mentioned before, my relaxed hair experienced a lot of breakage, but while transitioning it grew waist length before my recent cut this year.
Texture
My relaxed hair was limp and dry while my edges were thin. After I transitioned, my hair was much coarser and fuller and my edges were very thick and coarse.
Moisture
After I transitioned I definitely noticed a difference in the moisture of my hair. With a relaxer my hair was always dry and my scalp was not in good shape. I still have dry scalp, but it is nothing like it was when I was relaxed. I would get sores on my scalp from the relaxer and my scalp would bleed. After my transition, I didn’t have any more problems with scabs on my scalp. My hair was able to retain moisture due to my hair care regimen and my hair began to thrive.
It’s a trickle effect. Because my hair was not being stripped of moisture from relaxers and heat straightening, I was able to effectively combat breakage to retain length and see my curls. Moisture is key! Want to see your hair in its optimal health? Reduce or eliminate all damaging practices and watch your hair flourish.
How has your hair changed since you have been natural?
,0 1px 10px 0 rgba(0,0,0,0.15″>; margin: 1px; max-width: 658px; padding: 0; width: calc(100% – 2px”>;” data-instgrm-version=”7″>Since I began my natural hair journey, I have been conscious of what ingredients are in the products that I use for my natural hair. I like to know what ingredients are in the products that I put on my skin and also my hair. I know that looking at ingredient lists can be time-consuming, but it’s well worth it. Many products have ingredients that are drying, which is something that you definitely don’t want. Here are a few ingredients that I avoid in my products.
Bad alcohols
Let’s get one thing straight, not all alcohols are bad for your hair. From research on alcohols, the following are ones are considered short chain alcohols, which are very drying on the hair.
- SD Alcohol 40
- Ethanol Alcohol
- Propyl Alcohol
- SD Alcohol
- Propanol Alcohol
- Isopropyl Alcohol
Some alcohols are good for your hair so don’t get them mixed up with the bad alcohols. Good alcohols are the fatty alcohols that are from animals, plants and oils. In many cases the good alcohols are used in products to help mix ingredients together. For example a good alcohol can be used to mix oil and water in a product so that it does not separate. Good alcohols are actually beneficial and help with slip and detangling. Some of the good alcohols are:
- Cetyl alcohol
- Stearyl alcohol
- Myristyl alcohol
- Lauryl alcohol
- Behenyl alcohol
- Cetearyl alcohol
Sulfates
Another ingredient that I tend to avoid in products is sulfates. Harsh sulfates can be really bad for women with textured hair, so I try to avoid them. Sulfates can dry out your hair and also create frizz. I do, however, use shampoos that contain sulfates once a month to cleanse my hair and get rid of buildup. I tend to look for shampoos that contain the gentler sulfates, but sometimes it can’t be avoided. Sulfates that you should avoid include:
- Ammonium Laurel Sulfate
- Sodium Lauryl sulfate
- Sodium Laureth Sulfate
- Myreth Sulfate
- Sodium Alkybenzene Sulfonate
- TEA dodecylbenzenesulfonate
- TEA Luryl Sulfate
Mineral oil and petroleum
These are two ingredients that I also avoid in products. I typically avoid these two ingredients because they clog my pores and irritate my scalp. Mineral oil is a derivative of crude oil (i.e. petroleum”> that is used industrially as a cutting fluid and lubricating oil. When it is used in natural hair products it undergoes a purification process it is refined into a slippery fluid, which is then ready to be used in a variety of different products on the shelves today. Petroleum weighs down my hair and coats the skin and hair just like plastic wrap, which I don’t like.
Which ingredients do you avoid in your curly hair products?
What’s next?
You can find the ingredients and products Michelle does use in her hair regimen from start to finish.
Like what you see? For more articles like this, sign up for our newsletter!
When I first went natural I found myself trying to fit into a certain hair category within the hair chart. My hair just didn’t fit into any category on the chart and I felt frustrated. Recently, I decided against placing my hair into any category in the hair typing chart. When people ask what is my hair type, I simply say my hair type is H for healthy. My hair has always been different textures all over my head. Some sections are tightly curled and others are loosely curled. Honestly, when I first went natural my hair was somewhat thick and had very loose curls. After I had my baby, my hair changed and it is very thick and kinky.
I have tried products that are supposed to be for those with Type 2 hair and they worked well for me. I think it just depends on what products work best for your hair. I am a firm believer of trial and error for finding products that work for you. Consider partnering up with a curlfriend and swap products.
Instead of using the hair typing system to find products that work for my hair, I use my hair porosity and hair density to determine how to care for my hair. Porosity is your hair’s ability to absorb moisture and it is broken down into three categories: low, normal, and high. I tend to fall in the low porosity category. I feel that porosity is important because when you know your hair’s porosity, you can determine how much moisture your hair needs to thrive. Knowing your hair’s porosity can also help find products that may work well with your hair.
I also believe that knowing your hair density helps with finding products and better understanding your hair. I have high density hair that is very thick, so I have to use products that will help penetrate my hair. I believe that knowing your hair porosity and density helps a great deal, rather than the hair typing chart, but do what works for you.
Do you use the hair typing system? Why or why not?
Over the years my healthy hair regimen has changed several times. It especially changed after I had my first child. If you are newly natural, you may be building your natural hair regimen. If you have been natural a while, you may want to change some things up. No matter where you are in your journey, your regimen should always include cleansing, conditioning, moisturizing, detangling, and styling. Here is my updated natural hair regimen from start to finish.
Cleansing
How often you wash your hair varies from person to person. It really depends on your lifestyle and what works for you. I wash my hair once a week with a moisturizing shampoo and monthly with a clarifying shampoo, because my hair thrives this way. Some may also choose to wash once a week and co-wash every other week. Currently, I am using Design Essentials Natural Almond & Avocado Moisturizing Shampoo and EDEN Bodyworks Peppermint Tea Tree Shampoo.
Conditioning
I believe that conditioning is a very important part of my healthy hair regimen. Conditioning your hair keeps it strong and helps to maintain moisture. Deep conditioning is especially important for those who have color-treated hair and those who use heat frequently. I deep condition once a week with steam, so that I get the best benefits out of my deep conditioning session. I also use a protein deep conditioner once a month to strengthen my hair. My current conditioners include EDEN Bodyworks Coconut Shea Leave in Conditioner, TGIN Honey Miracle Hair Mask, and Crème of Nature Mango and Shea Butter Ultra Moisturizing Conditioner.
Moisturizing
This is another important part of my healthy hair regimen. I suffer from dry scalp, so it is important that I keep my scalp and hair moisturized daily. I usually use almond oil or tea tree oil for my scalp to keep it from getting dry. For daily moisture, I usually spritz my hair with a mixture of water and aloe vera juice to wake up my curls. I also love Design Essentials Natural Daily Moisturizing Lotion while my hair is in an updo or protective style.
Styling
When it comes to styling my hair, I usually try to maintain the least amount of manipulation as possible. Since I have cut my hair, my go-to style has been twists for a few days followed by a twist-out. When my hair was longer, I swore by a top knot bun. It really is up to you. Low manipulation styling is excellent if you are trying to retain length.
In addition to this, I take a multivitamin daily, drink water daily, and protect my hair at night with a satin bonnet. Your regimen may differ, but it is important to maintain a regimen for your hair.
What’s in your hair regimen?
[prodmod]1. Pre-poo
It is very important to pre-poo your hair. Even if you have been moisturizing your hair during your protective style, it will still be a bit dry after removing your protective style. Using a pre-poo definitely helps restore moisture that has been lost while making my hair more manageable and easier to detangle before washing with shampoo.
2. Use a clarifying shampoo
I know that when I take my protective style out, there is always gunk underneath. Clarifying your hair and scalp after a protective style is very important. Using a clarifying shampoo helps to remove all the buildup from your hair. Consider a DIY bentonite clay treatment to detox and clarify your scalp. I always follow up with a moisturizing shampoo after clarifying my hair for added moisture.
3. Use a protein deep conditioner + steam
A quick conditioning is not going to cut it. Your hair has been underneath your protective style and tucked away for weeks. You need to show it some major conditioning love. I always use a protein deep conditioner to help strengthen my hair after protective styling; it’s an absolute must. Adding steam with your deep conditioning session can increase moisture levels and help some conditioners absorb and adsorb. If the directions on your conditioner recommend using steam or heat, this is because the product is formulated with certain ingredients that need the heat for better penetration.
4. Follow up with the L.O.C. Method
After deep conditioning, I follow up with the L.O.C. (liquid, oil, cream”> method for maximum moisture. You seal the moisture in your hair by using this method. I use a leave-in conditioner, oil, and cream.
5. See your stylist for a trim if necessary
In some cases it may be time for your trim after removing your protective style. You want to make sure that your ends are properly cared for. If your ends are rough and split after removing your protective style, then it may be time for a trim. This may not be the case for you, but if you notice that your ends are not healthy, you should definitely consult your stylist for a trim to prevent breakage.
6. Give your hair a break
After your hair has been in a protective style for a while, it is important that you give your hair a break. I usually follow up with low manipulation styles like buns or mini twists for a few weeks. If you constantly install protective styles and don’t take proper care of your hair in-between, it can sometimes hurt your hair more than it helps. It’s important to take stress off of your hair and allow your scalp to breathe.
What is your hair care routine post protective styling?
Like what you see? For more articles like this, sign up for our newsletter!
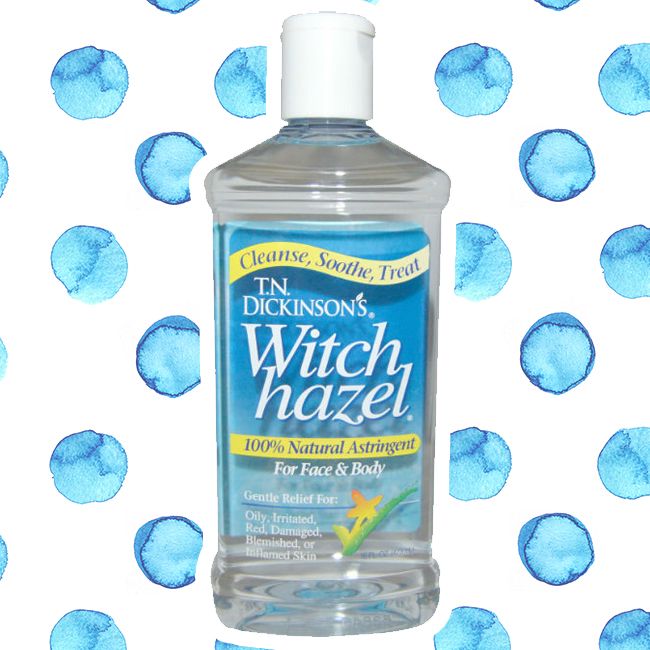
Witch hazel is also known to be the winter bloom, which is a flowering shrub with rejuvenating properties. Although it is popular as a toner, it can be found in shampoos as well. Witch hazel helps to relieve scalp conditions such as an itchy scalp or eczema. Also, witch hazel helps to stabilize an oily scalp without stripping moisture.
Salon Pressure master stylist, Nadling Pollard, swears by witch hazel: “Witch hazel is a mild toning solution for the skin. Your scalp is the skin that covers your hair. Keeping the scalp clean and fresh is an awesome launchpad for health hair growth. Witch hazel is a mild scalp refresher for people who experience dry and flaky scalps.”
Here are some benefits of witch hazel for natural hair:
Treats dandruff
I have an itchy scalp and dandruff. It can be the pits! No one likes having flakes all the time. I have tried many remedies that have not worked as well as witch hazel. Witch hazel as a pre-poo works wonders for my dry scalp. Simply massage witch hazel directly on your scalp before you shampoo. You can dilute with water if you find that it is too harsh.
Helps with scalp irritation
I suffer from a mild case of psoriasis and witch hazel has been a savior for me when I experience a flare up. Witch hazel helps with the healing process of a broken scalp and reduces irritation. As soon as I experience a flare up, I apply witch hazel to the affected area on my scalp and forehead and it clears up within a day! It’s like magic. I am so happy I found this remedy, because when I have a breakout, I don’t feel my best. Witch hazel has helped me a ton.
Helps increase blood circulation to the scalp
Witch hazel is believed to reduce hair loss by helping to grasp the hair follicle into the tissues of the scalp, helping to prevent hair loss.
Now that you know all about the benefits of witch hazel will you use it on your next wash day?
Simply having long hair means absolutely nothing if it’s not healthy.
I can definitely relate to this, because I’ve had long hair my whole life. When I had a relaxer, my hair was on the longer side, even though it was very unhealthy with a relaxer. I decided to long term transition to natural in 2009. I transitioned for two years, because I didn’t want to do the big chop; I just wasn’t ready for a short cut at that time in my life. I cut small portions of my relaxer out each time I visited my stylist, until I was fully natural two years later. It was a long process, but it was the best fit for my situation at the time. I loved my long hair and wanted to achieve the goal of waist length hair.
My big chop
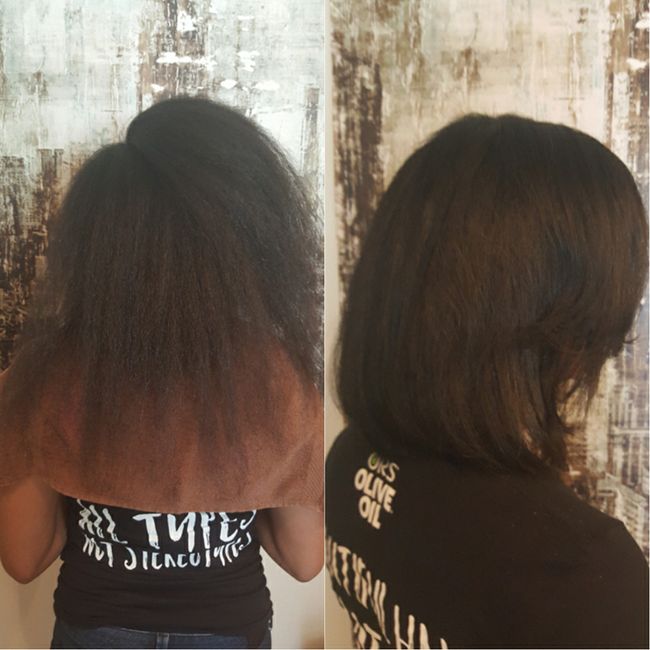
Sometimes life changes and you look at things differently. This month I recently did the big chop and I am not looking back. I absolutely love my new cut that is much shorter than my hair has ever been. This time around I had to cut my hair, because it was severely damaged. I had to let that damaged length go. It wasn’t flourishing because of several reasons. I was simply holding on to my damaged hair in hopes that I could somehow repair it. Truth is I couldn’t repair it, as my ends were thinning due to stress and post-partum changes. Today, I am very much ok with the fact that my hair is no longer near waist length. People were shocked and nearly in tears that I cut my hair, but length isn’t everything. If you have long hair that is damaged and you are not taking care of it properly, there is no point in holding on to that length.
Many times we find ourselves holding on to length, because we have it embedded into our brains that length, any length, is beautiful, but it’s perfectly ok to cut your hair. You don’t need the approval of anyone. I will take healthy hair over length any day. This new journey has taught me to focus on the healthy of my hair over length.
Truth is, short hair is just as beautiful as long hair.
Truth is, short hair is just as beautiful as long hair. I see so many women with super cute short haircuts and it’s amazing! Length truly isn’t everything and you are still beautiful no matter what the length of your hair is.
How do you feel about length? How do you define beautiful hair? What’s keeping you back from letting go of damaged hair?
What’s next?
Read why @rockyorizos declared 2016 the year of letting go.
Let it go, let it go: Your heat damaged hair.
Here are 5 fixes for when your hair won’t let you be great (hint, one of them is letting go”>.
Like what you see? For more articles like this, sign up for our newsletter!

