Search Results: Michelle Thames

Curlee Girlee
Curlee Girlee by Atara Twersky is a story about a girl who wants her hair to be like everyone else’s. She wants her hair to grow long like spaghetti down her back, not sideways and curly like her hair grows. She tries so many ways to look like everyone else but nothing works. Curlee Girlee finally realizes that her hair is fine just the way that it is and that she doesn’t need to look like everyone else.
” src=”https://diana-cdn.naturallycurly.com/Articles/nM_Books-650×650-2.png”>
Emi’s Curly Coily, Cotton Candy Hair
This story by Tina Olajide is about Emi, a 7-year-old girl who shares a positive message about her curly, coily, cotton candy hair and what she likes most about it. The fun story teaches basic natural hair care tips and techniques in a playful and memorable way.
” src=”https://diana-cdn.naturallycurly.com/Articles/S7_Books-650×650-3.png”>
Penny and the Magic Puffballs
This story is about Penny by Alonda Williams, a girl who wanted to wear her hair “down” like all of the other girls in her class. Penny wondered why her friends had long straight hair and she did not, which made her feel sad. Penny’s mom decides to style her hair in magical puffballs. In the story, Penny learns through a series of fun adventures where wonderful and magical things happen when she wears her puffballs.
” src=”https://diana-cdn.naturallycurly.com/Articles/bl_Books-650×650-4.png”>
Big Hair Don’t Care
This rhyming picture book by Crystal Swain- Bates is about a girl named Lola who has huge hair. Her hair causes her to lose at hide and seek and blocks the view of anyone who sits behind her. This book is designed to boost self-esteem and build confidence. It’s perfect for any girl or boy who has ever felt self-conscious about their hair and may need a reminder that it’s okay to look different.
” src=”https://diana-cdn.naturallycurly.com/Articles/TZ_Books-650×650-5.png”>
I’m a Pretty Princess
This rhyming and picture book by Crystal Swain- Bates features Makayla, a pretty princess who lives in a castle far away. She knows that being a princess isn’t just about her fancy things and that she has to put in work to be the best princess she can be. At the end of this story, Makayla realizes that “It’s not my castle, my wand, or the dress that I’m in.”
” src=”https://diana-cdn.naturallycurly.com/Articles/qk_Book-650×650-5.png”>
June Peters, You Will Change The World One Day
This story is about June Peters, a 10-year-old girl who has a very giving heart. June is determined to make a difference in the world and she will do whatever it takes to do that. June learns a valuable lesson about talking to strangers. She’s a naive young girl who does not understand why her act of kindness makes some people happy but also worries her parents. This story encourages children and adults help those in need.
” src=”https://diana-cdn.naturallycurly.com/Articles/sB_Book-650×650-6.png”>
Happy Hair
This is a picture book by Mechal Renee Roe that promotes positive self-esteem. Happy Hair shares love for different shades and hair types.
” src=”https://diana-cdn.naturallycurly.com/Articles/4j_Book-650×650-7.png”>
Princess Cupcake Jones and the Missing Tutu
Want your child to get in the habit of cleaning up after herself? This story by Ylleya Fields is about Cupcake learning the importance of tidying up and putting things in their proper place when her tutu goes missing.
What are your favorite children’s books for your curly kiddos?
SheaMoisture is a brand that continually expands to meet the different needs of their consumers. The brand started the Break the Walls campaign, challenging a segregated “beauty” and “ethnic” shopping experience. They launched phase two of the campaign several months later, challenging the notion of “normal hair.” SheaMoisture currently offers 150 different products for every kind of normal.
” src=”https://diana-cdn.naturallycurly.com/Articles/Cw_Coconut-650-2.png”>
SheaMoisture was one of the first brands I tried when I went natural. It has always been a brand that curly-haired women trust, so I had no hesitation in testing out many of their product lines. After SheaMoisture gave a sneak peek of its new SheaMoisture collection on its Snapchat, we spoke with textured hair guru, celebrity stylist and SheaMoisture brand ambassador Diane C. Bailey about the new 100% Virgin Coconut Oil collection and when we can expect to see it in stores.
” src=”https://diana-cdn.naturallycurly.com/Articles/0V_Coconut-650-5.png”>
What’s in the collection?
The new line contains lightweight formulas that deliver basic hydration, and can be used on all hair textures and types.
- The Daily Hydration Shampoo aims to cleanse and nourish the hair.
- The Daily Hydration Conditioner rehydrates and softens the hair.
- The Daily Hydration Leave- In treatment detangles, protects, and controls frizz while improving styling manageability.
- The Daily Hydration Finishing Oil Serum will smooth, protect, and add shine to the hair. This fast absorbing, silicone-free treatment contains the lightness of a milk with the potency of an oil. This is used as a finisher to lock in moisture and tame unruly flyaways for a healthy-looking shine.
How is this line different from the other collections?
This collection harnesses the power of coconut oil to nourish and beautify hair, and provides daily hydration for all hair types and textures. It may be used each and every day in any climate. I love that it’s loaded with extra virgin coconut oil, which is rich in fatty acids to support healthy hair growth. It also includes acacia Senegal to promote a balanced scalp and bring vibrancy back to dull, lackluster hair.
Can we expect a masque or deep conditioner with this line?
The rinse-out conditioner also works beautifully as a deep treatment masque. I recommend applying to damp hair, putting under a plastic cap, then using with a steamer for maximum results. You can also use it as a sleeping masque and rinse out in the morning. It’s great to use this way if hair is brittle.
Is there a need to cocktail this with the pure coconut oil product, or any other products?
I love cocktailing and it’s all up to you for what works best for your hair. This collection does offer comprehensive care, so if it you want it all in a simple collection – this is it.
Is this product line oily or greasy on the hair?
The collection offers maximum moisture, but isn’t greasy or heavy, and won’t weigh down hair.
When and where will the line be available?
SheaMoisture 100% Virgin Coconut Oil haircare collection is available online now at CVS.com, and will be more widely available in select CVS stores in early 2017.
NaturallyCurly World, will you be trying the new SheaMoisture 100% Virgin Coconut Oil Collection?
*Editor’s note, this article has been updated for accuracy.
1. Start out with clean hair
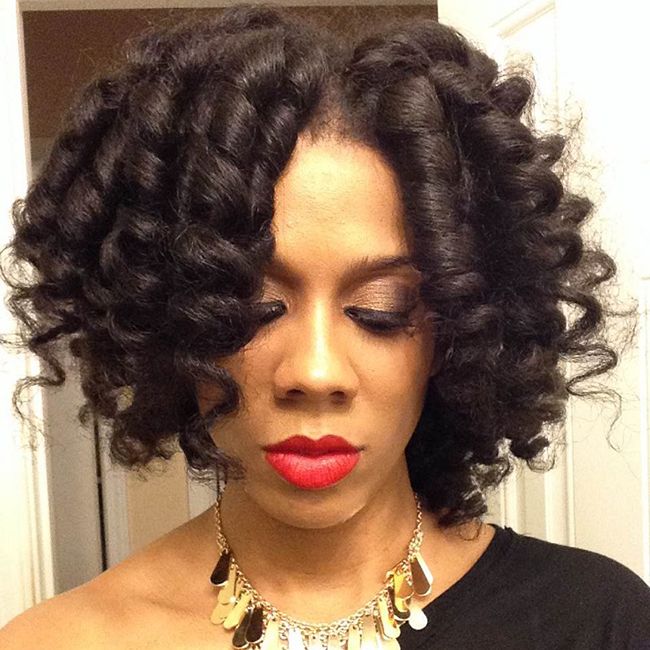
You want to make sure that you are starting your roller set with clean hair that has been washed, conditioned, and moisturized. You should also detangle your hair before starting this style. You will get smoother results on clean detangled hair that has been moisturized.
2. Use rollers that have a smooth finish
Some rollers have ridges or small teeth. Make sure that you are using rollers with a smooth texture, such as perm rods (without ridges”> or flexi rods. This will ensure that when you take your rollers out, your hair is not getting caught on the ridges or rough parts of the rollers.
3. Use a setting lotion or styling foam
Using foams and setting lotions reduce frizz. My favorite setting lotions and foams are Lottabody Style Me Texturizing Setting Lotion, Crème of Nature Style & Shine Foaming Mousse, and Design Essentials Natural Curl Enhancing Mousse. Also, when styling you should make sure to brush or comb each section with a Denman brush or rat tail comb for smoother curls.
4. Don’t put too much hair on each roller
Too much hair on one roller is more likely to slip off the roller and cause frizz from the roots to the ends. It also slows down your drying time and doesn’t allow for the fullest elongation at the roots, making it challenging to roller wrap if you wanted to.
5. Make sure your hair is completely dry
This is probably the most important step to achieving a frizz-free roller set. If you remove your rollers when your hair is not completely dry, your hair is guaranteed to frizz, especially in climates with high humidity and high dew points. I have been there way too many times and it is not a good look for your roller set. Sitting under the dryer will expedite the drying time, especially if your hair is high density.
6. When separating use an oil
Consider using a lightweight oil to separate your curls, but don’t fluff too much, as this can create unwanted frizz. Avoid heavy oils that can cause your style to feel weighed down and accumulate buildup easily. My favorite oil of choice to use for the takedown is Mielle Organics Mint Almond Oil.
7. Protect your hair at night
As with any style, protecting your hair at night is important. In this case, it will also help keep your frizz at bay. I usually put my curls into a pineapple and then cover my hair with my satin bonnet.
How are you keeping your roller sets frizz free?
Check out this video on tips to create your next frizz-free roller set.
Read next: Our editors tried 4 different types of rollers, these were their results.
Like what you see? For more articles like this, sign up for our newsletter!
[prodmod]Wash your extensions before wearing them
It is best to wash your extensions before you wear them. Before washing, most extensions usually have a gloss that does not match most hair textures, so washing the extensions is essential to making them blend with your hair. Use a gentle shampoo and condition the extensions and allow them to air-dry. In order to avoid breakage and frizz, remember to be gentle, work in sections if necessary, and always stroke the hair downward.
Get the color that best matches your real hair
Don’t go for the bold red if your hair is brown. The perfect color match is key in making extensions look natural. If you pick a shade that is too light or too dark, it can make your extensions really stand out. You can also color your extensions if your hair is colored to help them match your hair color.
100% human hair is best
If you want your hair extensions to look the most natural, it’s best to use 100% human hair extensions. It provides more versatility than synthetic hair for every reason. You can also curl, straighten, and color human hair extensions, helping you blend them perfectly. They also last longer than synthetic hair when properly cared for.
Style them
Whenever I wear hair extensions, I twist them just like I would twist my own hair. If your real hair has layers, you may want to cut layers into your extensions to remove the blunt ends and better conceal the extensions. You can also mix the extensions with your real hair by smoothing them with your fingers, comb, or detangling brush and twisting them together.
Less is actually more
You don’t have to use all the extensions that come with your bundle. If you use a few wefts in the back and some in the middle while leaving a bigger portion of your hair out at the top, this will help your extensions appear more natural. I usually do a twist-out with the top of my hair and just pin the back portion.
What helps you blend your natural hair extensions?
Read Next: The Different Methods for Installing Extensions and A Revealing Guide to Buying Hair Extensions
For your top knot bun you will need these tools and products to help create this style:
- Gel or edge control
- Bristle brush
- Bobby pins
- Stretchy headband or ponytail holder
- Added hair (If necessary”>
- Satin scarf
Check out these tutorials on the best high buns of YouTube.
Short natural hair
Just because you have short hair doesn’t mean that you can’t rock a cute top knot bun. For more volume, add hair extensions and use a good gel to hold your hair and edges in place.
Did you know that you can achieve a top knot using clip-ins? Work with what you have.
You can also rock a messy bun with short natural hair using a curly wig.
Medium/long natural hair
If your hair is medium length, it is likely long enough for you to create a top knot or high bun without using added hair.
You can also achieve a high bun on semi straightened or stretched medium length hair.
A high bun is achieved on type 4 natural hair that is medium length.
You can also try a top knot, half up half down look.
This sleek top knot bun is done on longer length hair.
This tutorial is a very chic version of the classic top knot bun. It features lots of height and personality.
Try pulling your hair upward and tucking inward, securing the style with bobby pins.
Now that you have had a chance to check out the different top knot/high bun tutorials, will you give this super chic and easy style a try?
Read next: How I care for my hair post protective styles and 15 Products perfect for protective styling
Co-washing is key
Co-washing is the key to maintaining soft and manageable extensions. I usually try to co-wash my extensions weekly to keep them looking shiny and soft. A few co-washes that I like to use are EDEN Bodyworks Coconut Shea Cleansing Co-wash, Mielle Organics Detangling Co-Wash, and Aunt Jackie’s Curls & Coils Flaxseed Recipes Purify Me Moisturizing Co-Wash Cleanse.
Use shampoo sparingly
It is best to use a sulfate-free shampoo when you need to cleanse your extensions. Harsh sulfates can strip the hair of its moisture. This is why co-washing is preferred over washing with shampoo. If the extensions have extensive product buildup, you can use a clarifying shampoo to remove buildup. If you go this route, make sure to follow up with a very moisturizing leave-in conditioner. I recommend Crème of Nature Certified Naturals Mango & Shea Butter Moisturizing Shampoo and Curls Blueberry Bliss Reparative Leave In.
Detangle gently
You want to make sure that you are detangling your extensions properly. The tools that you use on your extensions will affect how long they will last. It is best to use a wide tooth comb or a Denman brush to detangle your extensions. This will help keep the shedding to a minimum. It is also best to comb and detangle your extensions while the hair is damp or wet.
Let your extensions dry naturally
For my clip-in extensions, I let them dry naturally for minimal tangles. I place them on a towel or hang them on my shower and let them dry naturally before placing them in my hair.
Use minimal heat
Yes, your extensions can obtain heat damage just like your real hair can. If you must use heat on your extensions make sure that you are using the lowest setting possible. I tend to shy away from using a lot of heat on my extensions to prevent heat damage.
Store your extensions with care
When storing your extension you should place your extensions in an airtight container or breathable bag that is large enough to fit your extensions comfortably. Make sure that they are clean and completely dry before storing them away. You would not want to come back and find them full of mold and smelly.
How do you care for your extensions?
Read Next
10 Natural Hair Extensions That Will Make Them Think It’s All Yours
Before adding Clip-ins Do This
Like what you see? For more articles like this, sign up for our newsletter!
[prodmod]Get a protective style
This is probably the best thing that you can do to keep your hands out of your hair. Protective styling offers the ability to keep your strands tucked away. You will not be able to mess with your actual hair while in a protective style. Give your hair a break and install a cute protective style. A few good protective styles to try are Marley twists and crochet braids.
Wear low manipulation styles
Low manipulation styles like mini twists, buns, and halo braids are also a really good option to avoid putting your hands in your hair. One simple style we love is this halo braid.
Rock an updo
Updos are another style that can help to keep your hands at bay. There are so many cute updo styles that you can create, and they also can last a few weeks. Check out these super cute updo inspirations.
Wear a head wrap
Head scarves are a stylish means of keeping your hands out of your hair. Learning how to wrap your hair can be challenging, but once you get the hang of it, you might get addicted. Check out these super cute head wrap styles for some fierce inspiration.
Get your mind (and hands”> on something else
Prevent idle hands by focusing on something else. Try to engage in activities that keep your hands busy such as exercising, writing, cooking, or whatever hobby rejuvenates you. Personally, cleaning is my way of getting my mind off of things when I find myself touching my hair too much.
Not sure if you have hair in hands syndrome? Take this quick quiz.
How do you prevent putting your hands in your hair?
Why clean your hair tools?
Your hair tools and accessories come in contact with your hair, products, and the everyday elements. Hair tools collect dirt, dead skin, and buildup on a daily basis. Hair tools tend to get ignored, because sometimes we’re so busy caring for our hair that we forget to wash our tools. Clean hair tools will ensure that you are not adding any more particles or residue back to your hair after washing.
We spoke with Kyra Allen-Brown, a licensed cosmetology educator at Chicago Curl Collective, and she said “There is a saying that you are only as good as your tools, therefore you have to take care of them.” Kyra uses 99.9% alcohol to sanitize her tools between clients. She also told us that, “At the end of the night it is definitely important to drop your tools, such as combs, into barbecide to ensure that you are cleaning your tools effectively.”
How to clean your hair tools
Here are a few tips on how you can clean your hair tools at home.
- Remove debris – Use a toothpick or your fingers to remove as much hair as possible from your tools.
- Soak – Soaking your tools in warm water with dish soap or a clarifying shampoo will help to soften and remove dirt, debris, and product buildup.
- Use a toothbrush – After you finish soaking your tools, use a toothbrush to clean the remaining debris from the tools. Rinse when finished.
- Dry your tools – Use a cloth or paper towels to dry your tools. When drying brushes make sure to lay the bristles downward on the towel to prevent the water from sitting in the bristles. This will help prevent the water from loosening the bristles and housing bacteria. You can also use a blow-dryer to expedite the process.
If you are using any wooden tools or accessories, avoid soaking your tools for long periods of time to prevent cracking.
Do you clean your hair tools and accessories on a regular basis?
Read next 5 Tools That Make Natural Hair so Much Easier and 5 Hair Tools you’re Probably Using Wrong.
Styles with a lot of extensions
Toddlers are very active and sometimes protective styles seem like the only means to avoid daily maintenance for some parents, but if the style requires too much hair to be added, this can add stress on the hairline and even crown. If you plan to do protective style on your toddler’s hair, just make sure use lightweight extensions that will not causes pulling, breakage, and potential migraines.
Tight Ponytails and Puffs
In 4 Things that are Breaking Your Child’s Hair I addressed how, when used too tightly, rubber bands can cause breakage. Styles with too many ponytails and accessories that pull on the hair may not be good for toddlers. If you are creating a puff or ponytail, make sure that it is not repeated for too many days in a row. Repeated high puffs or ponytails can lead to thinning edges. Remember that too much of anything is bad. Make sure their edges flourish by switching up the style every week.
Tight French Braids
If done correctly, braids are a great option. When installed too tightly, they can irritate damage the scalp and cause breakage. If your child’s scalp is turning red or you see inflammation, that means it is irritated and probably hurts. Be gentler and don’t stress the flyaways and frizz.
Overall, you want to create simple hairstyles while also being cautious about causing breakage and damaging your child’s scalp.
Read Next 10 Product Lines Gentle Enough For Your Curly Kiddos
Step 1. Keep the curls moisturized
This is such an important step that it’s almost always missed, especially at bedtime. When caring for your curly kid’s hair you want to make sure that you are always keeping their hair moisturized. Moisturize your little one’s curls every single night by just spritzing the hair with a little water, or create your own DIY mixture of water and leave in. I like to use water mixed with my favorite leave-in conditioner, Mielle Organics Organic White Peony Ultra Moisturizing Leave-In Conditioner. It is lightweight and chock-full with moisturizing ingredients such as coconut oil and jojoba oil to help your hair retain the moisture it needs. You can also do this if your child’s hair is in a protective style.
Step 2. Protect hair with satin bonnet, scarf, or pillowcase
Using a bonnet on your child’s natural hair will prevent it from drying out. My daughter actually loves wearing her satin bonnet at night. If not protected, our curlies hair can rub against cotton pillowcases, which can cause friction, leading to breakage and dry hair. We never go to bed without our satin bonnets on. If you find that your little one’s bonnet does not stay on at night, try replacing her cotton pillowcases with satin pillowcases. Sometimes those bonnets fit too tightly on their heads and cause discomfort. This is an effective alternative to the bonnet. Although deciding to forgo the satin scarf or bonnet will not preserve the style as long, at least their hair will not be dry.
Step 3. Stay consistent
The key to any successful regimen is to stay consistent. If you stay consistent with your child’s bedtime regimen, it will keep you on track. Start introducing bonnets and scarves at an early age, because your child will get used to them and it won’t be foreign to them as time goes on.
What do you use on your toddler’s hair at bedtime?
What’s next?
These tips work well for us, but here are 4 things I never use on my child’s hair.
Have you noticed your child’s hair changing over time? This is why.
Follow us on Instagram and Facebook for more inspiration and tips.
Like what you see? For more articles like this, sign up for our newsletter!
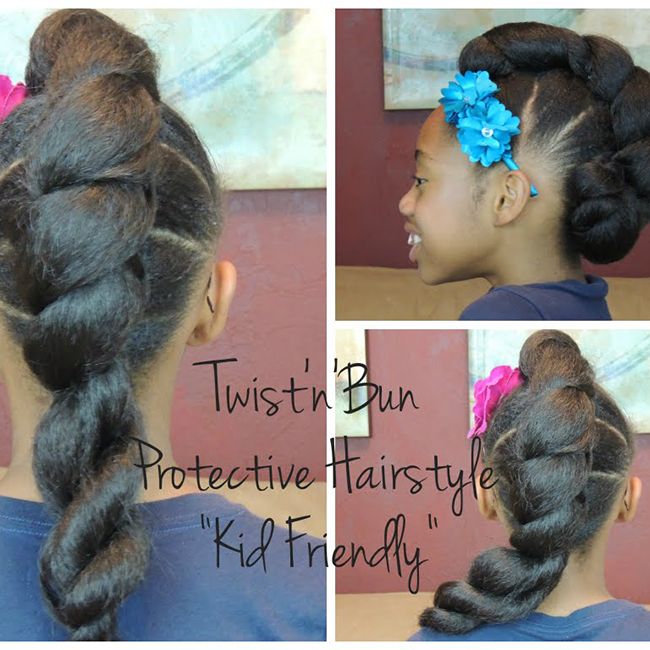
Twist and bun
This is a very cute protective style option for your child’s hair. It is easy to create and does not take a lot of time. For this style you will use Kanekalon braiding hair. You can also add to the style with a cute headband or bow.
Cornrows and twisted style
For this style, Marley braiding hair is used. The hair is braided to the side with extensions added. If you want the hair to look curlier you can add the perm rods, but perm rods are optional.
Crochet braid French twist ponytail
Crochet braids are a very cute style on both kids and adults. This style showcases French braids that are braided into a bun with twists crocheted around the bun to create a ponytail. This is a very cute and kid-friendly protective hairstyle option for kids.
Crochet braid layered curls
This cute style is ideal for younger children. For this style you will use soft dread hair and cut it in half and then crochet it in, leaving space in between, so that it is not too full and heavy. Don’t forget to separate the curls for added volume.
Havana mambo twists
Havana mambo twists are another style option for your little one. For this style the hair is French braided all over. The twists are then crocheted into the back half of the hair only, leaving some French braids at the top and twists in the back.
Caring for Your Child’s Protective Style
Remember that low-maintenance hairstyles still require some maintenance. Be sure to keep the scalp moisturized by spritzing it with a leave-in conditioner or braid spray. Also remember to protect the hair at night with a satin scarf, bonnet, or pillowcase, so that the style lasts and also to prevent breakage.
Check out 4 Things I never use on my child’s hair.
With different styling options available will you try out extensions on your child’s hair?
Barrettes
We all want to accessorize our children’s hair, but sometimes if barrettes are not used correctly, they can pull and break the ends. Small babies and toddlers are known to pull at their hair, so barrettes on the ends are not a good idea. Wait until your child is at the age where they will no longer pull on their hair, reducing the amount of breakage.
Tight headbands
I know that headbands are cute for young girls, but if too tight, they could pull strands along the hairline and cause breakage. Be mindful that hair along the edges tends to be finer and therefore more fragile than hair in other sections. Many hair accessories, including headbands, now put the recommended age range on the packaging, so that you are able to determine the correct size.
Styling combs
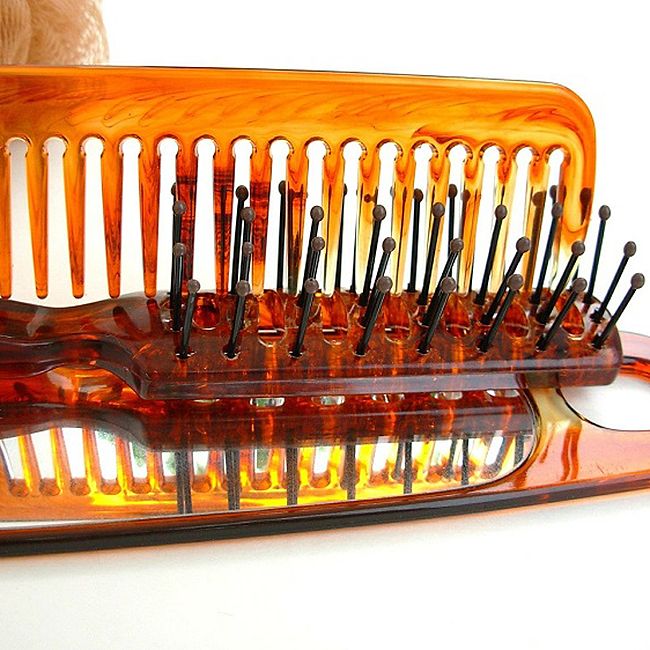
Different styling combs could also be the culprit that is breaking your child’s hair. Sometimes parents don’t know the proper combs that should be used for detangling versus styling. Detangling with a rat tail comb causes breakage and styling with a detangling comb will not provide polished results. The tangle tamer is an excellent tool for detangling children’s hair. Rat tail combs are used for styling and creating clean parts while detangling combs have wide teeth for gently unraveling knots.
Rubber bands
If used too tight, some rubber bands can pull the hair. They are known to pull hair too tight and strands get easily tangled around them. If you have used rubber bands on your hair before, you know that removing them can be a nightmare. There can be lent and tons of shed and broken care. Always remove with scissors to prevent more tangling and broken strands. A great alternative for rubber bands is Ouchless elastic band.
What are you favorite accessories and tools that don’t break your child’s hair?
Read next 4 Things I Never Use on My Childs Hair and learn about 7 Natural Curly Hair Kids Products That You Will Feel Great About Using.
Pre-poo
Pre-pooing has so many benefits for your child’s hair. Simply apply a little oil (like grapeseed oil”> to your child’s hair the day before wash day to help release tangles. Grapeseed oil is amazing, because it helps lock in moisture and contains vitamin E, restoring shine to the hair. Sometimes their hair can become dry during the colder months, so it really helps keep it moisturized.
Apply water/leave-in conditioner
You can also mix water with a leave-in conditioner and apply it to her hair to help with detangling. You never want to detangle your child’s hair while it is completely dry. Although hair is strongest when dry, it is easier to manipulate when damp, reducing the risk or amount of breakage. This also reduces tension on the scalp which means less tears.
Detangle
To prepare for wash day, you should make sure that your child’s hair is somewhat detangled before you get started on wash day. Detangling prior to wash day makes helps to reduce the chances of matting when her curls are activated with water. Pre-pooing goes hand in hand with the following step.
Part hair in sections
Once you finish detangling your little one’s hair, part it into four sections and braid it loosely to prepare for wash day. This helps to thoroughly rinse out product, buildup, and shed hair. Sectioning also helps to reduce breakage and expedite the washing process.
Have fun
Have fun preparing for wash day. It doesn’t have to be a daunting task. Make it a fun game! Sing a song or hide all of the tools and let your little curlie find them. Use it as an opportunity to give her your undivided attention. Keep her engaged and not be afraid of wash day. Explain the process as you go from step to step. If we teach our kids that wash day is fun and exciting, you can ease their fears over time. Now let’s have some fun and get to wash day with ease!
How to you prep your child for wash day?
Read next what did and didn’t work for my toddler on wash day.
Where to wash her hair
When my daughter was a small baby I was able to wash her hair in the bathtub. At that time she didn’t have as much hair as she does now, so it was easy just to shampoo it in the tub and rinse. Now that she is two, we have since moved our wash days to the kitchen sink. I lay her on her back and prop a pool noodle under her neck for support. That’s my little hack for washing your child’s hair in the sink. It’s definitely easier for her to lay back and get her hair washed and rinsed versus the bathtub as a toddler. We have fewer tears and it’s less stressful for me.
How to keep her busy
As we know children don’t like to sit still for a long period of time and wash day is no different. Distractions will help to get your little one through the process. I don’t know about you, but my daughter doesn’t like to get her hair washed at all. In order for us to successfully get through wash day smoothly, she needs a distraction. I have found that she will cooperate if she is able to watch her favorite show on her tablet. I am able to get through washing and styling all while she is watching Peppa Pig on YouTube.
Styling
I found that washing and styling at night didn’t work well for us. She would be really tired and fussy so it was never a success. Now I set aside wash day for the morning immediately followed by styling. I find it easier to get wash day over with early in the morning when we are both energized. I usually do mini twists on her hair for styling, because they can last up to a week without restyling. When the twists get old, I just untwist them and she wears a twist-out or a puff until wash day rolls around again. I typically wash her hair once a week. This routine works for us, but you may find it is easier to wash and style on a biweekly basis.
Nighttime routine
Since my child was a small baby I have always protected her hair with a satin bonnet at night. I figured we would start early with this routine, so that she would be used to it by the time she was a toddler. She actually likes wearing it to bed, because we have a matching set. I purchased our bonnet set from Ebonicurls. You must teach your child that it’s important to protect her hair at night. It’s fun and I love the look on her face when it’s time to put on our bonnets.
What did you find did or didn’t work for you and your child on wash day?
Detangle in sections
Detangling is not something that can be rushed through or looked over. Yes the task is a tough one for both parties, but it must be done. Detangling my daughter’s hair in sections has made my life and wash day so much easier. On wash day I separate my daughter’s hair into four sections and add conditioner to her wet hair. The conditioner helps add slip and makes the process much easier. Never detangle your child’s hair while it’s dry. To release tangles I use a Tangle Tamer or a wide tooth comb to help ease the tears and remove knots. Always detangle from the ends to roots, starting off slow and not being overly rough.
Moisturize often
Moisture is the key to everything. Keeping your child’s hair moisturized can help with the styling process. Water-based moisturizers will help to keep your child’s hair soft and manageable. You will be able to easily detangle and style your child’s natural hair if you keep it properly moisturized. I use water daily and apply a light moisture mist or milk to her hair daily for maintenance.
No tight braids or styles
I do not create tight braids or hairstyles on my child’s hair. Tugging and pulling can cause breakage and damage your little ones’ edges, because their hairline is very sensitive. When creating hairstyles, make sure that you are being gentle and not braiding your child’s hair too tight to prevent tension around the edges of the hair. I prefer to create protective styles such as medium twists that can be worn for multiple days. This helps to prevent over styling and too much manipulation.
Protect their hair at night
It’s also important to protect your child’s hair at night so that it doesn’t get matted or tangled. Satin bonnets help to protect the hair at night so that when you get to wash day, you won’t have a hard time detangling matted hair.
How are you gentle with your child’s hair?
Finger detangle
I try to do this process before anything else. I use my fingers to detangle my hair versus using a comb. This technique is good for me, because it is gentle on my hair. I don’t rush when doing this, because I simply want to take my time and untangle the knots in my hair one by one. It may be a lengthy and very thorough process, but it definitely gets the job done.
Detangle from ends to roots
You should never start detangling your hair from the scalp to ends, as it can cause major breakage. It’s best to gently start at your ends and then work your way up. It helps me, because I get through each section and get the job done.
Detangle with conditioner
This method works well for me. While I have my rinse-out conditioner in, I usually go through and detangle a little. The best time to detangle is when your hair is wet and covered in conditioner. Use a conditioner that has a lot of slip and you will be able to get through your detangling session with minimal issues. The more slip the conditioner has, the easier it is for me to get my comb, brush, or fingers through my hair without snags. This definitely helps you minimize breakage, because your hair is smooth and you don’t have to be overly rough to get the tangles out of your hair.
Detangle hair in sections
Please do yourself a favor and detangle your hair in sections. I have made this mistake several times trying to rush through my detangling session and not taking my time to do it in sections. By detangling your hair in sections, you make it easier for yourself. Trust me you don’t want to do this task with huge sections. Your arms will hurt and it will not be a wise choice for your hair. Use clips to help you section off your hair with the process to make life that much easier!
If you follow these tips, you will have less breakage and save more time. This is a process that no natural loves, but it’s important that you take the time to detangle properly for the health of your hair.
How do you detangle without causing breakage?
,0 1px 10px 0 rgba(0,0,0,0.15″>; margin: 1px; max-width: 658px; padding: 0; width: calc(100% – 2px”>;” data-instgrm-version=”7″>Are you newly natural and trying to find the perfect hairstyle while you transition to natural? When I first went natural the first two hairstyles that I learned about were twist-outs and braid-outs, and I still wear these hairstyles all the time. These two styles are probably the most popular hairstyles among naturals. I have always wondered whether naturals think one style is better than the other, so let’s take a look at each and talk about the pros and cons.
Twist-outs
I probably do this style the most. I think that it is probably the most popular style out of the two in my opinion.
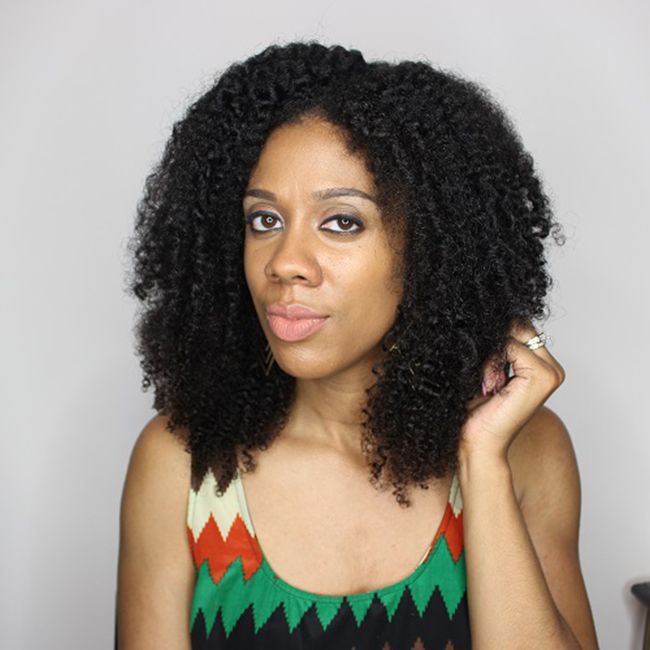
Pros: I prefer twist-outs because I feel that they give me the curl definition that I am looking for. I prefer a curlier look and I get that from twist-outs. Also I love that my twist-outs last a long time. I am able to get seventh-day hair when I install twist-outs. In order for me to get seventh-day hair, it is vital that I pineapple at night or retwist at night. I also notice that when I do twist-outs my hair does shrink a bit, but that is ok because I love my shrinkage. As the days go on my twist-outs start to look even better.
Cons: Sometimes twist-outs can get frizzy if you don’t take them down correctly. Also, if you don’t like shrinkage, then this style may not be your favorite. Also, twisting your hair can be time-consuming, so if you are not willing to put the time in for this style, then it may not be for you. Make sure you hair is properly detangled before twisting your hair.
Braid-outs
Braid-outs really stretch my hair and give me a wavy look versus the curly aesthetic from twist-outs.
Pros: Braid-outs give your hair more elongation, so if you don’t like shrinkage, then braid-outs might be the choice for you. Braid-outs are typically known to be less frizzy than twist-outs.
Cons: Sometimes it is a hassle to take down the braids without causing frizz. Also, I find that it takes my hair a long time to dry when I do braid-outs on wet hair. Try it on dry, stretched hair for a quicker set time and more elongation.
I don’t think that one style is better than the other. I believe that it’s simply a matter of preference. Some naturals prefer twist-outs while others prefer braid-outs and that’s perfectly fine. Both styles have their pros and cons, which will differ from one person to another. The products you choose play a major role in your definition and the longevity of your style.
Which style do you prefer? Twist-outs or braid-outs?
Goddess locs are sleeker than faux locs with a curled finish on the ends. You can thank trichologist, salon owner, and celebrity hairstylist Dr. Kari Williams for creating this super cute style. I remember first seeing this look worn by Meagan Good, who was styled by Dr. Kari Williams. When I first saw goddess locs I instantly fell in love with them, because the style is softer, wavy and more chic look than regular faux locs. Plus, the style looks amazing on anyone who wears it! I found that there are two ways you can install goddess locs. You can install the individual goddess locs or install crochet goddess locs.
How long do they last?
Goddess locs are known to last up to three months with proper maintenance. You should moisturize your scalp and protect your hair at bedtime, but I wouldn’t advise washing them, because it will cause frizz and loosen the locs. You can opt for a stylist to achieve this look, but if you DIY, here are some tips.
Prepping hair before installation
Make sure your hair is clean, deep conditioned, and well-moisturized so that you can get the most out of this style.
Choose the hair
As I stated earlier, you can either install individual goddess locs or crochet. Either way is cute, but choose the best option for you. If you go with individual goddess locs, you will need to choose two types of hair.
Individual goddess locs
The first hair that you will use will be for the base of the goddess locs, which will be a wavy texture. Marley hair will be the second texture that is wrapped along the hair shaft to form the loc.
Check out Donedo’s video on how she achieves flawless goddess locs.
Crochet goddess locs
If you choose to do crochet goddess locs, you will need to braid your hair underneath and then proceed to crochet the locs in. You will use pre-made crochet goddess loc hair for the crochet style. Check out this video on how to install crochet goddess locs.
Styling your goddess locs
I love wearing different styling options when I do any protective style. There are so many ways that you can rock your goddess locs: a bun, half up half down, ponytail, or low bun. The choices are just endless. Check out how Donedo styles her gorgeous goddess locs.
What do you think of goddess locs? Will you try goddess locs for your next protective style?


