Search Results: Jascmeen Bush

As much as I am enjoying my natural hair journey, it does seem like each phase comes with its own set of struggles.
When I had a TWA I complained of my lack of versatility, and now in the awkward phase I am dealing with the, well–awkwardness. *Maybe I am just like my mother, she is never satisfied.*
I would define the awkward phase as when your curls have started falling somewhere between your ears and shoulders. Of course, I cherish every itty bitty hair on my head but come on, I miss my updos.
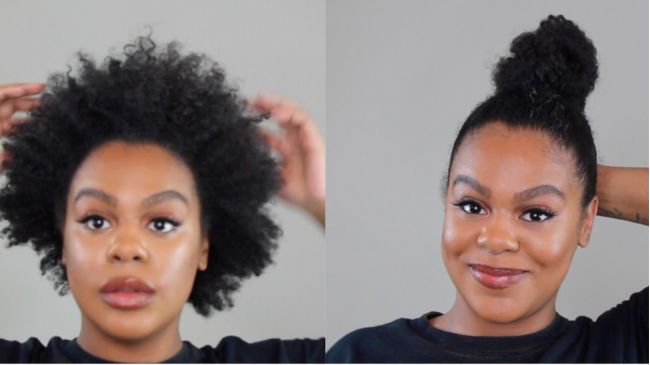
As luck would have it, I came across a pretty cool bun video on Facebook. A mom was showing how she got her daughter’s curls into a high bun and her hair was almost reaching her shoulders.
If this could work for a little girl, maybe it could work for me, too, I thought.
My styling secret
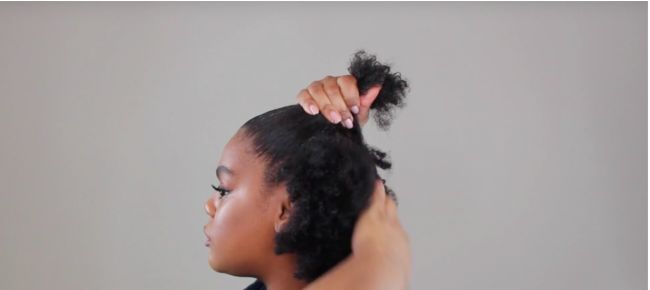
The trick is to make two ponytails close to one another. That way, the shorter hair near the nape of your neck do not fall out of your top knot:
I started by creating the ponytail in the front of my hair so I could make sure the placement was just right–all my girls with big foreheads know that it is all about the placement.
Next I made the back ponytail, bringing it as close to the first ponytail as possible.
I used a little bit of edge control and my fingers to sort of blend the sides to make sure there was no part line showing. For this to work, it really has to look like one huge ponytail all around the perimeter.
Now, to make an even bigger bun…
I added some Marley hair around my ponytails–this is a totally optional step.
A few precautions:
This style involves a lot of tension. It is something I reserve for special occasions as I am trying to keep my hair free from over-manipulation. I also try not to use edge control products daily and this style calls for a lot of product to keep my hair in place.
[do action=”youtube-video” videoid=”_4Fi-Mp6orQ&t=1s”/]
The possibilities are pretty endless, so I guess we’d better stop calling this the ‘awkward’ phase, right? Watch my tutorial below and subscribe to my YouTube channel now!
There is no denying that we are in the middle of a big 90’s resurgence.
Muted makeup is back, slip dresses are everywhere, and if I’m not mistaken, I saw plenty of platform sneakers stomping down the fashion week runways. The overwhelming nostalgia prompted me to play in some of my favorite hair products from back in the day.
Spoiler: it didn’t go so well.
My expectations were reasonable–after all, these are not curly hair products. I had no idea how terribly my hair would react to sulfates and how what once was a nourishing conditioner of mine doesn’t do much of anything for my hair anymore.
I started by washing my hair with Alberto V05 Normal Balancing Shampoo and conditioning with Suave Essentials Tropical Coconut Conditioner. The V05 was so harsh on my hair, I literally panicked and almost abandoned my experiment altogether. I am so used to sulfate-free formulas, my poor hair felt dry and stripped after only a few drops. The Suave conditioner had my back though. I had to use a lot to add moisture but it only cost a dollar so, NBD. Suave, if you’re reading this can we get a remixed version without the cones, because this stuff is still pretty good!
Needless to say, my hair was frizzy and curl-less.
Thanks to the V05 it was most definitely clean but not at all bouncy, hydrated, or healthy. For my leave-in conditioner I used the Luster’s Pink Oil Moisturizer Hair Lotion.
In yet another epic fail, I bought the ‘light’ version so I was pretty sure it would do nothing for me and my hair which is most definitely on the thick side. I was pleasantly surprised that it actually did a great job of softening my hair.
At this point my hair was squeaky clean and soft but pretty curl-less. Would I be able to make a puff happen? I started with Johnson Products Ultra Sheen (aka “grease”> and finished with Ampro Pro Styl on my baby hairs. After all, It’s a 90’s ‘do.
All in all, it was a fun experiment.
It was nice to have a throwback moment but uhh… by the looks of things, I have a long night of deep conditioning ahead of me.
Watch the full experiment here:
Every morning usually starts with me humming a little Erykah Badu to myself in the mirror. “Pick yo Afro, Daddy, because it’s flat on one side.”
Oh Erykah, my hair’s not just flat. It is dry, dull and lifeless.
My morning curl routine actually starts the night before. Without the proper bedtime routine, there’s just no saving my hair in the morning.
Before bedtime
- I oil my scalp with JBCO and mist my hair with a mixture of equal parts Cantu and a little water. Then I put my hair into a pineapple with a silk bonnet on top.
- What happens next all depends on my style and how quickly I need to get out the door.
The next morning
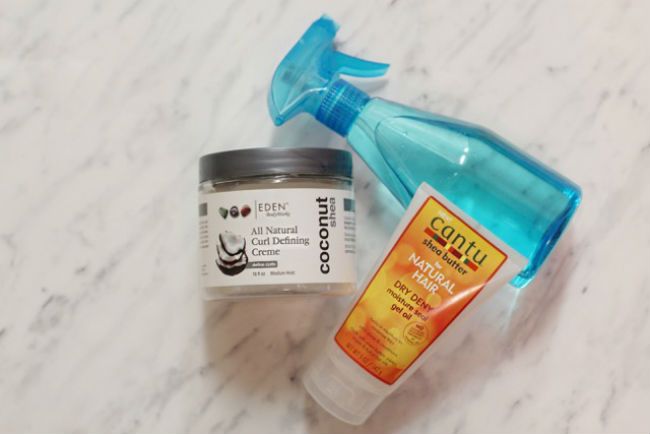
On a normal day where my objective is to preserve a twistout or a wash and go, I do an abbreviated version of the LOC Method:- I mist with water.
- I apply the Eden BodyWorks Curl Defining Creme.
- I seal with a bit of Cantu Gel Oil.
When I’m in a hurry
I’m a night owl and a serial snooze button abuser so most mornings I have to do my hair in a hurry. This is when I reach for my arsenal of sprays.
- I start with a little Dark and Lovely Moisture LOC Super Quench Leave-In Spray.
- I try to give that a minute to dry before I spray the Cantu Comeback Curl Next Day Revitalizer.
When I’m protective styling
Recently, I have been relying on wigs as my go-to protective style and braiding my hair into chunky braids. That doesn’t mean I can neglect my hair in the morning, though. I don’t use my water mixture on my braids because it gives me some bad knots on the ends of my hair.
- I simply slather a leave-in cream over my braids and then seal it with an oil. My combo of the moment is the Cantu Shea Butter Leave-In Conditioning Repair Cream paired with coconut oil or Marula Oil Rare Oil Treatment. Bonus: This treatment works well on the skin, too!
To sum it up
No regimen will give you results if you don’t stick to it. No matter what you do for your hair, make sure it is gentle and works consistently. In my experience, this has given me my healthiest, bounciest curls.
What does your day-to-day routine look like?
Comment below with your favorite go-to products.
Follow me on Instagram @Jascmeen for more 4b/4c natural hair inspiration and @NaturallyCurly for tips and inspiration.
[prodmod]
When it comes to the ingredients we will (and will not”> allow into our hair for the sake of health, we have a laundry list of -cones and sulfates to avoid. But what about protecting the environment?
Whenever possible, we should all opt for biodegradable products.
Aside from the fact that they don’t pollute our planet, water supply, or add to landfills, they are also often made with gentler, more natural ingredients. Here are 10 biodegradable conditioners to consider before your next co-wash.
Klorane Conditioner with Camomile
This one is for the blondes. Formulated with chamomile extract to naturally lighten the hair, this conditioner is not only biodegradable, but also free of silicone, sulfates and parabens. Available at Sephora.
Not Your Mother’s Clean Refreshing Conditioner
NYM’s conditioner has a laundry list of yummy ingredients including wild water mint to revitalize, raspberry to moisturize and quinoa proteins to protect. Available at Ulta.
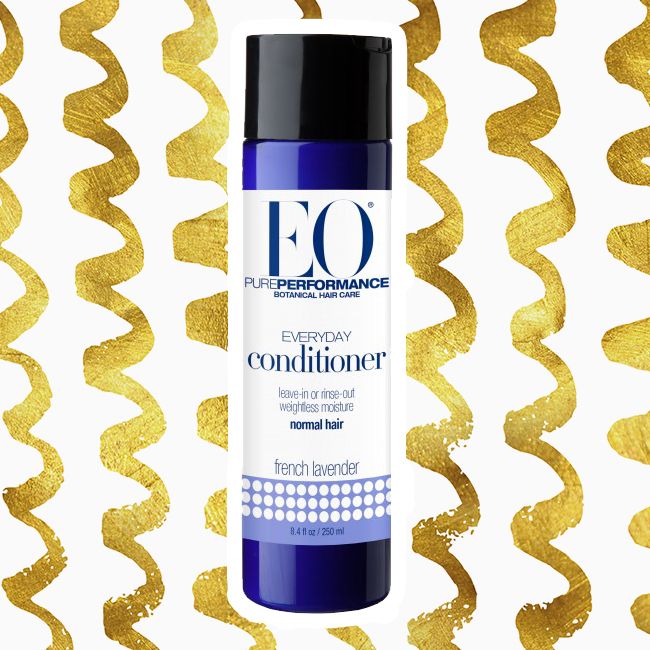
EO French Lavender Botanical Conditioner
With coconut, olive and jojoba oils, this conditioner gently works to soften coarse hair so that detangling is easier. If you love the EO hair products, expand your shower experience to include their bath products as well.
Garnier Fructis Pure Clean Conditioner (available at Target”>
Garnier’s Pure Clean range is 92% biodegradable and contains 50% recycled material. The entire Pure Clean line is free of silicones, dyes and parabens.
The Honest Company Deeply Nourishing Conditioner
This lightweight conditioner is formulated with Shea butter, murumuru seed butter, argan oil, jojoba protein and quinoa extract. Like all Honest Company products, this one is not tested on animals.
Faith in Nature Coconut & Frangipani Moisture Boost Conditioner
Kiwi and lime extract mixed with jojoba oil are only a few of the ingredients in this 99% naturally derived shampoo. Added bonus—it is vegan and cruelty-free, too. Available at Ethical Superstore.
Avalon Organics Strengthening Peppermint Conditioner
Avalon Organics has nine vegan, paraben-free conditioners that specialize in all natural hair necessities, from scalp care to clarifying. The brand has left no stone unturned and has a gluten-free conditioner as well.
Desert Essence Coconut Conditioner (available at most drugstores”>
In addition to bath products, oils, dental care, and baby products, Desert Essence has a full line of 10 biodegradable conditioners.
Nature’s Gate Aloe Vera Moisturizing Conditioner
Aloe vera is an incredibly moisturizing ingredient for natural hair. This product combines aloe vera with other powerful ingredients like avocado, sesame seed oil, jojoba seed oil and vitamin E.
Live Clean Coconut Milk Moisturizing Conditioner
Made with 98% plant-based ingredients, the Live Clean brand goes above and beyond. All of their products are sulfate, SLS and DEA free, using recycled materials whenever possible. Most of them are vegan, as well.
[prodmod]
If you are not properly caring for your hair while protective styling with wigs, I hate to break it to you–but you’re not protecting much of anything.
It is easy to forget about our natural hair when we’re enjoying all the convenience of wearing a wig over it.
However, neglecting our fragile texture will only result in breakage and stunted growth. I use three methods to care for my hair underneath my wigs.
1. Create large, chunky braids.
As a starting point, I braid my hair in chunky braids when I know I’m about to get nice and cozy with a wig that week. I prefer large braids that are easy to remove over a typical beehive pattern. Since I usually wear some sort of large kinky ‘fro, I don’t have to worry about them lying flat.
2. Apply a leave-in conditioner over the braids.
The easiest way to condition your braids is with your go-to leave-in conditioner. Mine happens to be the Cantu Leave-In Conditioning Repair Cream. I slather it over my braids, put a little extra on the ends and that’s about it.
Another easy way to moisturize braids is with a leave-in conditioning spray like Dark and Lovely Au Naturale Moisture L.O.C. Super Quench Leave-In Spray. It works well to condition and revitalize your scalp. Bonus: the mist is just a refreshing feeling after wearing a hot wig all day. This product is on the lightweight side so it works best on normal to fine density hair.
3. Oil your scalp every night.
I like to use a color applicator bottle so that I can apply the oil directly to my scalp. I massage it for a bit, then apply my conditioner to my braids and ends every night before bed. Oiling your scalp and moisturizing your ends is a fool-proof recipe to get well-conditioned hair. In addition, it will let your hair grow and thrive while in any protective style.
Watch how I do it
I walk you through my wig routine with a few other tips and tidbits. Have you worn a wig as a protective style before? Give me a thumbs up and let me know!
Want more?
Here’s how I create a soft Bantu knot-out (that only LOOKS like it could be a wig”>.
Here’s a quick tutorial on How to Avoid a Bantu Knot Fail.
Like what you see? For more articles like this, sign up for our newsletter!
[prodmod]I have been protective styling consistently and plan to continue doing so until my hair is at my shoulders in an unstretched state. When I am tired of my braids and wigs, I revisit Bantu knots.
I’m really on the fence about Bantu knots.
True: they’re a regal, striking style, but I can’t help but remember the time Denis Dasilva, co-founder of Devachan, warned me about the breakage Bantu knots can cause. To make matters worse, according to Denis, the twisting technique causes a diagonal pattern of breakage up and down your strands, making it very difficult to correct with a trim.
Why would he scare me like that?
Soft Bantu Knot-Out
I have been protective styling consistently and plan to continue doing so until my hair is at my shoulders in an unstretched state. When I am tired of my braids and wigs, I revisit Bantu knots, making a few changes to reduce tension and the possibility of breakage.
My favorite way to do my knots is on dry hair because I get a bit more elongation this way. I also like them to look like big soft curls as opposed to defined ringlets. For this I only use products with a moderate level of hold. I used the ORS Smooth n’ Hold Pudding with the Cantu Dry Deny Gel Oil. For more definition you can use a foam or a gel with more hold like ECO styler.
I start by misting my hair with water to make it easier to part and to add moisture. You can make your knots as big or as small as you’d like. I made mine semi chunky to get a fluffy end result.
I applied the pudding then the gel before starting the knots. Be sure to leave some slack at the root before you start coiling the bun. The more you coil, the more the Bantu knot starts to twist at the root on it’s own. This means that there’s no need to twist this area. Trust me, twisting at the root will result in a very tight set of Bantu knots that will be difficult to sleep in.
Next, I secured my knots with colorful Ouchless rubber bands.
I sleep really wild and simply tucking the ends in just doesn’t work for me. Bobby pins are another alternative, but for some reason I can’t make those work either. I stick to my colorful Ouchless rubberbands secured on the tip of the knot only.
In the morning, they’re easy to spot and cut out. (Black rubber bands? Not so much. I’ve definitely cut my own hair trying to cut those babies out!”>
The next morning, I carefully removed the knots and used my DevaDryer to ensure the curls were 100% dry before reaching for my Afro pick. Check out this video on the entire process from start to finish.
Want more?
If you’re a short curly girl who wants Bantu Knots, learn how to make it happen by visiting Do A Bantu Knot-Out (Even On Short Curly Hair”>.
Here’s a quick tutorial on How to Avoid a Bantu Knot Fail.
Get more natural hairstyle inspiration by following us on Instagram.
Like what you see? For more articles like this, sign up for our newsletter!
For a 3c/4a curl…
I start with the “Creta Girl” wig by Freetress. I finger comb it for volume and a less defined curl. Be careful during this step, you don’t want to over fluff. Once it’s combed out, that’s it! It’s synthetic hair so it doesn’t bounce back like human hair will.I don’t worry about parting and simply push it over to one side. Since these are on the cheap side, I don’t worry about washing it or trying to bring it back to life after too many wears. I simply replace it and use the older wig for creating buns or other styles. You can watch me style this wig from beginning to end below:
To get more of a wave…
I start with a wig that has a bigger Shirley Temple curl, this time I used the “Alexis” wig by Sensationnel. Whenever I play with color I like to find a wig with dark roots. It’s just so much easier when it comes to blending and it’s a much more realistic look.Finger combing doesn’t work really well for these types of wigs. (You’ll get more of a noodle shape than a texturized, voluminous wave.”> I use a paddle brush to comb out the curls in sections to get the most fluffiness I can. If you’re worried about having too much volume, brush out the bottom and middle sections, leaving the top section of curls intact. I left out a tiny bit of my hairline out to blend but kept the rest of my hair braided and protected. Here’s how I styled the “Alexis” wig from start to finish.
I prefer wigs over sew-ins or braids because I like to be able to take them off at night to moisturize my ends and oil my scalp. By using these wigs as protective styles, I can keep my hair from being over manipulated and it’s been growing extremely fast just by being left alone. I highly recommend everyone add a wig or two to their arsenal. Warning— they can be VERY addicting.
When is the last time you properly cleaned your hair brush? Not just scraping the hair out, when is the last time you sterilized it, getting rid of all the buildup and bacteria? Well, it’s okay. It’s not something we always remember to do. There’s certainly no point in giving your hair a deep cleaning only to style it with unclean combs and brushes. Here’s a simple way to sterilize your tools with stuff you have laying around the house.
1. Remove all hair
Use another brush, comb, or your fingers to remove all hair before starting the cleansing process. This will make everything much easier and more effective. (The last thing you want to deal with is a semi-clean brush with a clump of matted hair that won’t budge.”>
2. Scrub
Use a little warm water, dish soap or shampoo, and an old toothbrush to clean between the bristles. Lather, rinse and repeat until the brush is clean.
3. Disinfect
Soak your brush in a bowl with one part water and one part white vinegar. Vinegar is great at killing bacteria but you can also use ammonia if you prefer. Try to keep the handle out of the bowl while soaking. You only need to soak your combs or brushes for about 20 minutes but if you think your brush could use a bit more care, soak it overnight.
4. Lay out to dry
Let your comb or brush dry on a towel, depending on the type of brush you have it could take a full day to dry completely. (Annoying, right?”>
5. Repeat!
If you can wash your brush weekly to coincide with your wash day, that is ideal. If you do this you may only need to do a little cleaning with a toothbrush with no soaking. If you can’t do it that often, try to do it at least as often as you clarify, which should be every few weeks or so. Find a schedule that works for you, just be sure to make time to keep your instruments as clean and cared for as your hair.
If you’re not on the co-washing bandwagon, you should be.
Washing your hair with conditioner is gentler than shampoo and doesn’t strip curls of precious hydration. If the idea of giving up shampoo completely scares you, try limiting it to every other wash day. There’s no need to use harsh, drying shampoos frequently. Dry hair means broken hair, stagnant length, and limp curls. Give it a try, you’ll never turn back.
Co-washers may wonder, what is there to do with all our unused shampoo? Here are a few ideas:
-
Shave Your Legs
Shampoo can double as shaving cream in a pinch, some people actually prefer it. Be sure to follow up with an oil and lotion, the same way you would with any shaving product.
-
Clean Your Makeup Brushes
Most brush cleaners and shampoos have similar ingredients. Shampoo is great at cleaning dirty, oily brushes and it’s a lot cheaper than brush cleaners.
-
Clean Your Hairbrush
Nothing cleans a brush better than shampoo. Simply soak your comb or brush in water and shampoo for a few minutes before giving them a little scrub.
-
Disinfect Your Kitchen & Bathroom
Did you know you can use a tiny bit of shampoo to fix a stuck zipper, lubricate a squeaky hinge, and clean your toilet? You can even use it as a degreaser on your stove or fridge.
-
Playtime
My niece loves using my leftover shampoos on her dolls; she has gotten pretty good at giving them the salon treatment!
Don’t use up all your shampoo on shaving your legs just yet–after an extended protective style or an extended sweaty yoga session, it might be a good idea to reach for your it to ensure that you properly cleanse your scalp. Just be sure to follow up with a deep conditioner or masque and your usual LOC or LCO Method.
Do you have any other tips for using leftover shampoo?
If you have any other tips on making good use out of unused shampoo, leave them in the comments below!
“Don’t let anyone play in your hair.”
“No small braids, your hair will fall out.”
“Don’t wear a ponytail every single day, you’ll get a bald patch.”
“You don’t need to put all that heat on your hair.”
While she may have had my hair’s best interest at heart, my younger self was absolutely not interested in my mother’s sage advice. Why couldn’t she just let me get the 24” micro Yaky braids of my dreams? Quit hating, Mom! All I wanted to do was have a head full of microscopic braids so I could tie a rhinestone bandana around them, what’s the harm in that?
My signature reply, “It’s the style, Mom!” did very little to persuade her. Every creative hair idea I ever had was met with opposition. I was just trying to keep up with Moesha and my mom just wasn’t having it.
I missed out on interlocks, micro braids, and my most desired style, Poetic Justic braids. All were strictly forbidden. The only time I was allowed to get braids of any sort was the time I convinced her that it was part of my school’s Black History celebration. After about a week, they were a mere memory.
High school was met with a few compromises. My dreams of Beyoncé blonde was reduced to a compromise of three chunky face-framing highlights and I was given red extensions to appease my Avril Lavigne dreams.
Mom was all about healthy hair. Only my cousin, a licensed cosmetologist, could apply heat or a relaxer to my hair. I was given a lot of freedom when it came to clothes and wearing makeup, but absolutely no wiggle room on hair. I played by the rules until the day I moved out, otherwise known as “the beginning of the end.”
“Don’t let anyone play in your hair.”
Sorry, Mom. I definitely got a relaxer by a stylist I didn’t even bother to research. Oh, and instead of a touch-up he put it on the length of my strands. My hair looked like straw and I lost about 4 inches. Guess you were right.
“No small braids, your hair will fall out.”
Sorry, Mom. I got micro Sengalese twists and thought it was a bright idea to take them out the night before a huge midterm. It took all night and one twist at my hairline knotted up. I panicked and cut it out at the root. The result? A lovely bald patch in my hairline until I discovered Jamaican Black Castor Oil. Guess you were right.
“Don’t wear a ponytail every single day, you’ll get a bald patch.”
Sorry, Mom. When you’re a lazy college student you do things like that. Between the patch and my destroyed hairline, I was starting to get the picture. Guess you were right.
“You don’t need to put all that heat on your hair.”
My first heat break was when I started considering going natural. The way my hair responded to just being left alone made me seriously consider giving up relaxers and straight styles in favor of healthy hair. At first my mom was a bit skeptical about the big chop, but now looking at my growth and progress, I’m happy to say she gets it. Guess I was right, right?
Whether it’s for added volume or Diana Ross-level froth, your hair drawer needs an Afro pik. But should you be using metal or plastic? Short answer—both.
Afro piks are a staple in the black hair community, and we’re not just talking about your dad’s legendary collection from his high school days. Long before popular piks had a black fist, they were used in ancient pre-dynastic Egypt over 6,000 years ago.
Since then, piks have changed very little. There’s still no better tool for adding volume to kinky hair but it’s important to know your way around this little game changer. The wrong tool or technique can cause serious breakage and possibly abrasions on your scalp.
Our fragile curls only deserve the best.
- Plastic piks are gentler. For fine hair, these are the clear winner. Looser curl patterns may even reach for one to distribute product, plastic piks are great at that. If you like to rock a completely picked out ‘fro, you should certainly use a plastic pik for this as well. Although they may be far more gentle and versatile than their metal counterparts, don’t count them out just yet.
- Metal piks may look like a path to certain breakage, but when used properly they are an absolute godsend, especially for thicker hair and tight curl patterns. To get more volume in your twist-out or fake a more tapered cut, simply part your hair and slide in a metal pik. After a few short strokes (into your roots only”>, move on to the next section. Use care and control to avoid scratching your scalp. For added protection, try dipping your Afro pik into a little coconut oil.
What does your pik collection look like?
Metal? Plastic? Long spikes or short? Reach for your plastic Afro pik to pick out ends, distribute product, or volumize loose curls; but 4b-4c hair types may want to leave the serious root lifting to a metal pik. Always try to get as much volume as you can with your fingers first before whipping out any comb, brush, or pik.
Share your tips and tricks in the comments below.

