Search Results: Erika Owens

There is nothing worse than spending a good amount of time doing your hair only to wake up the next day having to do it all over again. That being said, knowing how to preserve your hair overnight is imperative to keeping it perfectly coiffed for the next day.
Before you go to bed
Image Source: @ellessentially
You can prevent next-day frizz and flat hat hair before you wrap your hair up at night. The number one thing you need to do to preserve your curls overnight is to avoid too much manipulation while you put your hair up before you sleep. Here are some techniques that work for other curlies before bed.
- Spritz—Some people lightly spritz their curls before bed to moisturize them throughout the week; others, however, find it unnecessary. The key to doing this is to ensure that the hair is not too wet; otherwise, it will cause frizz. You can spritz with water or a spray leave-in, whether homemade or store-bought.
- Spritz and seal – Another technique is to spritz and seal with your choice of sealing oil. Again, this will preserve the moisture in the curls and seal in the moisture as well. The only caveat to this technique is the friction you will cause by trying to apply your sealing oil.
- “No spritzing” method—This last preparation technique involves not applying any extra moisture to the hair other than what you initially applied when you first styled it. This technique is generally used by those who feel that they have ample moisture already or for those who plan on re-styling by the time the hair needs re-moisturizing anyway.
After preparing your hair for overnight sleeping, here are some techniques you can use to preserve/wrap your hair overnight:
1. Greenhouse Effect
Image Source: @booji_barbie
The greenhouse method of preserving your hair overnight is done in conjunction with one of the first two methods above, spritzing or spritzing and sealing. After one of those techniques is used to prepare the hair, you place a plastic cap over your hair and then wrap it in a silk scarf. This process forces the moisture into your hair. This should be done for those with extra dry hair (Alternatively, you can “greenhouse” your hair for one hour and then wrap it using one of the techniques below.)
2. Pineapple

Image Source: @thequeenofthegarden
Pineappling is the universal curly girl technique for preserving curly hair overnight. It involves placing the hair in a high ponytail and leaving the ponytail portion of your hair at the very top so that your curls are not disturbed when sleeping. Using this technique, you can sleep just on a silk pillowcase or wrap the base of your high ponytail in a silk scarf.
3. Turban

Image Source: @yougonatural
For some, pineappling doesn’t work for one reason or another. In those cases, this next technique could work. It involves loosely taking one side of the hair (as if you were gathering one side of the hair for a pigtail) and placing it over the top of the head, placing it in clips if you have to. Then, do the same to the other side so that your hair is all the way at the top of your head. Next, wrap your head in a silk scarf. You can also wrap your hair in a cotton t-shirt, but cotton tends to be drying to the hair, so we don’t recommend doing that often.
The technique you use to prepare and preserve your curls for sleeping overnight will depend mostly on your preferences, the length of your hair and the curly style you have it in i.e. twist out vs. wash and go. There are many other techniques not listed here that you can try, and what works for you may even be a variation or combination of the techniques above.
NaturallyCurly World, how do you wrap your hair at night?
Summer is one of the best times of the year. A time to explore, travel, and soak up the sun. That sounds nice, but the same can’t be said for your hair. Harsh sun rays damage hair, dry it out, and can even fade your color. That’s why it’s time to revisit (and revamp) your hair routine when summer comes around. Higher humidity levels and temperatures suck the moisture out of the hair. Because summer conditions differ so much from winter conditions, the products used should be modified to support healthy moisture levels during that time.
Water-Based Products
Image Source: @dajnaedoss
Lighter, water-based moisturizers are my go-to for the summer. In the colder months, hair butters are my friend. But now, the moisture in my hair is more easily sucked out of my hair and can work against me by causing dryness. Not only that, but the sun is hot, and hair butter will only work to suffocate my hair.

CURLSMITH – Full Body Milk Hair is a great light, water-based moisturizer. After one day in the summer heat, my wash-and-go can easily become parched.
Air Drying
Image Source: @fabentekle
It’s hot enough that I need not pull out the blow dryer to speed up the process. For me, diffusing rather than air-drying leaves my hair all the more dry at the end of the day. If I air dry, the problem is not as severe.
Morning and Nighttime Moisturizing Routine

In the morning, I take my hair down, lightly spritz it once again, and let it air out and gain its body once again. I assess the moisture level, and if needed, I will smooth down and refresh my wash and go using just the Pantene Gold Series Curl Awakening Spray for Curly and Coily Hair, Infused with Argan Oil, about a dime size to each side of my head.

At night, I lightly spritz my hair and apply the Carol’s Daughter Coco Creme Curl Perfecting Water Coco Mist, with Coconut Water. It is light but moisturizing and mixes well with the styling products I use. I apply about a nickel-sized amount to each side of my head. Once that’s done, I pineapple or place it in a high bun.
Whatever you choose to use to moisturize your curls this summer, make sure that it’s light and water-based so that your hair does not suffocate but maintains its moisture. Here are some things to remember.
Things to Remember
- In the summer, your hair needs to breathe so use lighter water-based hair products.
- Spritz and re-moisturize as needed (night/morning).
- If one product is not moisturizing your hair, try layering with another for extra moisture and protection from the elements.
- UV rays are harsh, so protective styles are great during the summer to cover your fragile ends.
- Lastly, remember that everyone’s hair is different, but try to avoid very heavy products such as hair butters, which can make it hard for your hair to breathe.
Ready to hop into the season’s latest trends? Check out the 25 Summer Hair Trends our team spotted at BeautyCon.
OUR EDITORS INDEPENDENTLY SELECT ALL PRODUCTS FEATURED ON NATURALLYCURLY. HOWEVER, WE MAY EARN AN AFFILIATE COMMISSION WHEN YOU BUY SOMETHING THROUGH OUR RETAIL LINKS.
Photo by Andrew Neel on Unsplash
What is fine hair?
Fine hair refers to the width or diameter of the actual hair strands. Hair that is smaller in diameter is classified as fine hair while hair and a thicker diameter is classified as coarse hair. Fine hair is also easier to straighten and style into updos because it is thinner, but one complaint many have about fine hair, is that protective styles such as braids or twists tend to look a little scalpy. People with fine strands tend to struggle to achieve volume. In short, there are benefits and setbacks when it comes to having fine hair, but there is a solution for everything. Here are a few things to better understand your fine hair.
What is the difference between fine hair and thin hair?
Thin hair is completely different from fine hair. Usually when people say they have thin hair, they are referencing low density. When you have thin hair or low density hair, that is characterized as having a low number of strands. So in other words, a person with fine hair can have high density hair just like a person with coarse hair can have low density hair.
If you’d like to know your hair type, including your width, density, porosity and curl pattern, you can take our Texture Typing Quiz.
How to style fine hair
Do not weigh your hair down
One of the upsides of having fine hair is that you do not have to use as much product, simply because you cannot. Multiple products will weigh down fine hair. This can cause it to look and feel too heavy, further weighing down the roots and jolting any hopes you had of sporting voluminous hair. That brings us to our next tip.
Create lift at the roots
People with fine hair need a little more help to create volume to prevent their hair from drying flat. They do not have the thickness required to have big hair so the roots need a little help. Lifting your roots for more volume and body starts with a blow-dryer. If you are a fan of diffusing, try doing it upside down. A great technique is to lie on a bed so you can hang your head over the side of the bed while laying down to diffuse.
Dry your hair in a pineapple
If you want lifted roots without using heat, simply pull your hair up into a night loose pineapple when it is 90% dry. When you sleep with only your roots are slightly wet, you will create volume as your roots set and your pillow will not be wet. Try to avoid placing the hair in a bun because that will just stretch out the hair, reducing the volume.
Protective style when partially dry
As I mentioned earlier, those with fine hair tend to have trouble with protective styling (e.g. twists”> because the fine strands cause the scalp to be more visible. To combat this issue, try twisting/braiding when the hair is damp or semi dry so that it looks fuller after styling.
All-in-all, fine hair is not a problem. Fine hair has its benefits and downfalls, but as long as you find what works for you, your fine hair should not be a big problem. Nobody is born with perfect hair. Whether it is fine, thick, or somewhere in the middle, we all have to work with the cards we were dealt, and that is not always a bad thing.
Read next: How to Make Fine, Thin Hair Look Fuller Without Losing Curl Definition
This article has been updated with additional resources.
If there is one thing my hair loves, it’s moisture—any kind, anytime, anywhere. Which is why all of the ingredients my hair loves happen to also be highly moisturizing. Here is a list of all of the ingredients my hair can’t live without.
1. Water
My hair loves water. When I try a new product and water is the first ingredient, it’s almost guaranteed that my hair will like it. My hair looks its best when it’s highly moisturized and my styles come out much better when I wet set them. For instance, my wash and go’s look fantastic when done on soaking wet hair rather than damp.
2. Vegetable Glycerin & Honey
Glycerin is a humectant and will attract moisture into your hair, which is why my hair loves it so much. Honey is another humectant and my hair adores that as well. I like to use these ingredients interchangeably in my deep conditions and have even used glycerin in my wash and go’s. Products that contain any one of these ingredients are a win for me.
3. Agave
Agave is another highly moisturizing plant derived ingredient. It is also a humectant and will draw moisture into the hair. It also provides great shine. I have several products that contain agave nectar and my hair loves them all. The SheaMoisture Coconut & Hibiscus Curling Gel Souffle is one of the most notable products that contain a lot of agave nectar and whenever I use it, my hair stays moisturized a lot longer.
4. Shea butter
Shea butter works wonders for dry damaged hair and it can also be great for perfectly healthy hair, as it provides many vitamins and has great moisturizing benefits, something naturally curly hair always needs—healthy or not. Shea butter will not clog the pores in your scalp, so your scalp will be able to breathe. It is also an excellent sealer for natural hair.
MORE: Shea Butter for Hair: Healing Magic
5. Argan oil
This oil is hydrating (in a natural way”> and is filled with antioxidants, which can help strengthen weak hair. It is also great if you have color-treated your hair, which is why I also like to use it. I generally will seal with this oil or add it to my whipped shea butter for sealing. A little goes a long way.
6. Aloe
Aloe is deeply moisturizing and soothing to the hair, and it is packed with vitamins and minerals. I love using aloe vera gel in my hair as an extra layer of moisture. You can’t really go wrong with aloe very gel.
Photo by João Paulo de Souza Oliveira on Unsplash
The phrase “less is more” strongly applies to hair. Many of us are so focused on our vision of the “perfect hair” and the “perfect product” that we obsess over products and styles while our hair routine becomes convoluted—inhibiting length retention and hair growth.Spending countless hours per week doing your hair and using products just adds stress to your strands and to yourself. With more frequent styling, comes more hair damage and the more products you use, the more it builds up on your hair and scalp, which doesn’t help your growth.
By simplifying my hair regimen and removing all unnecessary products and manipulation, I have essentially and unintentionally grown my hair to tailbone length. My length retention is the direct consequence of my minimalist approach and listening to my hair. Here are some tips to help you simplify your hair routine so you can start retaining more length:
Choose your staple products based on need
Many women don’t listen to their hair; they just do what they are told they should do with it, but everyone’s hair is different and if you listen to it, you will be rewarded. The key to the minimalist approach is to first identify what your hair needs. Identify any problems you may have, i.e. chronic dryness, breakage, weak hair, dull hair, etc. If you identify your hair challenges it will be easier to decipher the process and the products that are needed to simplify your regimen in order to retain length.
Develop your go-to styles
How often are you restyling? Do you incorporate any protective styling? Finding styles that have more longevity or that transition into other styles easily—for example, twists to a twist out—will also simplify your weekly hair routine and save your hair the unnecessary stress.
Create a hair schedule
Even if you don’t follow your hair regimen to a tee, roughly planning what days you will wash and style your hair will make your week much easier and save you a lot of time. I tend to plan my hairstyles on the weekend, particularly on Sunday, so that when I go back to work during the week I have a fresh hairstyle I can wear for at least the majority of the workweek.
Oftentimes, people make hair growth more complicated than it needs to be. They see the girl with the long flowing hair and think she must be doing some miraculous things to it or, that she is using some magical products to get her hair that long. The truth is, she is just listening to her hair and her “secret hair routine” is probably less complicated than you realize. The “secret” to long hair is that there is no secret. Just give your hair what it needs and keep it simple.
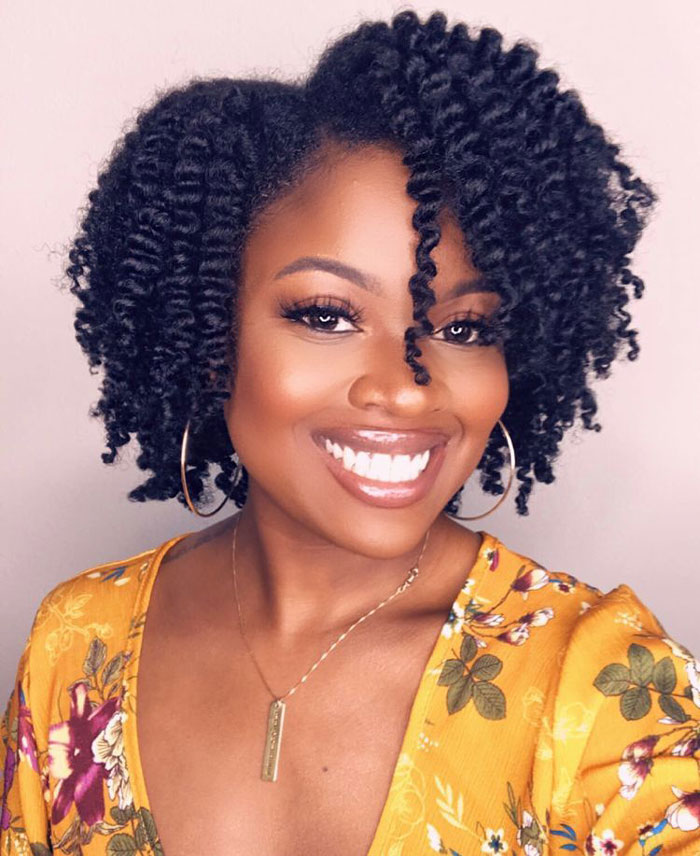
PICTURED: @TROPHDOPH
As we all know, natural curly hair styling can take some time and it has to be done right, if it’s not, all of that time is wasted and you have to start back at square one. One of those styles is the twist out. Here are some tips for making your twist out last from the moment you begin the style all the way to the finish.
1. Twist on wet hair
This may take longer to dry, but you get better definition and a sleeker looking style and of course, it doesn’t need to be soaking wet. You can soak up most of the water with a t-shirt or microfiber towel but be ready to twist right away before it starts drying.
2. Twist with ample moisture
Apply ample moisture before twisting each section with a cream or butter like the tgin Butter Cream Daily Moisturizer or OBIA Naturals’ Twist Whip Butter. This will ensure that your twists look shiny and moisturized for as long as possible.
3. Ensure that there is plenty of hold
There is nothing worse than spending a lot of time styling your twist-out only for it to last just a day or two. If you don’t have enough hold, that’s exactly what will happen. Frizz is bound to ensue if you don’t make sure you have good hold on top of your moisture. Try a strong hold gel like Ecoco Krystal Styling Gel to lock your style in place.
4. Unravel when completely dry
This is possibly the most important tip on this list because if you unravel when your hair is still damp, you will get frizz and you will have less definition and that is not conducive to a lasting twist out.
5. Unravel with care
Gently apply a light oil like SheaTerra’s Mongongo Nut Oil before unraveling in order to cut down on frizz.
6. Avoid touching
Once your hair is unraveled and fluffed to your liking, avoid touching any further to reduce the occurrence of frizz.
7. Make smaller twists
The smaller the twists, the longer they last so when twisting stick with smaller or medium sized twists, unless you want a chunky twist out and you’re okay with your style not lasting as long.
8. Re-moisturizer as needed
This can be different for different people. Some like to re-moisturize daily while others do it every other day, whatever works for you. The only caveat is to not get the hair too wet– your hair will revert back to its natural curl pattern.
9. Protect overnight
I prefer to pineapple my twist outs at night or even if I’m just at home, to protect and keep it fresh looking for as long as possible. When sleeping you can even wrap a silk scarf around the base of your head so that there’s less friction and frizz when you wake up or just wear a silk bonnet, from my experience, it will not mess up your twist out.
To sum it up
Like anything, perfecting the twist out may take you some time but if you follow these common tips for making your twist out last, I’m sure it will take you a lot less longer to get to that perfect twist out.
This article was originally published in 2015 and has been updated for grammar and clarity.
Often, women have one of two objectives when they go natural. They want to grow longer hair or, they want to get their hair into better health. Sometimes it is a combination. But just because you grew your hair to your desired length does not mean all of your problems are gone. In fact, long curly hair comes with their own set of challenges.
Problem #1 – It takes forever to set
As your hair grows longer, you have more to work with but it also takes longer to set. Whether it’s bantu knot outs, twists, flexi rod sets etc, be prepared to wait–probably all day.
Problem #2 – You settle for less
When you have a huge head of long hair, it can be challenging to conjure up the energy to style it. This often means a ponytail or bun will have to do. When we do style, we like styles that last for a few days so we don’t have to re-do our hair the day after day.
Problem # 3 – It’s heavy
Long hair, especially when it’s curly, can be really heavy, especially when wet. Even when it’s dry, product itself can add weight.
Problem #4 – Wash and go’s are not wash and go’s
For someone with long curly hair to do a wash and go, it takes time. Sure, it takes time for everyone but when your hair is long. You have to take the time to define each densely packed curl and you can easily end up with undefined frizzy hair if not. Once the product is applied the wash and go can remain wet for half of the day easily. Not only that, once you go though all that trouble it doesn’t last very long.
Problem #5 – Hair tie fiascos
Hair ties are a whole other story when it comes to long curly hair. They are difficult to get tight and easily loosen due to the weight of your hair. If you do get them tight, they will be stretched out and you may only get 2-3 more uses out of them, that is, if they don’t pop and break as you’re trying to get your hair into a ponytail because you are hair is too thick.
Problem #6 – To straighten or not to straighten…
Some ladies love to straighten their hair from time-to-time but the thought of all that work can be enough to deter you from doing so. It’s long, huge and sometimes you have to wonder, how will all this hair condense into a sleek straight look? The answer is: it takes a lot of time and elbow grease to do so.
Problem #7 – No shape
If you let your hair grow without shaping it or cutting it in layers or other style such as the deva cut, it can be very boring — long, curly and shapeless. Eventually, you need to get it cut or shaped in some way because if you don’t it can look like a pyramid. You just don’t get that bouncy cuteness of shorter hair unless you get it shaped.
Problem #8 – It’s a built-in cushion
Having your hair operate as a pillow doesn’t sound like a bad thing, but it is if you want to preserve your styles. When your hair is at a certain length it just starts to get in the way and you have to come up with techniques to keep it out of your way.
There’s so much more to a flat iron than just two plates that heat up. They employ certain technologies and materials such as tourmaline versus ceramic, heat up to varying temperatures and come in different widths. For this article, I will focus on different consumer favorites at different price points and features to help you find your perfect fit.
Before using a flat iron, be sure to always use a heat protectant and if you go for a flat iron with adjustable heat levels try going with a lower heat setting so as to avoid damage.
Ceramic vs. Tourmaline
There are two mainstream flat iron technologies widely known to the community–ceramic and tourmaline. Flat irons with tourmaline plates are made up of real crystal that is ground up and applied to the surface of the flat iron plates. It helps to straighten the hair quicker because of it’s ability to produce a high volume of negative ions. As a result, it creates a silky, smoothened ironed out result.
So, what’s the difference? Ceramic flat irons heat up quickly, within seconds. This makes them ideal for reducing heat and cuticle damage. Ceramic plates are also known to distribute heat more evenly. Both, are great for straightening and are highly recommended, it’s just a matter of preference.
To read more about these two materials, check out our article Tourmaline Versus Ceramic.
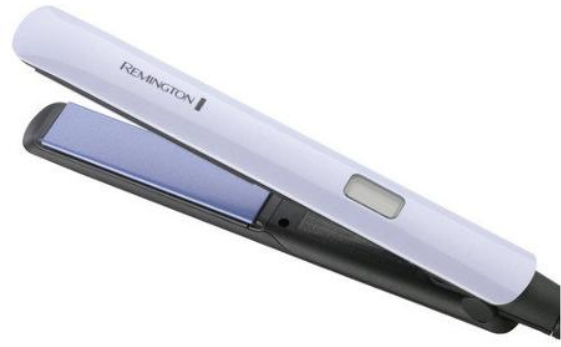
Remington T. Studio Wide Plate Straightener with Tourmaline,
-
Heats up quickly
-
Has wide plates which is great for thicker hair
-
Digital temperature reader
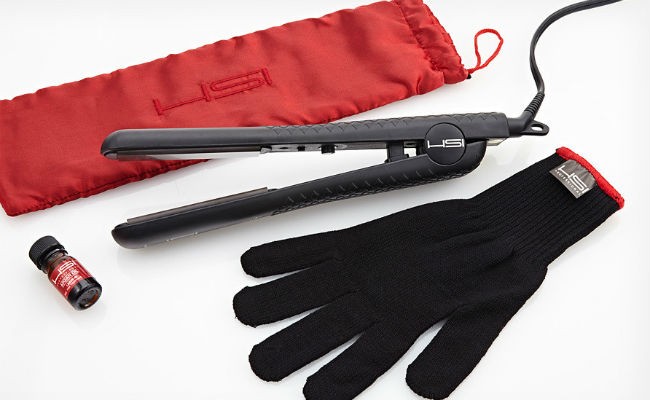
HSI Professional 1 Ceramic Tourmaline
-
Comes with argan oil
-
Swivel cord
-
Long-lasting results
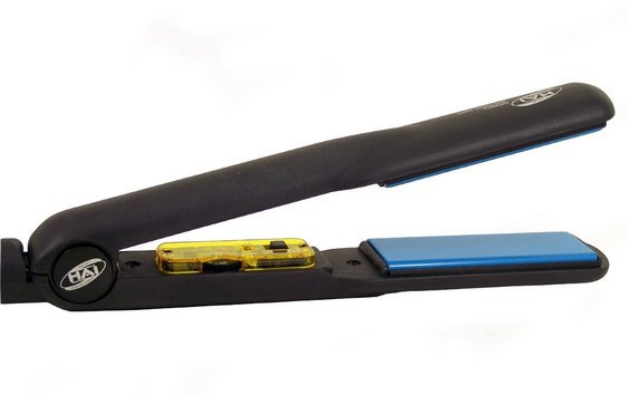
Hai Ceramic Flat Iron
-
Heats up in 30 seconds or less
-
InStyle magazine’s “Best Beauty Buy”
-
Current top seller in the flat iron market
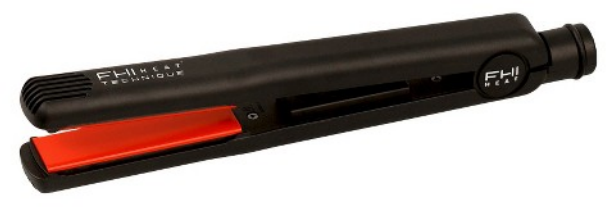
FHI Heat Technique G3 Original Tourmaline Ceramic
-
“Creates sleek style in one to two passes this” according to InStyle Magazine
-
Tourmaline plates
-
Long-lasting
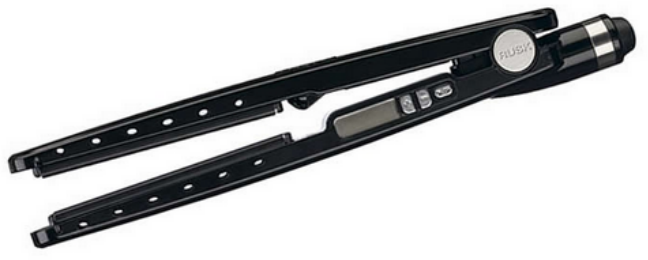
Rusk Professional STR8 Iron infused with CTC Technology
-
Great for all hair types
-
Makes hair silky and soft
-
Heats up fast
Babyliss Pro Nano Titanium-plated straightening Iron
- Price: $129.99
- Available at Ulta and Bed Bath & Beyond
-
Temperature adjustment up to 450 degrees
-
Nano titanium plates
-
Glides, doesn’t pull.
-
Ultra lightweight
Remington Frizz Therapy Iron
-
Heats up quickly
-
Easily straightens curls
-
Great value for the price
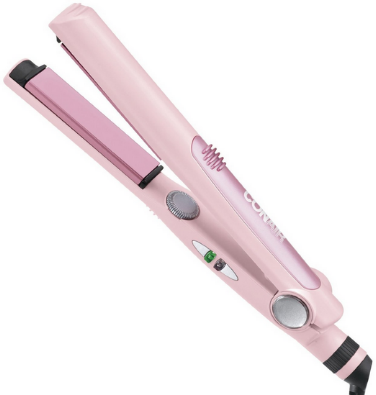
Conair The Power of Pink Ceramic Straightener
-
Portion of the sales go the Breast Cancer Research Foundation
-
Power straightener in small package (1 inch”>
-
Promotes shiny hair
The key to finding the right flat iron is knowing what your hair needs. Is it generally easy to flat iron your hair, or is it difficult? If you find it difficult or time-consuming, you may need a higher end flat iron that heats up high so that you can more easily flat iron your hair.
In the end, each of these flat irons has their strengths and their weaknesses. Once you determine exactly what you are looking for in your hair tool, then you can seek those flat irons out specifically without worrying about being overwhelmed by the features of every single other flat iron on the market.
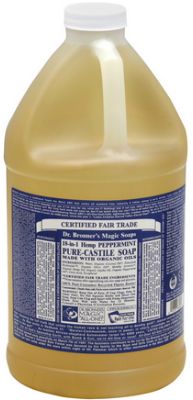
Dr. Bronner’s Magic Soap company started off as a family owned and operated business in Germany in the 1960s. Today it is located in San Diego, California. According to Frugally Minded and its longtime users, this brand of soap has a number of benefits to the body, skin, and hair–it is organic, sustainable, vegan and made almost entirely of jojoba, hemp, and coconut oils. They come in bar and liquid form. A little goes a long way so much so you may only need a few drops at a time of the liquid version and on top of that, it is extremely gentle.
Dr. Bronner’s Magic Soaps are made with ethically-sourced, certified fair trade ingredients and is known as “The Fighting Soap Company” for its activism in organic integrity, animal rights, and labeling genetically engineered foods.
The brand started off as a favorite of the counter culture in the 60s and the group thrived on this naturally derived soap—and still do. The brand is not commercially advertised and is still ran as a family business even though they have experienced exponential growth since their initial debut. The label itself is almost as famous as the soap. The company’s eccentric founder, Dr. E. H. Bronner, created a wordy label covered with Jewish and Christian scriptures and he was so passionate about his mission to spread the news about this soap and its many uses. Oftentimes, he was ostracized because of this. He traveled to universities and had other speaking engagements to tell people about the many ways you could use this soap. In addition, Dr. Bronner’s Magic Soaps are made with ethically-sourced, certified fair trade ingredients and is known as “The Fighting Soap Company” for its activism in organic integrity, animal rights, and labeling genetically engineered foods.
One of those uses that he talked about was washing hair. I have personally used Dr. Bronner’s Magic soap as a shampoo. I personally have used it because of its gentleness. Contrary to popular belief, Dr. Bronner’s soap does not strip the hair–as long as it is diluted, of course. This stuff is potent and extremely concentrated and you can use it as a shampoo. You just need to know how to do so.
This product itself doesn’t seem to be a problem but some curlies have voiced concern about the dilution process and whether or not you can actually use this soap as a shampoo because of that. Here is the proper way, according to the Dr. Bronner company, on how to properly use the soap for washing hair:
Dilute 1 tbsp to ½ cup of water and work into your wet hair. This seems like a reasonable dilution for not drying out your hair. Depending on the porosity of your curls, you may need to adjust this measurement of dilution. The key is to listen to your hair and figure out your perfect balance.
This is one of the first and still one of the very few that do not contain SLS chemicals such as sodium laurel sulfate Basically, it does not lather. So, if you do plan on adding this soap to your arsenal know that you will not get the magical foam you get from more common soaps, but you will get your hair clean and free of chemicals.
As with any product, you have to fully understand its use and experiment with it on your own, otherwise you can be left confused. One person’s experience is not everyone’s and some may decide this soap doesn’t work for them. But, there is a method if you do decide to use it and that is to stick to the suggested dilution proportions and then adjust for what works for you.
Will you be using it on your next wash day?
Dr. Bronner’s Magic Soap is available at Whole Foods, Target, GNC, and Walmart stores. This article is not sponsored.I usually spend part of my Sunday’s prepping my hair for the week. And, it takes time.
Deep conditioning, detangling, styling and setting is pretty routine so I don’t have to fuss with my hair as much during the week. The one thing that can put a damper on all that work is smooshed hair.
Prevent smooshed hair
To prevent getting smooshed hair the second day, there are a couple of things I always do.First, I make sure that my hair is completely air dried before touching or putting it up before bed. If my hair is still damp in the morning, this results in undefined and essentially “smooshed-up” curls. Instead of drying (or setting”> in a perfect little ringlet. It will dry frizzy. It is tempting to want to get out the blow dryer and diffuse to speed this process up, but patience pays off. For me, diffusing causes frizz, it makes the curls softer faster and it’s harder to prevent smooshing with second day hair when I do this technique. Air drying sets the curls perfectly for me.
Once my hair is completely dry, I can then put it up and out of my face without ruining the style for on the second day. My number one technique for this is the pineapple. The higher you put it, the less disturbed your curls.
However, whenever I do this, my hair falls all over my face. For me, that is fine if I am lounging around the house but not ideal for sleeping or preserving my curls.
Cover up
To mitigate, I cover my hair with a silk scarf or cap of some sort.
Right now, I am loving the “slapcap”–a stylish slouchy beanie with a silk interior–and I’m all about style so this is right up my alley. Also, my curls are much looser in the front sections of my hair so, if I am going for a defined look, I leave part of my bang section out, and pint it back so that when I take it down in the morning it’s not too stretched out.
Then refresh
Refreshing is also an important step for maintaining second day curls.
Whenever I spritz, in order to re-moisturize, I make sure that It’s barely wet, not even damp, just a very light spritz because If I don’t, it will cause smoosh and frizz the next day. This goes the same for any product re-application. Hair should be dry to the touch before putting up, or you will wake up frizzy, undefined hair.
Of course, these tips can be modified. If you hair is shorter and it’s hard to get a really good pineapple, try the multi-pineapple. Place hair in two or more (depending on your needs”> high pineapple-like ponytails so that you are preserving your curls.
If your hair is super long, you can still pineapple but you’ll have to loosely pint the hair around in a very loose bun and tie up with a silk scarf so that your hair doesn’t get loose and your curls ruined.
How do you keep your hair from getting smooshed?
Wash day for me comes at least once per week, twice, if I have too much product in my hair from styling. With wash day, for me, always comes deep conditioning, and of course sealing. Here are my product cocktails for my wash day routine.
I have been using the same deep conditioning cocktail for as long as I can remember. If it isn’t broken, then why fix it, right?
The pre-poo
Pre-pooing is great for curly hair. But I have to admit, I don’t always have time for it. If I do, a good slather of Trader Joe’s olive oil all over my tresses just before washing does the trick for me.
The cleanser
I use Aussie Moist Shampoo from Target primarily when washing my hair. However, I like to switch it up here and there. The best alternative is TRESemme Naturals Shampoo.
The deep conditioner
I have been using the same deep conditioning cocktail for as long as I can remember. If it isn’t broken, then why fix it, right? My deep conditioning mix consists of about a half of cup of conditioner, two tablespoons of olive oil and one tablespoon of honey.
I like to use Aussie 3 Minute Miracle Deep Conditioner but if I don’t have any, Aussie Moist’s regular conditioner works great too. The honey attracts moisture to the hair and provides shine, while the olive oil provides shine and causes the hair to condition even deeper, it just works. I detangle once the mix is in and I leave it on my hair for at least 20 minutes under a hooded dryer.
Once per month I like to deep condition after washing by using avocado, pure organic olive oil and 100% honey from Trader Joe’s. Let me tell you, avocado does some magical things to hair, at least it does to mine. It leaves me with shiny hair. I simply take one smashed avocado, please note, this needs to be blended, preferably in a Vitamix or Nutribullet because if it’s not, you will have little green fibers stuck all throughout your hair. Because of this, ripe avocados are important to use. After smashing the avocado, mix in two tablespoons of olive oil and one tablespoon of honey. Apply to your hair, place on a plastic cap and let it sit for at least 20 minutes. When done, I rinse and use my regular conditioner.
The sealant
Once the deep conditioning treatment is out of my hair, I’ll seal with Dark and Lovely Au Naturale Sheen Sealing Nectar from Walmart. It sprays on, so you do not have to slather your hands or hair with oil in order to apply. This is especially helpful if my hair is already styled.
[prodmod]
What product or ingredient cocktails do you make on wash day?
Our mane is our glory and it’s imperative that it looks glorious for date night. Everything starts with your hair. Even if it’s pulled back in a high bun, whatever you choose, you have to love it. I think hair for date night should be all about what makes you feel great. For me, nothing is more sexy than big fluffy hair so for this article I’ll show you how I did my hair for date night.
Here is the step-by-step of my blown out braid-out.
- Start with wash and deep conditioned hair. Since my hair will be lightly blow dried, I like to impart ample moisture before doing the blow drying process. For my deep conditioner, I use about a half of a cup of conditioner, one teaspoon of honey and two table spoons of olive oil. *These are rough measurements and not exact.
- Once my deep conditioner is rinsed out I use a leave in conditioner, for me, that means leaving a little bit of Aussie Moist in my hair before the next step. After, I place my hair in a microfiber towel and let it soak up as much water as possible. I air dry until it’s about 80% dry and then commence to styling.
- Tension blow dry. For this step, I hold the ends of my hair and let the blow dryer do its job. My goal here is to get the hair smooth and to stretch out my own curls so it’s ready to braid. In this step, I pay particular attention to my roots, so my curl pattern comes out the same in the end and I don’t have a super curly crown with soft wavy curls below.
- Separate in sections and section-by-section add your choice of products. This step is important for me because I want to make sure my braid out comes out looking moisturized and not dry. I start by using a little of Crème of Nature’s Argan Oil Butter-Licious Curls for the water based moisture. Next, I apply Paul Mitchell’s hair serum, for the extra moisture and smooth shine and finally I add just a bit of Dark and Lovely’s Sheen Sealing Nectar to seal, then I braid. I do four braids in the back total and two in the front.
- Before unraveling, I apply more oil to the braids. Next, unravel the braids and style as you wish. I like to flip the front of my hair to one side. Alternatively, you can do a half updo with this style which is great for a fun and more casual date.
The upkeep
I like to sleep overnight in my braids but since this is date night, you can do this earlier in the day and let them air dry 100%. The longer you keep them in, the more defined they will be. Also, the more product you use, the more defined they will be. It all just depends on what your preferences are.
Unless you have been living under a rock, you know that the new “Annie” is portrayed an adorable little black girl rocking natural hair.
Her name is Quvenzhané Wallis–pronounced, kwa-vin-ja-nay.
This pint size cutie is also an Oscar nominee for 2012s Beasts of the Southern Wild. In fact, she’s the first African American child actor to be honored with the Oscar nomination. She is also the winner of 2012s Critics Choice Award for “Best Young Performer.”
Roughly one year later, it was the delight of many to hear the news that Quvenzhané knocked down yet another barrier in the industry. She had been pegged to portray Annie in the new film version of the classic musical (historically played by a red headed caucasian girl with a red afro”>. The film also stars Jamie Fox, portraying the “Daddy Warbucks” character.
Hair is a big symbol in this movie.
Historically, the big red hair that this character wears was made to represent the unkempt nature of her life, having been a foster child with a less than enthusiastic and nurturing foster parent. The same goes with this version of the film. Quvenzhané’s “Annie” is on her own in every way. Her foster mother cynically, even mocks her “big hair” as if it’s a bad thing—oh if she only knew, big hair, is good hair—but I digress, sure her hair is disheveled at times, after all, she is a foster child. That is a part of the role she plays–unkempt, disheveled. Still, it’s charming to see a character whose hair represents more than its characters’ actual needs. It represents so much more, culturally, in America where many as still adverse to African American natural hair.
In a time where bone straight hair is so highly represented, her hair makes a statement. It is always refreshing to see curly, coily, and free hair in a major movie…Her hair gave her character that let her personality shine through.
I am not a parent just yet, but I can imagine being happy to have this character be seen by my imaginary daughter. Someone, who hypothetically would probably have similar hair. With straight hair Barbie’s and dolls abound, I imagine, straight hair and embracing their own natural hair could be confusing for a little girl.
Everyone wants what they do not have—young and old.
Many people with beautiful curly hair want to wear it straight while others appreciate the gap that the Annie movie has helped fill for little curly girls of all races–and even some adults.
People do what they see, they mimic celebrities, and with more of them embracing the natural look, even part of the time, and with characters such as Quvenzhané’s “Annie”, it will only fuel the ongoing shift of people wearing their hair natural more and more. There’s a part in the film where Annie looks up at a billboard and says: “Wow, my hair is huge!” It may be “huge” but you know what? It’s fabulous–not just the hair itself, but what it represents to such a diverse audience. Sure, we can make our hair straight, or we can choose to rock it our way–curly, coily, kinky, big. It’s perfect just the way it is.
What are you mixed with?
Regardless of the amount of white or Native American I have in my family I am African-American. Most of us our mixed to some degree, some more than others.
How do you get your hair like that?
This is my natural hair. I use various conditioners and different styling products at any given time. Aussie moist is my favorite at the moment.
What products do you use?
I use Aussie Moist Conditioner that is my most consistent staple. I also like As I Am and SheaMoisture products.
Can you tell me everything you do?
Because I’m usually in a store line, the quick answer is I wash and deep condition once per week. I also co-wash in between when needed and I also clarify with apple cider vinegar at least twice per month. For styling, I mainly stick with wash and go’s but I also love twists, twist outs, and flexi-rod sets. I take a minimalist approach to hair care and that is how I retain length.
What conditioner do you use?
Aussie Moist Conditioner and Aussie Moist 3 Minute Miracle Deep Conditioner. I also like the Tresemme Nourishing Moisture Conditioner (silicone free”>.
How did you get said curls?
My answer is usually a”> wash and go, b”> flexi rod set, or c”> twist out. Then, I briefly explain how I achieve those particular manipulated curl patterns.
How long is your hair when you straighten it?
Tailbone length.
How often do you straighten it?
I straighten once per year but I have gone as long as two years.
How do you deep condition?
With ½ cup of conditioner mixed with about one tablespoon of honey and two tablespoons of olive oil. I sit condition under a hooded dryer for 15-20 min because my hair is low porosity.
Where did you get your weave/tracks? It looks so real!
This is my natural hair, I’m sorry.
Your hair always looks so cute, how did you do this type today?
This is the same hairdo I wore yesterday; it is just in a ponytail (or whatever style it is in”>. I refresh my hair every Sunday and usually one other time during the week I do not re-style everyday.
How do you straighten your hair when you do without damaging it?
I am not paranoid about damaging my hair because I do not heat style very often. When straightening I deep condition, air-dry, stretch, blow-dry, and then flat iron with a heat protectant and Paul Mitchell Super Skinny Serum.
So there you have it, the most common questions people ask me about my hair and my response. All good questions I am more than happy to answer if it will help someone else out in their hair journey.
What are some of the most common hair questions you get and how do you answer?
[prodmod]Wash and go’s do not typically last very long, so when it is time to get active, it can be a troubling decision. Do I workout or wait until it is time to redo my hair? We all want to keep our hair looking good for as long as possible, but we still have to exercise so, what’s a girl to do when she wants to preserve her wash and go while maintaining her fitness. To answer that question here are a few tips to keep your hair in tact while you maintain your figure when working out.
Pineapple
This tried and true technique will keep your style in tact for the most part, but it definitely does not work for every hairstyle or length. For instance if you run, your hair will get bigger and frizzy due to the movement. However, if you are working out on machines at the gym then the pineapple will suffice just fine.
Loose buns or puffs
This technique involves constructing a loose but secure bun all the way at the top or rear of your head. Not only does it keep your hair out of your face, it protects it from being blown around too much. Of course, you cannot do this will all curly and coily hairstyles and lengths but for a dry, set wash and go, you should have no problems as long as it is not too tight. For medium length hair, consider two side puffs or side buns.
Headband
For those that sweat a lot, wearing a workout headband along with the former two styling options (i.e. the pineapple and loose buns”> is a great option to keep the moisture under control and keep your wash and go intact. Plus, no one wants products to run down their faces! Wearing a headband could help prevent acne.
Wake up and go
Well, maybe not wake up and walk out of the house exactly how you slept, but something similar. This technique involves wearing a scarf much like you would when you sleep. If you can make a cute head wrap or have a cute hair scarf tying technique that works very well for preserving your hair longer, then do that!
The combination
Sometimes different types of exercise require different protection techniques. You may have to tie your hair back differently when you are running versus doing club Pilates or yoga. Whatever the case any one of these techniques can help you when you want a good workout and still maintain your desired look.
The pineapple works well for me while exercising. My main objective when working out is to keep my hair contained and out of the way. If I do that is does not get messed up. Another option that works for me is a carefully and loosely constructed bun. This technique is used when my style is set well and the short time that it is in a bun will not affect it. The pineapple comes in handy when I am on those Pilates machines.
How do you preserve your wash and go while exercising?
Oil rinsing is a technique used to lock moisture in ones hair while in the process of washing and conditioning. It is very similar to the LOC method, except it is only done in the shower. It is usually done with one of three oils—olive, coconut or avocado—because they penetrate the hair shaft. Here is a Guide to Oil Rinsing for Hair.
Benefits
- You increase moisture retention because you are rinsing your hair with ample oil that penetrates the hair shaft to lock in water, leaving your hair more moisturized.
- Oil rinsing is a great way to add more shine to your hair. Some do it, just to get rid of lackluster hair and increase shine.
- You will have less single strand knots because oil rinsing combats dry ends, which prohibits single strand knots from forming.
There are many different ways that you can oil rinse your hair, but don’t be intimidated by this technique. The method that works for me is an easy introduction into the world of oil rinsing. And it’s easier than you might think.
Do you have dry hair?
Being that natural hair can be extremely dry, I like to do an oil rinse more often than not. For me, the best technique for doing this is after shampooing and during my conditioning process, instead of before my conditioning process like many do. In other words, I like to mix my oil of choice (i.e. olive oil”> in with my conditioner. I have tried the latter technique, shampoo, oil, and then conditioner. I have also tried shampoo, conditioner, and then rinse, but my hair often feels too heavy. By mixing my conditioner and the oil, I get extra moisture without the heaviness.
Conditioner oil mix
After shampooing, I condition as I regularly would, rinse, and then condition with the oil and conditioner mixture. To do an oil rinse, I take a bowl in the shower, add a half-cup of oil and three tablespoons of conditioner, and mix. I like to let this sit in my hair for a little while if I can, so that it penetrates the hair shaft.
In other words, I like to mix my oil of choice (i.e. olive oil”> in with my conditioner.
Why it works
My hair is low porosity, meaning the hair shaft is tightly bound, which makes it difficult for moisture to penetrate. That being said, a regular oil rinse adds moisture, but not as much as I would like on its own. It does not feel as moisturized as it would if I added the oil to some conditioner. Also, with a regular oil rinse the remnants sit on top of my hair, which leaves it feeling coated. Mixing oil and conditioner for my oil rinse allows me to get deeply moisturized result.
Oil rinsing not only adds moisture, it also adds shine and makes detangling much easier for you. I have seen some rave about it and others who were not so impressed, but remember there is always a way to modify almost any hair maintenance technique to make it work for you.
Have you tried oil rinsing? Do you have something similar to oil rinsing that you like to do?
Single strand knots
Single strand knots are literally tiny knots on the ends or along the length of individual strands. If you look closely at what appears to be a ball at the ends of your hair, you will probably see that it is tied into what is alternatively called a fairy knot, (because only a fairy can tie a knot that small”>. There have been whispers of women who can untie the knot with a safety pin, but it is likely that the tension from the knot has already caused damage. The best way to get rid of these is to cut them off unless you have the time, patience, phenomenal eyesight, and skill to unravel them.
What your hair is trying to tell you
- You may be wearing your hair in its shrunken state a little too much. When your hair is in its shrunken state (e.g. wash and go”> it is much easier for the hair to get tangled into itself, causing single strand knots.
- Be more efficient with detangling. If your hair is not thoroughly detangled, then it is much easier for your hair to tangle and create single strand knots.
- Your hair may be on the longer side so it needs more TLC. You should be extra vigilant of all of the above to decrease the single strand knot issue. Unfortunately, your hair creates more single strand knots the longer it grows. That is just the way the cookie crumbles.
Solutions
- Stretch your hair.
- Wear more protective styles.
- Detangle thoroughly and reduce manipulation, especially on wet hair.
Incomplete split ends
Ugh, these are one of the worst split ends. Imagine looking at a perfectly healthy hair strand, and then smack in the middle is a hole that appears to be shredded! This is an incomplete split end. With incomplete split ends, the hair splits mid shaft, causing this mid shaft loop split ends because the hair structure starts to break down. This does not happen due to one cause, it is usually several hair maintenance techniques used over time that start to break down the hair cortex. Brushing, chemical processing, excessive shampooing, and heat are all said to cause these hideous split ends.
What your hair is trying to tell you
- You may be using excessive heat.
- Rough manipulation is wearing on your hair over time.
- Your products are too harsh.
Solutions
- Eliminate heat.
- Be gentle.
Tree split ends
Tree split ends are caused when a regular split end goes awry. When you fail to trim your split ends over time, they grow and the splits start to split hence the term tree split ends.
What your hair is trying to tell you
- You failed to catch the standard split end at the start and now it is escalating to epic proportions, so stop procrastinating.
- Your hair could be overly dry.
- You may be processing or manipulating and using heat a little too much.
Solution
- Trim your hair more often.
- Keep your hair moisturized so you do not get split ends in the first place.
- 1
- 2

