Search Results: Elizabeth Tosanwunmi


SOURCE: Cara Palmer
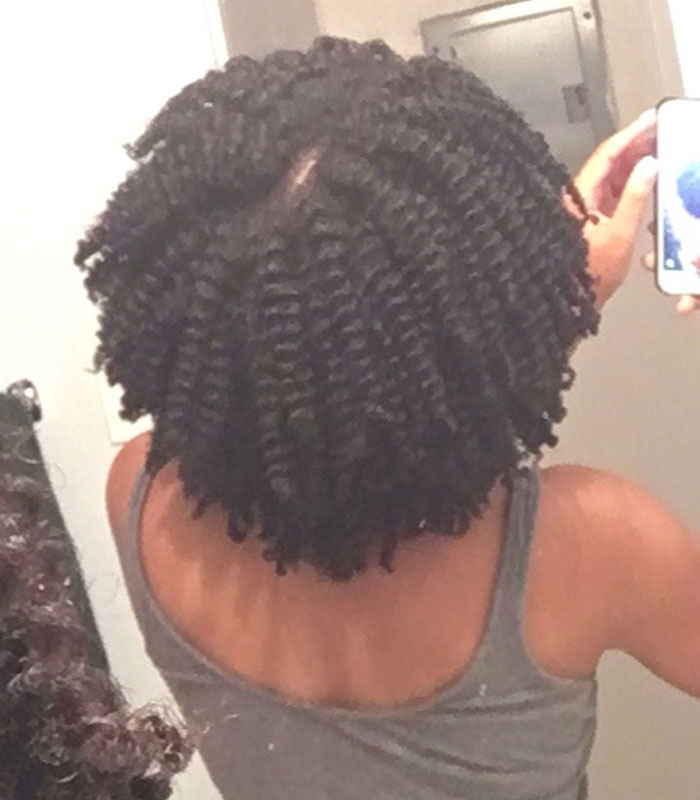
What are box twists?
Box twists, also known as square twists are a type of twist created by parting the hair into box-like sections and twisting.
What are the benefits of box twists?
They’re a popular hairstyle in the natural hair community because, for one, they are suitable for all hair types, lengths, and textures. You can also make them in different sizes — big, medium, or small. Furthermore, there is versatility when it comes to styling them. Lastly, they are a low-maintenance low-manipulation hairstyle that can be kept in for weeks and still look as beautiful.
If you’ve been wanting to try box twists but can’t seem to part out a clean box section, then let this article be your guide.
Step-by-step instructions on how to do box twists
What you should know before you begin:
Start on clean hair as this makes the parted lines on the hair come out neat. Another thing is if you’ve never done any type of twists by yourself before, it is advisable you start with bigger sections. These consume less time and energy. Smaller sections may take your time and leave you with cramped aching arms, making it frustrating for you to finish the entire twists.
Have these tools and products ready:
- Rattail comb
- Hair clips
- Spritz bottle containing water
- Moisturizing curl cream
- Natural hair oil
- Wide-tooth comb
- Elastic bands (optional)
- Hairbrush
- Edge control
Step 1. Split your hair into sections
Use the tail of your rattail comb to split your natural hair into four large sections: two in the front and two at the back. In this step, the parted lines do not have to be neat, as you’re simply splitting them in preparation for the moisturizing step. After doing this, use the hair clips to hold each section in place.
Step 2. Moisturize
In this step, you can moisturize using the liquid, cream, and oil (LCO) method. Take a section of hair and spritz it with water from your spray bottle until it is damp, not soaking wet. This is because soaking wet hair, just like dry hair, is hair at its weakest and if styled in that state is susceptible to breakage. Then there is the case of having water from wet hair drip on your neck, face, and shoulders. After spritzing, the next thing to do is apply your moisturizing curl cream and work it into your hair from roots to tips. Finally, rub some oil in each section of the hair to help lock in the moisture from the cream. It is important to mention that not all moisturizing curl creams may need the addition of oil as some were formulated to lock in moisture on their own. However, if you have dry or porous hair, adding a natural oil as a sealant can help your hair stay hydrated for a longer period.
Step 3. Get rid of knots and tangles
Here’s where your wide-tooth comb comes in. Use it to detangle your moisturized hair gently from roots to tips until all the knots and tangles are taken out and you’re left with smooth hair. The wide-tooth comb also helps to further distribute the moisture from the LOC evenly on your natural hair. When you’re done with this, put the section in a loose twist, wrap the hair around itself and secure it with a clip.
Then repeat steps 1 – 3 for each of the other three sections.
Step 4. Create a box section
Take down the clips and the two loose twist sections at the back and comb them together with your fingers. Then use the tail of your rattail comb to create a row two to three inches up from the nape of the neck (this size is for medium box twists). Make sure you part out in a neat horizontal line. Then divide the row by a vertical line into two to create a column. This will form the perfect box section.
Step 5. Smooth the section
Pick up one of the box sections and smooth down with some edge control at the base and then brush with your hair brush. This will help add a sleek look to your hair. Pick up an elastic band and coat in a small amount of oil to prevent friction on your hair as this can cause breakage.
Step 6. Twist or braid the section
Next, wrap the elastic band firmly not tightly around the hair to secure the twists at the roots. If the band is too tight, it can pull at the roots of your hair and leave some bumps on your scalp. When you’re done, divide the hair into two equal strands and begin to twist from the roots all the way to the ends.
Now, the rubber band part is completely optional. If you’re not doing that, after applying the edge control and brushing your hair, separate the box section into three equal strands and begin to braid at the roots. Here, instead of the rubber bands, the braids will help secure your twists at the roots.
Braid about 1 – 1½ inches of hair, merge, and then split the three strands of hair to become two equal strands instead. Take these strands and begin to wrap them around each other.
As you’re getting to the roots, you’ll notice that the hair becomes thinner, making it difficult to continue twisting. Simply twirl the thin ends with your fingers to keep them from unraveling.
Repeat
Repeat the steps of sectioning into rows and columns and twisting to create the remaining box twists all over your hair.
For a visual guide on how to create box twists by yourself, watch this YouTube video tutorial by Jeanette J Beauty:
Product recommendations for box twists

Creme of Nature Moisture Whip Twisting Cream
Product promise: Defines & elongates Curls. Provides crunch-free, soft & shiny curls. Long-lasting hold. Non-flaking, non-sticky, non-greasy.
Amazon customer rating: This product has a 4.5 star out of 5 stars global rating by 2634 users

Marc Anthony Curl Defining & Enhancing Lotion
Product promise: Defines and softens curls. Repels humidity. Adds shine. Controls frizz.
Amazon customer rating: This product has a 4.4 star out of 5 stars global rating by 8,867 users

Argan Magic Defining Curl Cream
Product promise: A lightweight, moisturizing curl defining cream for maximum frizz prevention. Ideal for wavy or curly hair, medium to coarse, this ultimate curl potion will spotlight every ringlet, smooth waves and eliminate frizz without feeling stiff or sticky.
Amazon customer rating: This product has a 4.3 star out of 5 stars global rating by 3012 users

Twist by Ouidad TWIST Weather Up Weightless Curl Defining Gel
Product promise: Keeps curls moisturized. Soft, touchable hold with no crunchy residue.
Amazon customer rating: This product has a 4.3 star out of 5 stars global rating by 1818 users

Avlon Keracare Natural Textures Twist and Define Cream
Product promise: Avlon Keracare Natural Textures Twist and Define Cream gives smooth shiny, soft twists and twist-outs.
Amazon customer rating: This product has a 4.3 star out of 5 stars global rating by 564 users
Read next: How to Care for Your Scalp While Wearing Braids & Twists
If there’s one thing that makes twists one of the most sought-after styles for 4c hair, it is their versatility. This along with the fact that they are a low-manipulation hairstyle and do not require a complicated routine when it comes to maintenance, all while being a protective style. As already mentioned, twists present a lot of versatility when it comes to styling options. This way, you’re not stuck with recycling one hairstyle. Instead, you can switch up looks for different events, activities, or just because you feel like it. Whether your 4c hair is short, medium or long, fine, thin or thick, here are 14 natural hair twist styles that are sure to get you compliments when you rock them:
Chunky Twists

SOURCE: Pinterest
Also sometimes called Jumbo twists or loose twists, these twists are sectioned large so that they give off a bold finish. It is best done on full and thick 4c hair and you can further accessorize them for that extra beauty.
CREDIT: Chika Park
Three Strand Twists
SOURCE: @jasminemoguel
A deviation from the traditional two-strand twists, this twist hairstyle requires a technique of wrapping three strands of hair around each other to create a unique twist look and it is suitable for all hair types. The technique can be tricky for beginners and it may take a bit of expertise to perfect which is why I have included the video below to help you out:
CREDIT: Jen Finds Gems
Halo Twists
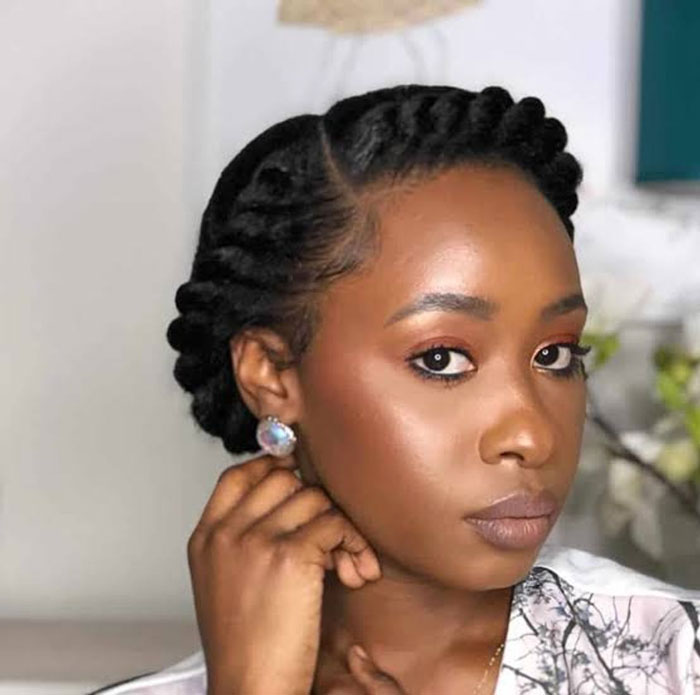
PICTURED: essie_n
Also called the crown twists by some, it is a simple hairstyle, created by twisting a large chunk of your hair from the front all the way back, tucking it in, and securing it with Bobby pins to create a halo-like effect. This style is usually recommended for naturals with longer hair:
CREDIT: MYTYPE4HAIR
Spiral Crown Flat Twists
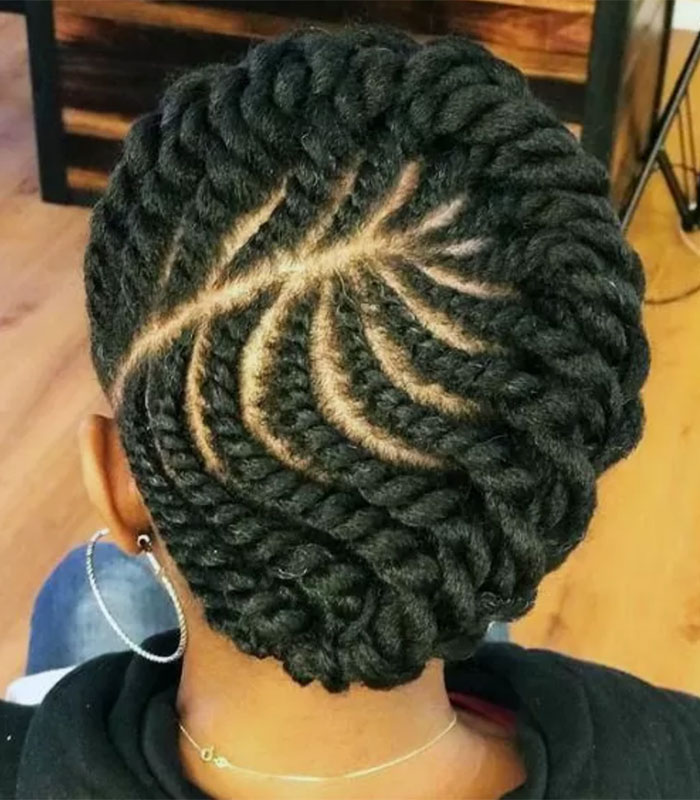
SOURCE: Black Hair Tribe
As the name implies, these are spiral flat twists created starting from the front and sides of the hair and wrapped around at the edges to give off a crown-like effect. Although ideally, they’re suited for naturals with long hair, those with short hair can do this too by adding extensions to give you that full twist effect.
Twisted Top Bun & Bangs
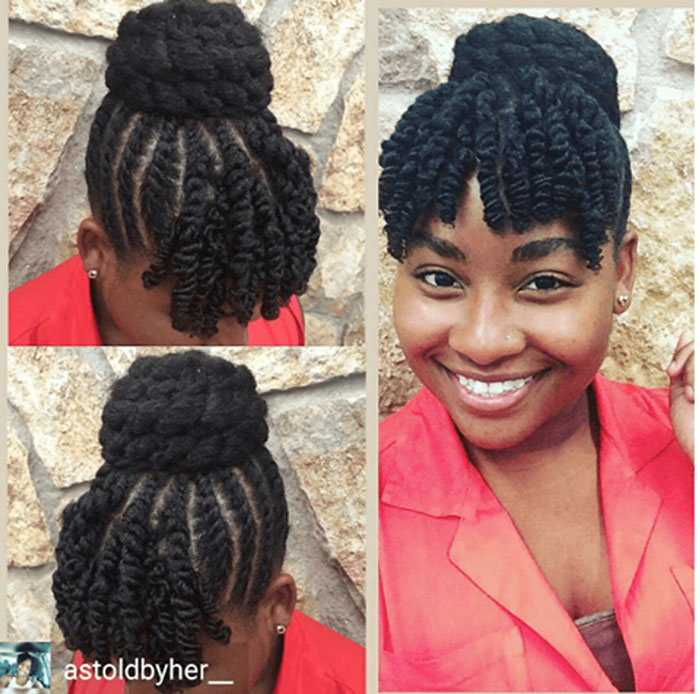
PICTURED: astoldbyher_
This 2-in-1 hairstyle (a combo of a bun and bangs), suitable for medium to long hair, is one that is definitely worth trying out. You can either choose to flat twist the bun or pull up single strands of twists into a bun and style the remaining twists in front as your bangs.
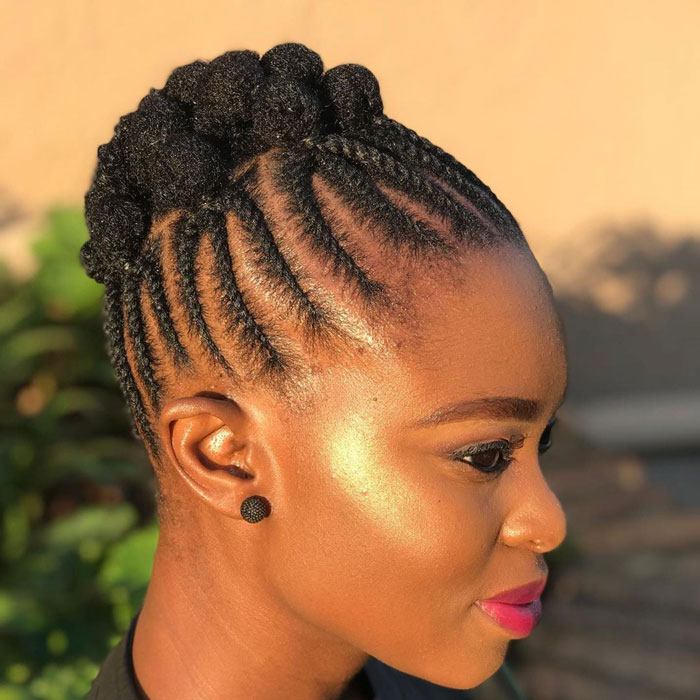
Mini Bantu Knots
The mini bantu knots are a hairstyle, especially for ladies with short 4c hair. With your hair neatly sectioned, firmly twisted, and wrapped in a knot, what better way to show off your proud African roots?
Mohawk Flat Twists
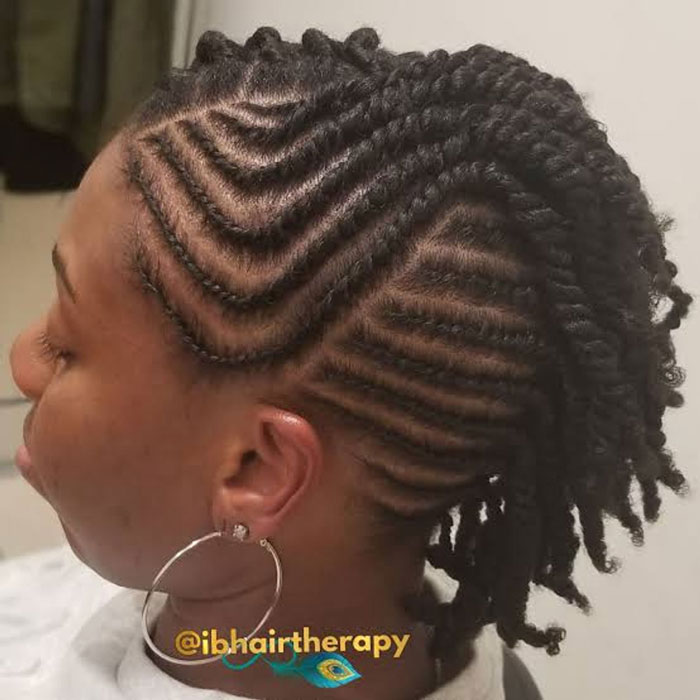
SOURCE: @ibhairtherapy
This stylish head-turner involves creating flat twists from the front or sides of your head all the way to the center. You can do the twists in swirling, criss-cross, or straight patterns, depending on your taste.
Flat Twists Updo on Short Natural Hair
PICTURED: Ruutos
Yet another hairstyle specifically for girls with short natural hair, the flat twists updo never looked better. With a look quite distinct, it gives its wearer a regal appearance and will surely get heads to turn in admiration when you walk by.
Flat Twist Pompadour Updo
PICTURED: Tyiece
The flat twist pompadour updo involves the technique of sweeping the hair upwards from the face and piling it up in thick chunks in the center of the head.
Flat Twists + Crisscross Hairstyle

PICTURED: @neishag
A blend of flat twists and crisscross hairstyle, this unique combo comes to life by crisscrossing flat twists atop each other. You can even rock it in a puff like Princilla Adu in the video below:
Chunky Blown-out Box Rope Twist
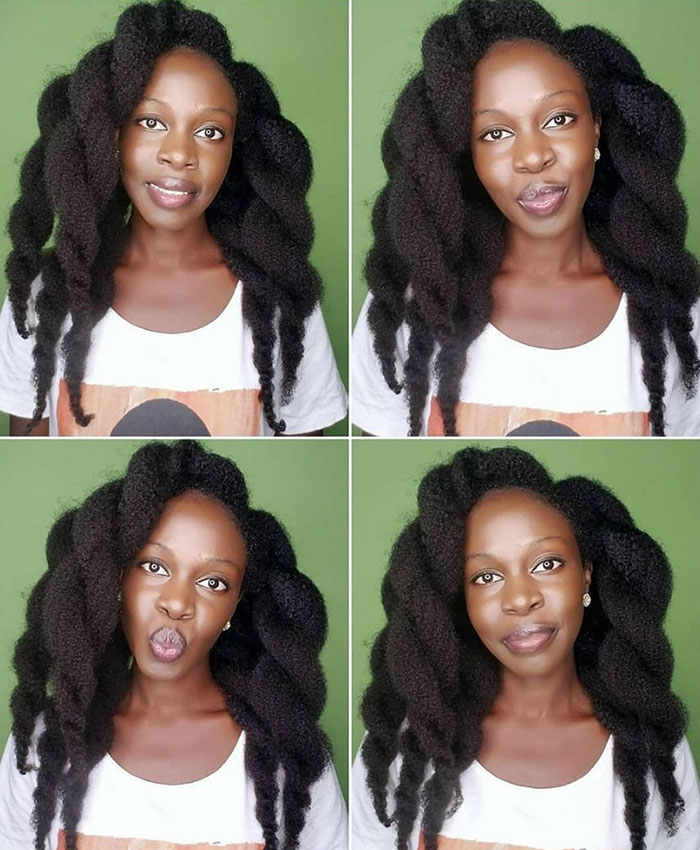
PICTURED: @thefrotales
Another hairstyle particularly for the girls with thick full hair. The large unusually full twists resemble hair that is blown out with a blow dryer.
Regular Twists With Highlights
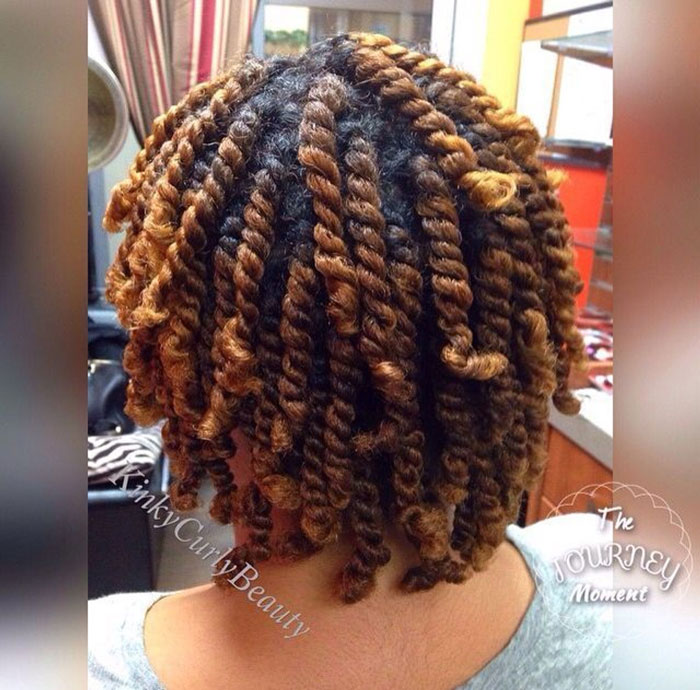
PICTURED: Kinky Curly Beauty
Spruce up your regular twists hairstyle with some color highlights. Blonde, red, purple, green, whatever the color, just dare to explore and give yourself a whole fresh look.
Ponytail and Flat Twists Combo
As the name says, you can create this style by putting your natural hair in flat twists and then adding a ponytail extension to its ends. You can choose to do this in a high or low ponytail.
All Back Flat Twists
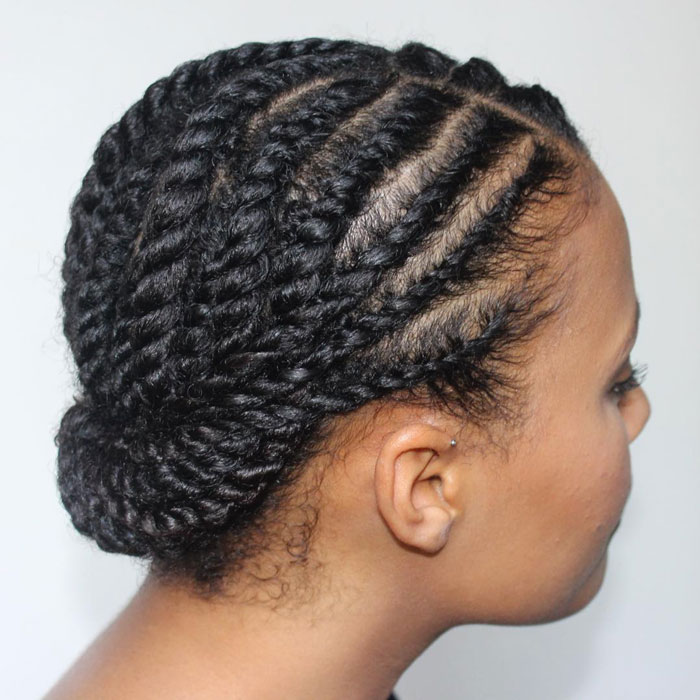
PICTURED: @_simplystasia
This is a simple girl’s hairstyle in which you section your hair into 4 or more and flat twist from your front hairline all the way to the back.
Which of these twist styles would you try? Do share in the comments!

