Search Results: Cristina Cleveland

If you have naturally curly hair then you have probably flipped through your fair share of magazines looking for “easy hairstyles” and been met with a plethora of styles that would never work on your curls (without the use of some serious heat or manipulation”>.
That is why we created this quick cheat sheet of hairstyles that every curly girl should know and try. You may have to tweak these steps for your unique curl pattern, but you may also find a go-to style that will save you time on your rushed mornings.
The High Puff
This style may look different on you depending on how tight or loose your curls or coils are, how dense your hair is, and how long it is, but the general steps will remain the same. It may look simple, but once you have mastered it it will be a lifesaver for your active lifestyle.
- Start with moisturized & defined hair to make your style last longer. Use a nourishing conditioner like the Aunt Jackie’s Moisturizing Co-Wash Cleanser on wash day and follow up with the Elongating Flaxseed Gel for definition.
- Pull all of your hair towards the crown of your head.
- Secure it with a large elastic.
- Smooth the edges with Tame My Edges Gel. Couldn’t be simpler!
Tucked French Braid
One of the perks of having curly hair is that it holds a braid really well, and curls naturally have so much movement that braids never look boring! This one is much easier to do than it looks.
- Start with detangled and moisturized curls to make the hair easier to work with. Use a detangler like Knot On My Watch Detangler follow up with a leave-in conditioner like the Half & Half Silkening Hair Milk.
- Create 3 small sections at crown and begin a French braid.
- Braid all the way to the end and secure your braid with an elastic (this will not be visible once you’re done”>.
- Tuck the bottom of the French braid under and secure with bobby pins.
Two-Strand Twists
This must-know technique can work on all curl patterns from loose waves to tight coils. The key is the smaller the sections of hair, the tighter the resulting curls will be. If you are using this technique to stretch your curls use larger sections, and if you are trying to create a tighter curl pattern than you naturally have use smaller sections.
- Start with moisturized hair to prevent frizz from ruining your style. Try a moisturizer like the Hydrating Silkening Hair Milk.
- Take a 1-2 inch section and divide into two.
- Apply a small amount of a styler like Defining Curl Whip and begin twisting the 2 sections around each other. If you have loose curls or waves take extra care not to use too much product here.
- Repeat this until all of the hair is twisted, and either air dry or use a hooded dryer.
- Once the hair is 100% dry, separate the twists with your fingers. It is extremely important that you wait until your hair is dry, otherwise you will end up with a frizzy twist out and your curls will not be defined.
- Unravel the twists. For a more defined look do not separate the twists once you have unraveled them. For a larger, voluminous look keep separating and fluffing with your fingers until you have the look you are going for!
This post is sponsored by Aunt Jackie’s.
If there is one thing we have learned about curly hair over the last 18 years of NaturallyCurly, it is that there is no one way to style curly hair.
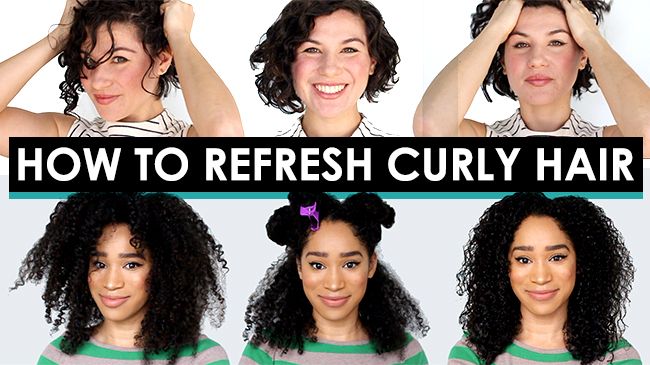
There is so much variation between curl pattern, length, width, density and porosity – it is impossible to recommend one method for everyone. So here are two methods that our editors use to refresh their Type 2 and Type 3 hair.
We will continue to share refreshing techniques for other curl patterns as well, so do not worry if these do not work for you.
For naturally wavy hair
The major challenges of refreshing wavy hair on the 2nd, 3rd or 4th days are:
- dents in the hair
- waves have fallen straight
- waves and curls are bent out of shape
Step 1 – Spray with water
Step 2 – Scrunch
Step 3 – Product (optional”>
Step 4 – Spot treat
It is very likely that even if you do everything perfectly, you will still have a few out of shape curls. Wavy hair is unpredictable! For these I have a very quick fix, simply wrap the curl or wave around your finger, and continue twisting it up all the way to the root. Pin with a bobby pin and repeat on any other curls that need to be spot treated. Usually I do 2-3 of these pin curls on the hair that frames my face, I have found that a couple of perfect curls creates the illusion that the rest of your hair is having a good hair day. I finish putting on my makeup and getting dressed, then take the bobby pins out and I have loose curls. Then I spot treat anything that’s out of place by twirling them around my fingers and make sure nothing is sticking up in a strange direction.
For naturally curly hair
The major challenges of refreshing curly hair on the 2nd, 3rd or 4th days are:
- knots
- dryness
- frizz
Step 1 – Section
Step 2 – Wet hair
Step 3 – Apply products
Step 4 – Detangle
My hair
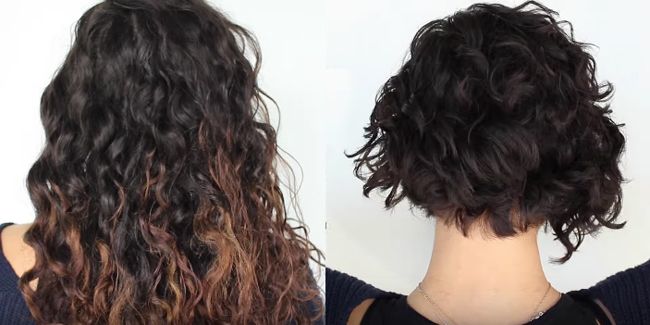
I have coarse, medium to high density, Type 2c waves that were suffering from a great deal of damage from bleach, henna, and hair dye. As a result my hair was high porosity and my curl pattern had loosened significantly. You can probably see in the video below that there is a clear line of demarcation between my virgin curly hair and the damaged hair that had an irregular curl pattern. If the ends of your hair have stopped curling, there’s a pretty good chance you could benefit from getting a haircut. Even if you haven’t colored or bleached your hair, damage can be caused by heat styling if you occasionally use a flat iron or a curling wand. Nothing can completely repair damage, you can do protein treatments or deep conditioning treatments to bring a little life back into your curl, but the only way to truly remove it is to cut it.
Finding a stylist
This is probably the biggest barrier to a great haircut for most wavies, curlies and coilies. We’ve all been scarred one too many times by stylists who claim to know how to work with your texture.
I found my stylist the old-fashioned way, I asked someone with curly hair if they knew a stylist they liked. I’m very lucky that that someone was Michelle Breyer, the Co-Founder of NaturallyCurly, who recommended Shannon Hollis, the owner of Method Hair in Austin, TX.
If you don’t know anyone who likes their stylist, you can find a stylist the new-fashioned way: online. I would recommend reading reviews by other curlies on our Salon Finder to find one in your area. I also know a lot of curlies travel great distances to get haircuts from curly hair experts, for some it’s definitely worth it!
Finding the right cut
Finding a wavy haircut proved to be a challenge because most haircut inspiration on Pinterest features women with curling wand waves and curls. I did my best to find photos of the length and shape on straight hair or “fake” wavy hair, but my stylist Shannon promptly informed me that those cuts were not going to work on my hair. A good stylist will tell you when a cut isn’t going to work! If you have wavy hair like mine, you have probably realized by now that our hair may look straight and close to our heads when it’s wet, but as it dries it flips out and up. Rather than fighting this, it’s best to find a cut that works with your natural wave.
Luckily Shannon had a whole portfolio of curly cuts for me to choose from, and together we chose a cut that I liked, that would work for my curl pattern. If you’re interested in seeing the photos I brought, you can find them on my Pinterest board but as I said, most of them had straight hair. The best source of Type 2c inspiration I found on my search was Karla Deras from Karla’s Closet.
The cutting method
You may be familiar with the concept of dry cutting or Deva Cuts, but this was not a dry cut. Shannon chose to cut my hair wet so that she could see that the shape was even. I don’t have a significant amount of shrinkage so this method worked for me. Once she was happy with the initial silhouette, and when my waves had begun to dry in their natural curl pattern, she went back in with her scissors and shaped the individual curls. She focused on removing weight from the bottom of the cut, an important step for preventing triangle head. Most people don’t have a uniform curl pattern throughout so it is likely that some curls will be tighter (and therefore shorter”> while other curls will be looser and longer. I personally have looser curls framing my face which usually leaves me with awkward long strands in the front, but Shannon took care of that.
She also explained that if I had Type 3 curls or Type 4 coils, her method for cutting would have been completely different. Just as one technique or product won’t work for every curl pattern, neither will a cutting method.
Styling short wavy hair
As a curly girl, we typically feel that we know how to do our hair better than anyone else – stylists included. So admittedly I was surprised when Shannon showed me a new diffusing method and introduced me to new products that I ended up loving. Shannon used her fingers to lightly lift my hair at the roots and point the diffuser at it, this also created a smoother, looser wave at the roots. Diffusing typically causes a bit of frizz, so Shannon followed up with a product I had never tried before – Kevin Murphy Easy Rider Creme. I’ve been using it along with their Killer Curls and I’ve been loving that they give my hair flexible hold that allows me to wear my hair down for 3-4 days by lightly refreshing it with water in a spray bottle in the mornings.
If you’re thinking about cutting your hair I say you should definitely do it! I was really nervous before getting this cut but I haven’t regretted it for a second and my hair just feels so much healthier.
I know how hard it is to find naturally wavy short haircuts, so I hope this helped you out!
Pre-poo
Pre-poo means pre-shampoo. To pre-poo you add generous amount of oil or a daily conditioner to your hair and allow it to sit for at least 15 min. before washing with a shampoo. This technique is done to aid in detangling and reduce the drying effects of shampoo. When done with coconut oil, you can prevent your strands from experiencing hygral fatigue, which can be damaging for your hair’s cuticle and cortex.
Read more: 4 Signs You Need to Pre-poo
Hot oil treatment
Hot oil treatments are used to replace deep conditioning. After you shampoo, heat your oil of choice in a microwavable container for a few seconds, pour it on your hair, cover with a plastic processing cap, and allow it to sit for 15 min. When you rinse your hair should feel silky soft.
Cocktail
If you want to use oils but not in generous amounts then try cocktailing. Mixing an oil with any product is considered cocktailing. Naturals are renown for cocktailing their daily conditioners and deep conditioners with penetrating oils like olive oil, avocado oil, and coconut oil. This is a great choice for those with looser curls and finer strands if you are worried about weighing your hair down from oversaturation. If you are a college student or budget conscious, adding those penetrating oils will transform your daily conditioner into a deep conditioner in seconds.
Oil rinsing
An oil rinse consists of dousing your hair with oil after using a deep conditioner and then rinsing away the excess oil with water. This technique allows you to seal in moisture without the worry of leaving oil on your hair.
Sealing
Sealing is coating your hair with oil after you have applied your moisturizer or leave-in conditioner. Oftentimes done with a light oil, this method reinforces the moisture you instilled after your masque. If you have porous curls, coils, and waves, consider using this technique to retain moisture. For hair that struggles to maintain moisture and softness, try using a butter to really lock the moisture in.
Read more: My Moisturizer Has Oil in It: Is Sealing Necessary?
Of course using all of these methods will leave your hair an oily mess so test out different steps and let us know what worked for you.
What are your favorite oils?
We have seen chia seeds dethrone the flax seed as the superfood seed of choice, and now it has made its way into our hair products too!
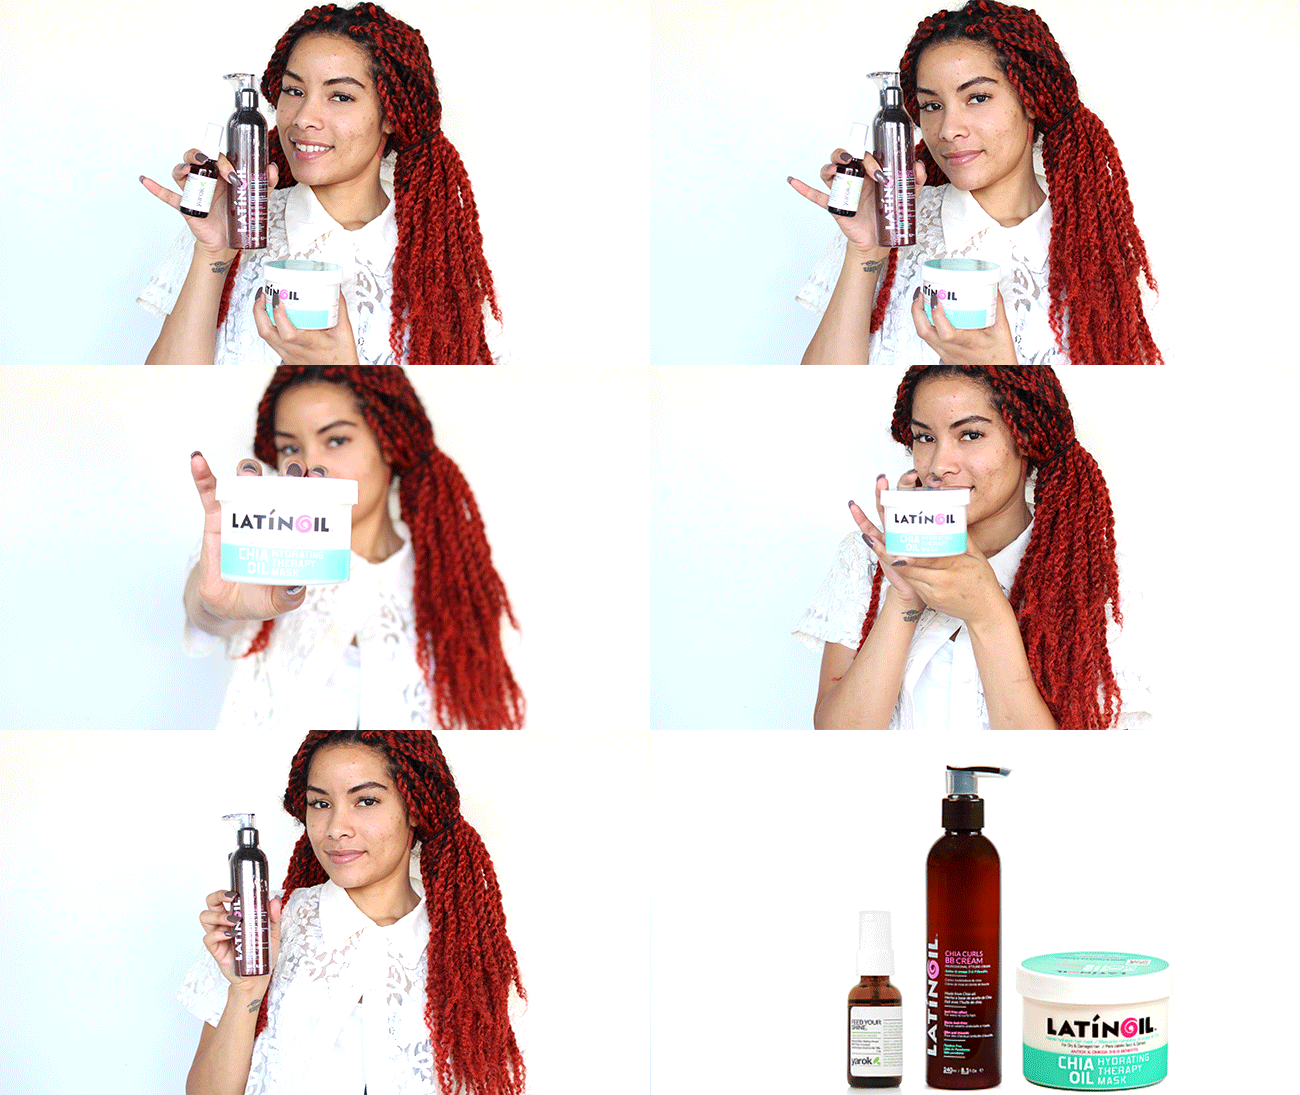
Some curlies have been using the seed’s gelatinous coating to create their own hair gel, and Latinoil is the first company to create a full line of hair products from of chia seed oil.
We’re especially excited about the Chia Oil Hydration Therapy Mask, which you can use as a weekly deep conditioning treatment or even as a leave-in conditioner (after applying a small amount to wet hair”>.
If you’d like to try 3 of the Latinoil products yourself, you (and 9 other lucky winners”> can win a prize bundle of them today.
How to enter
Tell us why you’d like to win in the comments below.
Prize
There are 10 prize packages, each includes:
- Latinoil Chia Oil Curls BB Cream – Leave-in anti frizz softening cream, fights humidity and frizz, while maintaining soft, and silky hair.
- Latinoil Chia Oil Hydration Therapy Mask – Antioxidant rich formula of Chia Oil and Omega Fatty Acids restores hair’s natural oil and is a perfect solution for dry and damaged hair.
- Yarok Feed Your Shine Hair Serum – Vegan-friendly serum absorbs quickly into the scalp and hair, deeply penetrating, conditioning and bringing out hair’s inner sheen while contrasting highlights and protecting hair from the damaging effects of hot styling tools.
If can’t wait to try these products for yourself, you can get 30% off of this bundle when you use NATURALLYCURLY30 at checkout here.
This giveaway is open to U.S. residents only, as per our Terms and Conditions.
*Please make sure you have liked us on Facebook, so that we can notify you if you’ve won.
This post is sponsored by Folica.
Many curlies use a t-shirt to wrap, plop or scrunch their hair because they know terry cloth towels can cause frizz, breakage, and flyaways. This month a few of our editors traded in their t-shirts to try the Hair RePear towel to see how it measured up.
Our Video Manager Nikki says “I love the way it feels. I used it in a similar way to my t-shirt but it feels like your best, softest t-shirt. Plus it’s EXTRA long so all my hair fits into it. I want to use this every time I wash my hair. I can finally get rid of using my actual t-shirts!”
Our Editor Devri likes that “it’s super long and easy to wrap up my hair with. The material is also really absorbent.” As someone who has tried many different microfiber towels, Devri says “unlike some other hair towels I’ve used, this one doesn’t leave behind any unwanted mildew-like odor after using it a few times. Love it!” Both have stuck to their Hair RePear ever since they first tried it.The difference between the Hair RePear and a t-shirt or microfiber towel is first of all its size, it can fit all of your hair if you have long or dense curls. The fabric also sets it apart as it’s Premium 100% Combed Cotton Interlock fabric, or in the words of our Editors “SO much softer than a t-shirt!”
Giveaway
Want to try a Hair RePear towel for yourself?
5 lucky winners will receive one to try! Simply comment below telling us how you will use it – wrap, plop, scrunch or another way?
If you can’t wait and want to try one now, you can purchase your own oline at Hair Repear using the coupon code tryit2015 for 10% off during the month of December.
Curly girls will go to great lengths for a great haircut, but this stylist has taken his trade to a whole new level. Scissors are so 2015, Spanish hair stylist Alberto Olmedo prefers to use medieval weapons such as swords, flames, and… claws?
His reason for employing these tools: to be more exact.
“Hairstylists always cut one side and then the other, and one side is always a bit different from the other… Even if it is only a little bit.” He has a fair point, as curly girls we have had our fair share of botched haircuts that are drastically uneven at times. So far, we like what Olmedo has to say. He goes on to explain that “The only way to do it in an exact mathematical way is to cut both sides simultaneously.” Olmedo proceeds to start slicing randomly into a woman’s hair, creating many different lengths, and setting large sections of hair on fire.
The only way to do it in an exact mathematical way is to cut both sides simultaneously
Now we recently delved into the “candle method,” also known as velaterapia, in which stylists use flames to remove split ends from their clients’ hair. Stylists take a small section of hair and twist it, then use the flame to remove the damaged pieces and flyaways that are sticking out of the twist. Celebrity hairstylist Anh Co Tran says “Of course, playing with fire certainly comes with a risk, and shouldn’t be a DIY move, it takes major control, which can be hard… if you don’t stop it on time, you may take off more [hair] than you wanted.” As terrifying as velaterapia sounds, it is infinitely more precise than Olmedo’s method. Watch the video and be amazed.
While we have our doubts, the proof is in the curly pudding – how do the resulting haircuts look? You can take a look for yourself. As Olmedo says, “Sometimes you have to use a bit of your imagination to get positive results.”
Watch the full awe-inspiring video for yourself.
Cutting Hair with SwordsDitch the scissors and get your hair cut with swords by the real-life Edward Scissorhands.Posted by AJ+ on Wednesday, December 2, 2015
We love our natural curls, no question. But there’s no denying that some days they can be unpredictable. That’s why I love looking for techniques that can take a bit of the guesswork out of what my curls will look like when I wake up in the morning. Many women use variations on twists, braids and knot outs to manipulate their curl pattern or make their curls more uniform. They can work from Type 2 waves to Type 4 coils, you just may need to customize the products you use or the amount of hair in your twists. In this tutorial YouTuber AlexandrasGirlyTalk shares her twist out technique on her natural Type 2C waves and curls.
What you’ll need
- A lightweight oil
- A liquid leave-in conditioner
Directions
1. It is important to begin by detangling your hair for your most successful results. Alexandra brushed her hair before getting in the shower, and this is the only time she recommends brushing curly hair. Personally I use detangle in the shower with a wide tooth comb and conditioner, but do whatever works for you, just make sure your hair is knot-free.
2. Allow your freshly cleansed, wet hair to air dry partially. Starting on partially dry hair will mean that your twists do not take quite as long to dry.
3. Section your hair so that it is easier to work with. Then start by taking a small, 1-2 inch section of hair and spray it with your leave-in conditioner.
4. Take 2 pieces from the top of your section and start twisting them around each other, adding a little bit of hair into the twist each time you twist. The smaller the sections, the smaller and more defined your curls will be in the end. Twist all the way to the end of the hair and tie with a small elastic.
5. Repeat this process until all of your hair is twisted.
6. Leave the twists in as long as you can, overnight is best. Alexandra slept with hers in.
7. When you wake up you might find that you have frizz the friction on your pillow. To reduce your frizz you can rub a small amount of a lightweight oil between your hands and smooth your hands lightly over the frizzy sections. Alexandra used Carol’s Daughter Marula Oil.
8. To unravel your twists, just work slowly through each section until all of your twists are unraveled. Do not move too quickly or you may create tangles and knots – be patient!
Have you used this technique on wavy curly hair before? Share your tips below!
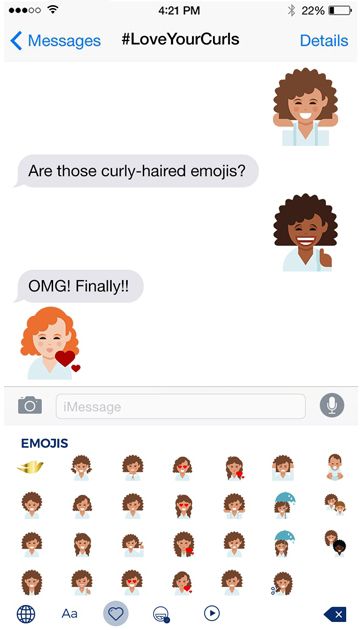
There’s an emoji for everything – a hazelnut, a paper clip, 3 kinds of CD-roms. Yet somehow not one curly girl to be found – until now. Dove recently launched their own line of curly girl emojis so now we can hair twirl and heart eyes to our hearts’ delight.
According to Sali A. Tagliamonte, a professor of linguistics at the University of Toronto who partnered with Dove Hair on this launch, “If people can use tools of communication that reflect who and what they are, this can have a positive effect on their self-confidence and quality of life.”
The best part? They did not simply release one curl pattern, one hair color, or one hair length. They got the memo that curls come in all shapes and sizes (and colors”> and gave us 131 variations to choose from.
We’re all for curly hair representation on every platform available, and considering 74% of us are using emojis daily this platform’s reach will be pretty all encompassing.
How to get them
Step 1 Download
You can download the Dove “Love Your Curls Emojis Keyboard,” on the iTunes App Store or Google Play. And don’t worry, it’s free.
Step 2 Add “Dove Curls” to your third-party keyboard
Once you’ve downloaded the keyboard, you can use it in your messages on Facebook Messenger, email, WhatsApp, Kik, Viber, and more.
Step 3 Click the globe icon and choose the Dove Curls keyboard
 These instructions are for the iPhone, so far we’ve seen that Android users are having issues getting the emojis to work for them.
Have you used these emojis yet? Let us know how you’ve used them below!
I received this co-washing question from fellow Type 2c wavy Nadine.
Question
I also have 2C curly hair although recently I don’t know what’s happening to my hair. I started the CG method a few months back but co-washing my hair made my curls limp, even if I do occasionally shampoo it using a sulfate-free one. I’m thinking to stop co-washing for good and start washing with sulfate-free shampoo but I’m thinking that it probably would make my hair dry. What do you think? Can you please give me some tips how to bring my curls back? I really, really like to know what your curly hair routine is. I would appreciate your help a lot as I am new at this and I miss my curly hair so bad.
Answer
I find that co-washing leaves my hair kind of limp too, so I only use it when I want to condition my hair but it hasn’t been long enough for me to need to shampoo yet. Instead I use sulfate free shampoos most of the time, and I cleanse my hair about twice a week. I try to go as long as I can in between washes and refresh with a spray bottle of water and leave-in conditioner in the mornings.
I personally don’t follow the Curly Girl Method, but I do try to avoid sulfates because my hair is color-treated and damaged. A few of my favorite sulfate-free cleansers are Ouidad’s Cleansing Oil (which really doesn’t have an oil consistency”>, ApHogee Textured Hair Wash, and EDEN BodyWorks Peppermint Tea Tree Shampoo. I know that SheaMoisture is a fan favorite among curly girls but for my Type 2C waves some of their popular cleansers leave my hair feeling weighed down, which is true for many products that tighter curlies and coilies like.
When I do co-wash I simply use my daily conditioner and my favorite scalp brush to work the product in and lift the dirt from my scalp. If you don’t have a scalp brush you can easily massage your scalp with the pads of your fingers, just make sure not to scratch. The scalp brush helps me feel really clean even when I am using a conditioner to cleanse. A few of my favorite daily conditioners are DevaCurl One Condition, UR Curly Quinoa Conditioner, and Elucence Moisture Balancing Conditioner.
My last suggestion is to be sure and clarify your curls at least once a month. This will remove any product buildup you have that could be causing the limp curls. My favorite clarifying shampoo is Kinky Curly’s Come Clean Moisturizing Shampoo, which is still sulfate free.
I hope this helps, Nadine!
If you have experience with co-washing or the CG Method, share your tips below!
[prodmod]Have questions about your hair? Post them on our Curly Q&A so that other curlies and our Editors can respond.
Many of us spend our lives searching for that one unicorn product. The one that provides everlasting moisture, shine, frizz-less texture that lasts 5 days straight and feels soft to the touch. The product whose ingredient label lists all natural, organic ingredient names we can pronounce, contains no chemicals or preservatives, has a neverending shelf life, costs $5 and can be found nation wide in our local drugstores.
If you have found your Holy Grail hair product, congratulations. But for those who are still looking, there is a way to get exactly what you want, when you want it – we call it cocktailing.
What is cocktailing?
Cocktailing is combining store bought products with raw ingredients to create your own personalized product. You know cooking at home is way better for you than eating out because in your kitchen you have control over what’s going into your food – the same can be said for cocktailing your own hair products.
For example, if you love the hold of your gel but it leaves your hair feeling dry, you have options! You can mix in your favorite leave-in conditioner, customize a curl cream, or even use aloe vera gel instead. With a few minor alterations, you can breathe new life into that graveyard of un-loved products under your bathroom sink.
Here are a few easy cocktails to start you on your way to becoming a brilliant mixologist.
2nd Day Hair Refresher
Everyone’s telling you to “shampoo less.” But if your hair is prone to dryness or product buildup is weighing your hair down by day 3, then you need a light, moisturizing refresher. This will reactivate any product you applied in previous days and help reshape any creases that happened while you were sleeping.
- Step 1 – Fill an empty spray bottle (you can either buy one or use an empty product bottle”> halfway with distilled water. Distilled water contains no impurities, minerals, contaminants, or gases, and has a desirable pH level of 7.
- Step 2 – Add 1-2 tablespoons of your favorite leave-in conditioner (we like Karen’s Body Beautiful Sweet Ambrosia Leave-in Conditioner or Kinky Curly Knot Today“>. Shake until the mixture is fully incorporated.
- Step 3 – In the morning spritz your dry, flattened 2nd (or 4th or 5th“> day hair lightly. Flip your head forward and spritz upside down, gently scrunching your hair with your fingers. If you have curls, coils or waves do not to brush or rake your fingers through your hair. Then spot treat any out of shape or frizzy spots using your fingers or, if you prefer, a heat styling tool.
Easiest Cocktail. Ever.
If your hair is in need of a transformational treatment – but you don’t have the budget for a fancy deep conditioner – then simply upgrade your daily conditioner.
- Step 1 – Add 2 tablespoons extra virgin olive oil to your daily conditioner. Shake until fully mixed.
- Step 2 – Condition as you normally would. Or for a deeper treatment saturate your hair with the conditioner and put on a shower cap for 15-30 minutes, then rinse.
Super simple right? As with all hair tips, everyone’s hair is different so you may find that 1 tablespoon of oil is plenty for you, or you may need more moisture – I have seen some women use a ratio of ¾ conditioner ¼ oil, and even up to 50/50 conditioner and oil. And you may find that instead of olive oil, your hair reacts better to grapeseed oil or honey (yes, honey!“>. When you are just starting out, mix a small cocktail in a bowl rather than dumping the oil straight into your conditioner bottle so that you can play with the quantities and oils until you find what works.
Moisturizing Curl Definer
Styling products are notorious for containing drying ingredients like alcohols, mineral oil or petrolatum, which can be especially problematic for curly, coily and wavy hair. In our pursuit of fighting frizz, we are drying out our hair, which can lead to even more frizz.
Instead, cocktail your own styler with the ultimate do-it-all ingredient: aloe vera.
Aloe vera is a do-it-all ingredient for hair. In the curly community we use it for moisturizing, detangling, scalp healing, hair growth, dandruff fighting, pH balancing and so much more. It can even give your curls a soft, touchable hold when used as a gel.
- Step 1 – For women with wavy hair or if you prefer a fluffy wash and go, pure aloe vera gel may be all you need to give you light hold and definition – you can stop here. For tighter curls, you can move on to the next step.
- Step 2 – Melt a tablespoon of shea butter in a bowl over a cup of hot water (like a mini double boiler”>. Add a tablespoon each of aloe vera gel and coconut into your softened shea butter.
- Step 3 – Mix until fully incorporated (you can use a spoon or a hand mixer”>. Apply this mix to your hair for moisture and soft, touchable hold.
Where to get aloe vera gel?
You can use aloe vera gel straight from the leaves of the aloe vera plant, or you can buy aloe vera gel for $5. Our community loves Fruit of the Earth,Lily of the Desert and Trader Joe’s. Most aloe vera gels (even the ones that say “100% pure””> still contain additives and preservatives, and the Trader Joe’s contains parabens, but our community still loves the way they work.
With so many different hairtypes out there, no hair product can be one size fits all, so save yourself the time and money and create your own dream product.
Looking for a last minute curly girl Halloween costume? Here’s a quick and easy tutorial on how to be Bellatrix Lestrange for Halloween!
What you’ll need
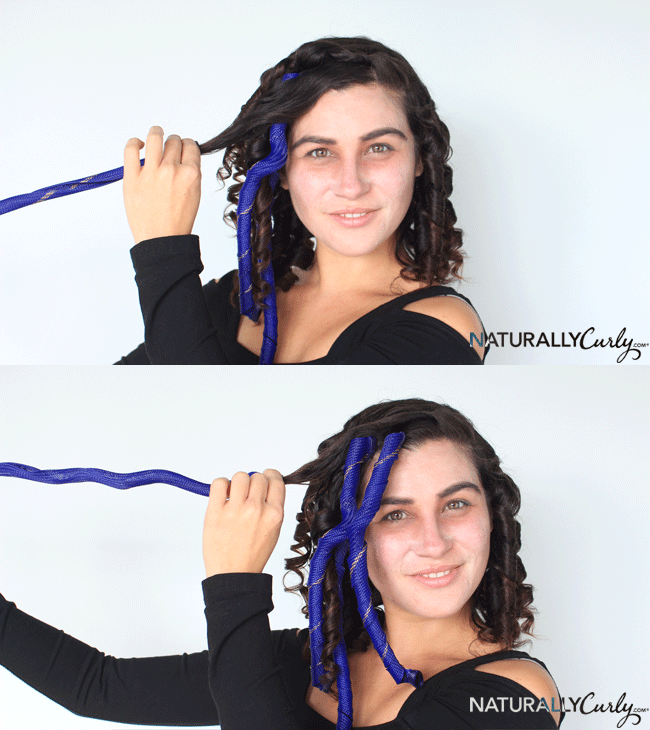
- New Deluxe Curlformers Kit, we mixed Spirals and Corkscrews for a more natural look
- Light foundation or white costume makeup
- Black & brown eyeshadow
- Dry shampoo or white eyeshadow
- Choker
- Wand
- Black long sleeved dress
- *Optional: hair extensions if you have short hair
Directions
Step 1
Apply a strong hold styling product like mousse throughout detangled, wet hair
Step 2
Install Curlformers throughout wet hair, we used a mix of Spirals and Corkscrews
Step 3
While hair is drying, apply light foundation or white costume makeup all over face, ears, and down the neck
Step 4
Use brown and black eyeshadow to contour sunken in cheeks, eye sockets, a pronounced bridge of the nose, and dark eyebags. Use brown and black eyeshadow to fill in eyebrows and line eyes.
Step 6
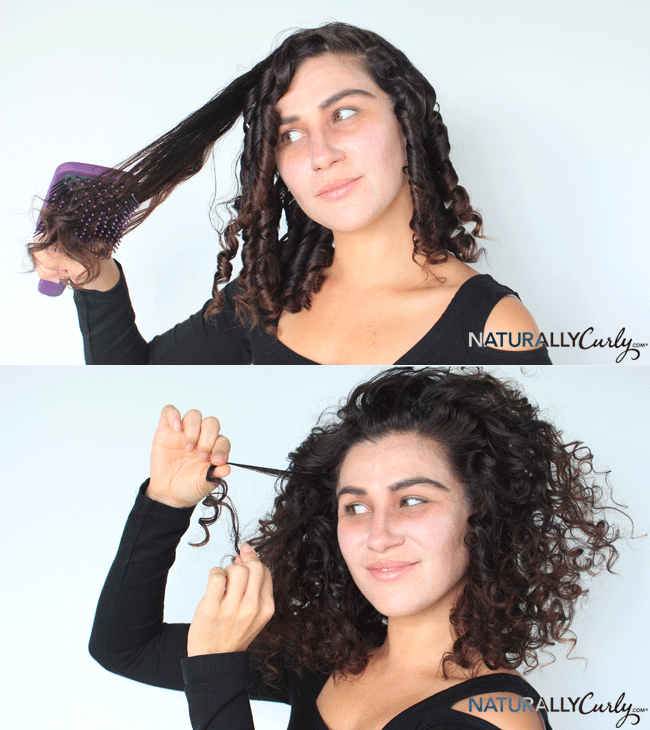
Once hair has dried completely, remove the Curlformers and spray with hairspray
Step 7
Use fingers or a brush to separate the curls, creating as much volume as possible
Step 8
Add in extensions now if you have short hair
Step 9
Pull hair up into a half up ponytail on the top right side of your head and secure very loosely with a hair tie and bobby pins
Step 10
Add dry shampoo or white eyeshadow to create gray streaks of color in the hair
Once your hair and makeup are all done, wear a black dress or black shirt and skirt and a black choker (ribbon works too”> and you’re ready to go!
What are you going to be for Halloween this year?
[prodmod]This article is sponsored by Curlformers.
- A. Stalked more than two long hair naturals on Instagram
- B. Declined to go out in the rain in fear of shrinkage
- C. Frantically tracked your hair growth every other day
- D. Seriously contemplated wearing protective styles until you’ve reach tailbone length.
1. Hair Growth Speed Is Pre-determined
2.Healthy Hair is ONLY a result of a Healthy Body
3. Worrying takes all the fun out
Watch our video
Unicorn, sand art, opal, gray hair – these are just a few of the fantasy color trends we’ve been loving this year. But as much as we’d love to get involved with the rainbow that is our Instagram feeds lately, there is one primary concern for curly girls: will it damage our curls?
Trends are fun, but not when they get in the way of our long term hair health goals. The last thing we want is loose, dry, damaged curls that eventually lead to an unwanted haircut.
If you’re wondering if it is at all possible to play with fantasy hair colors and not damage your hair, our curlfriend Naturally Tash, aka the Queen of Temporary Hair Colors, is here to tell you: it can be done! Here’s how she does it, from natural lightening to temporary colors and how all of the deep conditioning in between.
Have you experienced damage since coloring your hair?
No I haven’t. I only use temporary coloring methods that are less harsh on the hair. I also do lots of deep conditioning and protein treatments so I really don’t even give my hair a chance to become damaged. Although I really love coloring my hair, my hair’s health is what’s most important to me.
I also clip my ends every three months.
,0 1px 10px 0 rgba(0,0,0,0.15″>; margin: 1px; max-width: 658px; padding: 0; width: calc(100% – 2px”>;” data-instgrm-captioned=”” data-instgrm-version=”4″>
Did you use bleach to lighten it first?
No. I have never used bleach in my curls. In the beginning I used cinnamon and honey treatments to lighten my hair gradually over time. I did this for over a year every two to three weeks and it brought my hair up to a light brown which enabled me to do very vibrant colors. This method will not happen overnight and if you’re looking to lighten your hair very quickly this would not be the method to use. Later on when my roots grew out I used a Feria box color in copper to merge the two colors together.
What brand of hair color do you use?
For color sprays I use
For semi-perm colors which I use in my deep conditioning color method (which is mixing conditioner and a semi perm color”> I use
For hair shadowing I use
- Maybelline Color Tattoos
- Maybelline Dream Bouncy Blush
- Wet N Wild Eye Shadows
- NYX Eye Shadows
- Ulta Eye Shadows
For lightening my roots I will use either
- a box color by Feria
- Shea Moisture Color System
,0 1px 10px 0 rgba(0,0,0,0.15″>; margin: 1px; max-width: 658px; padding: 0; width: calc(100% – 2px”>;” data-instgrm-captioned=”” data-instgrm-version=”4″>
What’s the process of coloring your hair multiple colors?
In order for me to color my hair multiple colors I use Color Oops between each color to pull out the previous color and then re color. Then I do a deep condition and then apply my next color.
I always have a base color that is achieved with my deep conditioning color and then I will add color sprays, or hair shadowing to achieve a two or sometimes three color affect.
Do you use any special shampoo and conditioner?
Right now my staple shampoo is the Shea Moisture Strengthen, Grow & Restore Treatment Shampoo and Masque with Jamaican Black Castor Oil and my fave conditioner is the Aussie Moist 3 minute Miracle.
How often do you touch up your color?
I touch up my color every two weeks by applying a table spoon of the semi perm color in my hair at the time to my condish and letting it sit at least 30 minutes. I then wash out and style as usual.
,0 1px 10px 0 rgba(0,0,0,0.15″>; margin: 1px; max-width: 658px; padding: 0; width: calc(100% – 2px”>;” data-instgrm-captioned=”” data-instgrm-version=”4″>
How do you prevent damage?
I don’t use bleach and I deep condition and do protein treatments every month. I also use little to no heat and when I diffuse my hair I only use the cool setting. I also avoid products with sulfates.
Do you have any advice for someone who’s interested in coloring their hair vibrant colors for the first time?
If your hair is really dark instead of using bleach to lighten your hair try a box color safe for dark hair like the Shea Moisture Color System to lighten your hair first and then do your vibrant color on top using a semi perm dye. If you want to bleach your hair to achieve a lighter color I would say go to a professional. You can never be to careful when it comes to bleach. If your hair is already a light enough color to achieve vibrant colors mix the color with a conditioner before applying to your hair. Make sure the conditioner is light in color like white or yellow. Mixing it with the condish will make the color less harsh on your hair and as your apply the color you will not only be coloring your hair you will be conditioning it as well. If you are unsure about a color try a small piece in the back of your hair to see how you like it before you do your entire head.
,0 1px 10px 0 rgba(0,0,0,0.15″>; margin: 1px; max-width: 658px; padding: 0; width: calc(100% – 2px”>;” data-instgrm-captioned=”” data-instgrm-version=”4″>
To see more of Naturally Tash’s fab color inspiration, follow her on Instagram and YouTube.
You know you should not be cleansing your hair all of the time, but what do you do when your waves or curls were bouncy spirals on day one but by day two or three they’ve become stringy and limp? No, the answer is not wash your hair again. And do not feel forced into a top knot or a ponytail. Curly hair stylist Evan Joseph of Evan Joseph Salon in Ohio has two tricks for reviving your flattened curls.
If you have your own question for Evan, you can ask them in our Curly Q&A section all week, where he’s answering our readers’ questions personally!
Question
Why do my curls always fall wavy and some of them flat after two or more days? – MyWomenPower
Answer
This is common and not to worry about! It’s just from sleeping and living in your curls. Most curly girls need to wet down or refresh on the regular.
DIY refresher spray
- Make yourself a spray bottle full of a silicone free botanical conditioner + spring water.
- Mix it the consistency of skim milk.
- Use this to wet your hair back down and scrunch back up and let it dry again.
Splash & scrunch
If your hair need a complete overhaul but not a cleanse:
- Fill your sink with water and conditioner.
- Splash the water and conditioner up into your hair scrunching and squishing.
- Flip head over and scrunch with microbe towel and let dry again.
If you have a question for Evan Joseph, post it here to get his feedback.
After years of hiding her curls behind extensions and the ubiquitous high ponytail, Ariana Grande debuted soft, natural curls yesterday on Instagram. Last year Ariana was getting so much flack for her repetitive ponytail that she took to social media to defend her style choice, saying it was a result of the damage her hair underwent on her Nickelodeon show, “I had to bleach my hair and dye it red every other week for the first 4 years of playing Cat… as one would assume, that completely destroyed my hair,” she said. “I wear it in a pony tail because my actual hair is so broken that it looks absolutely ratchet and absurd when I let it down. Trust me, it’s… difficult for me to have to wait forever for my natural hair to grow back and to have to wear more fake hair than every drag queen on earth combined.”
Her curls are still looking a lot looser than the few photos that we’ve seen of a young, naturally curly Ariana. This could be due to a number of factors, from hormonal changes in her curl pattern to heat damage, or perhaps her curls were manipulated by a curling wand in this photo. Either way, we’re happy to see her curls making a comeback.
We have all experienced hair damage at some point in our hair journeys, so we know that it takes nurse your hair back to health, and how rewarding it can feel when your curls grow back. If you’re transitioning from damaged hair to wearing it naturally curly, here are a few tips from our writer Nora, who has been transitioning from a Keratin treatment gone bad.
- Wear your hair in stretched styles
- Choose styling products that will stretch out the curly roots and make the straighter ends appear curlier
- Master a braid out or twist out, to give your curls a more uniform curl pattern
- Be patient! Your curls will grow back, but it takes time
,0 1px 10px 0 rgba(0,0,0,0.15″>; margin: 1px; max-width: 658px; padding: 0; width: calc(100% – 2px”>;” data-instgrm-captioned=”” data-instgrm-version=”4″>We also recommend mastering a few heatless hairstyles that will make this often tricky transition a little more fun. Ariana shared her excitement on Instagram with this side braided selfie. Whether you’re bringing back your curls or have been natural for years, you can rock this side braid too. We turned to curly hair stylist Ricky Pennisi for his guide on how to recreate the look.
Get the look
- Start with freshly washed hair. Towel dry and apply about a dime-sized of a styling cream or gel, like the RICI Thirsty Styling Gel, to create hold for your waves.
- Diffuse your hair for more body and more prominent curls. If you need a little more hold add a finishing product like the RI CI Memory Setting Spray.
- When your hair is about 90% dry, hit the cold button on the dryer.
- When your hair is 99% dry take the diffuser hit the hair again with the dryer. This will give you a softer, looser curl like Ariana.
- Section off the hair that you will be braiding (from just above the ear up to where you part your hair”> and loosely tie back the rest of your hair to keep it out of the way while you braid.
- Divide the remaining section into two, and French braid the top half alongside your head, pinning the braid at the base of your neck. Repeat this with the bottom half.
*Optional if you have any curls that dried out of shape, you can spot treat those curls by finger twisting with a little gel or using a curling wand similar to your curl pattern.
If you don’t know how to braid, Ricky says you can create a similar look by “pinching a section by the hairline slowly twisting back” then as you continue to twist back “grab each section behind it to create this braided look.”
We actually filmed a tutorial a couple of years ago when Miranda Kerr wore a similar style to the Met Gala (back when my hair was long”> which you can reference as well.
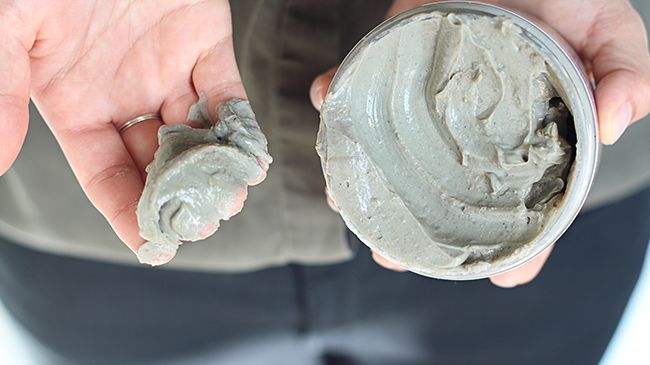
When we received a box of clays in the NaturallyCurly offices the Product Junkie inside me got excited – a new product category to explore! But before giving myself my first mud wash I discovered, upon closer inspection of the fine print on the label, that clays should not be used on chemically processed hair. Seeing as I bleached my hair last year and have since been dyeing it, I was glad I hadn’t made that mistake! It made me wonder… why not? And what is the difference between clay and mud anyway? I took my questions to Bridgett Ellington, who has her own line of mud washes from her brand Krave Naturals & Organics.
Why do a clay detox?
Bentonite is a great detox for hair because it acts as a magnet and draws the impurities from the hair to the surface to be washed away. So, if you overdid it with the synthetic products (you know those serums and stylers that claim to repair your dry damaged hair”> detoxing with Bentonite will get you back on track.
Who should use a clay or mud wash?
A mud wash can be used by anyone. The key is the type of clay used to make the mud wash. If you have product build up from synthetics like serums and stylers that make our hair smooth and shiny, you are probably a great candidate for a mud wash. I wouldn’t recommend a mud wash if you chemically process your hair (more on that below”>.
Bentonite is a great detox for hair because it acts as a magnet and draws the impurities from the hair to the surface to be washed away.
Is there a difference between clay and mud?
Yes, to some degree. Clay is a naturally occurring volcanic ash with a high mineral content. It is the main component used in creating a mud wash. When liquids such as aloe vera juice or apple cider vinegar are combined with clay along with other essentials, it creates a fabulous mud wash.
How does Bentonite compare to the other clays out there?
Of the top three:
- Kaolin clay (white clay or China clay”> is the milder of the three. It is a gentle cleansing clay that is great for those who have dry hair in need of strength and elasticity.
- Rhassoul clay (Moroccan Red clay”> has a high mineral content, which makes it a great detox that leaves the hair smooth, soft, and moisturized.
- Bentonite and Rhassoul clay provide similar detox results and their use is based on personal preference. Here at KRAVE Naturals & Organics, we prefer Bentonite!
Why shouldn’t chemically treated or processed hair use clay?
Unless you’re willing to “break up” with your chemical treatments or synthetics you will not be happy with the results. When the structure of your hair is altered with chemical treatments, Bentonite being a negative ion seeks out positive ions (synthetics, plastics, and fillers, etc.”> to remove from your hair. It doesn’t remove the color of your hair. There are no fillers to make the hair soft and shiny. Those who use a mud wash for the first time often state that it caused their hair to feel dry, brittle, and straw-like. Some even vow to never use it again. Many who stayed the course, end up kicking themselves for not trying a mud wash sooner.
Where in the hair routine does a mud wash go? Before shampoo & conditioning? Instead of shampoo?
A mud wash like KRAVE’s Hair Mud can be used in place of a shampoo due to its awesome cleansing properties. One of the great things about using a mud wash is that it’s optional to follow up with a conditioner. When used alone it can leave your hair soft, shiny, and nicely detangled. Whether you follow up with a conditioner is truly a user preference.
How often should you do a clay detox?
Depending on where you are in your “state of hair” and the product build you have to remove; whether you are natural, gradually “weening” yourself off of synthetics and chemical treatments, or going cold turkey, will determine how often a mud wash should be used. Each individual detox may vary.
Is there anything you shouldn’t do when doing a mud wash?
- If you have allergies or sensitive skin, don’t use a new product without doing a strand test first.
- When using KRAVES’ Hair Mud, do not use metal utensils as they can react with the clay rendering it ineffective.
- Do not add water to container.
- For thicker hair, you may want to dispense some of the premixed mud wash into a small bowl with aloe vera juice or apple cider vinegar, just to thin out the mix and ease of rinsing.
If you have ever shopped for a doll, then you know that the vast majority of dolls on the market have shiny, straight hair. We hear that curly, coily and wavy hair is harder to manufacture, but we figured it’s nothing a quick DIY project couldn’t fix!
A Google search and a trip to the store later, Evelyn and Nikki tried giving this doll a naturally curly makeover.
What you’ll need:
- Pipecleaners
- Doll
- Scissors
Directions:
- Cut your pipecleaners in half and fold it into a V-shape
- Twirl a small section of your doll’s hair and place the bend of the V-shape at the doll’s scalp
- Twist the section of hair over and under both sides of the pipecleaner until you reach the end, and then bend the end of the pipecleaner to keep it from unravelling.
- Repeat for until all of the hair is twisted.
- Dunk the doll’s head into a cup of boiling water for 10 seconds.
- Blot her hair dry with a towel and let it air dry over night.
- The next day, unravel all of the twists.
- Separate and fluff the curls, and use scissors to snip off any straight ends.
What NOT to do
It was a fairly easy process, but not without its missteps. Learn from our mistakes! If you’re going to give this project a go, keep these tips in mind:
- Don’t purchase a doll with a ponytail. She’ll probably be bald in the center of her head. Look for a doll that is created with her hair already down.
- Prep the hair. If you’re transforming an old doll, be sure to detangle the hair. It’ll make for smoother results!
- Avoid cheap dolls. The price of toys can be shocking, we know. But there is a difference between a $1 doll and a $20 one. And that difference is shed synthetic hair all over your carpet.
- Avoid tinsel pipe cleaners. These are all we could find at the time, but the normal fuzzy ones are much easier to handle.
- Let the hair completely dry. Blot with a towel to remove excess moisture, then let it air dry for at least 24 hours.
Watch the Video
Can’t be bothered with DIYs? Purchase gorgeous handmade naturally curly dolls from Natural Girls United.


