Search Results: Cristina Cleveland

Unicorn, sand art, opal, gray hair – these are just a few of the fantasy color trends we’ve been loving this year. But as much as we’d love to get involved with the rainbow that is our Instagram feeds lately, there is one primary concern for curly girls: will it damage our curls?
Trends are fun, but not when they get in the way of our long term hair health goals. The last thing we want is loose, dry, damaged curls that eventually lead to an unwanted haircut.
If you’re wondering if it is at all possible to play with fantasy hair colors and not damage your hair, our curlfriend Naturally Tash, aka the Queen of Temporary Hair Colors, is here to tell you: it can be done! Here’s how she does it, from natural lightening to temporary colors and how all of the deep conditioning in between.
Have you experienced damage since coloring your hair?
No I haven’t. I only use temporary coloring methods that are less harsh on the hair. I also do lots of deep conditioning and protein treatments so I really don’t even give my hair a chance to become damaged. Although I really love coloring my hair, my hair’s health is what’s most important to me.
I also clip my ends every three months.
,0 1px 10px 0 rgba(0,0,0,0.15″>; margin: 1px; max-width: 658px; padding: 0; width: calc(100% – 2px”>;” data-instgrm-captioned=”” data-instgrm-version=”4″>
Did you use bleach to lighten it first?
No. I have never used bleach in my curls. In the beginning I used cinnamon and honey treatments to lighten my hair gradually over time. I did this for over a year every two to three weeks and it brought my hair up to a light brown which enabled me to do very vibrant colors. This method will not happen overnight and if you’re looking to lighten your hair very quickly this would not be the method to use. Later on when my roots grew out I used a Feria box color in copper to merge the two colors together.
What brand of hair color do you use?
For color sprays I use
For semi-perm colors which I use in my deep conditioning color method (which is mixing conditioner and a semi perm color”> I use
For hair shadowing I use
- Maybelline Color Tattoos
- Maybelline Dream Bouncy Blush
- Wet N Wild Eye Shadows
- NYX Eye Shadows
- Ulta Eye Shadows
For lightening my roots I will use either
- a box color by Feria
- Shea Moisture Color System
,0 1px 10px 0 rgba(0,0,0,0.15″>; margin: 1px; max-width: 658px; padding: 0; width: calc(100% – 2px”>;” data-instgrm-captioned=”” data-instgrm-version=”4″>
What’s the process of coloring your hair multiple colors?
In order for me to color my hair multiple colors I use Color Oops between each color to pull out the previous color and then re color. Then I do a deep condition and then apply my next color.
I always have a base color that is achieved with my deep conditioning color and then I will add color sprays, or hair shadowing to achieve a two or sometimes three color affect.
Do you use any special shampoo and conditioner?
Right now my staple shampoo is the Shea Moisture Strengthen, Grow & Restore Treatment Shampoo and Masque with Jamaican Black Castor Oil and my fave conditioner is the Aussie Moist 3 minute Miracle.
How often do you touch up your color?
I touch up my color every two weeks by applying a table spoon of the semi perm color in my hair at the time to my condish and letting it sit at least 30 minutes. I then wash out and style as usual.
,0 1px 10px 0 rgba(0,0,0,0.15″>; margin: 1px; max-width: 658px; padding: 0; width: calc(100% – 2px”>;” data-instgrm-captioned=”” data-instgrm-version=”4″>
How do you prevent damage?
I don’t use bleach and I deep condition and do protein treatments every month. I also use little to no heat and when I diffuse my hair I only use the cool setting. I also avoid products with sulfates.
Do you have any advice for someone who’s interested in coloring their hair vibrant colors for the first time?
If your hair is really dark instead of using bleach to lighten your hair try a box color safe for dark hair like the Shea Moisture Color System to lighten your hair first and then do your vibrant color on top using a semi perm dye. If you want to bleach your hair to achieve a lighter color I would say go to a professional. You can never be to careful when it comes to bleach. If your hair is already a light enough color to achieve vibrant colors mix the color with a conditioner before applying to your hair. Make sure the conditioner is light in color like white or yellow. Mixing it with the condish will make the color less harsh on your hair and as your apply the color you will not only be coloring your hair you will be conditioning it as well. If you are unsure about a color try a small piece in the back of your hair to see how you like it before you do your entire head.
,0 1px 10px 0 rgba(0,0,0,0.15″>; margin: 1px; max-width: 658px; padding: 0; width: calc(100% – 2px”>;” data-instgrm-captioned=”” data-instgrm-version=”4″>
To see more of Naturally Tash’s fab color inspiration, follow her on Instagram and YouTube.
It may have taken years, but now you love wearing your natural curls. You love them so much, that when they start to disappear on you it can be frustrating and upsetting. Especially when they do so in an uneven fashion.
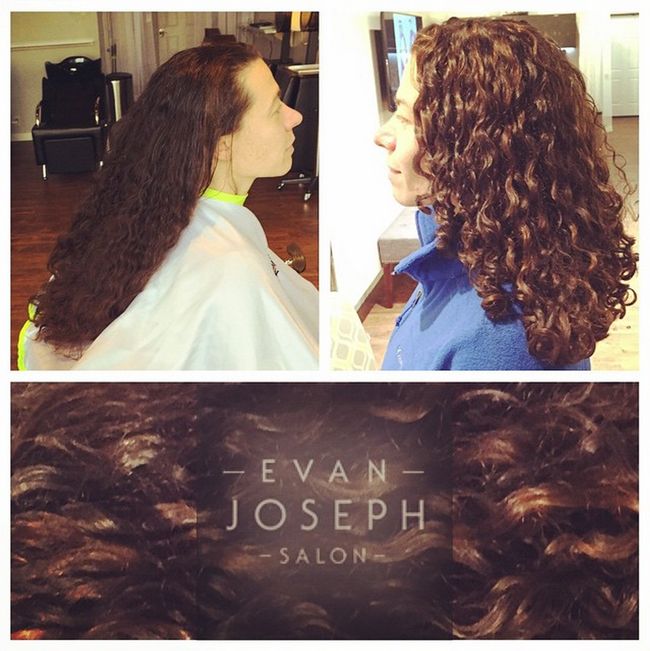
One of our curly readers asked this question in our Curly Q&A section, where curly hair stylist Evan Joseph of Evan Joseph Salon in Ohio has been our guest expert all week.
Question
3b that has gone straight underneath. Suggestions?
It’s gone completely straight underneath. I never straighten my hair so I guess it’s just change in age/hormones. It looks like two different heads of hair tho and I can’t stand it. Is there a safe perm to use so it will look more uniform? – kgs2092 (Type 3a”>
,0 1px 10px 0 rgba(0,0,0,0.15″>; margin: 1px; max-width: 658px; padding: 0; width: calc(100% – 2px”>;” data-instgrm-captioned=”” data-instgrm-version=”4″>
Answer
Perms are not safe for curls! If you get a perm that hair will ultimately end up straight in the long run. There are two things you can do.
1. Shape up
Have a professional curly expert cut that straighter under layer a little shorter then the rest of your hair.
2. Pin up
You also could take the straighter sections, when dry, spray and wrap them around one finger and clip, making a pin-curl. Let them sit for 10-15 minutes then unclip and you’ll have perfect tighter curls.
You know you should not be cleansing your hair all of the time, but what do you do when your waves or curls were bouncy spirals on day one but by day two or three they’ve become stringy and limp? No, the answer is not wash your hair again. And do not feel forced into a top knot or a ponytail. Curly hair stylist Evan Joseph of Evan Joseph Salon in Ohio has two tricks for reviving your flattened curls.
If you have your own question for Evan, you can ask them in our Curly Q&A section all week, where he’s answering our readers’ questions personally!
Question
Why do my curls always fall wavy and some of them flat after two or more days? – MyWomenPower
Answer
This is common and not to worry about! It’s just from sleeping and living in your curls. Most curly girls need to wet down or refresh on the regular.
DIY refresher spray
- Make yourself a spray bottle full of a silicone free botanical conditioner + spring water.
- Mix it the consistency of skim milk.
- Use this to wet your hair back down and scrunch back up and let it dry again.
Splash & scrunch
If your hair need a complete overhaul but not a cleanse:
- Fill your sink with water and conditioner.
- Splash the water and conditioner up into your hair scrunching and squishing.
- Flip head over and scrunch with microbe towel and let dry again.
If you have a question for Evan Joseph, post it here to get his feedback.
After years of hiding her curls behind extensions and the ubiquitous high ponytail, Ariana Grande debuted soft, natural curls yesterday on Instagram. Last year Ariana was getting so much flack for her repetitive ponytail that she took to social media to defend her style choice, saying it was a result of the damage her hair underwent on her Nickelodeon show, “I had to bleach my hair and dye it red every other week for the first 4 years of playing Cat… as one would assume, that completely destroyed my hair,” she said. “I wear it in a pony tail because my actual hair is so broken that it looks absolutely ratchet and absurd when I let it down. Trust me, it’s… difficult for me to have to wait forever for my natural hair to grow back and to have to wear more fake hair than every drag queen on earth combined.”
Her curls are still looking a lot looser than the few photos that we’ve seen of a young, naturally curly Ariana. This could be due to a number of factors, from hormonal changes in her curl pattern to heat damage, or perhaps her curls were manipulated by a curling wand in this photo. Either way, we’re happy to see her curls making a comeback.
We have all experienced hair damage at some point in our hair journeys, so we know that it takes nurse your hair back to health, and how rewarding it can feel when your curls grow back. If you’re transitioning from damaged hair to wearing it naturally curly, here are a few tips from our writer Nora, who has been transitioning from a Keratin treatment gone bad.
- Wear your hair in stretched styles
- Choose styling products that will stretch out the curly roots and make the straighter ends appear curlier
- Master a braid out or twist out, to give your curls a more uniform curl pattern
- Be patient! Your curls will grow back, but it takes time
,0 1px 10px 0 rgba(0,0,0,0.15″>; margin: 1px; max-width: 658px; padding: 0; width: calc(100% – 2px”>;” data-instgrm-captioned=”” data-instgrm-version=”4″>We also recommend mastering a few heatless hairstyles that will make this often tricky transition a little more fun. Ariana shared her excitement on Instagram with this side braided selfie. Whether you’re bringing back your curls or have been natural for years, you can rock this side braid too. We turned to curly hair stylist Ricky Pennisi for his guide on how to recreate the look.
Get the look
- Start with freshly washed hair. Towel dry and apply about a dime-sized of a styling cream or gel, like the RICI Thirsty Styling Gel, to create hold for your waves.
- Diffuse your hair for more body and more prominent curls. If you need a little more hold add a finishing product like the RI CI Memory Setting Spray.
- When your hair is about 90% dry, hit the cold button on the dryer.
- When your hair is 99% dry take the diffuser hit the hair again with the dryer. This will give you a softer, looser curl like Ariana.
- Section off the hair that you will be braiding (from just above the ear up to where you part your hair”> and loosely tie back the rest of your hair to keep it out of the way while you braid.
- Divide the remaining section into two, and French braid the top half alongside your head, pinning the braid at the base of your neck. Repeat this with the bottom half.
*Optional if you have any curls that dried out of shape, you can spot treat those curls by finger twisting with a little gel or using a curling wand similar to your curl pattern.
If you don’t know how to braid, Ricky says you can create a similar look by “pinching a section by the hairline slowly twisting back” then as you continue to twist back “grab each section behind it to create this braided look.”
We actually filmed a tutorial a couple of years ago when Miranda Kerr wore a similar style to the Met Gala (back when my hair was long”> which you can reference as well.
When we received a box of clays in the NaturallyCurly offices the Product Junkie inside me got excited – a new product category to explore! But before giving myself my first mud wash I discovered, upon closer inspection of the fine print on the label, that clays should not be used on chemically processed hair. Seeing as I bleached my hair last year and have since been dyeing it, I was glad I hadn’t made that mistake! It made me wonder… why not? And what is the difference between clay and mud anyway? I took my questions to Bridgett Ellington, who has her own line of mud washes from her brand Krave Naturals & Organics.
Why do a clay detox?
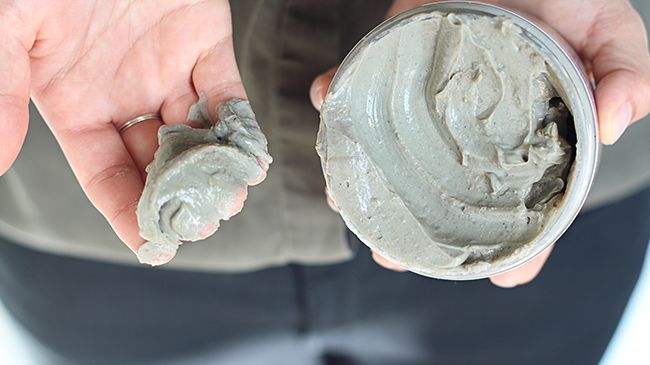
Bentonite is a great detox for hair because it acts as a magnet and draws the impurities from the hair to the surface to be washed away. So, if you overdid it with the synthetic products (you know those serums and stylers that claim to repair your dry damaged hair”> detoxing with Bentonite will get you back on track.
Who should use a clay or mud wash?
A mud wash can be used by anyone. The key is the type of clay used to make the mud wash. If you have product build up from synthetics like serums and stylers that make our hair smooth and shiny, you are probably a great candidate for a mud wash. I wouldn’t recommend a mud wash if you chemically process your hair (more on that below”>.
Bentonite is a great detox for hair because it acts as a magnet and draws the impurities from the hair to the surface to be washed away.
Is there a difference between clay and mud?
Yes, to some degree. Clay is a naturally occurring volcanic ash with a high mineral content. It is the main component used in creating a mud wash. When liquids such as aloe vera juice or apple cider vinegar are combined with clay along with other essentials, it creates a fabulous mud wash.
How does Bentonite compare to the other clays out there?
Of the top three:
- Kaolin clay (white clay or China clay”> is the milder of the three. It is a gentle cleansing clay that is great for those who have dry hair in need of strength and elasticity.
- Rhassoul clay (Moroccan Red clay”> has a high mineral content, which makes it a great detox that leaves the hair smooth, soft, and moisturized.
- Bentonite and Rhassoul clay provide similar detox results and their use is based on personal preference. Here at KRAVE Naturals & Organics, we prefer Bentonite!
Why shouldn’t chemically treated or processed hair use clay?
Unless you’re willing to “break up” with your chemical treatments or synthetics you will not be happy with the results. When the structure of your hair is altered with chemical treatments, Bentonite being a negative ion seeks out positive ions (synthetics, plastics, and fillers, etc.”> to remove from your hair. It doesn’t remove the color of your hair. There are no fillers to make the hair soft and shiny. Those who use a mud wash for the first time often state that it caused their hair to feel dry, brittle, and straw-like. Some even vow to never use it again. Many who stayed the course, end up kicking themselves for not trying a mud wash sooner.
Where in the hair routine does a mud wash go? Before shampoo & conditioning? Instead of shampoo?
A mud wash like KRAVE’s Hair Mud can be used in place of a shampoo due to its awesome cleansing properties. One of the great things about using a mud wash is that it’s optional to follow up with a conditioner. When used alone it can leave your hair soft, shiny, and nicely detangled. Whether you follow up with a conditioner is truly a user preference.
How often should you do a clay detox?
Depending on where you are in your “state of hair” and the product build you have to remove; whether you are natural, gradually “weening” yourself off of synthetics and chemical treatments, or going cold turkey, will determine how often a mud wash should be used. Each individual detox may vary.
Is there anything you shouldn’t do when doing a mud wash?
- If you have allergies or sensitive skin, don’t use a new product without doing a strand test first.
- When using KRAVES’ Hair Mud, do not use metal utensils as they can react with the clay rendering it ineffective.
- Do not add water to container.
- For thicker hair, you may want to dispense some of the premixed mud wash into a small bowl with aloe vera juice or apple cider vinegar, just to thin out the mix and ease of rinsing.
If you have ever shopped for a doll, then you know that the vast majority of dolls on the market have shiny, straight hair. We hear that curly, coily and wavy hair is harder to manufacture, but we figured it’s nothing a quick DIY project couldn’t fix!
A Google search and a trip to the store later, Evelyn and Nikki tried giving this doll a naturally curly makeover.
What you’ll need:
- Pipecleaners
- Doll
- Scissors
Directions:
- Cut your pipecleaners in half and fold it into a V-shape
- Twirl a small section of your doll’s hair and place the bend of the V-shape at the doll’s scalp
- Twist the section of hair over and under both sides of the pipecleaner until you reach the end, and then bend the end of the pipecleaner to keep it from unravelling.
- Repeat for until all of the hair is twisted.
- Dunk the doll’s head into a cup of boiling water for 10 seconds.
- Blot her hair dry with a towel and let it air dry over night.
- The next day, unravel all of the twists.
- Separate and fluff the curls, and use scissors to snip off any straight ends.
What NOT to do
It was a fairly easy process, but not without its missteps. Learn from our mistakes! If you’re going to give this project a go, keep these tips in mind:
- Don’t purchase a doll with a ponytail. She’ll probably be bald in the center of her head. Look for a doll that is created with her hair already down.
- Prep the hair. If you’re transforming an old doll, be sure to detangle the hair. It’ll make for smoother results!
- Avoid cheap dolls. The price of toys can be shocking, we know. But there is a difference between a $1 doll and a $20 one. And that difference is shed synthetic hair all over your carpet.
- Avoid tinsel pipe cleaners. These are all we could find at the time, but the normal fuzzy ones are much easier to handle.
- Let the hair completely dry. Blot with a towel to remove excess moisture, then let it air dry for at least 24 hours.
Watch the Video
Can’t be bothered with DIYs? Purchase gorgeous handmade naturally curly dolls from Natural Girls United.
We recently got our hands on a Target Beauty Box , and we have a sneaking suspicion a curly girl was in charge of this one. It contains products from Jane Carter Solution, CURLS, Dove’s Quench Absolute curl line, and SheaMoisture, so we gave our editors their pick of the products to try and review.
This is the upcoming Fall box which goes on sale on September 8, and if you want one we recommend setting yourself a little calendar reminder because these babies usually sell out on the first day! At $5-7 each, it’s no wonder they’re in high demand. Of course you can find these products on the Target shelves year-round, so if the thought of waiting until September 8 is too much to bare (we’re talking to you, Product Junkie”> then pick them up at your local Target or online any time.
*Editor’s Note: We checked and it looks like the Fall Beauty Box has now sold out.
Jane Carter Solution Revitalizing Leave-In Conditioner
I’ve been using this as a “braid spray” while I have my protective style in. Old school braid sprays are greasy or sticky and often make me feel like I need to wash my hair sooner! This leave-in is lightweight and doesn’t contain glycerin — no stickiness! The extracts like vitamin E, camomile, horsetail, and rosemary soothe my scalp when it gets itchy. I haven’t noticed increased buildup on my roots at all. It only takes 3 or 4 sprays and I’m good!
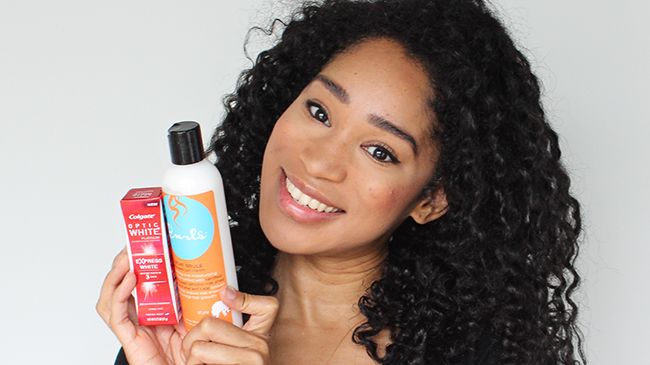
Colgate Optic White Toothpaste Express White
I’m ALWAYS a little skeptical when it comes to teeth whitening things ( strips, mold, and especially toothpaste.”> I have never really seen results. Once, I tried whitening trays and I experienced some sensitivity. I didn’t like that. With that in mind, I must say the Colgate Whitening toothpaste was good. I’ve only used it 3 times for a total day and a half. It said I would see results in just 3 days. So far, my teeth feel clean. Whiter? Not so much. I like how thick the paste is. That makes me feel like it will stick to my teeth and create that whitening effect.
CURLS Creme Brulee Whipped Curl Cream
Aquaphor Healing Ointment
Dove Quench Absolute Anti-Frizz Serum
SheaMoisture Jamaican Black Castor Oil Styling Lotion
This styler has a thick consistency and plenty of hold, which I found is great for elongating my curls. Not only is a great for wash and go’s, but I have had much success using it as a heat protectant during the blow-dry process before flat ironing. This product pairs well with the SheaMoisture Jamaican Black Castor Oil Leave-in Conditioner for twice the amount of moisture and strength.
This article is sponsored by Target.
Our #curlcommunity had a lot to say about the “biracial hair” myth, and we are constantly discussing the common industry standard of dividing consumers up by their ethnicity rather than their hairtype (for example, that “ethnic” aisle in groceries and drugstores”>. So we decided to explore another great divide in the shelves of the haircare aisle – Latina products!
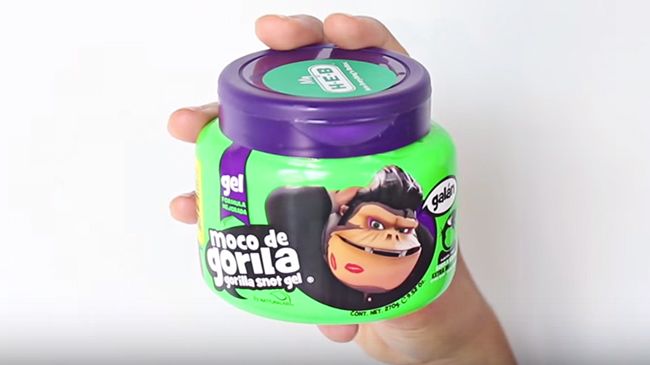
Nikki picked up the Moco de Gorila, aka Gorilla Snot, which you may have seen in your grocery or beauty supply store before. It looks like Nickelodeon’s neon green slime and really does resemble the consistency of, well, snot. Because we don’t have experience with the Gorilla Snot, we polled our community, here’s what you had to say:
Apparently, sometimes what your hair NEEDS is gorilla snot!
Evelyn chose the Cabellina Conditioner Chile Con Romero, which contains pepper and rosemary natural extracts, and they weren’t kidding about the pepper extracts. Upon closer inspection (with their noses”> Evelyn and Nikki discovered this conditioner smells like fresh jalapeno peppers. From what we’ve read, there is no stinging sensation involved when using this product.
Nikki also grabbed the La Bella Lots of Curls Gel, which was one of the only products in the whole Latina section that said the word “curls” on the packaging. It was under $3 for 22 whole ounces, which excited the Product Junkies in the office. We’ve seen curlies use this gel to much success for their 2nd day hair.
The major difference Evelyn and Nikki found was that the packaging and labels were in Spanish, but aside from a couple of ingredients (like the pepper extracts”> they didn’t find other noticeable differences. They also noticed an absence of products for textured hair, such as cream gels, butters, curl creams, co-washes and moisturizing stylers, instead they saw mostly shampoos, conditioners and gels.
On Facebook, curlies offered their own experiences and insight. The offerings of the Latina section aren’t based on hairtype, but the brand’s country of origin:
Have you ever shopped for Latina hair products? If you live in a Latin American country, what are your favs? We’d love to know!
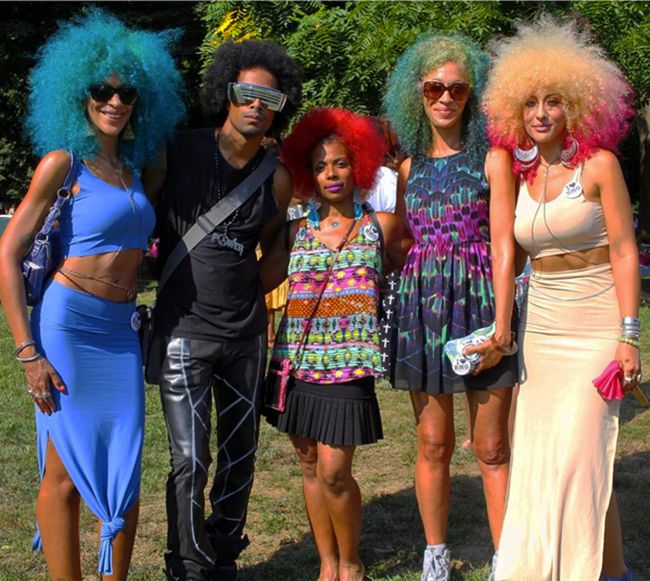
[prodmod]Your Instagram feeds were likely brimming with #hairspiration this weekend when Curly Girl Collective (CGC”> hosted its second annual CURLFEST, “a mecca of Afros, Twist-Outs, Curls (and Beards!”> set to a soundtrack of chill music and positive energy” in Prospect Park, Brooklyn.
In addition to giving us enough eye candy to last until CURLFEST 2016, this was an opportunity to unite the many supporters of the natural hair community, to promote self love, and combat societal views that lead to self-hate and low self esteem. To spread this message of empowerment, the event featured a team of bloggers and influencers who hosted Picnic Chats on topics like “Raising Children Who Love Natural hair,” and “How to Stay Fit, Curvy, & Naturally Fabulous.” The hosts included Whitney White of Naptural85, Jenell Stewart of KinkyCurlyCoilyMe.com, Christina “Love Brown Sugar” Brown, Curvy Fitness Professional Anowa Edjah, Anu Prestonia of Khamit Kinks Salon, and Celebrity Stylist Kimberly Gedeon of Bravo’s Newlyweds show.
Keep scrolling for a healthy dose of natural hair (and style!”> inspiration.
,0 1px 10px 0 rgba(0,0,0,0.15″>; margin: 1px; max-width: 658px; padding: 0; width: calc(100% – 2px”>;” data-instgrm-version=”4″>
,0 1px 10px 0 rgba(0,0,0,0.15″>; margin: 1px; max-width: 658px; padding: 0; width: calc(100% – 2px”>;” data-instgrm-version=”4″>
,0 1px 10px 0 rgba(0,0,0,0.15″>; margin: 1px; max-width: 658px; padding: 0; width: calc(100% – 2px”>;” data-instgrm-version=”4″>
,0 1px 10px 0 rgba(0,0,0,0.15″>; margin: 1px; max-width: 658px; padding: 0; width: calc(100% – 2px”>;” data-instgrm-captioned=”” data-instgrm-version=”4″>
,0 1px 10px 0 rgba(0,0,0,0.15″>; margin: 1px; max-width: 658px; padding: 0; width: calc(100% – 2px”>;” data-instgrm-version=”4″>
,0 1px 10px 0 rgba(0,0,0,0.15″>; margin: 1px; max-width: 658px; padding: 0; width: calc(100% – 2px”>;” data-instgrm-version=”4″>
,0 1px 10px 0 rgba(0,0,0,0.15″>; margin: 1px; max-width: 658px; padding: 0; width: calc(100% – 2px”>;” data-instgrm-captioned=”” data-instgrm-version=”4″>Stopped by #curlfest2015, fell in love with these amazing beauties at the @hausofswag booth! #prospectpark #bksummer #curlfestA photo posted by Demetria Lucas D’Oyley (@abelleinbk”> on
,0 1px 10px 0 rgba(0,0,0,0.15″>; margin: 1px; max-width: 658px; padding: 0; width: calc(100% – 2px”>;” data-instgrm-captioned=”” data-instgrm-version=”4″>
,0 1px 10px 0 rgba(0,0,0,0.15″>; margin: 1px; max-width: 658px; padding: 0; width: calc(100% – 2px”>;” data-instgrm-version=”4″>
,0 1px 10px 0 rgba(0,0,0,0.15″>; margin: 1px; max-width: 658px; padding: 0; width: calc(100% – 2px”>;” data-instgrm-captioned=”” data-instgrm-version=”4″>Thank you @dretothepeople for capturing this adorable shot of #babybrownsugar! She was having too much fun at #CURLFEST – the @official_darkandlovely crew & their bubbles & hula hoops kept her entertained .A photo posted by Christina Brown (@lovebrownsugar”> on
,0 1px 10px 0 rgba(0,0,0,0.15″>; margin: 1px; max-width: 658px; padding: 0; width: calc(100% – 2px”>;” data-instgrm-captioned=”” data-instgrm-version=”4″>We were Squad deep! #curlfest -BlackQueens-A photo posted by Kadiatou Sylla (@ms.sylla”> on
,0 1px 10px 0 rgba(0,0,0,0.15″>; margin: 1px; max-width: 658px; padding: 0; width: calc(100% – 2px”>;” data-instgrm-version=”4″>
,0 1px 10px 0 rgba(0,0,0,0.15″>; margin: 1px; max-width: 658px; padding: 0; width: calc(100% – 2px”>;” data-instgrm-captioned=”” data-instgrm-version=”4″>
,0 1px 10px 0 rgba(0,0,0,0.15″>; margin: 1px; max-width: 658px; padding: 0; width: calc(100% – 2px”>;” data-instgrm-version=”4″>
,0 1px 10px 0 rgba(0,0,0,0.15″>; margin: 1px; max-width: 658px; padding: 0; width: calc(100% – 2px”>;” data-instgrm-version=”4″>
,0 1px 10px 0 rgba(0,0,0,0.15″>; margin: 1px; max-width: 658px; padding: 0; width: calc(100% – 2px”>;” data-instgrm-version=”4″>
,0 1px 10px 0 rgba(0,0,0,0.15″>; margin: 1px; max-width: 658px; padding: 0; width: calc(100% – 2px”>;” data-instgrm-version=”4″>
,0 1px 10px 0 rgba(0,0,0,0.15″>; margin: 1px; max-width: 658px; padding: 0; width: calc(100% – 2px”>;” data-instgrm-version=”4″>
,0 1px 10px 0 rgba(0,0,0,0.15″>; margin: 1px; max-width: 658px; padding: 0; width: calc(100% – 2px”>;” data-instgrm-version=”4″>
,0 1px 10px 0 rgba(0,0,0,0.15″>; margin: 1px; max-width: 658px; padding: 0; width: calc(100% – 2px”>;” data-instgrm-captioned=”” data-instgrm-version=”4″>
,0 1px 10px 0 rgba(0,0,0,0.15″>; margin: 1px; max-width: 658px; padding: 0; width: calc(100% – 2px”>;” data-instgrm-captioned=”” data-instgrm-version=”4″>
,0 1px 10px 0 rgba(0,0,0,0.15″>; margin: 1px; max-width: 658px; padding: 0; width: calc(100% – 2px”>;” data-instgrm-captioned=”” data-instgrm-version=”4″>Adorable! @_callmesparkle at #curlfest! photo: @omartakespictures via @curlygirlcollective. A photo posted by Style Influencers Group (@styleinfluencers”> on
,0 1px 10px 0 rgba(0,0,0,0.15″>; margin: 1px; max-width: 658px; padding: 0; width: calc(100% – 2px”>;” data-instgrm-captioned=”” data-instgrm-version=”4″>Fros & Frocks On Fleek! Photo by @ronspecsphotographyA photo posted by Erica (@glammzmore”> on
,0 1px 10px 0 rgba(0,0,0,0.15″>; margin: 1px; max-width: 658px; padding: 0; width: calc(100% – 2px”>;” data-instgrm-captioned=”” data-instgrm-version=”4″>
,0 1px 10px 0 rgba(0,0,0,0.15″>; margin: 1px; max-width: 658px; padding: 0; width: calc(100% – 2px”>;” data-instgrm-version=”4″>
,0 1px 10px 0 rgba(0,0,0,0.15″>; margin: 1px; max-width: 658px; padding: 0; width: calc(100% – 2px”>;” data-instgrm-version=”4″>
,0 1px 10px 0 rgba(0,0,0,0.15″>; margin: 1px; max-width: 658px; padding: 0; width: calc(100% – 2px”>;” data-instgrm-version=”4″>
,0 1px 10px 0 rgba(0,0,0,0.15″>; margin: 1px; max-width: 658px; padding: 0; width: calc(100% – 2px”>;” data-instgrm-version=”4″>
,0 1px 10px 0 rgba(0,0,0,0.15″>; margin: 1px; max-width: 658px; padding: 0; width: calc(100% – 2px”>;” data-instgrm-version=”4″>
,0 1px 10px 0 rgba(0,0,0,0.15″>; margin: 1px; max-width: 658px; padding: 0; width: calc(100% – 2px”>;” data-instgrm-version=”4″>
,0 1px 10px 0 rgba(0,0,0,0.15″>; margin: 1px; max-width: 658px; padding: 0; width: calc(100% – 2px”>;” data-instgrm-version=”4″>
,0 1px 10px 0 rgba(0,0,0,0.15″>; margin: 1px; max-width: 658px; padding: 0; width: calc(100% – 2px”>;” data-instgrm-captioned=”” data-instgrm-version=”4″>
,0 1px 10px 0 rgba(0,0,0,0.15″>; margin: 1px; max-width: 658px; padding: 0; width: calc(100% – 2px”>;” data-instgrm-version=”4″>
We talk curly hair challenges year round at NaturallyCurly, but questions and traffic always seem to spike during the summer months, just as the heat and humidity do. And we’re sure it’s no coincidence. Caring for curly hair can become considerably more difficult in the summertime, so we enlisted the help of an expert to answer your biggest summer hair questions – Diane Bailey, the Beauty Ambassador for SheaMoisture.
Diane C. Bailey is a salon entrepreneur, celebrity stylist, beauty educator, author, innovator and a standard bearer in the natural hair care industry. As a celebrity stylist, Ms. Bailey has worked with Beyoncé, Lauryn Hill, Toni Morrison and Iyanla Vanzant, among others. For over 25 years she acted as president and head stylist of the renowned Tendrils Salon in Brooklyn, NY, one of the first salons in New York to offer chemical-free services for textured hair.
If you have summer hair questions for Diane, post them here. NaturallyCurly community member curlysophie did, and this was Diane’s response.
Question
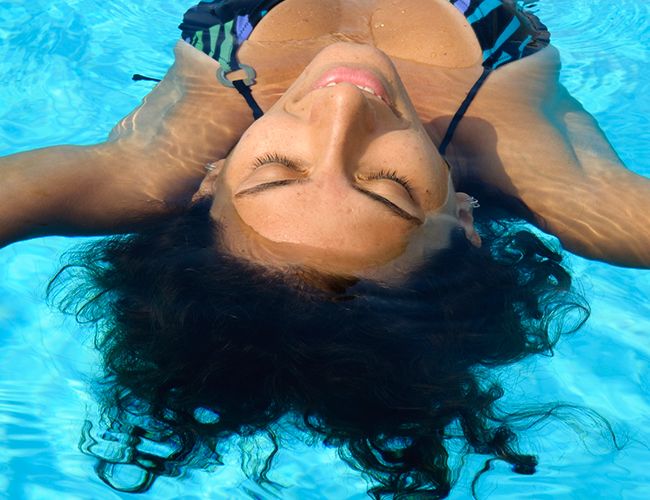
How should I take care of my hair after swimming- it always looks like a total wreck! XD
Answer
Create a barrier
For in the sun/on beach/in the pool care, put a barrier between your hair and the sun’s damaging rays, which may fade color and leave tresses feeling like straw. Spritz on an oil-based treatment such as SheaMoisture Raw Reconstructive Elixir with argan oil, unrefined “raw” shea butter and sea kelp. Oils seal in moisture and provide high-gloss shine.
Wash your hair the same day
After swimming in a pool or the ocean, be sure to wash your hair that same day with a clarifying shampoo such as SheaMoisture African Black Soap Deep Cleansing Shampoo to remove chlorine or salt, which can cause dryness and damage, leaving it brittle and fading color. This sulfate-free shampoo also gently washes away product buildup for healthier tresses.
Replenish your moisture
After being exposed to the heat and sun, always replenish moisture in your hair by applying a hydrating leave-in treatment, such as SheaMoisture’s Jamaican Black Castor Oil Strengthen, Grow & Restore Leave-in Conditioner, which softens, promotes manageability and shine, while busting frizz. Also, be sure to do a deep conditioning treatment every two weeks to rejuvenate your locks. I use SheaMoisture Anti-Breakage Masque, which intensely moisturizes, aids in reducing breakage and supports healthy hair growth. Distribute the mask evenly throughout wet hair after shampooing, place hair under a plastic cap and apply moderate heat for up to 30 minutes, then rinse thoroughly.
Boost your conditioner
For an added super boost of moisture, shine and nourishing fatty acids, I recommend adding a teaspoon of extra virgin olive oil to your deep conditioning treatment when you apply it to your hair.
[prodmod]Head over to Curly Q&A and post your questions this week if you’d like Diane to answer yours personally!
You’ll be surprised how easy Nikki’s bodacious top knot is to do. Sure, it looks big, beautiful and even a little bit fancy, but as you’ll soon see the bun only takes her about 2 minutes to complete. She wears it to work, to the gym, to formal events, there’s nowhere you can’t wear a bun – except maybe the movie theater.
Nikki posted this look in our curly photos section, StyleNook, and listed all of the steps and products she used. But she also created a video tutorial that proves it can be done in under 2 minutes!
What You’ll Need:
- bobby pins
- hair tie
- *optional – bandana or headband
- *optional – edge tamer like Design Essentials Edge Tamer or Karen’s Body Beautiful Edge Control
Directions
- Step 1 – Gather all of your hair on top of your head, starting at the back of your head and pulling forward
- Step 2 – Use the hair tie to wrap the hair once (or twice, if you have less hair”> with the ends tucked into the band, it will look very messy at this point
- Step 3 – Tuck all of the loose ends in, using bobby pins to secure them when necessary
- Optional Step 4 – If you’re going for a polished look, apply your edge tamer at the end
- Optional Step 5 – Nikki accessorized with a $1 bandana she got from Walmart, but any headband would work!
Watch the Video
[prodmod]This article was originally published in August 2014 and has been updated for grammar and clarity.
We recently posted this photo of Amber’s wash and go on our Facebook wall and received so many positive comments, we wanted to share how she got the look in an article. Lucky for all of us, Amber posted her selfie in our photos section, StyleNook, and gave each of the steps and products she used.
Amber’s wash & go routine
STEP 1
Amber co-washes with Tresemme Naturals Nourishing Moisture Conditioner, she says “it’s very moisturizing with amazing slip without the pesky silicone that coats the hair shaft and averts necessary moisture!” Then she detangles using a Ouidad Wide Tooth Comb.
STEP 2
Then she rinses with cold water & applies a leave-in conditioner. SheaMoisture Curl Enhancing Smoothie acts as both her moisturizer and her styler. She says “I’m always trying new styling products, but I tend to stick with the Shea Moisture line.”
STEP 3
The last step is to seal with Shea Moisture Curling Gel Soufflé for hold, and coconut oil for shine and added moisture.
We suspect that one of the reasons this photo was so popular on our Facebook was to do with Amber’s length. Long hair is a result of a healthy scalp and hair, which leads to length retention. If you’re looking to grow longer, healthier hair, this is Amber’s advice:
“take the time to explore what options are best for YOUR hair to keep it healthy! The easiest way to do that is DROP THE HEAT TOOLS! Your hair will thank you! It’s hard to do, but you’ve really got to allow your hair to breathe and get moisturized. Constantly using heat tools deprives your hair of much needed moisture! But, this doesn’t mean you can’t use them at all, just not as often…A healthy diet, plenty of water and exercise is the best thing you can do for yourself!” For a full interview on Amber’s regimen and her natural hair journey, click here.If you’d like to find more long hair inspiration, check out the long hair category on StyleNook for more curly selfies. Or share your own fabulous selfie!
[prodmod]Naturally curly women have dealt with more than their fair share of bad haircuts. But the first time you receive a genuinely flattering haircut from a curl specialist, it’s like suddenly your curls are working with you not against you. One of the most popular hair cutting techniques for curlies is the Deva Cut, but as you’ve probably discovered by now one size does not fit all when it comes to curly hair. Perhaps the Deva Cut just isn’t for you, or maybe there isn’t a trained Deva specialist in your area.
We want you to know there are other options out there, so here is one of them: the RI CI Cut. We recently interviewed Ricky Pennisi, renowned edgy salon owner, stylist, and educator, about his RI CI cutting technique.
Do you cut the hair dry or wet? Why?
I prefer to cut curly hair wet. The RI CI cut is based on the hair weight and density, not the curl pattern.
How does weight and density affect the way you cut hair?
Weight and density are the biggest problem for curls. When not treated correctly it can give clients that dreaded curly pyramid look. The key to remember when cutting into curly hair is curls tend to drag down with fine hair and clump together into a mass of curls with no definition in thicker hair.
What hair type does your hair cutting technique work best for? Wavy, curly, coily?
The RI CI cut is great for various types of hair. With wavy hair, this cut will enhance the curl. With curly hair, this cut will help control the curls. With coily hair, this cut will open up the interior in order to make room for the curl to form. Too many times, wavy, curly and coily hair, the curls have no room to move or form and wind up just handing, which causes frizz. The RI CI cut correct this.
We’re excited to share different cutting methods with our community, how does your cut differ from the Deva Cut?
The condition of the hair, weather and environment all play a critical role in your hair’s appearance. Since the RI CI cut focuses on the weight and density of the hair, and not the curl pattern, this allows us to create a cut for our clients that is manageable after they leave the salon. When a cut is focused on curl pattern, clients have a harder time managing their hair weeks after the cut.
How does your technique vary if you’re cutting coily hair vs. wavy hair?
Since the curl pattern changes with weather and moisture, the RI CI cut focuses on the density of the hair.
What styles and cuts does your technique work best for? For example we commonly see a lot of longer, rounded bobs when it comes to Deva Cuts.
What makes RI CI groundbreaking is that the cutting technique and product provide my clients the ability to wear their hair at every length – long, medium and even short. Since the RI CI cut focuses on each section and base individually, it gives me the advantage to shape the hair so that it has a natural movement that enhances the natural curl.
How do you customize your cut for low and high density hair? What do you focus on?
Always determine what the problem area is. Once it is identified, regardless if the hair is thick or fine, I focus on that specific area during the cut. For high density hair, I focus on the removing interior and creating movement. Additionally, I try not to create thick layers since that creates more volume then wanted.
What do you do for fine hair? What about coarse hair?
Regardless of fine or coarse hair, the technique remains the same. Density is more important than texture. With fine hair balance is crucial. Fine hair’s biggest enemy is weight and that’s a huge understatement when fine hair gets heavy it dies, but removing too much weight and thin hair gets stringy. The key is to approach each section individually and cut only what’s necessary. After each cut, shake out each section to ensure the hair falls properly.
Where can people get a RI CI cut?
There are certified salons all over the United States that are trained in the RI CI cut and sell the entire line of products. To find a salon nearest you, visit www.ricicurls.com.
One of our YouTube idols Whitney, also known as Naptural85, recently tried the new L’Oreal Liquid Chalk on her hair and we were curious to see how they would compare to temporary hair colors we’ve tried in the past like oil pastels and cream eyeshadow. She picked up the chalk in purple, pink, bronze, red AND blue (we would have too”> and tested each one on a different section of her hair, here were her results.
Step 1 Shake the bottle well and apply to a cotton pad
Step 2 Use the cotton pad to distribute the color evenly over a small section of hair
Step 3 Blast the section of hair with a blowdryer, Whitney used her blowdryer with the cool setting to avoid heat damage
Step 4 When she was done Whitney twisted the hair so that the curl pattern would match the rest of her hair
Her review
After applying two layers of each of the five colors to her hair Whitney said “it’s not super bright, it doesn’t really pop like normal hair chalk does, but it doesn’t transfer like normal hair chalk does. And that’s kind of a big deal, I wouldn’t have to wear a black shirt I could wear anything that I wanted.” We have used hair chalk and pastels in the past and she is right, it is a big deal. Going to sleep, taking a shower, and getting dressed without making a mess are all impossible tasks when you have pastels in your hair that can transfer to your clothing, towel, pillow case and sheets.
The color may not be vibrant after just two coats, but like an eyeshadow or a blush, the product is buildable, “if I really wanted to make this more vibrant I could just put more hair chalk on it.” If you’re going for an extremely vibrant color, then this might not be for you. Whitney says “I actually like that it’s not really bright, it’s actual more natural. As natural as a jewel-toned hair chalk can get… it’s really pretty.”
She compared the bronze to the Kevin Murphy Color Bug which she reviewed and liked previously, and she actually preferred this L’Oreal chalk because “it looks so much more natural. It doesn’t look as ashy, the color itself is more of a burnt bronze-y color, whereas the other one was kind of like an ashy yellow.”
If you have used pastels on your hair, then you probably found that it left your hair feeling dry and straw-like. With this product “it definitely feels a little bit harder than your natural hair, but it’s still pliable. It’s not here to moisturize your hair, it’s here to deposit color… It does what it’s supposed to do.”
Removal
The color completely washed out after she co-washed, even though the bottle says the color should last an average of two shampoos. Her hair returned to its natural, black color with no staining or remnants of any color after just one wash.
Overall, Whitney says these hair chalks are amazing, she doesn’t mind that they washed out with just one wash because she was worried about staining, which did not happen. Most of all she loved that the color did such a good job of staying on her hair and not transferring.
Watch the video for her full demonstration and review:
Have you tried hair chalk? What was your experience?
As a NaturallyCurly Editor my curl regimen changes every week. When I started working here my consistent regimen of Aussie Moist and Infusium 23 opened up to a whole Product Junkie world. These days product is far-reaching in my home, from my bathroom to my closet and all the way to my kitchen cabinets, so when I find myself returning to a product time and time again, I know I’m onto something. Ever since I first tested the Amika Obliphica Curl Defining Cream it within arm’s reach in my bathroom, so I wanted to share my review with fellow wavies and curlies who love their curl creams.
My hair issues
Inconsistent – My curl pattern is Type 2c, but some days my waves lose their shape and appear more like frizzy straight hair, and some days they curl up into 3a ringlets. There’s no telling what my hair is going to do on a given day, so I need my products to help encourage my curls on their lazy days, and to give them definition on their curly days.
Color Treated – My hair has high porosity ever since I bleached and colored it last year. I have to take extra care choosing moisturizing products for my color treated hair than I did when it was virgin and healthy. If I’m not vigilant about moisturizing it regularly, it starts to look and feel like straw.
Coarse – It is a common misconception that looser curl patterns have finer hair, but that is not always true. The width of the hair can vary widely and in my case, I have coarse, wavy hair. This affects my choice of products because coarse hair is more prone to dryness and creams work better for me than lighter products. To know more about why width matters, read here.
Amika Obliphica Curl Defining Cream
Ingredient List
Aqua (Water”>, Mineral oil, Petrolatum, Cetearyl alcohol, Stearic acid, Cetyl alcohol, Phenoxyethanol, Hippophae rhamnoides (Obliphica”> oil, Argania spinosa kernel oil, Polyquaterniu-7, Cetrimonium chloride, Triethanolamine, Fragrance, Panthenol, Sunset yellow.
Consistency
The Amika Curl Cream has the consistency of a lotion, and I use a quarter-sized amount on my whole head. It does not leave my hair feeling greasy the way other lotion-like curl creams do, and it does not take a lot of product to coat all of my hair and is easy to apply evenly.
Fragrance
Fragrance is very subjective (just ask the NaturallyCurly Editors!”> but in my opinion the Amika line has one of the best smelling fragrances on the market. It smells like a perfume that I would happily wear on its own, not too sweet and not too overpowering.
Second and third day curls
One of the primary reasons I like the Amika Curl Cream is that my curls look good on the second, third and fourth days. With many curly styling products I find that my hair may look great on the first day, but after sleeping on it they either get bent out of shape, start to go straight, or start to look greasy. This product does none of the above.
Reliable
I know that I put my hair through a lot, constantly testing new cleansers, conditioners, oils and stylers on a weekly basis. So it gives me peace of mind knowing that on days when I don’t have time to experiment, I can always rely on this curl cream to perform consistently without any extra cocktailing needed. If I know I need to take pictures for an article, this is the product I reach for in the morning.
How I use it
I apply this cream to my hair when it is freshly washed and after I have applied my leave-in conditioner. When I get out of the shower I typically spray a liquidy leave-in like Oyin Juices and Berries, ApHogee Moisture Rich Leave-In, or Obia’s Curl Hydration Spray all over my hair.
Then I take a quarter-sized amount of curl cream and rub it between my hands, then scrunch that through my hair pushing the ends of my hair up close to my roots. This helps my ends to curl instead of drying straight.
At this point my hair is likely dripping water and product, so I take a microfiber towel like the Curly Tee Towel and scrunch out any extra moisture and product, then wrap my hair in a plop for 5-15 minutes while I put on makeup or get ready.
If I have time, I diffuse my hair. This gives me the most volume and the most defined, bouncy curls. If I really need my hair to look good then I need to diffuse it, but on a regular day I just go to work with my hair damp and let it dry throughout the day, scrunching every now and then.
I don’t use this product on dry hair as a curl refresher because I prefer a liquid, spray formula for my refresher products.
Have you tried Amika Curl Defining Cream? What did you think?
[prodmod]Henna is a powerful dye with amazing conditioning properties. In addition to being used to dye hair, henna is used as a hair growth remedy. When henna is applied it puts a protective coating on the hair, and many women find that their strands feel thicker and stronger. In India, henna has long been used as a natural panacea for many haircare issues.
Make sure it’s pure
In order to reap the benefits, make sure you are using pure henna. Many products that are labeled “henna hair color” are actually full of chemicals that can damage the hair. Stick with a trusted brand like Reshma or buy it from a trusted natural herb supplier.
Henna’s many uses
- Dandruff fighter – It can help to reduce or eliminate dandruff
- Scalp cleanser – It helps maintain the natural acid-alkaline balance on your scalp and cleanses it of dirt without altering the natural balance unlike chemical-based products.
- Shine booster – It smooths the hair cuticle, giving it a shiny, healthy appearance.
- Sealant – It forms a coating on the cuticle which makes the hair appear thicker as well as shielding it from further damage.
- Natural hair dye – You can use henna as a healthy way to dye your hair a reddish tinge, as it does not contain damaging chemicals.
- Hair growth – Its antibacterial and antifungal properties nourish the scalp for optimal hair growth and less hair fall.
- Skin healer – If you have a burn injury, mix some henna powder with water and apply it on the affected areas for instant relief. It not only heals the wound, it also prevents infection and bacterial growth. It can help cure acne, boils and warts as well.
Some people report that henna loosens their curl pattern, I would not consider this a benefit but some people henna for this reason.
How to apply
If you’re interested in trying henna for the first time, Reshma’s henna has an easy 30-minute process that is not messy or difficult to apply. Watch how our editor Devri mixes and applies it to her hair.
[prodmod]This article is sponsored by Reshma.
Many hair products promise longer, thicker strands, but the fact is, anything applied topically can only create the appearance of a thicker mane. If you want to actually get more volume, you have to make changes from the inside out.
We often overlook diet and health when it comes to our beauty regimens, but they play a huge role in the look and feel of our hair and skin. One symptom of having a (very rare”>biotin deficiency might be thinning hair (or hair loss”>, so taking biotin in that case might correct that. But, for the average person who isn’t deficient, taking extra biotin probably won’t do very much.
Although, so far, there has only been weak scientific evidence to connect vitamin H, commonly known as biotin, with improvements in hair, skin, and nails, many women are declaring it as a wonder drug, claiming supplement consumption has led to faster hair growth, thicker strands, and stronger nails. In fact, there’s evidence that it helps with nail growth, but it’s inconclusive as far as hair.
Supplements and their claims aren’t regulated by the FDA, but anecdotally biotin has been making the rounds with varying results in our curly community for years. In the NaturallyCurly offices, we’ll try just about anything once (some advice: Banana is very difficult to get out of hair”>, so our team put biotin to the test, and this is what happened. We also reached out to our Instagram community about their biotin results, and here’s what they had to say.
Priscilla Sodeke
Which biotin product did you take, and for how long?
“I’ve tried biotin on and off for years. Most recently, I bought it from Walmart and it was just plain, generic-brand biotin. I have also taken Hairfinity (2,500 mcg of biotin”> and Hair Essentials (350 mcg of biotin”> for less than a month each time.”
Why did you decide to start taking biotin?
“My goal with biotin was longer and faster hair growth, length retention, and healthier skin and nails. However, I don’t think I used any of them long enough to notice any results in terms of hair growth or skin and nail health, because each time I tried it, I began to break out, which made me stop taking it.
“To be fair, Hairfinity and Hair Essentials also have MSM in them, and I’m almost certain that MSM makes me break out. But, I still had similar results with the plain-biotin supplement. If this sounds like your skin and you’re worried about breakouts, I would recommend you drink lots of water throughout the day while you are taking biotin. In my experience, I would need at least nine cups of water; more when I was active or exercising.”
What were your results?
“I don’t think I stuck with it long enough to see results.”
Clare Szabo
Which biotin product did you take, and for how long?
“I took three tablets of Nature’s Bounty Extra Strength Hair, Skin, & Nails per day, about 5,000 mcg of biotin. I’ve done this off and on for about four years now. Each time I do this, I take it consistently for a few months at a time.”
Why did you decide to start taking biotin?
“I started taking biotin after noticing I was losing a lot of hair during washing and styling. I talked with my hairdresser about my concerns that I was thinning and the possible reasons for it. This was during college, and we deduced that it was primarily stress-related. She recommended that I take biotin. My goal was just to strengthen my hair, as well as promote growth.”
What were your results?
“After about a month of taking biotin, I noticed a decent amount of new growth — at the crown of my head, specifically. There were a lot of baby hairs popping up. I also noticed that I was losing fewer strands after washing and styling, which was really exciting. It was overall a positive experience with my hair, but not so positive with my skin. I didn’t have any major problems with my skin, but going from having fairly clear skin to having a few pimples pop up here and there was unwanted.
“Although I may have broken out a little more than usual, it wasn’t enough to deter me from continuing to take it. My hair was becoming stronger and fuller, which was the goal. I didn’t notice a real difference with my nails.”
How long did it take for you to see results?
“It took me about two to three months to really notice a difference, especially with the thickness of my ponytail. My hair just felt stronger and fuller. I was clearly losing less hair, as well as growing new hair.”
Naturally Curly Instagram Followers
Nikki Johnson
Which biotin product did you take, and for how long?
“I took Central Market biotin tablets, one a day at 10,000 mcg. I only took it for about three weeks and it was a mess!”
Why did you decide to start taking biotin?
“I started taking them after hearing reports of better looking skin, and longer, thicker hair. I didn’t really need longer hair; my hair was already long enough for me, but I was hoping for fuller hair.”
What were your results?
“I didn’t notice a positive difference in any category: hair, skin, or nails. My hair didn’t grow or become thicker. My skin didn’t become clearer or suppler. Actually, my skin broke out in cystic acne, which I’ve never had before. This terrible side effect is the number-one reason I stopped using it. I hear my results are not atypical. I have a few friends that experienced the same thing. On the other hand, my mother has been taking the same biotin tablets in the same dosage with completely different results (the results I was expecting to see”>.”
How long did it take for you to see results?
“I was about one-and-a-half weeks into taking them when my skin started to flip out. I took it for a total of three weeks before giving it up.”
Amanda Starghill
Which biotin product did you take, and for how long?
“I took Nature Made Biotin, 2,500 mcg twice a day, for three weeks.”
Why did you decide to start taking biotin?
“I wanted to stimulate [hair] growth and thicken my strands. My cousin is in her 60s, and when she used biotin she went from low-density to extremely high-density strands, so I’ve seen it work for others — just not for me.”
What were your results?
“I had pimples all over my cheeks, and I noticed my body hair was thicker…only my body hair. There was a clear line of demarcation where the new thickness began, so it worked for every part of my body but my scalp. My hair continued to grow at the same rate, with no signs of thickness on my scalp. Just imagine how mad I was.”
How long did it take for you to see results?
“I broke out within the first week. I continued to take it for a couple more weeks, but the side effects just weren’t worth it to me.”
Devri Velazquez
Which biotin product did you take, and for how long?
“I took one capsule of Nature’s Bounty 10,000 mcg daily. I used it consistently for three consecutive months.”
Why did you decide to start taking biotin?
“I was on a chemotherapy-like treatment that was causing my edges to thin, so I read up on all of the hair-growth benefits of biotin and checked with my primary-care physician before giving it a try.”
What were your results?
“I felt nauseous every day for about a week, but I knew that this reaction is expected when taking a new medication or supplement. However, the feeling didn’t get any better with time. Then, I started breaking out in cold sweats, and hives would appear on my chest for minutes at a time. This happened throughout the day with no warning.”
How long did it take for you to see results?
“Unfortunately, I did not notice any results as far as hair growth is concerned. However, my nails did become stronger. The negative side effects began within the first week. While biotin deficiency has been linked to hair loss, biotin is found in the food we eat, and the body naturally produces biotin, so it is actually very rare to have this deficiency.
“You only need a small amount of biotin, and if you have a balanced diet, chances are you’re already reaching your daily intake of about 30 to 100 mcg. If you’re considering taking biotin supplements, we recommend checking with your doctor first to make sure it won’t interact with any other medications you may be taking, especially since many people have experienced such challenging and uncomfortable side effects.”
That is how we reacted to biotin, but we want to know: have you tried it? What were your results?
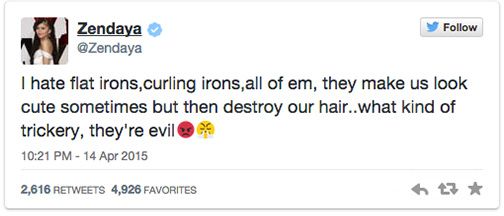
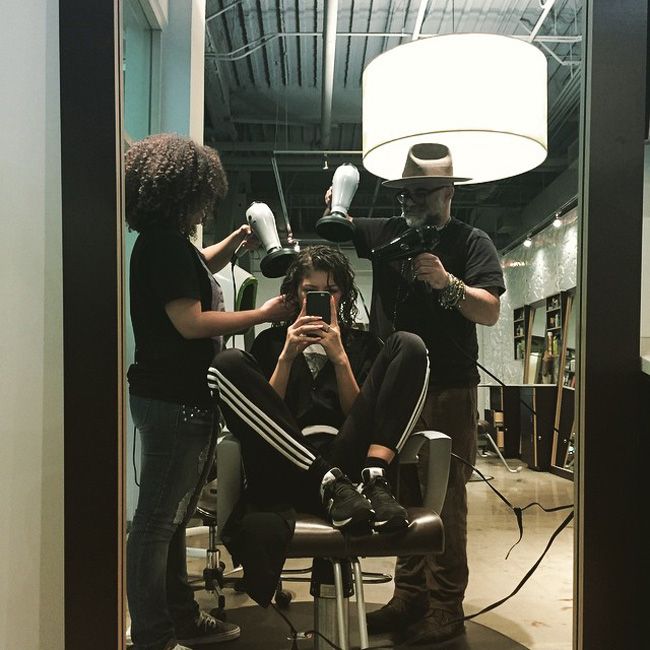
Zendaya’s hair and its many styles have been making headlines lately, but our favorite Zendaya look? Naturally curly of course! Zendaya visited Curl Dr Shai Amiel at Capella Salon in LA this week and walked out of the salon a happy camper (as all of his clients do”>. Shai is a serious #CURLboss whose curly transformations we can never get enough of, and Zendaya’s is no exception. We hope to see more naturally curly looks from her soon, and if her Twitter is any indication she’ll be taking a break from the heat tools.
Unfortunately, we all come to this realization at some point in our curly hair journeys, some sooner than others, when the (heat”> damage has already been done. And a fresh cut from a curl expert is oftentimes the best and only way to truly repair it.
What do you think of Zendaya’s new look?


