Search Results: Christina Patrice

I know what you’re thinking, it can’t be true. All-natural heat protection? As in like, no silicones and other funny business?
I was shocked too.
Nicole Metcalf, owner of Organic Heat Pro reached out to me because she wanted me to try her spray. She promised that it provided heat protection, super shine, and was completely natural. She told me it passed all rounds of testing with flying colors. But did it really work? I took it to task on my flat-ironed natural hair that I got done at the Lawrence Ray Concepts Salon.
Key Ingredients
- Exotic fruit oils, pure alkaline water, rosemary oil. To be upfront and honest with you all, they were not able to reveal their full ingredient list to me.
Normally, I’d be concerned, but as a blogger on the business end of things, I’ve come to understand that without the proper legal protection around product formulations, companies leave themselves vulnerable to other brands looking to prey on their ideas and profit. I’d definitely say keep your eyes peeled in the near future for full ingredient disclosure.
- Product Claim/Description: “After years of research on exotic fruit oils, we found the right formula to protect your hair from everyday stress. Organic Heat Pro is all natural and provides unparalleled heat protection for all types of hair.”
Performance/Delivery
Umm….do you see my hair?!
As far as the ingredients are concerned, I did have some initial reservations. However, Nicole Metcalf (the owner”> assured me that the product is all-natural and full of good for your hair fruit oils. The star of the show is rosemary oil, which provides follicle stimulation, and strengthens the roots of the hair, which promotes growth. The spray is water-based, which I actually like. One of my biggest problems when I wear my hair straight is that I am unable to maintain internal hydration, because typically, water + straight hair = reversion. But the Organic Heat Pro blend, when used properly, does not cause reversion or poofiness in the slightest. The oil blend in the heat protectant is lightweight, provides super shine, and does not weigh the hair down. It definitely smells like rosemary, but the fragrance doesn’t linger for long. The spray itself is milky white-ish, but does not build up or flake in the hair whatsoever.
What I like most about the Organic Heat Pro spray is how SHINY my hair is, while still being lightweight and movable. My hair does not feel greasy or oily AT ALL! I’m totally impressed, because this spray is as powerful as some high powered silicone serum — but it’s all natural and totally right up your alley if you’re looking to go cone-free even in straightening.
While I don’t have all the science together of why the spray provides heat protection without silicones, I do know that it works. In the video below, I make 2 and 3 passes over selections trying to curl them (again because I don’t know what I’m doing”>, and I experienced absolutely no heat damage or loss of my curl pattern whatsoever. I’m sold on Organic Heat Pro!
- Drawbacks: I’m an ingredient junkie, so I really want to know what’s in the product. Argan? Pracaxi? Moringa? I’ll be keeping up with Organic Heat Pro for sure, because I gotta know!
- Bonuses: Another thing I really like about the spray is that it”s not just limited to use on straight hair. I use it to seal in moisture for wash and go’s add shine to my natural curls. I sprayed it on my scalp to moisturize and stimulate growth there, too. It’s also perfect if you frequently do blowouts, Curlformers, flexi rods, perm rods, roller sets, or any other stretched style that requires direct or indirect heat.
Bottom Line
Overall, Organic Heat Pro Heat Protection Spray is a one of a kind, all natural, highly effective spray that has quite honestly, blown me away. It does exactly what it says it will do, without all of the ingredients most naturalistas find to be problematic. I mean, look at these curls that reverted back #noheatdamage:
Availability
The Organic Heat Pro Heat Protection Spray is only available online at www.organicheatpro.com
Affordability
At $25 for 8 oz., it is on the pricier side of natural hair care, but in my eyes well worth it. When used properly, a little bit goes a long way. Besides, you get what you pay for–right? I’d never pay $25 for a silicone serum, because cones are cheap. But an all natural, oil-based spray? Very much worth it.
Watch my tutorial & review
And don’t forget to follow me on Instagram @ManeObjective. Subscribe to my YouTube channel for more curly/natural hair tutorials.
In the name of #curlsonfleek, our hair can become dry and brittle to the touch due to holding ingredients like polymers and certain polyquats present in our styling products. But thanks to the increasing demand for more natural products, brands are taking note and delivering gels and curl definers that are botanically-based.
If you follow the Max Hydration Method, swear by the Curly Girl Method, or just are an avid fan of more natural than synthetic hair products, then this list is for you!
Top 8 Botanical Gels For Curly Girls
Depending upon where you live, the winter air can be dry and unforgiving. Combine that with frequent temperature fluctuations as you travel between car and office heaters, and into the cold, and by the end of the day you’re seriously questioning whether or not you even moisturized your hair.
I’m sure you did. But between the weather and heating units, getting hair to stay and feel moisturized can be tough. Your summer/spring oils might not be up to the task, so what do you do? Check out these 4 oils that will help you retain moisture, softness, and shine this winter. And because coconut oil is so 2014, here are some different options.
You can use them individually, blend them for an epic pre-poo, apply them directly to your scalp for a stimulating massage, or mix them into your favorite conditioner for an extra moisturizing boost!
1. Argan Oil
It took me a while to warm up to argan oil, because it can be pretty expensive. Until very recently, I had difficulty coming across a 2 oz bottle that was under $20. But Vitamin Shoppe changed all that! Nowadays, Argan is one of my staple winter oils because it’s lightweight, nourishing, protective, rejuvenative, and $8. Argan oil contains high concentrations of vitamins A and E, Omega 6 fatty acids, carotenes, squalene, phenols, and other phytonutrients. Vitamin A is a potent antioxidant, and along with Vitamin E, helps to fight free radicals to prevent and reverse damage and aging in hair.
Additionally, Vitamin A assists in sebum production to effectively coat and moisturize the hair — helping to ward off breakage. Omega 6 fatty acids control water loss by helping to ciment cuticle layers, stimulate hair growth, and can even provide some relief for dry, itchy, and flaky scalps, while phytonutrients nourish the scalp at a cellular level. Since Argan oil is so nutrient-dense, a little bit goes a long way. One or two pumps per section of hair is plenty enough to impart softness, shine, and moisture.
2. Jamaican Black Castor Oil
Jamaican Black Castor Oil, for all its thick, smelly-ness, is one of my favorite winter oils. A staple of many naturalistas, Jamaican Black Castor Oil (or JBCO for short”> is a thick, highly viscous oil with antibacterial, antifungal, and humectant properties. The major difference between JBCO and regular yellow castor oil is the roasting of the castor beans prior to the extraction process. That is precisely where the burnt, smoky smell of JBCO comes from–and what is believed to give JBCO the ability to improve hair growth, and re-grow previously bare spots in the scalp. I don’t have any hard scientific evidence of the growth properties of JBCO, but it remains a staple of mine because it is one of the best sealants I’ve ever used.
I wear wash and go’s year round, and with my red ombré ends, I need something that is going to protect my ends as they rest on jackets, sweaters, and sweatshirts. JBCO has drastically cut down on my split ends, and it just might be helping out with decreasing fairy knots while leaving my ends smooth and shiny. JBCO is also a wonderful scalp massage oil (just make sure you put it in a narrow tip applicator bottle to avoid overuse”>, and is great for oil cleansing as well.
[prodmod]
3. Avocado Oil
Another winter favorite of mine is the wonderfully multi-purpose avocado oil. I’m not a huge fan of putting food on my hair, so I don’t foresee myself using an avocado mask anytime soon.
However, avocado oil makes a wonderful substitute, because it is rich in Omega 6 and 9 fatty acids. Omegas 6 and 9 are responsible for controlling water loss in the hair, by cimenting the cuticle layer. Avocado oil is full of monounsaturated fatty acids, which are the same fatty acids that make coconut oil so wonderful. In fact, those monounsaturated fatty acids are believed to be responsible for giving oils their hair penetrating properties, which means avocado oil readily absorbs into the skin and may soak into the cortex of the hair, moisturizing internally.
To make a long story short, avocado oil is an wonderful moisturizer, imparts shine, improves elasticity, helps prevent breakage and split ends, and eases itchy, flaking scalp. Although it shares similar properties to coconut oil, it does not solidify in colder temperatures like its tropical counterpart. What’s there not to love?
4. (Sustainable”> Red Palm Oil
For some reason, the smelly oils always find their way to my heart. Although red palm is not nearly as egregious in odor as JBCO, it is not innocuously scented like argan or avocado oil. Red palm oil is harvested from the fruit of the red palm tree itself, instead of the kernel only — which allows it to retain its deep, reddish-orange hue. Red palm oil is rich in carotenes, Vitamins A and E, and monounsaturated fatty acids. In fact, red palm oil contains more beta carotene per ounce than any other oil. The carotenes, combined with Vitamins A and E are vital and valueable antioxidants that help stop and reverse signs of aging, damaging, and weathering on the hair.
Vitamins A and E are also wonderful for nourishing and stimulating the follicles, encouraging healthy hair growth. And we just learned all about what monounsaturated fatty acids are thought to be able to do, so here’s another perfectly viable alternative to coconut oil if you’re looking for shine, softness, and penetration into the cortex of the hair. Because red palm oil does contain some saturated fat, it thickens at colder temperatures. In my experience, it looks partially solid, but has some movement. Sitting the jar or bottle in a warm water bath for 10-15 seconds gets everything nice and liquidy. In case you’re concerned about sustainability, habitat destruction, and other eco-issues, you can rest assured that Nutiva has you covered.
I purchase their red palm oil from Sprouts regularly, and you can read their FAQ and have your concerns assuaged here: http://nutiva.com/company/faq/red-palm-faq/
These are my personal picks. What oils are helping you out this winter?
Editor’s Note, August 2015: The brand Hello Curly no longer exists, Curly Magic is currently being sold by Uncle Funky’s Daughter here.
There’s been a lot of buzz in recent months about the emerging brand, Hello Curly. Most people recall Uncle Funky’s Daughter and their holy grail fave, Curly Magic. Many also recall Tonya Goff, co-founder of Uncle Funky’s Daughter. When the Curly Magic formula changed and Hello Curly sprouted up under Goff’s name as sole owner, many naturalistas were confused. Why did Uncle Funky’s Daughter change their already perfect formula? What is Hello Curly Curl Stimulator, and is it the same as Curly Magic, like Goff says?
According to Goff and other sources, Tonya and her husband went through a grueling divorce and she was forced to sell Uncle Funky’s Daughter against her wishes as a part of the process of dividing assets. She then took her Curly Magic cult favorite formula and rebranded it as Curl Stimulator, under the new label Hello Curly.
Although I never tried the original formula of Uncle Funky’s Daughter, there are several comparison reviews online and the conclusions are all the same: Hello Curly’s Curl Stimulator IS the old Curly Magic.
The Holy Grail lives on under a new name. All of the raves online about Curly Magic and now Curl Stimulator got me curious. How would Hello Curly stack up against favorites of mine like Camille Rose Naturals Curl Maker? Let’s find out.
Ingredient List
Organic Aloe Vera Juice, Aqueous-Infused Extracts of Marshmallow, Chamomile, Nettle, Horsetail, Vitamin E, Agave Nectar Extract, Citric Acid, Potassium Sorbate and Natural Fragrance
Top Ingredients 411
-
Organic Aloe Vera Juiceacts as a natural conditioning agent that restores the hair’s sheen, luster, and shine. It not only makes the hair soft, but it also enhances strength and suppleness. Acts as a natural conditioning agent that restores the hair’s sheen, luster, and shine. It not only makes the hair soft, but it also enhances strength and suppleness.
-
Aqueous Infusion of Herbs and Extracts: These herbs and extracts provide slip, conditioning, shine, moisture, and nourishment to the strands while strengthening the follicle and healing damage.
-
Citric Acid is a natural extract derived from citrus fruits, it is a widely accepted organic acid used in the cosmetics and food industries as a preservative and a pH control agent. It has antioxidant properties and is used as a stabilizer.
-
Potassium Sorbate is a potassium salt of sorbic acid, a naturally occurring antimicrobial compound; used as a preservative.
Product Claim/Description
“Everybody loves curly hair. It’s unique in its own right, and just like people, no two curls are the same. At Hello Curly, we think of ourselves as Curly Crusaders, on a mission to banish frizz, define curls, and connect souls across the planet. We must warn you, when you use our products all kinds of lovelies will send compliments your way. Take it very personally. It is the Universe’s way of affirming to you that you are beautiful, you are magnificent, and your curls are uniquely amazing!”
“Moisturizes and defines medium to loose curly strands without leaving it crunchy or flaky. Works well to maintain definition on tight curls that have a visible curl pattern when wet, but dries with a kinky afro texture. Tames frizz and defines curls. Firm hold, lots of shine, no crunch. Lasting 2nd and 3rd day curls. Moisturizes and defines medium to loose curly strands without leaving it crunchy or flaky. Works well to maintain definition on tight curls that have a visible curl pattern when wet, but dries with a kinky afro texture.”
Performance/Delivery
Out the gate, the first thing I noticed about Curl Stimulator was the SLIP. Major, major, maaaaajor slip. Any tangles that remained in my head after washing didn’t stand a chance. I definitely think Hello Curly needs to expand their line to include a detangler, because they’ve got that formulation on lock!
The SLIP. Major, major, maaaaajor slip.
Needless to say, the product distributed easily throughout the hair. The moment I applied the Curl Stimulator to my hair, my frizz disappeared. My curls were very well defined — it did an excellent job at capturing that “wet look” curl I like to rock from time to time.
Curl Stimulator definitely has a learning curve. This is not one gel that you can just haphazardly slap in your hair and hope for the best. It is really potent, something I didn’t expect from an all-natural, botanical gel. I played with the gel on several occasions to see what application techniques would give me the best result. I was able to follow pretty much every step I do normally to define my curls, except be heavy-handed with styling product. Overuse can lead to super defined, stringy curls, and may lend itself to stickiness.
Using 1-2 pumps per large section of hair seemed to do the trick. This gel works great alone, or in conjunction with other leave-ins and moisturizers. I had absolutely no trouble mixing it with my faves, and it easily got me to day 3 and 4 hair without feeling dried out or crunchy. I was able to progressively achieve that “right” amount of frizz and definition in the days following, which I absolutely loved!
Oh and the shine? Epic.
Availability
Hello Curly Curl Stimulator is available online at www.hellocurly.com and through online retailers like www.hattache.com and www.hairizon.com.
Affordability
At $25 for 18 oz., Curl Stimulator is definitely on the more affordable end of things, considering the quality. Most botanical curl definers are $12 and up for 8 oz. (or less”>, and the 18 oz. jar of Hello Curly Curl Stimulator is HUGE! Especially considering how little you have to use to get great results. My bottle is going to last me a looooong time.
[prodmod]
Bonuses, Drawbacks, and Bottom Line
- Hands down, the slip. Any product that glides through my hair, kicking tangles and taking names is a winner in my book. Getting product through my hair shouldn’t be a struggle, and Hello Curly understands that.
- To be quite honest, I’m not a huge fan of the fragrance. It isn’t strong and artificial, on the contrary it’s very green, earthy, and gentle. It doesn’t bother me enough to have me discontinue using Curl Stimulator, because it’s not overbearing and fades quickly.
- If you’re looking to clean up your curl definers and use more products that are good for your hair, Hello Curly Curl Stimulator is the one. It does exactly what it says it will do, without drying or dulling your natural curls. A lot of naturalistas have put Hello Curly Curl Stimulator on their holy grail list — and I see why! I’m just about ready to add it to mine!
Are you tired of relaxing, chasing your kinks away with a flat iron, or just ready for a change? Congratulations, you’re on your way to joining #TeamNatural!
The Big Decision
But before you take the plunge, you need to decide–are you going to big chop or transition? If you’re eager for change ASAP, or your hair is severely damaged, you’re likely to opt for the big chop. But if you’re like I was, and are not ready to part with your length, transitioning is most certainly an option.
Before I go any further, let’s clarify the two terms:
Big Chop
Cutting off all straightened, damaged, or relaxed hair into a short fade or TWA (teeny weeny afro”>. The big chop allows ladies to begin their natural hair journey from the ground floor, caring for and styling only the natural hair that grows from the scalp.
Transition(ing”>
Gradually growing out straightened, damaged, or relaxed hair. Transitioners make the conscious decision to stop the practices that got their hair into the position that it’s currently in. Transitioners coddle along both natural and damaged tresses, growing out the hair until they are ready to cut the ends off.
One method is not superior to another, it ultimately is a matter of circumstance and preference. I transitioned because I was uncomfortable with the idea of growing out big chopped hair. There are plenty of resources available to support big choppers (here is a great place to start“>, but today I’d like to chat with all the ladies considering a transition.
Once you’ve made up your mind that you’re going to transition, there are 4 things that you’re going to need to do in order to make it a successful one. This is not to say that you won’t make mistakes or get frustrated, but rather that those hiccups won’t derail your journey to healthy hair.
1. Backwards Plan
I’m sure you’re no stranger to the saying, “Begin with the end in mind.” That is the first thing you will absolutely need to do as a transitioner. How long will you transition? What goal length would you like to achieve before you chop your ends? When I first embarked on my natural hair journey, I gave myself 3 months to test the waters. I wanted to see how much my hair would change without heat in this amount of time. The results were so moving, that I tacked on another 3 months, and then another 3. By the 9th month, I had planted a firm decision in my mind that I would transition for 2 years. Yes, 24 months.
But I didn’t make it, and that was okay.
By month 21, I was at my wits end with my transitioning tresses. I had more natural hair than heat damaged, and I just wanted to be done with them already. I booked a consultation and appointment at Devachan Culver City, and haven’t looked back since. Beginning with the end in mind helped me get as close to my goal as I could. My goal was to have thicker hair that was long enough for me to feel comfortable rocking naturally (with shrinkage factored in”>, and by 21 months I was practically there. Knowing what I wanted helped me be more diligent about caring for my transitioning hair, and greatly improved my patience in dealing with more frustrating times.
2. Adjust Your Expectations
You won’t wake up 6 months from now with hair like your hair crush or favorite Instagrammer. I used to have a practically covetous relationship with Hey Fran Hey’s hair, and I realized that it was doing me more harm than good. The more I loved and longed for her hair, the more I ended up hating my own. It wasn’t until I began to adjust my expectations for my own hair that it began to flourish.
No, my hair isn’t going to grow 3 inches in a month.
And it most certainly will not be a fuzzy, curly, shiny, halo of ringlets after a year of transitioning. Or at all. Your hair is uniquely your own, and the best thing you can do is spend time getting to intimately know each kink, coil, curl, and wave throughout the transitioning process. Knowing your hair will help you develop more realistic expectations for your tresses.
3. Flex Your Info Filter
Another popular phrase, “all money ain’t good money” most certainly applies here as well. All information isn’t good information — not for you at least.
This is not to discredit the wealth of information that exists online, but rather to encourage you to activate your own filter. Everything you read, and every YouTube video you watch won’t directly translate into something beneficial for you.
A certain blogger may swear by a particular holy grail deep conditioner, but that doesn’t mean it will automatically become a HG product for you too. Don’t feel compelled to run out and slather Monistat on your scalp, or soak your hair in a paste made of garlic and onions just because you read about it online. Approach your transitioning journey with the same level of discernment you do in everyday life.
4. Get Some Sticktoitiveness (and lots of pictures”>
You will get irritated.
Styling will become hard.
You will feel defeated.
You will cut off some hair (probably more than you wanted”> out of sheer frustration.
All of this is normal.
For all of its frustration, many wonder why transitioners even bother coddling along damaged ends. The truth is, the level of commitment varies by individual, but for those who choose to stick it out, the payoff is great. I blow myself away sometimes with comparison pictures:
My hair would not be what it is today without the discipline and sticktoitiveness that kept me on my journey. My primary source of motivation was pictures — of my own hair. Seeing my hair’s progress with my own eyes got me back on track whenever I had fallen off. Seeing my improved hair thickness, and noticing curls and waves were there were bone straight pieces gave me hope, and inspired me to keep going. You’ll need something to hold on to and inspire you when your hair journey runs you low. Why not keep a photo journal (Instagram is a great way to go”>, so you can see your hair at each stage?
Are you stuck in a hair rut?
You know, those times when it seems like your hair has launched a personal attack against you — and despite your best efforts to diplomatic with the best deep conditioners and holiest of holy grail curl definers — it refuses to back down? Maybe you made a mistake (or three, or ten”> and you’re just ready to throw in the towel. Or perhaps, this whole “natural thing” seems too complicated, and you’re ready to go back to what feels simple and familiar — that relaxer or that flat iron.
Trust me, I’ve been there–more times than I want to admit. But before you run to Sally’s and grab those deeply discounted relaxer kits (I can’t be the only one that notices them on clearance everywhere!”> or go digging for your precious flat iron, stop and read this.
Trust me, I’ve been there–more times than I want to admit. But before you run to Sally’s and grab those deeply discounted relaxer kits…
You can get over this hump
I know you can, because I did. In my moments of weakness and peaks of frustration, I had to hunker down and be honest with myself. I’ve never had a relaxer, but I know what it feels like to hide behind a flat iron every two weeks. I know what it feels like to straighten your hair within an inch of its life, and then turn around and use a curling iron to fake “volume” because your hair has thinned terribly.
I also know what it feels like to look in the mirror and hate your hair.
I transitioned for 21 months, a period which tried every bit of my patience, resolve, and self-confidence. There were days that my banana clip and bobby pins would tuck away a multitude of hair sin, and there were days where I looked in the mirror and just said, “I can’t.”
But those days, those feelings, those frustrations–they will all fall away in due time as you learn. It doesn’t mean they won’t be back, but you’ll be better equipped to deal with them as you delve further into your natural hair journey. These 4 tips will help you cope with the temptation of going back to what seems comfortable or easier.
Adjust your expectations
When you first embarked on your natural hair journey, did you think that you were just going to wake up with a head full of thick, juicy, shiny ringlets, or a kinky fro that defies gravity? I’m sure you did, because I did too. I had somehow gotten into my mind that in just a moment’s time, my tresses would magically transform into that of my hair crushes. For the record, it didn’t.
To this day, I have yet to find someone with hair that behaves like mine.
Even while completely natural, I have to stop myself from looking at my hair with a deficit perspective–fixating on what it cannot do and what my limitations are. The truth is, I get the most frustrated with my hair when I try to force it to do the things it is not meant to.
My hair is somewhat thick, but I can’t get a curly halo around my head like some of my favorite YouTubers and Instagrammers. The longer my hair gets, it just hangs. And the more I try to manipulate it to make it big, it fights back with tangles, knots, and breakage. So I stopped, and adjusted my expectations. My curls will never be all one uniform pattern, and I will always have disrespectful shrinkage in the front half of my hair. The moment I embraced those two facts, my frustration dissipated and I came back from the brink.
Give in a little
If your hair is forcing you to test the upper limits of your patience, caving in a little may be just what you need. Sometimes when I got tired of dealing with my hair, I took it as a sign that I should probably flat iron it just to whet my straight hair appetite. This worked for me on two levels: one, it was fun to switch it up. Ask any curly girl — rocking a straight style makes you look like a completely different person. Two, I found that every single time I straightened my hair, I came running back to my curls within a week (or less”>. That alone showed me that in spite of my misgivings and frustrations, I loved my natural hair. Taking a mini vacation from your kinks, curls, and coils may just be the thing that helps keep you from doing something drastic and irreversible.
Note: If and when you decide to flat iron, check out my heat straightening routine and these great heat protectants. After all, when you want your curls to come back, you want them to do so sans heat damage.
Put it away
If you used to relax and flat ironing won’t give you the same satisfaction, or you don’t want to run the risk of heat damage, it is perfectly okay to opt for tucking your hair away. Experiment with protective updos, faux locs, crochet braids, and even those fancy schmancy kinky coily wigs and clip-ins.
Putting your hair away will provide you with some much-needed breathing room, while allowing you to experiment with versatility. This is also an excellent option for ladies who are experiencing major breakage or damage in the process of transitioning to or beginning a natural hair journey. Putting a relaxer or heat on already fragile hair isn’t the best idea, but rocking a protective style is. Just don’t forget to take care of the hair underneath!
Spoil your hair
Every once in a while, I feel like having a spa day. Mineral baths, mud masques, and massages. You know what I’m talking about! After a day at the spa, I feel like I can conquer the world. Or take a really good nap. Whatever the case may be, treating your hair to a spa day may be just the thing you need to bring yourself back from the brink of the relaxer box.
Think about it — when was the last time you pampered your hair? Not followed your regimen just enough to get by, but actually pampered? It’s probably been a while. So treat your hair with that luxurious DIY avocado mask you’ve been putting off. Splurge on that fancy, overpriced deep conditioner that works like a charm. Give yourself a hot oil scalp massage. Detox your hair with a clay mask. Spend 4 hours detangling in tiny sections with your favorite coconut-jojoba-peppermint oil blend while watching Scandal on Netflix. While life is too busy to do this every weekend, there’s nothing wrong with taking some time out every few months to give your hair a treat. Every once in a while, we have to stop cutting corners!
Have you been tempted recently to go back to the relaxer or too-hot flat iron? What helped bring you back from the brink?
On any given day, I look the same.
Wash and go, no makeup, no earrings, and no jewelry — save for my nose ring and anniversary necklace.
I own only a handful of makeup products, and know even less about applying them properly. The extent of my expertise is mascara and a little bronzer (eyeliner too, if I feel adventurous…or like poking myself in the eye”>.
I wasn’t always this way–back in my “straight hair” days, I wore makeup all the time. I felt like I needed makeup to “complete my look” — rather than a means of enhancing my appearance, makeup became my crutch. I didn’t feel attractive, pretty, or ready for the day without it.
When I began dating my current boyfriend Samuel in 2010, I was still pretty into makeup (although I had ditched the bright eye shadows”>. He insisted that I didn’t need the makeup, and that I was beautiful as-is. I only halfway believed him (haha”> at the time, but the real change came when I decided to go natural.
During my transition, I embraced more natural products, and got invested in my health and wellness. In truth, my decision to back away from the makeup had less to do with being “more natural” and more to do with the fact that I was working out regularly and leading a more active lifestyle. Fast forward about two years from my transition, and I’m just as described above.
And this is on one of those more adventurous date nights.
My decision to ditch makeup (and only dabble in a little bit on date night”> almost entirely is a reflection of who I am at this stage in my life. Anybody that knows me knows that I’m all about comfortable. I wear wash and go’s because they’re easy, and I don’t have to worry about my hair should the weather change (but seriously, I’m in LA”> or if I decide to embark on a random adventure.
I own more workout clothes than regular clothes, because I’m active and the clothes are so comfy. I avoid heels like the plague. I don’t wear any makeup because I’ve grown to feel comfortable in my own skin. Besides, if I go missing–I want to help make it a little easier to find me (please laugh, that was a joke”>.
In more recent months, I’ve noticed a trend in the natural hair community.
A lot of ladies love makeup. Bold makeup. I’m talking beat faces like they live at MAC (and some of them do work there!”> or have a personal MUA at their vanity every morning. Now, I’m not here to knock or judge. By all means, do you! But I do have some questions.
Forgive me now if any of this offends you.
I don’t mean to offend, disrespect, or shade anyone. These are just my honest thoughts and feelings, and are in no way the gospel according to NaturallyCurly.
I’ve seen videos from natural hair YouTubers that discuss at length makeup routines — involving concealers, primers, contouring, highlighting, blending, and more — to the point where the person at the end of the video looks absolutely nothing like the person that started it. Many natural hair routine and tutorial videos start out the same way — the vlogger goes from fresh face to camera ready in 10 minutes or less.
Have we ever stopped to wonder why? Are beat faces and bold lips necessary natural hair accessories? I understand loving makeup for fun, or using it as a means to enhance natural beauty and express creativity.
There are ladies like BeatFaceHoney who have taken makeup artistry to new levels, and I applaud them for pursuing their passions. Showing women how to play up their gorgeous features and build confidence is a beautiful thing. But in my opinion, there is a fine line between enhancing your natural beauty and creating a completely unrealistic aesthetic.
We all have blemishes. We all have flaws, and dark spots, and acne scars, and enlarged pores, and dry skin patches, and bags under our eyes from not getting enough rest. However, many of us choose to conceal our imperfections because somehow we’ve gotten the message that those things make us less than beautiful. In truth, I find beauty in not being completely flawless — because it means we’re human.
I’ll admit, there’s a lot of pressure in general for women to roll out of bed looking like Beyonce.
But for women with natural hair that pressure is nearly tenfold. Even with all the online and social media support the natural hair community provides, ladies with natural hair are still in many ways under the gun to use makeup to enhance, complete, and beautify –as if natural hair somehow lessens the aesthetics of attractiveness. I appreciate bloggers and vloggers like Shelli (Hairscapades”>, Ebony Clark (Eclark6″>, and Francheska (Hey Fran Hey”> who share the majority of their content with a bare face or minimal makeup. They make me feel a little less weird for uploading plain-faced selfies, and doing non-camera ready YouTube videos.
This weekend, I wore serious makeup for the first time in over 4 years for a special event.
I’m talking so many shades, tools, and whatchamacallits that I couldn’t even begin to tell you what was on my face. My MUA friend did a wonderful job, and I got so many compliments on my makeup and appearance that day. Some folks even told me that I should do the makeup thing more often.
I respectfully declined.
Don’t get me wrong, my friend did an amazing job on my face. I felt glamorous and beautiful, like a more fabulous version of myself. But something wasn’t quite right. As the day wore on, I started to feel more uncomfortable More unlike myself. More like this version of myself wasn’t true to who I am. After I returned to church from my event, I received more compliments on my beat face. But one compliment stood out in particular. One sweet member said about me, “She’s a beautiful girl anyway, with or without the makeup. But not because of the outside. It’s because of what’s inside…”
Of all the yassssss-es and slays I had heard that day, that compliment meant the most. My value in her eyes, wasn’t determined by the length of my false lashes (which I had ripped off by that point”>, or the magical contouring of my cheekbones. It was my character and spirit that spoke to her. But how many of us truly believe our beauty radiates from within? When was the last time someone told you that your inner-self was gorgeous?
At the end of the day, we have to start asking ourselves some questions that may be difficult to digest. Why do you wear makeup? Do you feel uncomfortable being bare-faced? Why? What imperfections are you masking?
Who told you that you needed to put on that face? Are you using makeup as a crutch? If so, what are you overcompensating for? And the biggest question: are you willing to give it up?
Rocking a bare face with natural hair can be uncomfortable, trust me. It was a process, and still is one. There will be days where you feel unattractive, but let’s be honest — we all have those days anyway. But if you can challenge yourself to go one week without makeup, I wholeheartedly believe you’ll see some major changes in how you see yourself. We gave up relaxers and flat irons in order to embrace what God gave us, and out of refusal to continue to conform to society’s standard of beauty in hair. Imagine what would happen if such a shift occourred in the world of makeup?
How powerful would it be if we could truly embrace our completely natural selves, bare-faced and all?
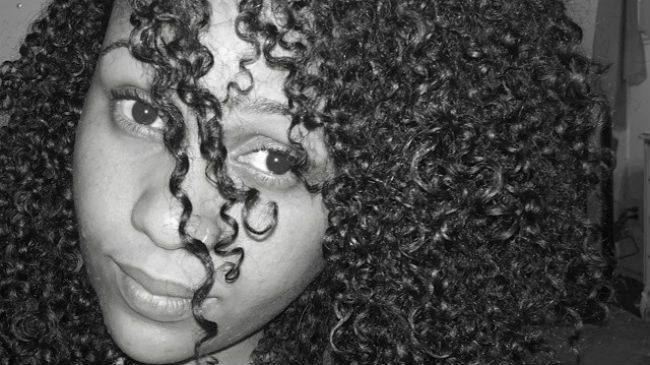 If you follow me on Instagram or keep up with me on ManeObjective.com, then you know I live in the wash and go. I switch up my products to keep it interesting, but I’ve got the technique down to a science.
The wash and go gets a bad rep, because the hair is left to curl, coil, kink, and clump freely while being exposed to the elements, and depending upon the length of your hair, being exposed to rubbing against your clothing as well.
By contrast, protective styling involves tucking the hair away into twists, braids and updos that keep the hair from tangling, snagging, and breaking. In protective styling, the ends of the hair are often tucked away, to encourage length retention.
So how is it possible that such an “out” style can be considered protective? Consider the following:
1. Low Manipulation
The wash and go is considered a low manipulation style for two reasons. One, unlike twist-outs, braid-outs, and other styles, the wash and go doesn’t require any tugging pulling, or stretching (unless you’re into that sort of thing”>. You simply wash, deep condition, add product, and keep it moving. Of course, you can plop, diffuse, and add other steps, but at it’s core the wash and go is a relatively simple style to pull off that doesn’t require you to excessively manipulate your hair. The second reason is that when done correctly, wash and go’s can last anywhere from 3 to 10 days. Maintenance (at most”> involves spritzing and applying water-based products and oil to seal the ends of the hair, and protecting it at night. No combing, no re-twisting or braiding at night means that for several days at a time, the hair is left unmanipulated–rendering it protected.
2. Protective Gel Casts
When we think of sealing our hair, typically an oil or butter comes to mind. It rarely occurs to us that gel is a sealant, too. In fact, the gel cast that forms after you apply your product envelopes and clumps your curls locks in moisture and keeps your hair protected. Additionally, the gel cast helps reduce tangling by holding curls together. I know we typically look down upon crunchy curls, but if you’re looking for maximum protection, firmer hold gels will yield the best results. Besides, the gel cast wears off — and you can even scrunch it out with a little oil or butter. Work gel through the hair in sections to ensure full coverage and protection.
3. Clumping Improves Hair Strength
When it comes to withstanding the elements and resisting breakage, clumped curls via wash and go’s are especially beneficial. Clumped curls are stronger than separated strands, and are less prone to breakage and damage. Curls that clump together last longer, so make sure you use the “praying hands” to smooth product through and encourage clumping.
Are you convinced yet? Don’t hide your hair away for fall just yet. Give a wash and go a try, with some of my favorite curl definers:
- Aunt Jackie’s Don’t Shrink Flaxseed Elongating Gel [review here]
- Camille Rose Naturals *new* Curl Maker [review here]
- Obia Natural Hair Curl Enhancing Custard [review here]
- Wonder Curl Curl Control Styling Lotion [review here]
- Kurlee Belle Jelle Coconut Styling Gel
- CURLS Goddess Curls [review here]
- TreLuxe Hi! Definition [review here]
Watch my video for the 7 Secrets to a Fabulous Wash & Go
[do action=”youtube-video” videoid=”https://www.youtube.com/watch?v=iw-HQ5DIt3E”/]And if you need one final piece of information to convince you, check out my growth and length retention progress from my chop in December of 2013 to September 2014:
As a transitioning and natural hair blogger, I love to observe (and sometimes participate in”> the waves and trends that roll through the natural hair community. First, it was all about growth, length retention, and proving that textured hair could be just as fab (if not moreso….but hey, I’m biased”> as straight hair. Now, some of our favorite bloggers and YouTubers are doing second and third chops, and tapered cuts are taking the reins. Coloring natural hair used to be met with the side eye, but now bright and bold colors are everywhere — with only a marginal few claiming that hair dye strips you of the title of naturalista. What used to be a race for the most complicated regimen is now met with “ain’t nobody got time for that” and a supreme side eye. The current trend in minimalist/lazy natural hair care has ladies looking to eliminate the fluff from regimens, focusing only on what’s necessary.
Which brings me to this point: is pre-pooing a necessary step in your wash day regimen? Could that 30 minutes to an hour be better spent, or eliminated to truncate wash day?
The answer isn’t as cut and dry as one would think. The real answer depends on what you’re using to prepoo your hair, whose advice you trust, and what has yielded the best results for your own head of hair. Let’s explore the two most common pre-poo methods, and what folks have to say about them:
Pre-Pooing with Oils
The first popular pre-poo method is done with oil — either a single oil, customized blend, or pre-poo oil like Vatika, Darshana or Ion. Most ladies like to pre-poo with an oil because strands coated in oil glide past each other easier, which results in a less complicated detangling job. Oils are even be used to help prevent shampoos from drying the hair out. But one thing is to be noted — all oils were not created equal. It is widely understood that coconut oil possesses the unique ability penetrate the hair — moisturizing, strengthening, and preventing the hair shaft from swelling during the uptake of water, which helps minimize cuticle damage. According to Jc of The Natural Haven ( a scientist with a passion for natural hair”>, coconut oil should be added to the hair prior to shampooing to reap the most benefits.
On the opposite end of the spectrum, there are those like multicultural stylist Jennifer Rose at Belissimo Hair Spa in NYC who believe a pre-poo is an unnecessary step and a waste of time. Via Instagram, Rose says (on a post encouraging ladies to simmer down on the wash day madness”>:
Why are you dousing your hair in oil which only prevents your shampoo from binding to the dirt, sweat, and product thereby preventing cleansing? You’re the reason you have a wash day instead of a wash hour. Pare down, please.
In a general sense, I can see where Rose is coming from–many oils sit atop the hair and do not readily penetrate the hair. In that case, they do prevent the shampoo from stripping the hair completely clean. However, most natural ladies don’t desire that “squeaky clean” feeling, so the presence of oil on the hair after cleansing isn’t entirely problematic. My advice? Try a wash day with and without oil pre-pooing. Don’t change anything else, the presence or absence of the pre-poo should be the only variable. Does your hair look, feel, or behave any differently? Therein lies your answer.
Pre-Pooing with Conditioner
Many naturals for a variety of reasons have also taken to pre-pooing their hair with a rinse out or deep conditioner prior to cleansing. The idea here is that conditioning the hair prior to manipulating it results in softer, more pliable hair that is easier to detangle and is less likely to encounter breakage. Additionally, many of the conditioners utilized have enough slip to ensure that strands glide past each other without tangling or knotting.
But is pre-pooing with a conditioner more or less effective, or even necessary? Once again, I consulted the work of the fabulous Jc of The Natural Haven. According to her findings here, conditioner adsorbs (sticks to the hair”> and works better after the hair has been shampooed. This is because hair carries a slightly negative charge that is enhanced by shampoo (thanks to anionic surfactants”>. Conditioner carries a positive (cationic”> charge and therefore is more attracted to the hair post-poo. Does this mean that your conditioner-based pre-poo doesn’t work? Not necessarily. I’ve always been a fan of pre-shampoo treatments (Kurlee Belle Banana Nut Avocado Deep Treatment is my favorite”> to detangle, soften, and prep my hair for cleansing. But for most heads of hair, deep conditioning or pre-pooing with a deep conditioner before washing does not remove the need to deep condition afterward. You will still have to deep condition after cleansing to replenish the strands and lie the cuticles flat.
Just like pre-pooing with oil, try pre-pooing with a rinse out or deep conditioner during your wash day, and then again skipping that step. Which yields you the best results? That’s the one you stick with.
When all is said and done, pre-pooing is not an essential step for any hair care regimen. It’s optional. If your hair benefits from it, then continue to do it. But if you’re feeling like it yields you no tangible benefits, throw it out.
At the end of the day, it’s about doing what works best for you and your hair, not incorporating random steps because someone told you so.
More specifically, I’m a small business product junkie.
Ladies, there are some AMAZING products out there that I’ve covered consistently on the blog and even shared here on NaturallyCurly. I will always and forever continue to support natural hair small businesses because I believe in them. Not only are the products incredibly unique, well thought out, and crafted with love, but they are made by women (and some men too”> who know our hair best — because they are naturally curly too. They know and understand what ingredients we don’t like, and what we want our products to be able to do. And many of them are involved in initiatives beyond natural hair, aimed at making our communities (and world”> a better place, like TreLuxe.
TreLuxe is a socially conscious natural hair and beauty care brand founded by husband and wife duo Cortney and Kiprono Sigiali.
They have focused their brand not only on natural haircare, but on community-based initiatives to educate, support, encourage, and meet the needs of girls and women beyond hair.
TreLuxe hair products are designed to give ladies with natural hair a premium upscale product experience, combining wholesome ingredients and Active Botanicals to alleviate our hair woes — from dryness to curl definition. Currently, the TreLuxe line consists of four products — Untie the Knot Nourishing Leave-In Conditioner, Curl Supreme Styling Cream, ReFlex Curl Styling Serum, and Hi! Definition Curl Enhancer Styling Gel. I was too excited to try out the TreLuxe line. So let’s get on with the review!
[prodmod]
 Untie the Knot Nourishing Leave-In Conditioner $18.50
Detangles, nourishes, and replenishes moisture for lively curls. Let’s face it, Mother Nature can do some serious damage to our precious curls. A constant beating from the elements without the proper protection can leave curls dry, brittle, and vulnerable to complex knots; but, there is hope. Untie the Knot Nourishing Leave-In Conditioner was designed with you in mind! The naturally based conditioner formulated with coconut milk, slippery elm, and olive extract allows for ease of detangling while moisturizing and softening every strand of your textured tresses. The formula is reinforced with a combination of avocado and broccoli seed oils to smooth hair and seal the cuticle, helping to maintain healthy curls and coils. Avoid the damage that Mother Nature never intended!
Ingredient List
Water (Aqua”>, Cocos Nucifera (Coconut”> Oil, Persea Gratissima (Avocado”> Oil, Aloe Barbadensis (Aloe Vera”> Leaf Juice, Propylene Glycol, Behentrimonium Methosulfate, Cetearyl Alcohol, Cetrimonium Chloride, Steareth-2, Lactobacillus/Tomato Fruit Ferment Extract, Oryza Sativa (Rice”> Extract, Keratin Amino Acids , Acyl Coenzyme A Desaturase, Cocos Nucifera (Coconut”> Milk, Squalane (Olive derived”>, Ulmus Fulva (Slippery Elm”> Bark Extract, Panthenol (Provitamin B5″>, Brassica Oleracea Italica (Broccoli”> Seed Oil, Fragrance, Phenoxyethanol, Sorbic Acid, Caprylyl Glycol
Top Ingredients 411
-
Water
-
Coconut Oil: oil high in saturated fats (which is why when cold, it is solid”>. One of the few known oils to penetrate the hair shaft and truly moisturize hair. Coconut oil helps to moisturize, seal, and prevent breakage.
-
Avocado Oil: Omega 3-rich nourishing oil extract that can enhances shine, moisture retention, softness, and elasticity in hair.
-
Aloe Vera Leaf Juice: acts as a natural conditioning agent that restores the hair’s sheen, luster, and shine. It not only makes the hair soft, but it also enhances strength and suppleness.
-
Propylene Glycol: humectant and conditioning agent, often mistakenly attributed to being carcinogenic. It has no links to cancer or any other illnesses.
-
Behentrimonium Methosulfate: gentle surfactant made from non-GMO rapeseed (canola oil”>, and is one of the mildest detangling ingredients out there. It doesn’t cause buildup or irritation to the scalp.
Performance
One of the first things I noticed about Untie the Knot is the fragrance, and how totally appropriate it is for the coming fall and winter months. The fragrance is reminiscent of those sweet, warming apple, sugar, and pumpkin spiced candles that roll out at places like Bath and Body Works and Yankee Candle around this time of year. Just smelling it makes me feel all warm and fuzzy inside. Even if the fragrance isn’t your cup of tea, it doesn’t linger or conflict with other product scents. The leave-in is rich and lotion-y in consistency, without being greasy or weighing the hair down. For those of you that have tried it, the consistency is similar to Camille Rose Naturals Fresh Curl. What I love about TreLuxe the most (and this leave-in is no exception”> is that they work INSTANTLY. When applying the leave-in, my hair felt instantly hydrated, moisurized, and smooth. It helped encourage clumping and curl definition, while harnessing enough slip to glide through tangles and rough patches. I especially appreciate Untie the Knot because it s based in three ingredients my hair LOVES — coconut oil, avocado oil, and aloe vera. With temperatures dropping (as much as they will in LA anyway”>, I welcome Untie the Knot with open arms into my fall/winter product rotation.
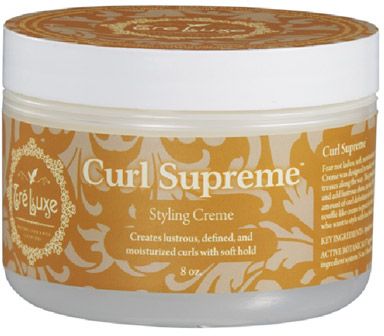 Curl Supreme Styling Cream $22
Creates lustrous, defined, and moisturized curls with soft hold. Fear not ladies; moisturized and defined curls are well within reach. Curl Supreme Styling Cream was designed to make your natural curl pattern take center stage, moisturizing your curly tresses along the way. This premium styler is packed with natural oils and extracts to nourish and add lustrous shine, as our 360 Curls Complex regulates moisture and supplies the right amount of curl definition for the job. With just enough hold to maintain your style, this souffle-like creme is great for the coilest textures, as well as for those with moderatey curly hair who want to style with less hold and more moisture.
Ingredient List
Water, Aloe Barbadensis (Aloe Vera”> Leaf Juice , Cocos Nucifera (Coconut”> Oil, Cetyl Alcohol (Coconut derived”>, Propylene Glycol, Lactobacillus/Tomato Fruit Ferment Extract, Oryza Sativa (Rice”> Extract, Keratin Amino Acids , Acyl Coenzyme A Desaturase, Glyceryl Stearate, Capric/Caprylic Triglycerides (Coconut derived”>, Prunus Armeniaca (Apricot”> Kernel Oil, Persea Gratissima (Avocado”> Oil, Althea Officinalis Root (Marshmallow”> Extract, Butyrospermum Parkii (Shea”> Butter, Carbomer, Cocos Nucifera (Coconut”> Milk, Tocopheryl Acetate (Vitamin E”>, Triethanolamine, Squalane (Olive derived”>, Dehydroxanthan Gum, Emulsifying Wax, Fragrance, Phenoxyethanol, Sorbic Acid, Caprylyl Glycol
Top Ingredients 411
-
Water
-
Aloe Vera Leaf Juice: acts as a natural conditioning agent that restores the hair’s sheen, luster, and shine. It not only makes the hair soft, but it also enhances strength and suppleness.
-
Coconut Oil: oil high in saturated fats (which is why when cold, it is solid”>. One of the few known oils to penetrate the hair shaft and truly moisturize hair. Coconut oil helps to moisturize, seal, and prevent breakage.
-
Cetyl Alcohol: considered “fatty alcohol” — NOT to be confused with drying alcohols such as ethyl. Acts as a lubricant, thickener, and emollient. Gives conditioner its velvety feel without making hair greasy. Also used to keep product ingredients from separating.
-
Propylene Glycol: humectant and conditioning agent, often mistakenly attributed to being carcinogenic. It has no links to cancer or any other illnesses.
-
Lactobacillus/Tomato Fruit Ferment Extract: bio-fermented enzyme complex that creates long-term conditioning without buildup. Tomatoes are rich in vitamins, minerals, and a variety of potent phytochemicals. By directly nourishing the hair with essential amino acids, this extract efficiently provides hair the building blocks it needs to form keratin and maintain the hair’s integrity. It can readily penetrate deep into the hair fibre and works in synergy to protect and maintain the hair’s natural integrity and health.
Performance
When I get excited about a product, I start singing. Today will be no exception.
Now that I’ve got you in my stash,
I won’t let go of you,
Got you shackled in my product space
I’m latching on to you….
That pretty much sums up how I feel about Curl Supreme. See, I thought I had all my favorite moisturizers/creams locked down. Then Curl Supreme came along and made me re-evaluate my entire life. I’m being dramatic, but I am hard pressed to find anything about this creamy concoction that I don’t like. Of all the products in the TreLuxe line, this fragrance is my favorite. It’s sweet, floral, and not overbearing. It’s thick, rich, and super creamy, and has slip for the ages! Yes, a moisturizing creme wth slip! After applying it, my hair is soft, defined, and intensely hydrated. It works great by itself for a super soft hold, or makes a dreamy moisturizing layer underneath Hi! Definition or ReFlex. I’m ingredient obsessed, so the inclusion of Tomato Fruit Ferment Extract in Curl Supreme and all of the TreLuxe products excites me. It is a relatively undiscussed underutilized ingredient in the natural hair community. I’ve only seen it pop up in a handful of products from the likes of AG and Briogeo. Call me crazy, but I believe that extract really sets Curl Supreme apart from other moisturizers and curl cremes I’ve tried. Plenty of products have coconut oil and aloe vera in them. But none have come close to working like this!
 ReFlex Curl Styling System $18.50
Creates bouncy, silky, natural curls with flexible hold. ReFlex Curl Styling Serum was created to bring flexible hold to your curly and wavy styles without sacrificing the “bounce” of your curls. Our lightweight liquid styler provides just enough slip to glide through every twist and turn of your tresses, wile adding definition and increasing curl elasticity for those bounce back curls you’ve been waiting to unleash. Botanical extracts help provide shine and smooth texture to showcase your curls while a coconut water/aloe juice infusion delivers moisture to thirsty curls, keeping them rejuvenated throughout the day.
Ingredient List
Water, Aloe Barbadensis (Aloe Vera”> Leaf Juice, Propylene Glycol, Lactobacillus/Tomato Fruit Ferment Extract, Oryza Sativa (Rice”> Extract, Keratin Amino Acids, Acyl Coenzyme A Desaturase, Cetrimonium Chloride, Hydroxyethyl Cellulose, Cocos Nucifera (Coconut”> Water, Vitis Vinifera (Grape”> Seed Extract, Polyquaternium-10, Juniperus Communis (Juniper Berry”> Fruit Extract, Polysorbate-20, Salvia Officinalis (Sage”> Leaf Extract, Fragrance, Phenoxyethanol, Sorbic Acid, Caprylyl Glycol
Top Ingredients 411
-
Water
-
Aloe Vera Leaf Juice: acts as a natural conditioning agent that restores the hair’s sheen, luster, and shine. It not only makes the hair soft, but it also enhances strength and suppleness.
-
Propylene Glycol: humectant and conditioning agent, often mistakenly attributed to being carcinogenic. It has no links to cancer or any other illnesses.
-
Lactobacillus/Tomato Fruit Ferment Extract
-
Rice Extract: provides natural UV protection for the hair, while also improving the structural integrity (strength/health”> of strands.
-
Keratin Amino Acids: extracted amino acids from keratin that are purified and made more potent, with the ability to penetrate the hair shaft and repair damage, correct porosity issues, and increase sheen and volume.
Performance
I liked ReFlex, but I wasn’t crazy about it. This curl defining serum is definitely for the ladies that prefer a lighter hold, and desire that big hair on day 1 look. It does fight frizz, and creates voluminous hair as soon as it’s dry — no fluffing required! It was not drying and left no crunch or flakes whatsoever. ReFlex definitely delivers on the promise to deliver flexible hold curls with bounce. I see this product also working exceptionally well for looser, type 2 and 3 curls. Again, there is absolutely NOTHING wrong with how ReFlex performed. I just like my curl definers to deliver a little more hold — which brings me to my other FAVORITE product from the TreLuxe line…
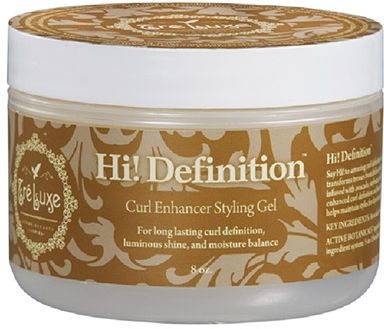 Hi!Definition Curl Enhancer Styling Gel
For long lasting curl definition, luminous shine, and moisture balance. Say Hi! to amazing curl definition and bye to pesky friss as Hi! Definition Curl Enhancer Custard transforms tresses from lifeless to luxe in a snap. Our moisture and nutrient rich puree is infused with avocado, soybean, and honey extracts, and is specifically formulated to provide enhanced curl definition and luminous shine with medium hold. Hi! Definition Curl Enhancer helps maintain styles for days instead of hours, giving you confidence in every curl.
Ingredient List
Water, Aloe Barbadensis (Aloe Vera”> Leaf Juice, Propylene Glycol, Carrageenan Gum (Seaweed Extract”>, Xanthan Gum, Polysorbate-60, Lactobacillus/Tomato Fruit Ferment Extract, Oryza Sativa (Rice”> Extract, Keratin Amino Acids, Acyl Coenzyme A Desaturase, Persea Gratissima (Avocado”> Fruit Extract, Honey Extract, Panthenol (Provitamin B5″>, Glycine Soja (Soybean”> Seed Extract, Elaesis Guineensis (Palm”> Fruit Extract, Oryza Sativa (Rice”> Extract, Salvia Officinalis (Sage”> Leaf Extract, Tocopheryl Acetate (Vitamin E”>, Fragrance, Phenoxyethanol, Sorbic Acid, Caprylyl Glycol
Top Ingredients 411
-
Water
-
Aloe Vera Leaf Juice: acts as a natural conditioning agent that restores the hair’s sheen, luster, and shine. It not only makes the hair soft, but it also enhances strength and suppleness.
-
Propylene Glycol: humectant and conditioning agent, often mistakenly attributed to being carcinogenic. It has no links to cancer or any other illnesses.
-
Carageenan Gum (Seaweed Extract”>: seaweed common to the Atlantic is boiled to release this compound, which thickens and stabilizes mixtures, keeping them from separating.
-
Xanthan Gum: plant-derived thickener and mixture stabilizer that is water soluble
-
Polysorbate-60: emulsifying agent that helps to keep water, oils, and extracts from separating.
Performance
Oh, won’t you stay with me? ‘Cause you’re all I need…
This is love, and yes, those are more Sam Smith lyrics. Yes, yes, a million times yes. Hi! Definition is absolutely amazing. The fragrance can only be described as luxe. I can’t call it exactly, but I know I feel fancy every time I smell it. It is custard-esque without being too runny or impossibly thick. Because it isn’t super gel-ly or stiff, it mixes well with a wide range of other products — Curl Supreme included. As a matter of fact, the two make one heck of a wash and go duo. Layering Untie the Knot, Curl Supreme, and Hi! Definition gave me one of the best wash and go’s I’ve ever had to date. See for yourself! This wash and go lasted for days while retaining excellent definition and minimal frizz with no flaking or dryness. A word of caution to those that love to overzealously apply product — Hi! Definition doesn’t require gobs and mounds of product in order to be effective. Apply it liberally, but don’t go over the top. One or two quarter-sized amounts per section (depending upon the thickness and length of your hair”> applied to wet hair is plenty.
To sum it up…
As you can see, I thoroughly enjoyed the TreLuxe line of products. My only wish? That they had a shampoo and deep conditioner to go with these wonderful styling products! Hopefully those are in the works.
If you are interested in trying products from TreLuxe, be sure to support their newest initiative — A Natural Fit. TreLuxe has teamed up with Girls with Sole, Girls on the Run, and Girls in the Game to help promote healthy habits and active living among girls in communities that are at-risk for developing health-related illnesses directly correlated to a lack of physical activity. Through these partnerships, the A Natural Fit initiative is designed to support charities that enhance opportunities, build self-esteem, and promote healthy habits among at-risk girls and teenagers. During the month of September, 10% of all sales will go toward the charitable organizations supported by A Natural Fit. You can also donate your rewards points from shopping at discovertreluxe.com to the charities ($5 for every 375 points earned”>, and work with TreLuxe to host events where the charities directly benefit. For more information on A Natural Fit, click here. To get more information on donating rewards points, click here.
[prodmod]
Don’t be fooled! You don’t have to sacrifice soft, hydrated kinks and coils, for cleanliness.
Many naturals and curly girls hate clarifying because it causes so much drama.
You wreck your hair and strip it of natural oils, softness, and hydration for the sake of a clean slate. Even after intense deep conditioning, your hair doesn’t start “acting right” for another two weeks, and by that time, you’re able to get another good week and a half out of your hair before it’s time to clarify all over again.
Break the cycle
These shampoos offer you the chance to deeply clean with out stripping, and to clarify without causing drama. Get clean, healthy, shiny, soft, and moisturized hair with these cleaning powerhouses that don’t contain harsh sulfates like SLS:
 Before dropping a product into your basket at Target, Ulta, or in your cart on CurlMart, how much time do you spend reading the ingredients? At this point in the game, probably more than you have in your entire life.
Whether you’re an ingredient snob and only purchase products made with the best of the best, a clean living curly who believes in eating and using only whole and natural products, or a natural newbie just taking it all in, there’s one thing we can all agree on–ingredients can sound confusing, scary, and like you need an advanced degree in material science to understand how to pronounce them.
Luckily, not everything that looks and sounds terrible is. Relax, naturally curly world– take in these 8 ingredients that sound all sorts of naughty, but are really pretty nice!
Behentrimonium Methosulfate
Because of how harsh traditional shampoo and cleansers can be, many of us turn away from anything that has the word “sulfate” in it. But the truth is, behentrimonium methosulfate is a far cry from the sodium lauryl sulfate that dries out and damages our kinks, coils, and curls. In truth, behentrimonium methosulfate is neither drying nor a sulfate. It is actually a super gentle surfactant made from non-GMO (imagine that!”> rapeseed (canola oil”>, and is one of the mildest detangling ingredients out there. It doesn’t cause buildup, or irritation to the scalp. You can find this gem in products like Kinky Curly Knot Today, Camille Rose Naturals Fresh Curl, and Lawrence Ray Concepts Shake & Go.
Cetrimonium Chloride
Nerd moment: I really, really, like, REALLY love cetrimonium chloride. I’m *almost* obsessed with it. I make it a point to ensure that practically ALL of my deep conditioners have this ingredient. Why? It rocks. Cetrimonium chloride is a quaternary ammonium salt with penetrating, conditioning, anti-static, and emulsifying properties. It also helps to gently cleanse and prevent odor by inhibiting the growth of microorganisms, and helping oil mix with water to be able to wash them away. And lastly, what REALLY rocks my socks about cetrimonium chloride is what it does when combined with heat. When cetrimonium chloride is activated by heat (like sitting under a dryer, blow drying, and even the occasional flat ironing”>, it increases the tensile strength of hair. This ingredient is a MUST HAVE in any deep conditioner, leave-in, or heat protectant if you’re planning to blow out, flat iron, or just maximize your deep conditioning. Catch it in Eva NYC Therapy Session Hair Mask, ApHogee Keratin and Green Tea Restructurizer Spray, ApHogee Curlific Texture Treatment, and TGIN Triple Moisture Replenishing Conditioner.
Stearamidopropyl Dimethylamine
Another common ingredient found in many regular and deep conditioners. Stearamidopropyl dimethylamine sounds scary, but it’s really just a derivative of stearic fatty acid that is used to keep ingredients from separating (an emulsifier”>, as well as provide slip for easy detangling. But where does stearic acid come from? Here’s where things get a little sticky. Typically, stearic acid is derived from animal fat. However, you can ensure your hair goodies are free of animal byproducts by purchasing products that are vegan, and that explicitly state they contain no animal products. A good place to start is Obia Natural Hair’s Babassu Deep Conditioner.
Hydrolyzed Vegetable Protein PG-propyl Silanetriol
Whoa, that’s a mouthful. We’ll just call this one Keravis protein, since that’s what it’s marketed as. Keravis protein is a vegetable-derived protein and silicone blend that was designed specifically to strengthen, fortify, and revitalize dry and damaged hair. Although its composition makes it not Curly Girl-friendly, Keravis protein is able to penetrate the cortex of the hair, helping to build strength from within while coating and conditioning the hair to protect the surface. The end result is hair with significantly improved tensile strength, which helps reduce the damage our hair sustains from dye jobs, environmental factors, and mechanical stress from styling. If you’re ok with cones, get your Keravis protein fix in Eva NCY Therapy Session Hair Mask and ApHogee Keratin and Green Tea Restructurizer Spray.
Sodium C14-16 Olefin Sulfonate
Typically, when you see a sulfate free shampoo, this ingredient almost always makes the list. And no, manufacturers aren’t pulling the wool over your eyes — sodium c14-16 olefin sulfonate really isn’t a sulfate. It is a surfactant and gentle alternative to sodium lauryl sulfate often used in conjunction with other mild cleansing agents to deliver a clean scalp and hair without completely stripping or drying out. Typically, the most gentle cleansers have sodium C14-16 olefin sulfonate as opposed to C12-14. The numbers represent the number of carbon atoms, and the larger they are, the more gentle the surfactant is. Get your gentle cleansing fix with TGIN Moisture Rich Sulfate Free Shampoo and Ouidad Superfruit Renewal Clarifying Cream Shampoo. (Tgin and Ouidad superfruit.”>
Maltooligosyl Glucoside
Would you be surprised if I told you this ingredient was a combination of something you probably have in your pantry? Simply put, maltooligosyl glucoside is a complex derived from carbohydrate syrup (sugar”> and corn starch that conditions and moisturizes the hair. It helps improve moisture balance and moisture retention in the hair, and also helps soothe and improve dry scalp. It also goes by the name of hydrogenated starch hydrolysate. Not scary or bad at all, right? You can find this sweet little ingredient in Ouidad’s Superfruit Renewal Clarifying Cream Shampoo.
Propanediol
If you’re wary of propylene glycol, then this propanediol should make you sing! Propylene glycol has raised concerns in the naturally curly community, and propanediol definitely eases them. Propanediol is actually a plant-based, ECOCERT-approved emollient, solubilizer, and viscosity improving agent. As a natural alternative/replacement for propylene glycol, it improves moisture binding activity which results in silky smooth hair. Catch this safer and less irritating alternative in Eden BodyWorks Coconut Shea All Natural Cleansing CoWash.
Guar Hydroxypropyltrimonium Chloride
A water-soluble derivative of guar gum, which comes from the cluster bean. It conditions the hair and contains anti-static properties that help fight frizz. For these reasons, it is a great additive to conditioners, deep conditioners, shampoos, and leave-ins that claim to soften and tame frizzies. Innocuous enough, right? Guar Hydroxypropyltrimonium Chloride is the perfect example to showcase that ingredients that are difficult to pronounce aren’t inherently bad. Catch these magic beans in Eden BodyWorks Coconut Shea All Natural Hair Masque, Miss Jessie’s Pillow Soft Curls, and ApHogee Curlific Textured Hair Wash.
[prodmod]
If you have a pulse in the natural and curly world, you know about CurlBox. If you’re a little more well-versed, you probably know about CurlKit too. But have you heard of these 3 subscription boxes for natural and curly girls?

Summertime is coming and you know what that means — out hair! When the temperatures warm up, naturalistas live for a good blowout, braidout, twist-out, bantu knot-out, or even flat-ironed hair. And for many of us curlies–the bigger and smoother, the better.
At the heart of almost every good style is stretched hair. Check out these 5 methods and get ready for #goodhairseason!
1. Bunning
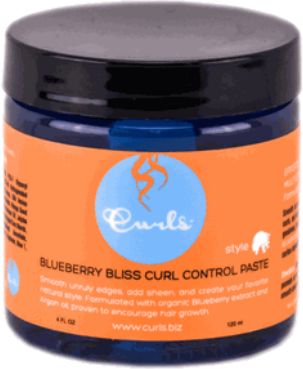
For me, bunning is a great way to stretch only the roots of the hair. By creating buns with old wash and go hair, my roots and the perimeter of my hair are stretched, while maintaining the bulk and volume of my hair through the ends. Bunning is the perfect precursor to a half up, half down or pulled back style. Buns always work best on dry hair. Wet, bunned hair is an invitation for eternal dampness and tangle city. Amp up your sleekness for the bun and the takedown style by using a little Passion Fruit Curl Control Paste on your edges.
[prodmod]
2. Blow Drying
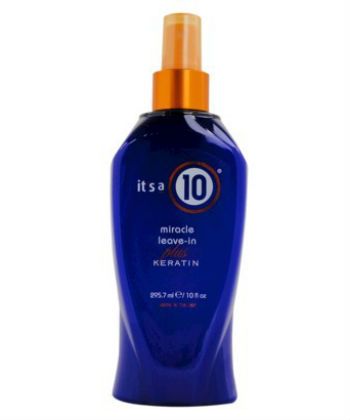
Many naturals aren’t a fan of blowdrying, because it can be, well, drying. But for the most elongated and stretched hair, blowdrying is the way to go. Just remember to deep condition your hair, and always use a leave-in and heat protectant to prevent the hair from drying out and causing heat damage. For deep conditioning, try Eva NYC Therapy Session Hair Mask. For leave-in and heat protection try Blow Dry Addict, It’s a 10 Miracle Leave-In Plus Keratin, and Tresemme Heat Tamer Spray.
3. Banding
Banding is another popular way to go, because it only requires two things: scrunchies and patience. Depending upon how stretched you want your hair, you can band in as few as two sections, or as many as 10 (or more”>. Simply part hair into sections, and put each section in a ponytail. Move down the length of the hair, adding more scrunchies. For less stretch, space them wider apart. For more stretch, put the scrunchies close together. For hair that stretches quicker, wait until your hair is almost completely dry to band it — or band hair that is already dry. Soaking wet hair underneath bands will take an eternity to dry. And remember — don’t cause too much tension at the roots!
4. Braiding
Braiding as a stretching method gives you the best of both worlds. Not only does it elongate the hair, but the end result can range from a smooth crinkly style to flowy mermaid-esque waves. For less stretch and more definition, create smaller braids. For more stretch than definition, make larger (about 4″> braids. For maximum elongation, make sure hair is completely dry first. Some naturalistas love to blow dry or band, then braid!
5. Bobby Pins
Don’t want to chance ruining the rest of your style, but still want some stretch? Try bobby pins. I have multiple textures, and the front/center area of my hair shrinks significantly more than the back of my hair. To avoid mushroom hair syndrome, I almost always spend day 1 of my wash and go with a pulled back style using bobby pins. It allows the bulk of my hair to dry, and helps my hair to dry in the most shrinkage-prone areas of my hair to dry in the stretched position. Bobby pinning is also good for braidout stretching as well. Braiding the hair, stretching it across the head, and securing it with bobby pins guarantees even more stretch!
How do you stretch your hair?
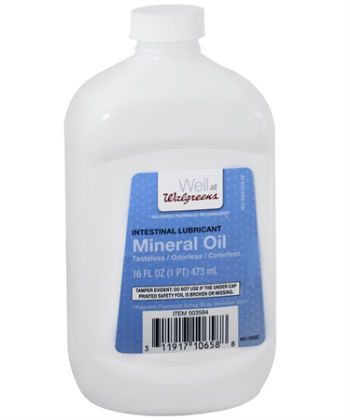
“Stay away from mineral oil”
Whether you’re newly natural or a textured hair vet, this is one piece of advice that continues to propagate across blogs, YouTube videos, books, social media, natural hair product websites, and more.
But why? What’s so bad about mineral oil? Let’s explore some commonly held beliefs about the taboo ingredient, and whether or not they are rooted in truth.
Is Mineral Oil Bad For Hair?
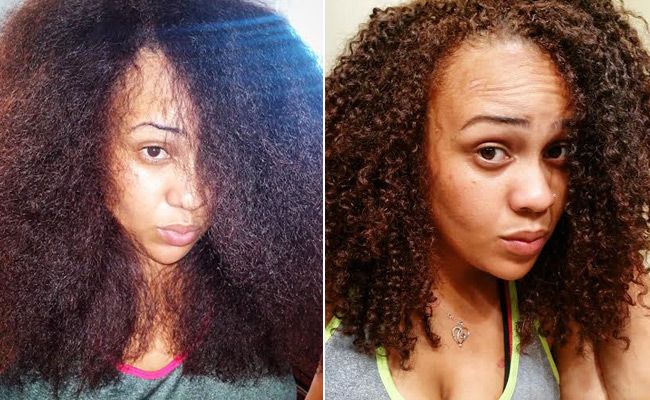 By far, the best decision I ever made in my natural hair journey was to have my chop turned into a Deva Cut at the end of my transition. Not only was there a tremendous amount of care put into cutting my hair curl-by-curl, the resulting shape of my hair (both curly and straight”> was awesome:
But that was in December. According to several popular stylists that work with natural hair like Felicia Leatherwood, as a rule of thumb natural and curly girls should look to trim their ends every time the seasons change — every 3 to 4 months. It doesn’t have to be a drastic trim, but just enough to get the split, dry, damaged, or uneven ends away from the bulk of the healthy hair.
As much as I love my Devachan stylist Sergio, I can’t afford a Deva Cut every 3 months. Besides, he travels back and forth between New York and LA, so getting appointments that regularly would be insane.
The solution? Do it myself.
Although there are about 54,648 different reasons to not take scissors to your hair yourself, a small trim at home does have some benefits:
1. You save money –you’re only major cost is shears. I spent around $12 for a pretty decent pair from Target.
2. You have a reason to play in your hair, and doesn’t love playing in their hair?
3. You’re able to learn even more about the unique characteristics of each section, coil, kink, or curl–thus becoming intimate with your natural hair.
4. You’ll become better at trimming. Because of number 3, the more times you work with your hair, the better at trimming it you get. If you know that one side shrinks more than the other, or one section has looser curls, you can trim accordingly to help maintain the best shape.
There are two ways to approach maintaining a Deva Cut. Option one mimics the Deva Cut itself–working curl-by-curl in medium sections. The second option follows the same notion of working in sections, but on blown out hair.
What you’ll need:
- Clips
- Hair shears
- Clean, dry hair that is styled how your normally wear it. A wash and go style is best, because it allows you to see your hair un-manipulated or stretched, and curls are already clumped and prime for trimming. You can also work with day 2 or 3 wash and go hair.
Instructions
- Clip hair in 5 to 7 sections, depending on length and thickness.
- Ideally, you want to separate hair based on how it is shaped. Two horizontal sections across the back, three sections around the middle/through the crown (one on the left, right, and center/crown”>, and two in the front/center section.Starting at the back of your hair, take your first section and break it into 3 or more sections. each section should contain a few clumps of curls, to show you how your hair “falls” naturally.
- One by one, gently stretch each curl until you reach the end of your hair that you desire to trim. Get as close to the end of the “C” in your curl as possible. In one snip, Trim the end of the curl in a downward motion.
- Repeat this step for each small section of curls. Frequently check for a general evenness (each curl will not be dead even”>, and that hair is still falling in the Deva Cut shape you initially had. You can always go back in and trim more.
- Repeat steps 2 – 4 for each of the clipped up sections of hair. When you reach pockets of hair that you can’t readily see like the back of your head or crown, use two mirrors to see with shorter hair. For longer tresses, when stretching, pull each curl to the left, right, or upward to see.
- Shake it out and fluff! You’re all done! You shouldn’t really notice too much difference in length, but your hair should look fuller!
 To do a DIY Deva Cut trim on blown out hair, you’ll need:
- Clips
- Hair shears
- Blow dryer with comb attachment or concentrator nozzle
- Paddle brush
- Heat protectant
Instructions
- On freshly washed and deep conditioned hair, apply your heat protectant and blow your hair out in sections. Use either the comb attachment or concentrator nozzle and paddle brush to get your hair as stretched as possible. If you’re looking for a good heat protectant, click here.
- Clip hair in 5 to 7 sections, depending on length and thickness.
- Ideally, you want to separate hair based on how it is shaped. Two horizontal sections across the back, three sections around the middle/through the crown (one on the left, right, and center/crown”>, and two in the front/center section.
- Starting at the back of your hair, take your first section and break it into 2 sections. Take the first section, and brush it with the paddle brush to ensure it is fully detangled and stretched.
- On the final brush stroke chase your index and middle fingers (similar to how you’d use a fine tooth comb chasing a flat iron”> down the length of your hair behind the paddle brush, until you reach the end you want to trim. Follow the same swift snip in a downward motion.
- Repeat steps 2-4 for each of the clipped up sections of hair. When you reach pockets of hair that you can’t readily see like the back of your head or crown, use two mirrors to see with shorter hair. For longer tresses, when stretching, pull each curl to the left, right, or upward to see.
Happy Deva Cutting!
Like most folks, I love chocolate. But we can’t eat it all the time, right? Luckily, I’ve found the perfect substitute for a chocolate-fueled sugar binge: hair products.
So the next time you feel a sweets craving coming on, pick up one of these 20 products to indulge in, guilt-free.
Are you ready to take your hair, scalp, and body health to the next level? Sea Buckthorn Oil may just be the thing you need. When it comes to healthy hair and scalp, oils like tea tree, castor, coconut, and olive are frequently mentioned. As far as supplements go, biotin and MSM tend to reign supreme.
Sea Buckthorn Oil helps stimulate hair growth while improving the overall health of your hair, scalp, and skin.
Where’s this wonder oil from?
The sea buckthorn (Hippophae rhamnoides”> plant is native to several sandy coastal and semidesert areas of Europe and Asia. 90% of the world’s natural Sea Buckthorn habitat is found in China, Russia, northern Europe, and Canada where it draws part of its name from its proximity to the coastline and the salt sprays it receives from the sea.
Nutrients
Sea Buckthorn Oil is a deep amber and relatively thin in consistency, but boasts a rich nutrient profile beneficial for hair and scalp:
Vitamins A & E
Vitamins A & E are actively involved in the rejuvenation and renewal of cell membranes, and are superior antioxidants which help to fight aging in hair and skin — combating dryness, brittleness, thinning, and breakage.
Vitamins B1 (Thiamin”>, B2 (Riboflavin”>, B6 (Pyridoxine”>
Combined, these B vitamins are responsible for helping to convert food into energy, and are essential for the rejuvenation and creation of healthy skin, hair, and blood. B6 is also responsible for the creation and stimulation of healthy blood cells, which transport oxygen and vital nutrients throughout the body and to the hair.
Vitamin C
Anti-oxidant properties of this essential vitamin are beneficial for fighting the free radicals and environmental factors that can cause structural damage to the proteins in hair– helping to prevent breakage and split ends.
Amino Acids
Hair is made of keratin, and keratin is made of amino acids. Amino acids are essential to replenishing the strength and health of hair that has suffered mechanical or chemical damage, and for promoting healthy hair growth.
Omega-7
A little-discussed omega, this fatty acid provides key building blocks for skin, hair and nails. It helps combat dryness, loss of skin and hair elasticity, and other symptoms aging and damage. It protects against oxidative damage, helps hair retain moisture better, and can even help repair sun-damaged hair and skin.How to Use Sea Buckthorn Oil
Sea Buckthorn Oil is incredibly potent, and in use for hair it is best treated as an essential oil — meaning you will get the most benefit and value by mixing it with a complimentary carrier oil for use. Coconut, jojoba, hemp, olive, grapeseed, and sweet almond are all great options. But be warned, it does not have the most pleasant of smells. Combining with other carrier and essential oils will help mask the smell and make it more tolerable.
Sea Buckthorn Oil can be purchased at many online retailers. I purchase my Life Flo brand of Sea Buckthorn Oil from Vitamin Shoppe for $17.
Scalp Massage & Pre-Poo
For a stimulating scalp massage and pre-poo, mix:
- 1oz Virgin Unrefined Coconut Oil
- 1oz Cold Pressed Virgin Olive Oil
- 10 drops Sea Buckthorn Oil
- 5 drops Rosemary Essential Oil
Massage into the scalp and work through the length of your hair. Allow it to sit for 30 minutes to 1 hour then continue your wash day regimen as usual.
Scalp Treatment
If you suffer from psoriasis, Seborrheic Dermatitis, or Eczema–use this soothing blend on your skin and scalp. This blend will help ease itching, and may even slow scalp flaking.
Ingredients
- 1oz Alcohol-Free Witch Hazel (I recommend Thayer’s”>
- 1/2oz Glycerin
- 8 drops Sea Buckthorn Oil
Directions
Mix all of the ingredients and shake well. It will be runny, so applying a little at a time to the desired areas using a dropper is best. Be sure to rub it into your scalp or skin well, to avoid staining from the Sea Buckthorn Oil.
Easy DIY Conditioner
For extra conditioning, add 5 – 10 drops of Sea Buckthorn Oil to your favorite regular and deep conditioners. Be careful at all times when handling Sea Buckthorn Oil — it can temporarily stain clothing, surfaces, and even your skin a deep orange, which is why diluting it (like in the recipes above”> is recommended. Alternatively, this Aubrey Organics Sea Buckthorn Leave-In Conditioner already contains the oil as an ingredient.
Vitamin Supplement
If you want to kick the benefits of Sea Buckthorn up a notch, taking a supplement is always an option. I personally take the Solaray Super Omega 3-7-9, which has been working exceptionally well to combat my scalp psoriasis. Since incorporating the Sea Buckthorn-based omega into my vitamin regimen, my scalp health has drastically improved, which has translated into less flakes, less breakage, and less-complicated wash days.
Will you be incorporating Sea Buckthorn Oil into your regimen? Let us know.
And go visit more of my posts on ManeObjective.com.


