Search Results: Anya Grant

Dandruff, Seborrheic Dermatitis, Folliculitis (ex. Barber’s Itch, Tinea Capitis”> are just a few of the fungus bacteria that dirty hair tools can contribute to in your hair. The frequency with which you cleanse your own hair and scalp should match how often you clean your hair tools. Why use dirty, fungi-infested brushes and combs on hair that you work so hard to keep clean? Aim to dedicate one hair wash day a month to also washing your hair tools.
Cleaning your hair tools is easy and ideally should be done bi-weekly (if you use lots of products and hair tools frequently”> or at least once a month. Oftentimes the products we use leave a residue which can be transferred to the hair and scalp. That residue is easy to see on your heat styling tools, but a similar buildup occurs on the rest of the tools we use as well.
The frequency with which you cleanse your own hair and scalp should match how often you clean your hair tools.
This goes beyond the average comb and brushes to include hair ties, perm rods, flexi rods, hair clamps, clips, and much more. With just a few household ingredients, you can create a dirt-fighting natural cleaner for your hair tools.
DIY Hair Brush Cleaner
- 2 cups white or apple cider vinegar
- 12 drops of tea tree oil
- 1 cup baking soda
- Boiling hot tap water
- Old toothbrush (optional”>
- Few drops of clarifying shampoo (optional”>
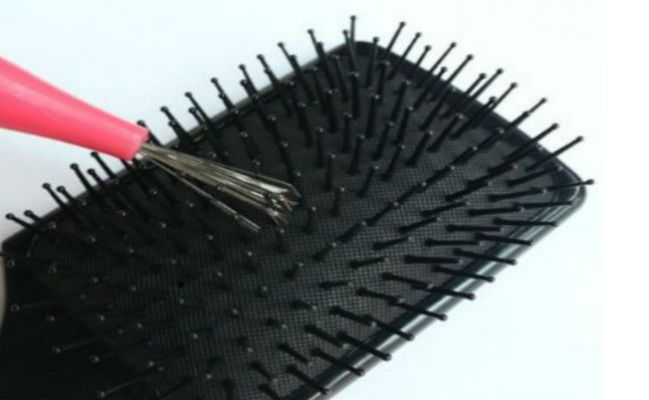
1. Start by removing visible debris and hair from all hair tools with a Hair Brush Cleaner and a toothbrush.
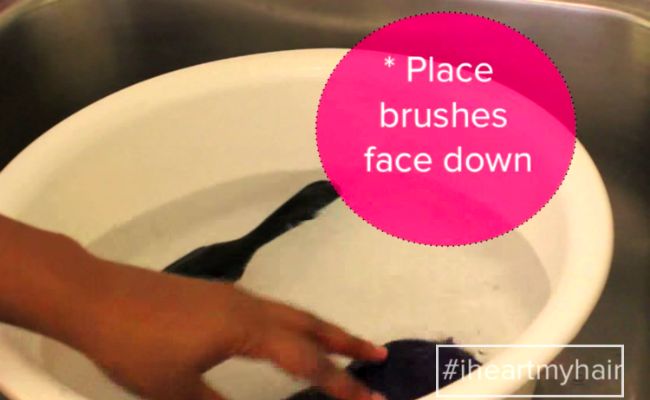
2. In a small basin or sink fill with hot water, add vinegar and baking soda along with a few drops of tea tree oil. If you choose to, pour a few drops of a clarifying shampoo on each hair tool.
3. Place all hair tools in solution and leave for anywhere between 15 to 30 minutes. If you do not have a lot of time, start to scrub your hair tools just soon after placing the tools in the solution.
5. Remove your hair tools for the cloudy brown solution, rinse thoroughly at least twice. Leave hair tools out to air dry.
Quick tips
-
The best tool to use to remove hair, debris in a compact bristle brush like the Tangle Teezer is a Hair Brush Cleaner.
-
For hair scarves, silk pillowcases, and nighttime bonnets, wash those with laundry detergent in a regular load of laundry.
-
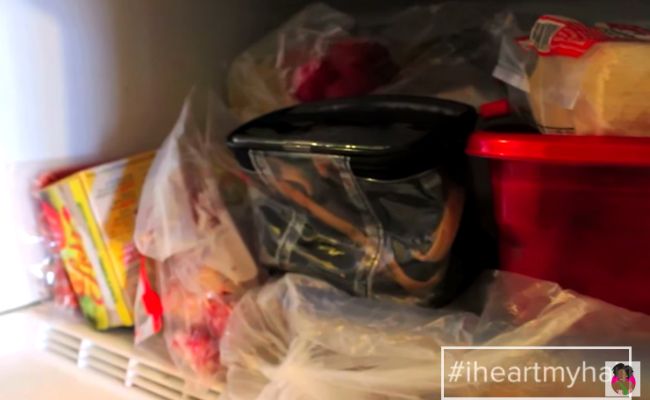
For the hard to clean hair tools such as bobby pins, hair bands etc. Dr. Oz says to place everything in a plastic bag or a makeup bag, place in the freezer and leave in for 1 hour to overnight.
Watch how I do it
Still not convinced? We understand that hair care is a lot of work, and this is one more step to add. Even if once or twice a month sounds like too much work, at least give this method a try one time – especially if you have never washed your hair tools before. When you clean your tools, you’re potentially avoiding these conditions:
- Dandruff is a common scalp condition that produces itchy scalp, flakes of skin cells appear. Severe dandruff is due to the rapid appearance of new cells that are produced in larger quantities that the dead cells. This causes more shedding and skin cells building on the surface of the scalp.
- Seborrheic Dermatitis is a fungal skin condition that causes inflammation from a yeast due to a build-up of oil secretion on the skin called malassezia.
- Folliculitis (Barber’s Itch or Tinea Barbae”> is caused by bacteria and fungus occasionally getting into the hair follicles giving rise to a skin disorder. This usually affects the upper part of the hair follicle, or deeper skin area surrounding the hair follicle. The symptoms consist of rash, itchiness, redness on the skin, and sometimes, the formation of pus-filled blisters.
When is the last time you cleaned your hair tools?
Have you been natural for a while yet you feel as if your hair is just not growing? I certainly felt like this for the first five years of wearing my hair natural–I am now seven years natural and I have started to pay more attention to the habits that were preventing my hair from retaining length. The first step I took was to stop dying my hair. Hair dyes can make our hair even more fragile, brittle and prone to dryness. Within a few months after dying application you may begin to notice breakage if you use color treatments. The hair color you see in the video below was my last hair dye and I was growing it out. The step I took to retain length was trimming split ends on a regular basis.
I would like to stress that damaged ends cannot be permanently reversed, no matter how much you try to smooth the ends and no matter how much a product you use. Products assist with anti-breakage–in other words, maintaining healthy strands that prevent our ends from thinning out or splitting anywhere from the middle to the ends of the shaft. There are products that can help your split end stick together and decrease the rate at which it splits further, using a complex known as PEC. But neither of these product categories will actually fix the hair permanently once the end is split. In the video below I demonstrate how split ends work by using a piece of electrical wire and outline 3 steps you can take to be split end free.
Tip 1: Avoid daily activities that may cause split ends
Try to minimize daily manipulation of the hair, for example excessive brushing and combing or manipulating it into a hairstyle every day.Tip 2: “Poo on top.”
Use the technique “Poo on top, condition on bottom.” In other words use shampoo on the scalp only and add plenty of conditioner and leave-in conditioner on the ends of the hair.
Tip 3: Detangle your hair properly with good detangling tools.
If you like to use a tool to detangle then use wide tooth combs on wet hair, but if you have the patience finger detangling is your best option.
Tip 4: Dry your hair properly with a T-shirt or a Microfiber Towel or Turban.
Traditional terry cloth towels will remove the much-needed moisture from your hair. Next time you shower use an old t-shirt to dry your hair instead of a towel, you should see less frizz and dryness right away.
Tip 5: Skip that blow drying your hair after you wash it.
Instead style your hair wet and let air dry. If you absolutely need to use the blow dry, then turn down the heat and blast at low temperatures.
Tip 6: Learn to have second and third day hair.
Styling and re-styling your hair every day is manipulation that can lead to damage. The less hair manipulation the less you’ll experience rapid split ends.
Tip 7: Protect your hair from the sun.
Learn how to effectively prevent your hair from getting sun burned.
Tip 8: Use ouch free hair accessories and tools.
Stay away from accessories that has metal connector or doesn’t have elasticity. Do not use hair tools with metal edges or brushes that tug and pull against the elasticity of the hair.
Tip 9: Stop using chemicals.
Hair dyes, chemical treatments, and hair products with alcohol and drying agents will only aggravate any dryness in your hair. If you currently use any of these treatments you will find a noticeable difference when you stop using them.
Tip 10: Treat your hair 50/50.
In order to have healthy hair strands it is important to give your hair moisture and protein treatments on a 50/50 ratio. What I mean by that is alternate between moisture and protein treatments every time you wash your hair. I wash my hair every two weeks, so every month I give my hair 1 moisture and 1 protein treatment.
Tip 11: Trim your ends right now.
The best time to start preventing your hair from Split Ends is right after you get your hair trimmed. So if you haven’t trimmed your hair in the last 2 months then this will be Step 1 for you. If you follow these 10 Hairlove Tips to the T, then instead of trimming every 8 weeks, you can go a bit longer, not exceeding 16 weeks at a time.
Tip 12: Stop wetting your hair every day.
Consistently adding water to your hair every day. Water is a natural humectant but too much of it every day can affect the strength of the hair shaft, causing it to weaken, split or break.What do you do to prevent split ends?
Spring is in the air but for some reason so many of us just aren’t ready to unleash our curls. If you are anything like me and want to continue protecting your hair and still look FAB, then try any or all of these 7 quick and easy hairstyles.
The Added Benefits
- Add low hair manipulation
- Less is more in this case, low hair manipulation simply means taking a simpler approach to your hairstyling routine. Less combing, brushing and tugging, putting down the blow dryer, flat iron is ideal. This way your hair will be less likely prone to split ends and mid shaft breakage.
Incorporate protective hair styling
- Protective hairstyling is recommended if your hair tends to dry out easily and you want to lock in moisture in your hair. The overall goal of protective styling is to keep the oldest part of your hair (the ends”> protected and moisturized, which leads to retaining healthy hair growth. See the video below for 7 DIY protective natural hairstyles and discover the magic you can create with a bunch of hairpins, a flexi-rod and hair ties.
- This hairstyle is ideal for someone who is in a rush and doesn’t have a lot of time to create a funky hair style, this pin up style works well.
Hairstyle 1: The Hawt Bang
You’ll Need: Bobby pins, 1 flexi rod and a hair scarf (optional”>
Section the front of the hair as if you’re creating a big bang. Starting from the ends of the hair you want to roll the hair onto the flexi rod.
In this video there are 2 hairstyles that are ideal for someone who is in a rush and wants to style their hair quickly and go, but your hair is either too thick, too knotted or too short.
Hairstyle 2: Faux High Bun
You’ll Need: 4 hair ties and your fingers
Part hair diagonally leading to the center of your head, think of it as making an X. With each hair tie gather hair as close together as you can possibly get them. Then twist hair or if you have longer hair you can braid each section. Next step is to cross pin them with bobby pins to create an elegant design.
The next 4 hairstyles are ideal for someone who is looking to style their routine daily twists.
Hairstyle 3: Lil Miss Modest
You’ll Need: Bobby pins and your fingers
If you do not already have your hair twisted then this is the first step in achieving this style. Next, take the back section of the hair, separate in two, the twists in your right hand just criss cross over on top of the twists on the left or vise versa then secure with bobby pins.
With the front simply sweep the twist on the left side towards the back and secure it with bobby pins. On the right side I created a loose roll to give it some volume and then secure with more bobby pins.
Hairstyle 4: Twisted Side Sweep
You’ll Need: Bobby pins, your fingers and hair accessories (optional”>
Start by flat twisting your twist diagonally all the way to the back. You can decide how many sections you want your hair to be flat twisted in. I did mine in 2 sections. Secure each section with bobby pins. Similar to hairstyle Lil Miss Modest I created a loose roll with my twist and tuck away with bobby pins. I combine all sections and roll into a side bun.
Hairstyle 5: Save My Edges Bun
You’ll Need: Bobby pins, your fingers and hair accessories (optional”>
Similar to Twisted Side Sweep simply flat twist twists from one side to another and secure it with bobby pins. Take the remaining twists and put hair in a high bun tuck twists away with bobby pins and accessorize.
Hairstyle 6: The Pretzel
Part your hair into 4 sections going all the way to the back and stop that section just before you get to the very nape of your neck. In each section all you need to do is just roll and tuck roll and tuck and secure with a bobby pins. Do the 2 outer sections first because the inner sections is what you’ll use to connect the outer sections and create a pretzel look. Now your hair should be in two sections, finger roll each section and create a criss cross by pinning the ends on the opposite side.
Hairstyle 7: Mini Cinnamon Rolls Updo
You’ll Need: Bobby pins, your fingers and hair accessories
Section the bottom half of your twisted hair and roll the twist together all the way up to the front of the head then secure with a bobby pin. Alternate direction until the back is complete. Next sweep the hair from the left side over to the right or which ever section you want to wear your hair in cinnamon rolls as I like to call them. The are two ways you can achieve the cinni roll look- Roll each twist around itself and then secure with 2 bobby pin. Or–secure 1 bobby pin at the end of the twist and then roll the twist up towards the middle then secure it.


