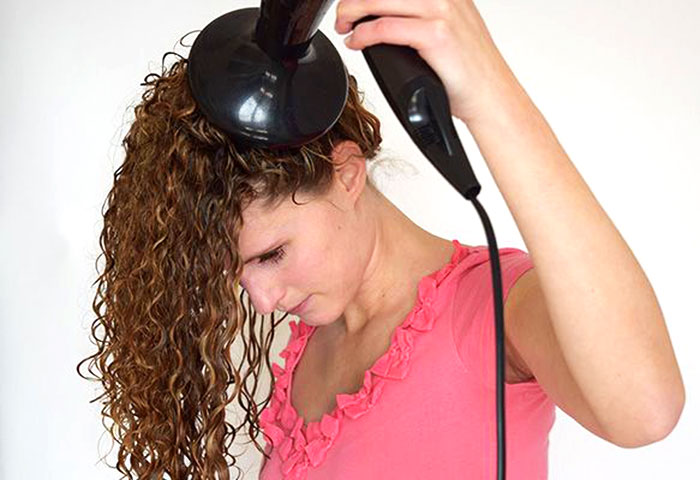

Pictured: Just Curly aka Sandra
If you’re looking for a no-frizz styling method that also fights flyaways, the pixie curl method may be what you’re looking for! You can use this styling method any time of year for any length of curly or wavy hair.
Keep in mind, this has nothing to do with a “pixie-style” haircut—this is just one method in which curls and waves can be dried and styled.
The best part of pixie curl styling is that you only need you dryer and hair diffuser and your favorite styling products.
Before you diffuse
You may want also to use a heat protector like Cantu Thermal Shield Heat Protectant or SheaMoisture Jamaican Black Castor Oil Strengthen & Grow Thermal Protectant Spritz. You might not need to use a heat protector if you don’t use heat a lot on your hair, or if you want a more natural look, since some heat protectors contain silicones and other additives. By diffusing, you are protecting your hair from direct heat and allowing the heat to literally “diffuse” through your hair.
Set the diffuser on high
When you’re ready to start drying, set your hairdryer on a higher setting. Long periods of heat exposure can damage hair, so this method reducing the amount of time your hair is exposed to high heat for a no-frizz finish. Typically we recommend blow drying curly hair on a lower setting, but many people who use this method find that curls tend to do better when the dryer is on a higher strength setting and when the process takes less time.
Flip over
Ready? Flip your hair over (helps with volume and flat tops”> and take one small section of hair. Place it on the diffuser and dry it with your diffuser by pushing up and working roots to ends and finishing with the dryer close to your head.
Turn off the dryer
Stop. Literally stop. Shut off your dryer, move to your next section, then start again. The idea is not to “blow” your hair around, but to try and move it as little as possible.
Repeat
You can also pile your hair on the diffuser, push it to your head, then turn on the heat. Allow it to sit for a minute (or less”>, shut the dryer off and move to another section. Do the same for every section of hair. You don’t want to spend more than 1 minute per section. If your hair is still wet, then go around a second time.
If you’re afraid to use too much heat, do 1 or 2 “rounds” and get your hair 85-90% dry, then let the rest dry on its own. To ensure a no-frizz finish, do not touch your hair as it dries.
Think of it as “plopping” your hair with a damp towel. You use the same motions, only with a diffuser instead of a towel.
Optional: Clipping
If you have a lot of hair, or if it’s longer, you may want to opt for the clipping method — both before and after pixie curling. First, style with the products you normally use. Then section using clips, and begin to dry with the pixie method. After you are done and the heat is off, you may opt to clip the hair again and pass over with your diffuser one last time.
You may need to experiment with the products you use for your hair type for this method as well as with the heat settings and amount of time you need for each section.
To help reduce the amount of time you expose your hair to heat, you may want to look for an ionic or tourmaline dryer. These tools help speed up the drying process yet leave hair shiny and healthy.
Once you’ve discovered just how well the no-frizz pixie curl method works, and just how bouncy and defined your curls and waves become, you’ll use it all the time.
Have you ever tried the pixie curl method, or do you have your own variation? Tell us how it worked for you in the comments.