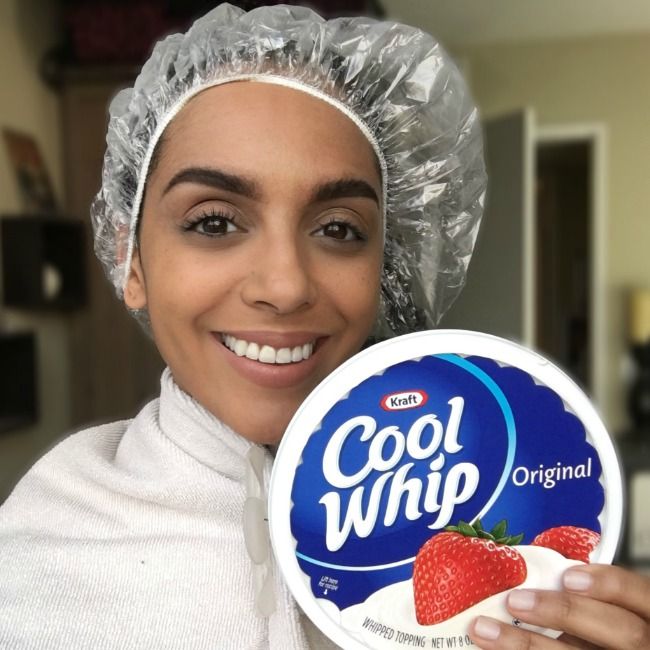
On my quest to discover new and interesting beauty products, I’ve been introduced to something I never imagined I would put in my hair. I’m a big fan of multi-purpose products so when I heard that you can use Cool Whip as a deep conditioner, I jumped on the experimental train. I’ll try anything once and this sounded fun and easy.
I didn’t necessarily mix anything together to make it a true DIY–the simple fact that I’m using something from the kitchen made it enough for me. I’ll try anything once, and this sounded fun and easy.
Although Cool Whip contains ingredients that I wouldn’t necessarily consume, it does contain coconut and palm kernel oils that are great for softening and adding shine to the hair.
Although Cool Whip contains ingredients that I wouldn’t necessarily consume, it does contain coconut and palm kernel oils that are great for softening and adding shine to the hair. According to LiveStrong, both coconut & palm kernel oils contain lauric acid (a type of saturated fatty acid”>. There is a higher amount of lauric acid found in coconut oil, which aids in strengthening hair strands.
Keep in mind that these are in the hydrogenated form. Plus, there are many other ingredients involved, so you won’t necessarily get all of the amazing benefits that you would get from using these oils in their natural state. However, for the sake of an experiment I still wanted to see what the hype was all about.
What you will need
1 cup Cool Whip (generic store brand is ok, but I went with the original”>
a towel
Article continues after video.
a disposable shower cap
How to apply to your hair
Using your measuring cup, measure out 1 cup of Cool Whip (1/2 cup for shorter hair”>.
Wrap a towel around your neck to avoid a mess on your clothing.
Using your hands apply the Cool Whip on dry or wet hair from root to tip.
Once your hair is saturated, place your disposable shower cap on and leave on for 15-20 minutes.
Rinse well and then continue with your normal wash routine.
My experience
It was strange to apply cold, Cool Whip to my curls. However, I loved that the mask wasn’t messy and stayed in place. After 20 minutes under the disposable shower cap, I felt my hair and it was noticeably softer. It was very easy to rinse out, unlike some of the other DIY masks I’ve tried in the past. I didn’t feel the need to use a shampoo so I just co-washed with my conditioner.
My results
It gave me softer curls that were shiny but lacked moisture.
Unfortunately, the cons outweigh the pros on this mask. My hair did feel noticeably softer but it didn’t provide a lot of moisture to my curls. It also lacked slip. It wasn’t easy to slide my fingers through my hair.
Also, applying cold Cool Whip on my hair did make the experience a little less enjoyable. The only real benefit I noticed from this was that my hair did look a bit shinier but that could have been due to the conditioner I added in my co-wash.
It wasn’t my favorite hair mask, but still fun to experiment with nonetheless. I’d be very interested to see if trying this on wet hair or using Creamy Cool Whip next time would make a difference. Perhaps, those with naturally straight or wavy textures will have better luck than me. I think I’ll stick to my all natural DIY hair masks in the future.
Let’s play a game. What do you think of when you hear the word “mousse?” If you’re anything like me, it may bring up associations with crunchy curls, the 80s, and drying alcohols, but you should know that things have changed. Hairstyles, techniques, brands, and product formulas have all evolved since the days of teased, crispy curls. But because we still get flashbacks when we pick up a bottle of mousse, we spoke with a few curly hair experts about when to use mousse, who should be using mousse today – and who shouldn’t.
Why use a mousse?
Brooke Michie, curl stylist and owner of Lyric Salon in Austin, Texas, first made me reconsider mousse when she used it in Grace’s wavy hair transformation. She loves using mousse on her curly haired clients because it’s “easy to apply, economical per use, has buildable coverage and hold, and can be layered with so many other types of products.”
Maya Smith, International Master of Natural Curls and founder of The Doux®, a haircare line she created specifically for naturally curly hair, says mousse can be used for “any style that requires definition and light hold. It can be used not only to set wash & go’s, but for twist outs and rod sets as well.”
As I’ve been starting to experiment with mousse more, I’ve wondered if I can use it on my dry hair as a refresher on second-day hair. According to Maya, “Mousse is best applied to wet hair for Wash & Go styling, but it can also be used to set a dry twist-out and to redefine the curl pattern. I wouldn’t recommend using it to replenish moisture on next-day hair.”
What causes that crunch?
Maya says, “It’s common for mousse to be combined with gel or cream because most mousse on the market contain alcohol to make the hair dry faster. They are also polymer-rich, which creates a sticky coating on the hair, much like a hairspray. This can leave hair feeling dry and stiff. We formulated our Mousse Def as an all-in-one solution for this problem. It creates the shine and definition of a mousse, yet leaves hair soft and touchable with no flaking.”
Maya recommends watching out for ingredients such as sodium laurel sulfate (SLS, Isopropyl, and Prolyene, which “have been found to cause breakage and dry out your hair). The best way to achieve healthy hair is to have that balance between protein and moisture.”
Brooke says it depends on the mousse, “lightweight, airy mousse or foam is great for wavy hair. Denser mousse is great for 2s and 3s and as a thin layer of added hold for more definition over a moisture foundation for well-hydrated 4s even!” For Maya, it depends on the hairstyle: “I recommend mousse for hair up to Type 4B, depending on the desired results.”
But before you rule mousse out for your Type 4C coils, Gerilyn Hayes, NaturallyCurly Senior Copywriter, loves using mousse on her 4C wash and go (like Camille Rose Spiked Honey Mousse). “I use about 5-6 pumps of mousse in my hair after shampooing and conditioning. I do this because I want to make sure that I’m starting with a clean scalp and curls that are free from any other previous products. And because my curls are very coarse and need lots of hydration, I make sure that my curls are soaked with water (which is why the shower is great for applying mousse to my hair).
To avoid product and water getting into my eyes, I flip my head over and scrunch my curls’ ends to my scalp. Although I do not have a lot of length, I still use this ends-to-root scrunching method to get the optimal curl definition. Sometimes I rake the mousse through my curls and then wrap them in a scarf, giving them more shine. Although rake versus scrunching may look similar to any onlooker, the textural differences are apparent to me!”
Who shouldn’t use mousse?
“Curls with moisture as the number one priority,” says Brooke, “or those who don’t need a product with general hold, but seek more of a product/product combo to hydrate than seal.” So if your curls are thirsty and your top priority is moisture, then you may want to opt for something like the LOC Method, which layers a leave-in for moisture, an oil to seal in the moisture, and then a cream for hold.
When to use mousse
Brooke prefers “the lightest weight mousse (she loves Bread Beauty Supply Hair Foam) in wavy hair for primary, general hold,” and this is how she recommends applying it:
On freshly rinsed detangled hair in the shower, glaze a small amount over the surface area of the hair.
Then flip and glaze another small amount over the underneath surface area.
Then, apply the majority of it via scrunching and distribute it in your palms, making sure not to flatten the airiness of the foam.
Before scrunching the ends of the hair up toward the scalp with a flat palm into a clenched fist motion, rotating your head to reach curls on either side.
Once a leave-in or moisture foundation is either combed through or scrunched in sopping wet hair.
Then add a little denser mousse by finger combing detangled sections, or for longer curls, scrunching as above.
“This will create a cast of hold,” says Brooke, but before you worry about the crunch, remember you need to break that cast by scrunching out the crunch. “Release the cast once hair is fully dry by touching curls gently, or scrunching once more to release the wet-looking hold that was necessary during the drying process to maximize definition.”
OUR EDITORS INDEPENDENTLY SELECT ALL PRODUCTS FEATURED ON NATURALLYCURLY. HOWEVER, WE MAY EARN AN AFFILIATE COMMISSION WHEN YOU BUY SOMETHING THROUGH OUR RETAIL LINKS.