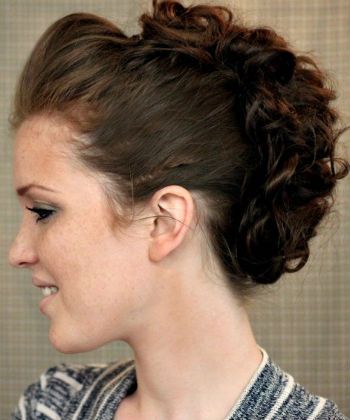
Who doesn’t enjoy a fab wavy, curly, or coily mohawk? During the warmer seasons, they’re convenient (your neck gets to breathe!”>, chic, and still have that bit of edge you need in your personal style. If you don’t want to commit to the drastic commitment of a razor/tapered cut while still maintaining the fierceness of a sexy, fierce natural hairstyle, try these 3 cocktails suitable for all hair types.
The Perfect Faux Hawk
Loose, Wavy Faux Hawk
What You’ll Need
- Teasing comb
- Denman Brush (found here”>
- Large perm rods
- Bobby pins
- Hairspray
Directions
- After detangling during a fresh wash, either air dry or plop.
- Section your hair in 3 straight lines from front to back. Leave the middle section open to style.
- For each section, roll your hair straight back using a large perm rod like these from Conair. Keep them in overnight.
- Brush back the other sections with something that locks in moisture but has firm hold like Ossat Naturals Natural Oil Mist.
- Once your hair is about 60% dry, use the tension method to get your hair straight and dry as possible, without a lot of heat damage.
- Gently back-comb or “tease” your front waves back and slick a balm like this from Tigi till it is appears full of volume.
- Pin up the two loose sides on as well as a ‘poof’ in the front piece of your middle section (see photo”>.
- For longer-lasting hold throughout the day, try a hairspray like Aussie Freeze Spray all over.
Curly Faux Hawk & Chunky Bangs
What You’ll Need
- Rat-tail or fine-tooth comb
- Softening Moisturizer/leave-in
- Wide-tooth comb
- Secure elastic bands
- Curling jelly
- Curlformers Spirals
- Thin headband
Directions
- Do your usual wash-and-go routine and either plop or use a diffuser to dry your curls. Use a setting lotion like the one from Design Essentials to secure your hold.
- Seal your hair with an essential oil (we love this inexpensive beginner’s kit“>.
- Divide your hair into 3 sections, one “upside-down U-shaped” in the front, one left to right in the middle, and one “U-shaped” in the back (the remainder of your hair”>.
- For the front section, use about 5-7 Curlformers (found here“> with a defining cream like Dark and Lovely Curl Defining Glaze.
- Using a wide-tooth comb, lightly pick out the middle and back sections of your hair, leaving the front part alone (which is Curlformers”>.
- Sleep with a satin scarf to preserve your style overnight.
- The next morning, slowly and gently take your Curlforming spirals out. Separate them with your fingers, but not too much–you don’t want a lot of frizz.
- For the middle section, secure with an elastic (not rubber”> band, and fluff out with your fingers as well.
- Repeat step 8 for the back section and use your fingers to blend the 2 sections together to create the illusion of 1 curly ponytail.
- Add sheen and hold with something like Curls Cashmere Curl Jelly.
- Secure your headband around the base of your head (edges”> for a fun, flirty look.
Braided, Coily Faux Hawk
What You’ll Need
- Rat-tail or fine-tooth comb
- Moisturizer/Butter
- Soft bristle brush
- Bobby pins
- Edge gel
Directions
- On 2nd or 3rd day hair, moisturize your hair from root to tip with a silicone-free product like Oyin Whipped Pudding.
- Section your hair from one ear to the other in an upside down “U” shape.
- Part each section for the front of your hair into about 8 small sections.
- Flat twist each section from front to midway (not all the way back to your neck”>; leave that back part open.
- Use a strong gel (we like Design Essentials Edge Tamer”> to keep frizz from forming on each braid/twist.
- For the back half of your hair, twirl medium-sized sections with your finger or a pick gently with a butter like Aunt Jackie’s Custard.
- Pin up the sides from the front to the back, leaving the middle open (about the width of three fingers”>.


