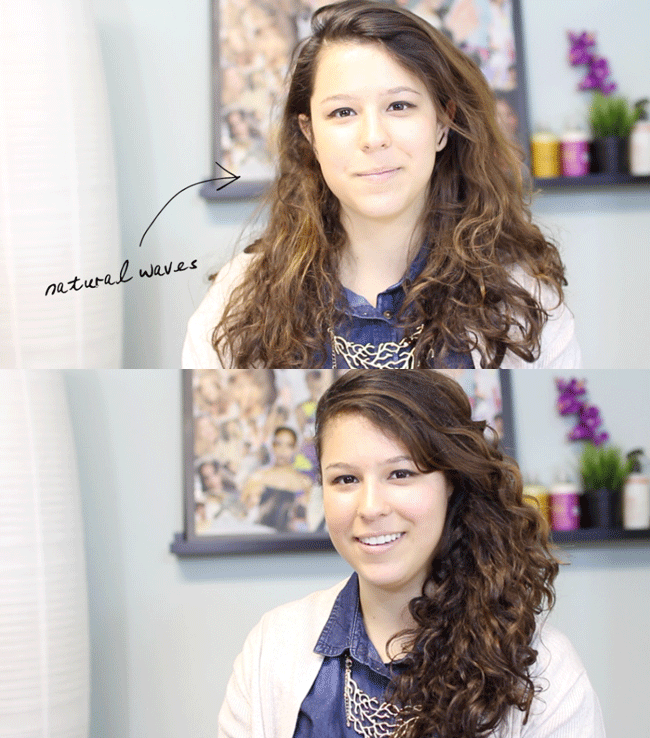
Even if you wear your hair naturally wavy most of the time, you may be tempted to reach for a flat iron to change things up when you have a date or formal event. We get that you want to set your look apart from your daily hair and makeup! But you don’t have to straighten to feel glamorous.
This date night look accentuates your natural waves by practicing safe heat styling, for a look that still feels like you!
Ashley has loose, Type 2b waves, but this technique will work for many natural waves and curls.
Step 1 – Protect
On freshly cleansed wet hair, apply a leave-in conditioner to prevent dryness and frizz. Ashley used the Zotos Professional 180PRO Miracle Repair Damage Eliminator Treatment because it also acts as a heat protectant. Start with a small amount of product but make sure that the product is evenly distributed on any hair that will be heat styled to prevent heat damage.
Step 2 – Diffuse
To speed up the drying process and add volume to your waves, use a diffuser. The GVP Pro Blow Dryer has adjustable settings so that you can choose the heat and intensity of the air. It also has a unique advantage of being motion activated, so when you put your hand on the nozzle it turns on and when you take it off the dryer switches off.
Attach a diffuser and gently place your waves in the bowl of the diffuser, pushing it up towards the roots to encourage more curl. You can also diffuse the roots to create more lift and volume there.
Step 3 – Spot treat
Once your hair is completely dry, you can use a curling wand to spot treat any waves that are undefined or loose. Ashley used the Hot Shot Tools 1″ Nano Ceramic Taper Iron, which matched her curl pattern and allowed her to adjust the heat being applied to her hair. Make sure to always wait until your hair is 100% before using a heat tool.
You can curl just a couple of face-framing ringlets or do more pieces throughout your hair, you can decide what works best for you. This way you limit your hair’s contact with direct heat by doing just a few sections for a second or less each, rather than passing a flat iron over all of your hair several times for a straight look.
Step 4 – Pin back
Create a deep side part and pin back a few waves from one side using bobby pins to create a sideswept look.
Watch the tutorial
This post is sponsored by Sally Beauty.


